Create Mitigation Job
You can create mitigation job for the vulnerabilities of the respective asset. The QID may contain one or more CVEs and each CVE has associated Qualys Detection Score (QDS) score.
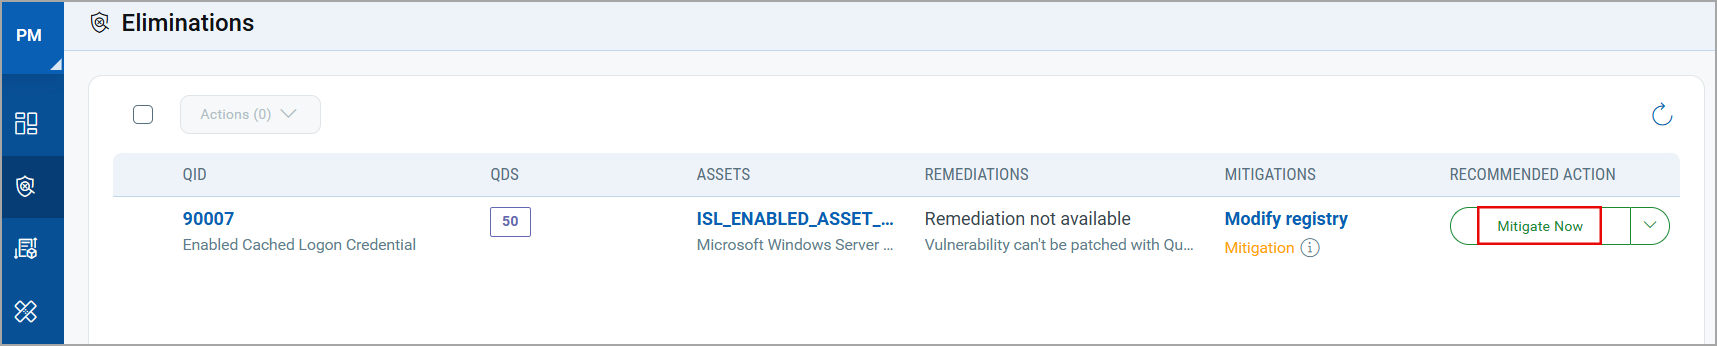
Navigate to the VMDR > Vulnerabilities tab and select the QID to mitigate. From the Quick Actions menu, click View Risk Elimination. You are redirected to the Mitigation > Eliminations tab. Click Mitigate Now.
On the Create: Linux Mitigation Job window, perform the following steps:
1. Basic Information
Enter a job title and description of the job in the respective fields and click Next.
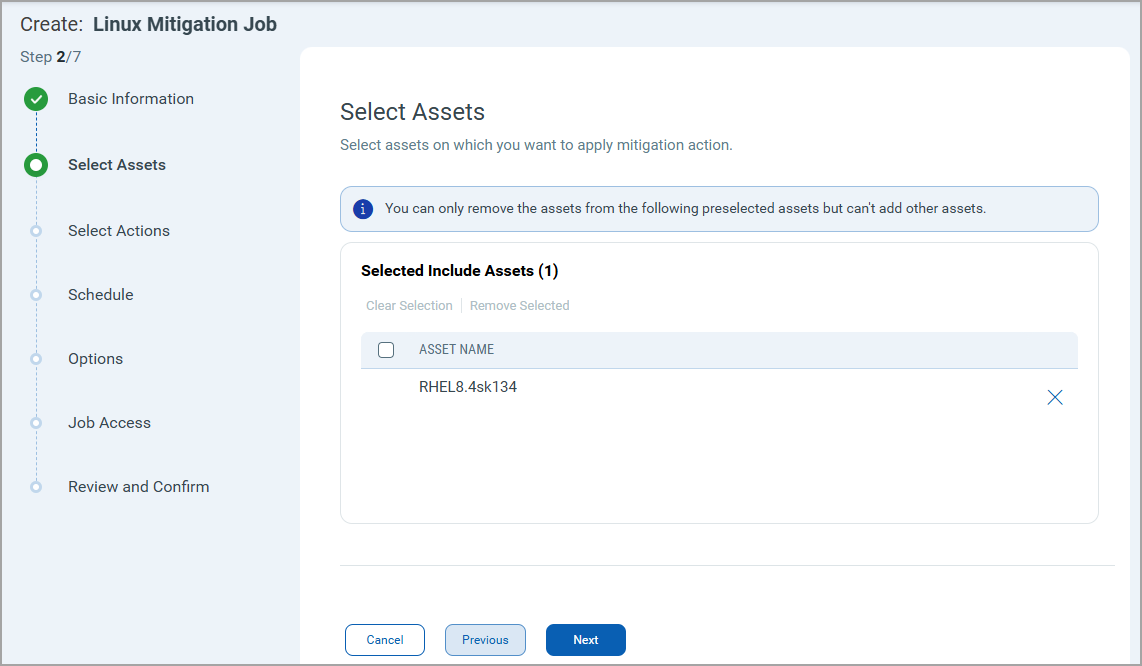
2. Select Assets
- Click ![]() to add the required assets to the job on which you want to apply mitigation. The Select Assets window is displayed, select the required assets and click Apply. You can remove the asset if not required.
to add the required assets to the job on which you want to apply mitigation. The Select Assets window is displayed, select the required assets and click Apply. You can remove the asset if not required.
- Click ![]() to add the required asset tag in the mitigation job. You can remove the added asset tag if not required.
to add the required asset tag in the mitigation job. You can remove the added asset tag if not required.
You can add asset tags to mitigation job, only when the QIDs are selected from the VMDR > Prioritization tab.
Important to Know
- You can only remove assets, but cannot add additional assets to the mitigation job.
- If you remove an asset, the associated QID is also removed from the job.
- You need at least one asset to save the mitigation job.
3. Select Actions
The selected QID is auto populated on this page. The respective CVEs are listed in the left column. The CVEs that do not have mitigation available are categorized separately as shown in figure.
There are two types of mitigation scripts available:
- Qualys script: This script is provided by Qualys and is marked as default.
- Custom Script: The custom script with the highest impact factor is selected if the Qualys script is unavailable.
The QID status is updated based on the selected CVEs and their available mitigations:
-
Fully Mitigable – The QID is considered Fully Mitigable if mitigation scripts are available for all included CVEs.
-
Partially Mitigable – The QID is considered Partially Mitigable if mitigation scripts are not available for some of the included CVEs.
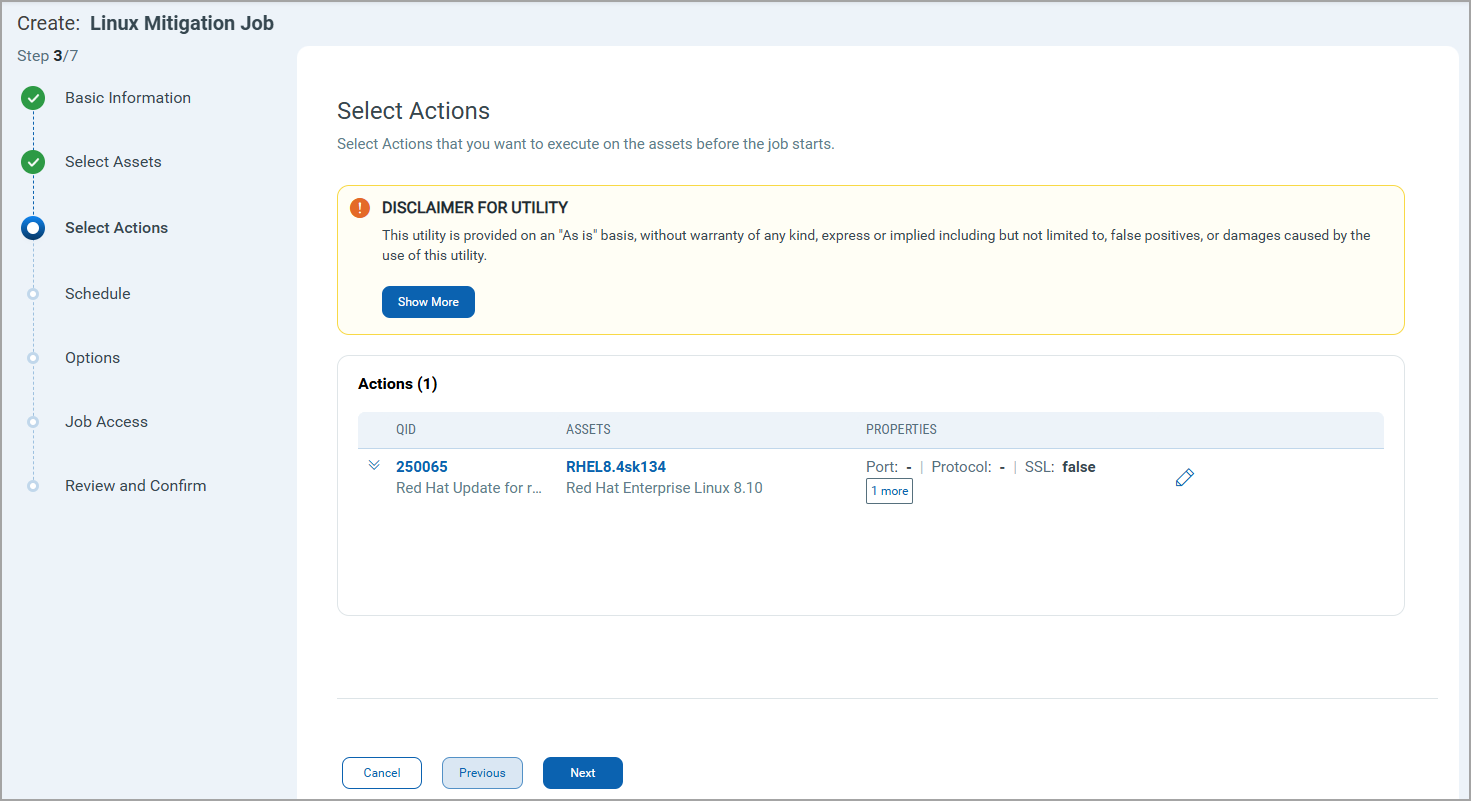
You can select multiple or all CVEs that you want to mitigate and also select the required script you want to use for mitigation. Click Next.
If you do not edit the QID, by default, all the CVEs will be associated with the QID will be sent in the job.
4. Schedule
i) The On Demand job run option is selected by default, and the job is executed once enabled.
ii) To schedule the job to run at a specific time:
- Click Schedule.
- Select the required START DATE and START TIME.
- To select the required timezone, click Set timezone and select from the options from the dropdown list.
By default, the system uses the agent timezone.
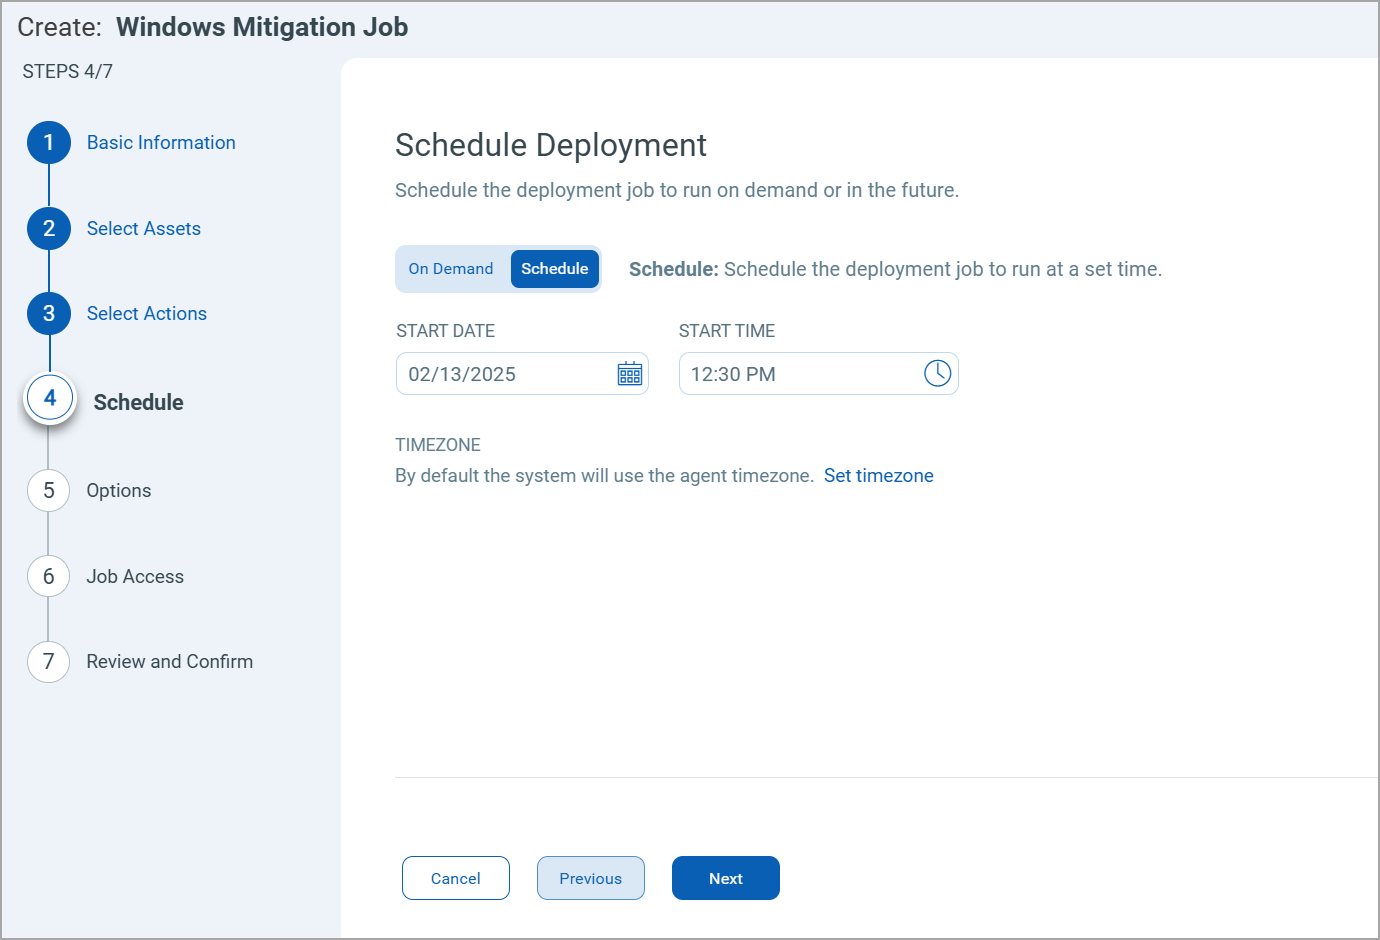
- Click Next.
5. Options
To configure job notification settings:
- Enter the email address of the recipient. You can enter a maximum of fifty email addresses.
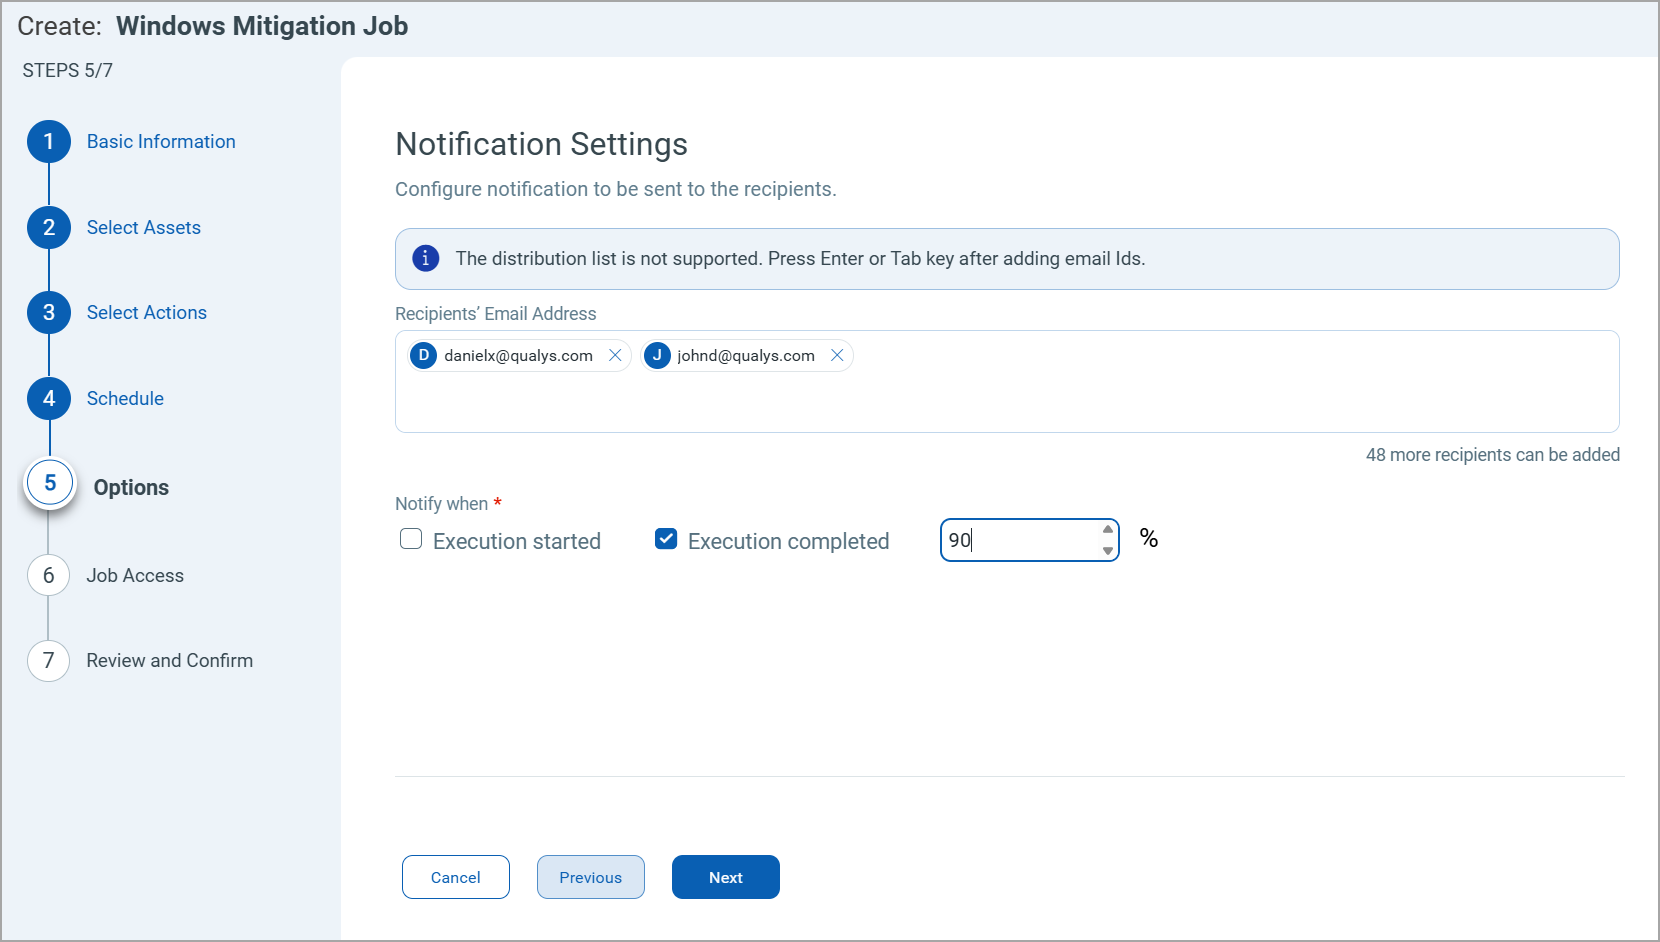
- (Optional) Select Execution started checkbox to receive email notification when the job is started
- Select the Execution Completed checkbox and enter the percentage of job completion on which you want to receive the notification.
- Click Next.
6. Job Access
Select the co-authors for this mitigation job and click Next. The co-authors can perform job actions based on their permissions, such as editing the job.
- You can add a maximum of 200 co-authors to a job.
- Any deactivated user or a user without the required permissions is removed as a co-author, when you save the job.

7. Confirmation
Review your selections, and select Save or Save and Enable the job.
Note that the SuperUser or Administrator can change the job status (enable/disable), delete and edit the job.
- When you click Save, the job is saved, and its status is DISABLED. You can enable it later.
To run a job in the DISABLED state, you must enable it. To enable it, go to the Jobs tab and click Enable from the Quick Actions menu of a job.
- When you click Save & Enable, the job is saved and ENABLED. This option is available only when creating a Job the first time, not during editing the job.
The Save and Enable option should be chosen only when you are confident that the job is correctly configured because it's enabled and in a good-to-execute state.
You can use the Disable option to temporarily disable a scheduled job. Later, at your convenience, you can re-enable the job.
Once all the CVEs associated with the QID are mitigated, the asset status changes to Mitigated. After mitigation, the QDS score reduces as per the impact factor that reduces the vulnerability impact on the asset. For example, if the impact factor is 30 and the QDS score of the CVE is 90, after mitigation, the QDS score reduces to 60.
When all the CVEs associated with the QID are mitigated, only then the asset status changes to Mitigated.
The mitigated job status can be viewed on the VMDR > Vulnerabilities tab. Click on the QDS score to see the score reduction.
