Generating Aggregated Job Progress Report - Windows
You can generate the aggregated job progress report for Windows deployment jobs with the "Assets Responded" status. You cannot generate the report for Linux and Mac deployment jobs.
The report is in CSV format. The details about the installed and failed patches are included in the report, but the skipped patches details are not included in the report.
- You can generate the aggregated job progress report only from the Patch Management UI but not by using the API.
- This feature is only available for Patch Management users with a trial or full license.
Consider this
- You can generate the aggregated job progress report for a maximum of 10 jobs.
- You can generate the aggregated job progress report for jobs with the "Assets Responded" status only, and the job must include at least one asset.
If you don't select at least one job with the "Assets Responded" status but select jobs with other statuses, such as Disabled, Prepared, Executing, etc., a message is shown that mentions that you must select at least one job with the "Assets Responded" status.
If you select jobs with other statuses, such as Disabled, Prepared, Executing, etc., and jobs along with the "Assets Responded" status, a confirmation message is shown that mentions that the data will be shown only for patch jobs that include at least one asset, and the status of the jobs is 'Assets Responded'.
Complete the following steps:
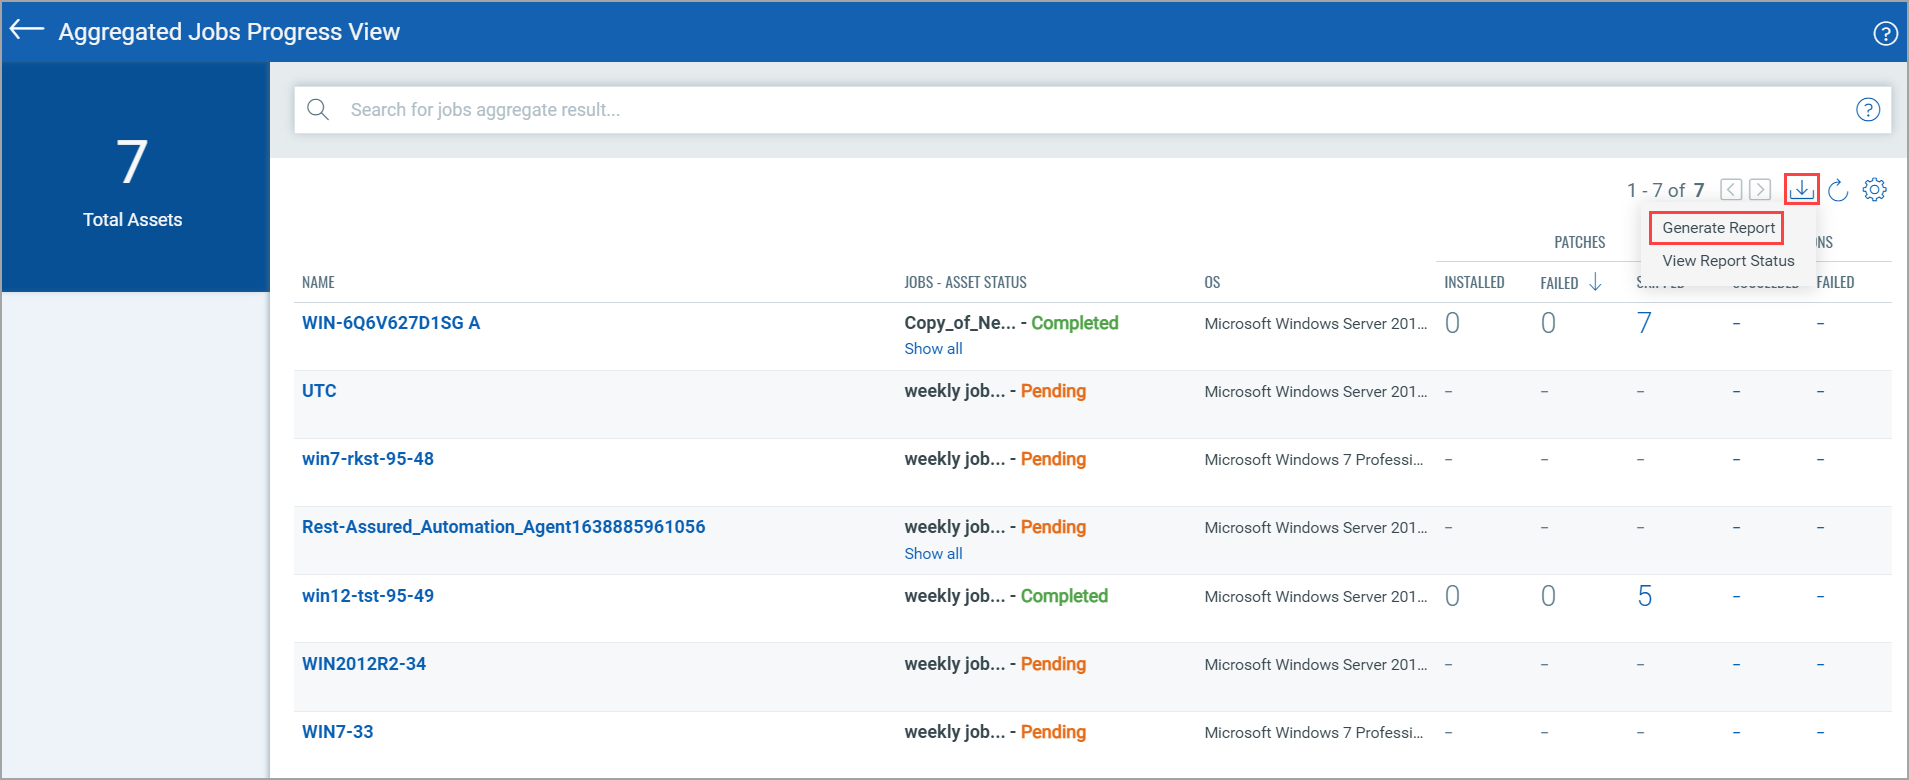
- Go to Jobs > Windows tab, and click View Aggregated Job Progress from the Actions menu for the jobs with the "Assets Responded" status. A confirmation message is shown. Click Continue to proceed.
- Click the Download
 icon from the "Aggregated Jobs Progress View" page, and then click Generate Report. A Generate Report pop-up message is shown.
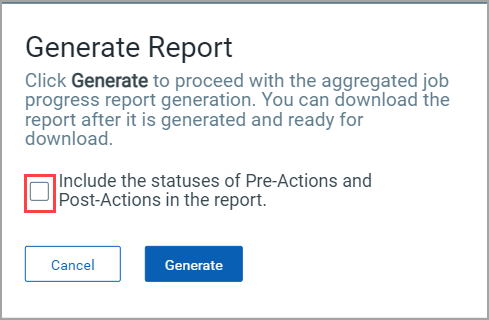
- Click the highlighted check box if you want to include the pre-actions and post-actions in the report, and click Generate.
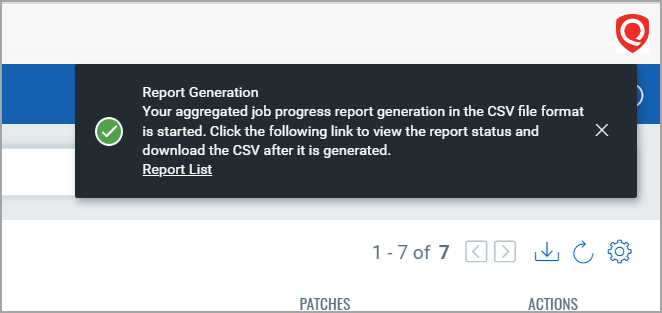
- The Report Generation message mentions the report format, which is CSV.
Note: You can click the Report List link from the screen capture to see the status of the report.
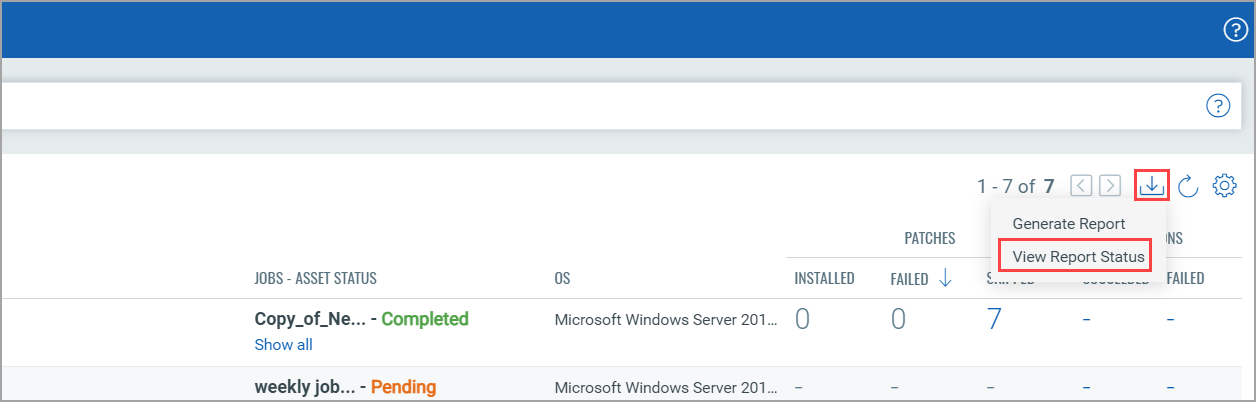
Alternatively, click View Report Status to see the status of the report. You are navigated to the "Report Download Request Status" page.
- Click the Download icon from the Actions column, and download the report. Note that the Download icon from the Actions column is enabled only if the status of the report is "Ready".

The report is downloaded as a zip file. After you extract the zip file, you can see the report in CSV format.
Note: You can also Download the Report by using the Patch Management API.
Good to Know
When you hover over the details from the query column, as shown in the earlier screen capture, you can see the Job Ids of jobs for which you generated the aggregated job progress report.
Also, if you chose to include the pre-action and post-action in the report, as highlighted in the screen capture, includeActionsResult: true is also shown.
If you didn't choose to include the pre-action and post-action in the report, the includeActionsResult details are not included.