Enable Vendor Acquired Patches
Users with the Patch Manager, Patch User, and Patch Security roles can enable, add, and edit vendor-acquired patches to Windows and Mac deployment jobs.
You can add the vendor-acquired patches to the Windows or Mac deployment jobs. these patches are available on the following paths:
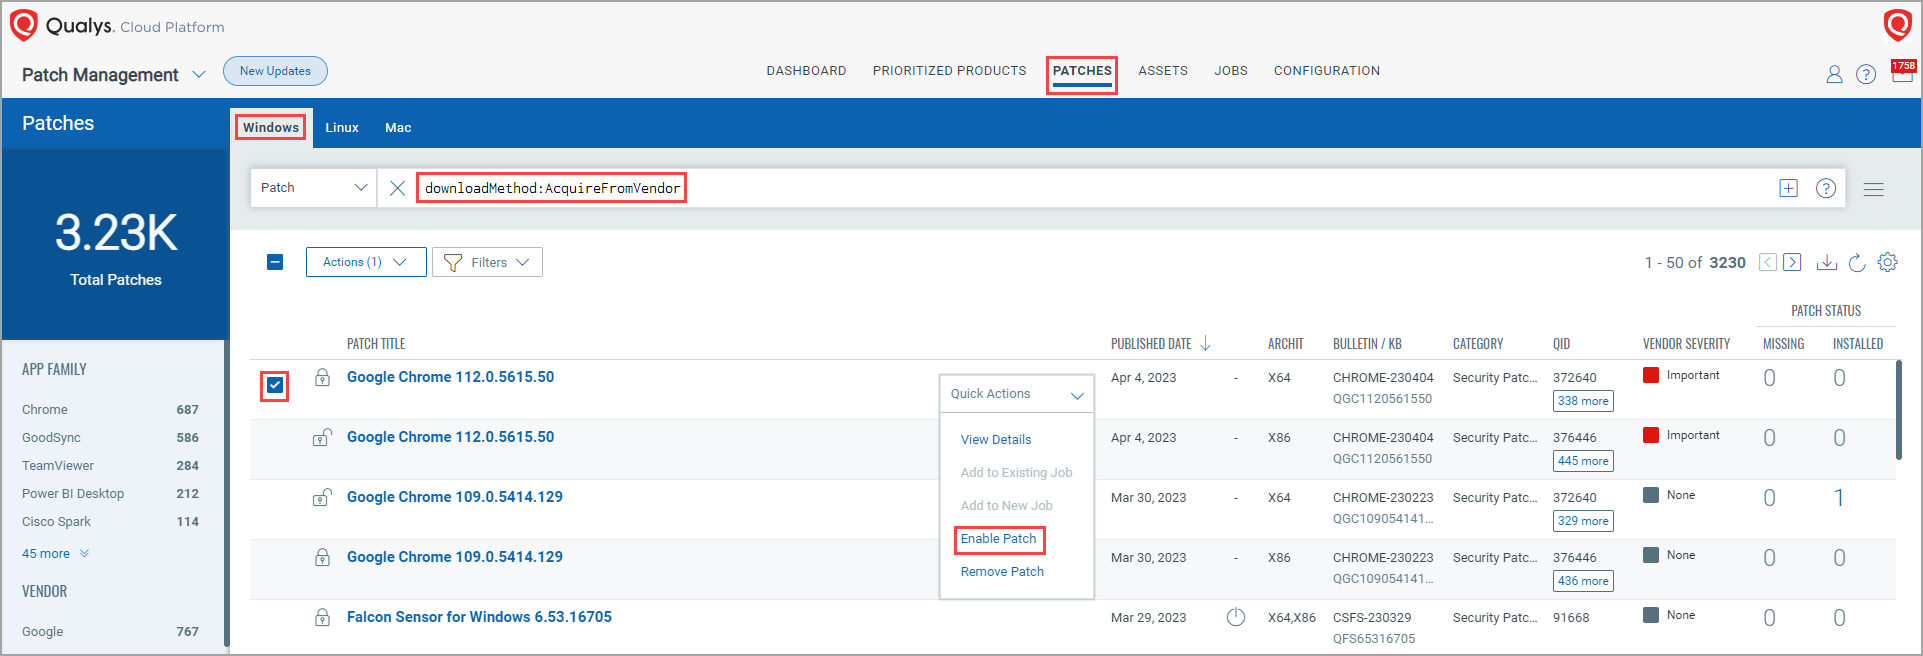
- Patches > Windows tab or Patches > Mac tab: Use the QQL token downloadMethod:AcquireFromVendor to view patches for enablement.
- VMDR > Vulnerabilities tab: To find the vulnerabilities that are flagged and have missing patches, use the QQL token
finding.isQualysPatchable: Trueto add to the patch jobs.
Note: The vendor-acquired patches must be enabled, to create a Remediation job. If you select the non-enabled patches indicated by the lock icon, the Remediate Now option is disabled.
Patches with the Lock ![]() icons are available for enablement. Patches with the Unlock
icons are available for enablement. Patches with the Unlock ![]() icons are enabled for adding to patch jobs.
icons are enabled for adding to patch jobs.
Refer to the following sections:
- Enabling Vendor-Acquired Patch
- Adding Patch to Windows Deployment Job
- Adding Patch to Mac Deployment Job
Enabling Vendor-Acquired Patch
You can enable the “AcquireFromVendor” type of Windows or Mac patches, and then add them to existing or new Windows or Mac deployment jobs.
In the case of on-demand jobs, the required cloud agent version for vendor-acquired patch enablement is 5.2 and above.
Complete the following steps:
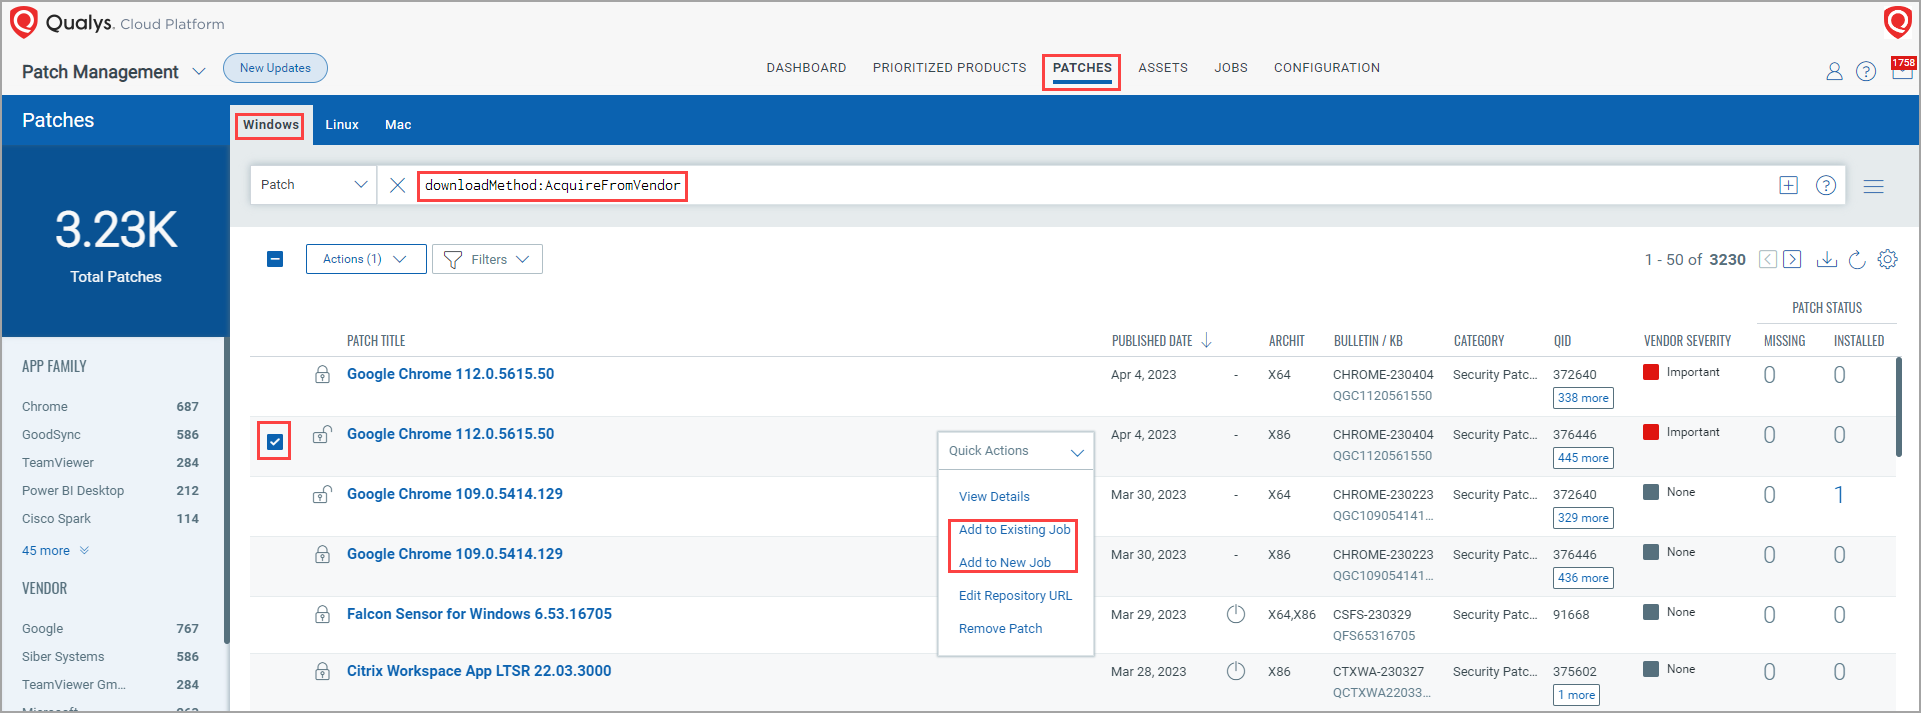
- Go to the Patches > Windows tab or Patches > Mac and run the
downloadMethod:AcquireFromVendorQQL query. You can see patches with the Lock icons. These patches are available for enablement.
 - Select the check box next to the patch you want to enable and click Enable Patch.
- From the "Enter Repository URL or Upload File" page, select either of the following:
- Use Existing URL: This option is pre-selected by default. Complete the following steps:
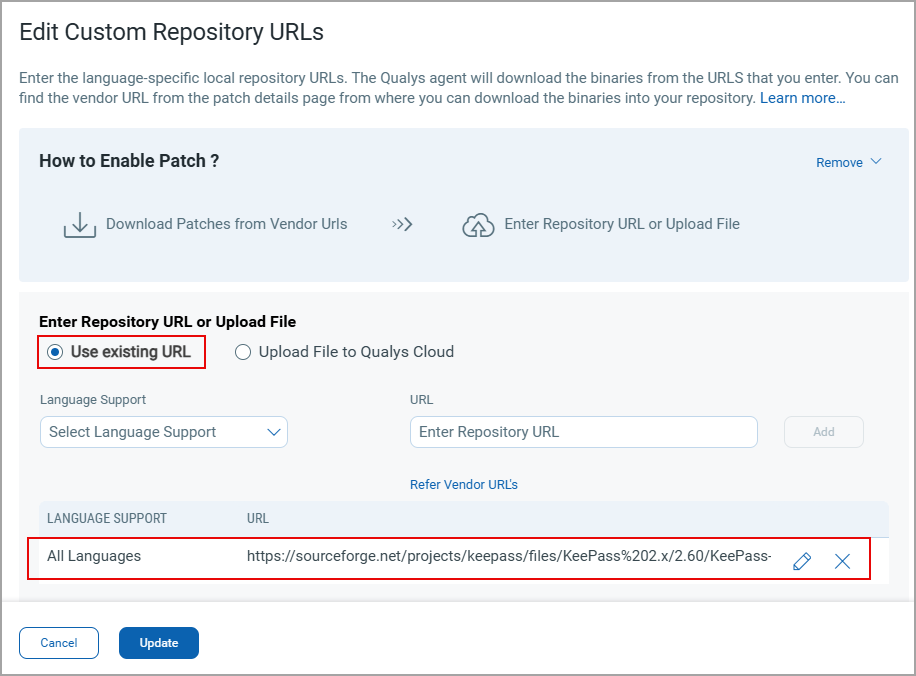
- Select the required language, for example, All Languages, from the Language Support list.
- Enter the respective local repository URL in the URL field, and click Add. You can enter both the HTTP and HTTPS types of links.
- After the URL is added, click Add URLs.
Note: You can also find the Vendor URL on this page. Click the VENDOR URLS tab, where you can see the vendor URL. Click the Copy icon next to the vendor URL. Refer to the Add Patch Process shown in the following screen capture. You can hide the Add Patch Process representation by clicking Remove.
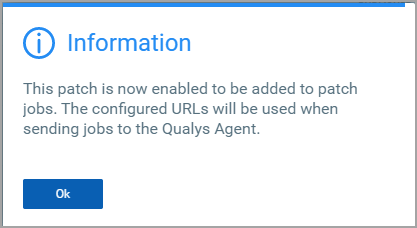
The following message is shown. Click OK to close.
- Upload File to Qualys Cloud: You can upload your installer files to the Qualys Cloud storage. You are allocated 15GB of storage per subscription on the Cloud repository and can upload files as per the storage available. The supported file types for upload are .exe, .iso and .msi.
This feature is supported starting with Windows Cloud Agent version 6.3.
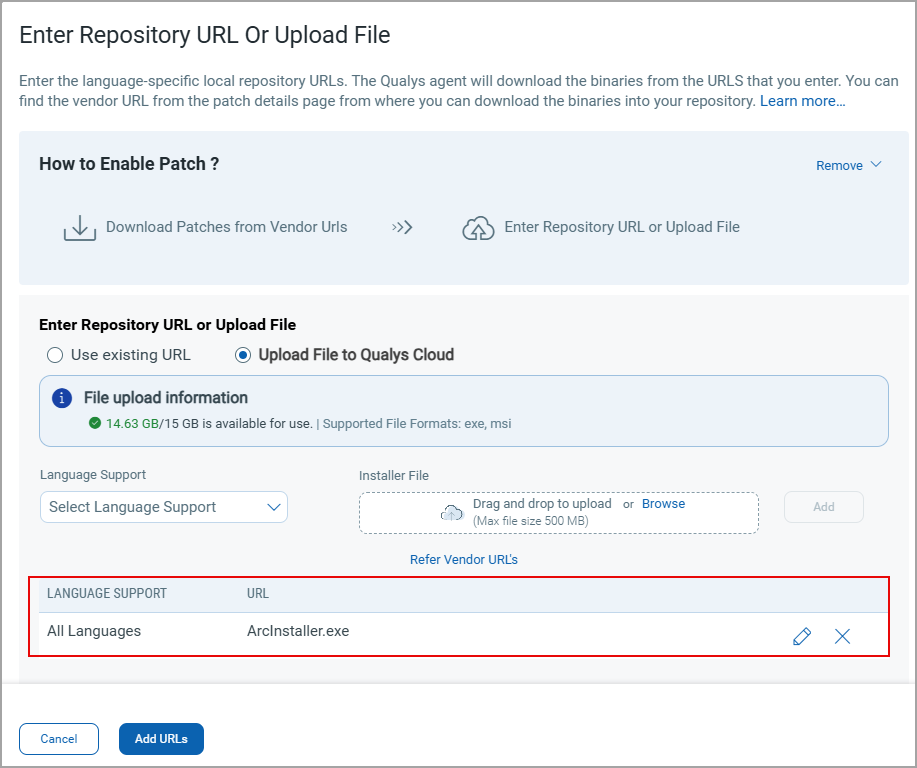
- Select the required language, for example, All Languages, from the Language Support list.
- Click Browse to upload the installer file and then click Add.
- (Optional) Click
 to edit and X to remove the uploaded file.
 - Click Add URLs.
To ensure Cloud Agents can access the Qualys CDN URLs, you must add the following URLs in the allowlists, for your network configurations to access them.
URLs to be added in AllowlistsURLs to be added in AllowlistsAmerica:
US1: https://caskcf.qg1.apps.qualys.com ·
US2: https://caskcf.qg2.apps.qualys.com ·
US3: https://caskcf.qg3.apps.qualys.com ·
US4: https://caskcf.qg4.apps.qualys.com ·
CA1: https://caskcf.qg1.apps.qualys.ca ·
IAD2: https://caskcf.gov1.qualys.us/
EMEA:
· EU1: https://caskcf.qg1.apps.qualys.eu
· EU2: https://caskcf.qg2.apps.qualys.eu
· EU3: https://caskcf.qg3.apps.qualys.it
· UK1: https://caskcf.qg1.apps.qualys.co.uk
· AE1: https://caskcf.qg1.apps.qualys.ae
· KSA: https://caskcf.qg1.apps.qualysksa.com
APAC:
- Use Existing URL: This option is pre-selected by default. Complete the following steps:
The patch you selected is now enabled. You can now add the patch to the Windows deployment job.
When you view the details of that patch from the Basic Information tab, you can see the custom Repository you entered.

Adding Patch to Windows Deployment Job
After enabling the patch, you can add it to an existing or a new Windows deployment job.
Complete the following steps:
1. Go to the Patches > Windows tab, and run the enabledVendorAcquiredPatches:true QQL query. The patches with the Unlock ![]() icons are enabled for adding to patch jobs.
icons are enabled for adding to patch jobs.
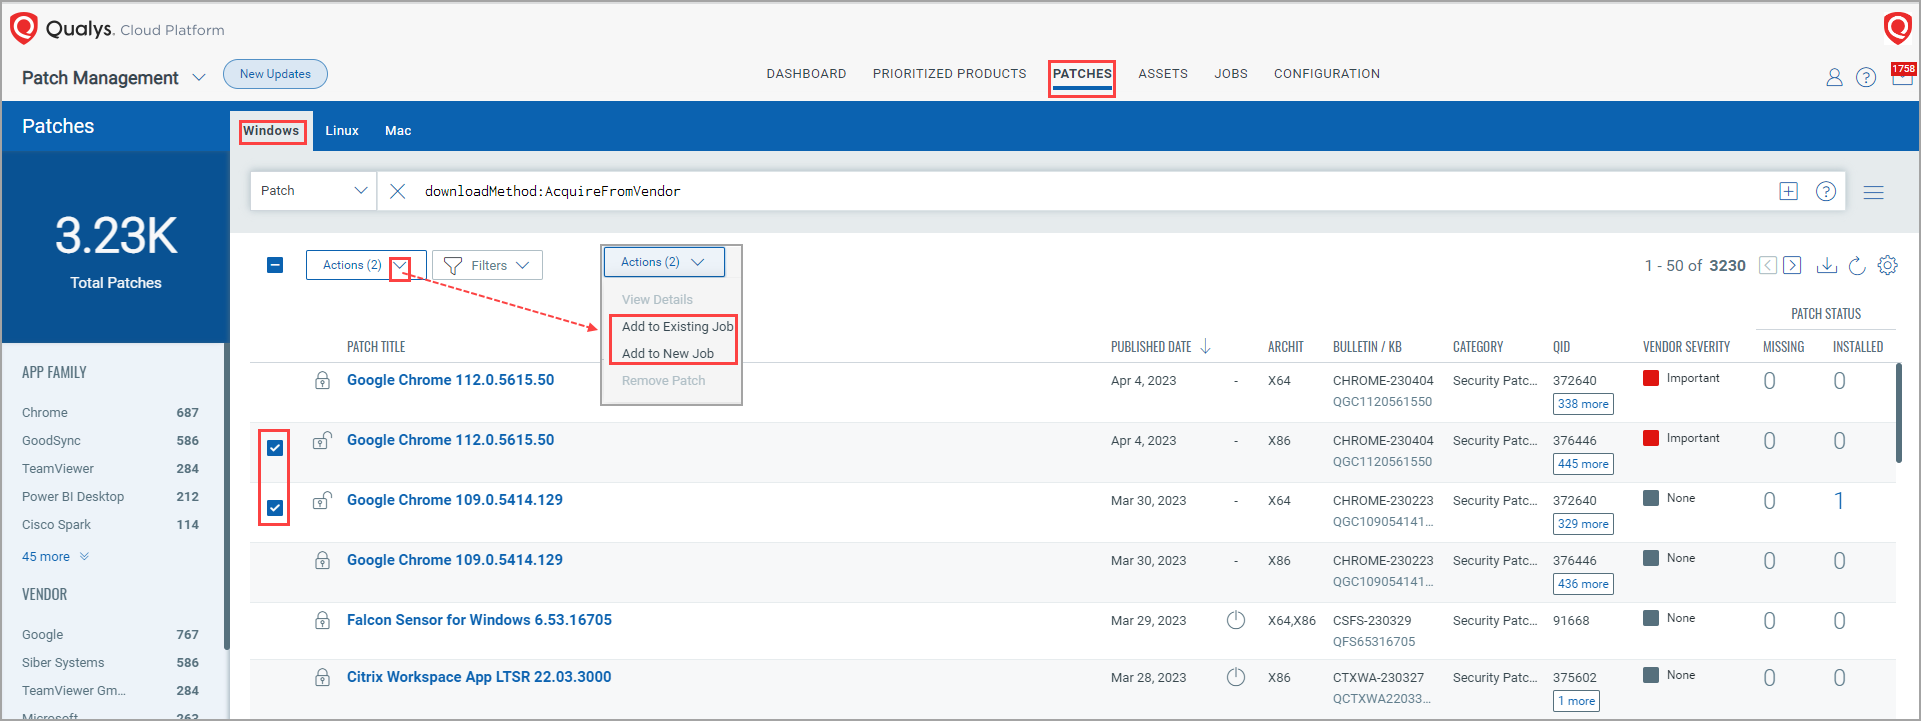
2. Select the check box next to the patch you want to add to the deployment job, and click Add to Existing Job or Add to New Job as required.
You can also add multiple patches to an existing job or a new job.
- If you click Add to Existing Job, you are navigated to the "Add Patches: Existing Deployment Jobs" page. Select the check box next to the job and click Add. The Adding Patches window is shown, wherein it's mentioned that the patch has been successfully added. Click Continue.
Note: Make sure that you turn the Enable opportunistic patch download toggle to ON from the job you selected.
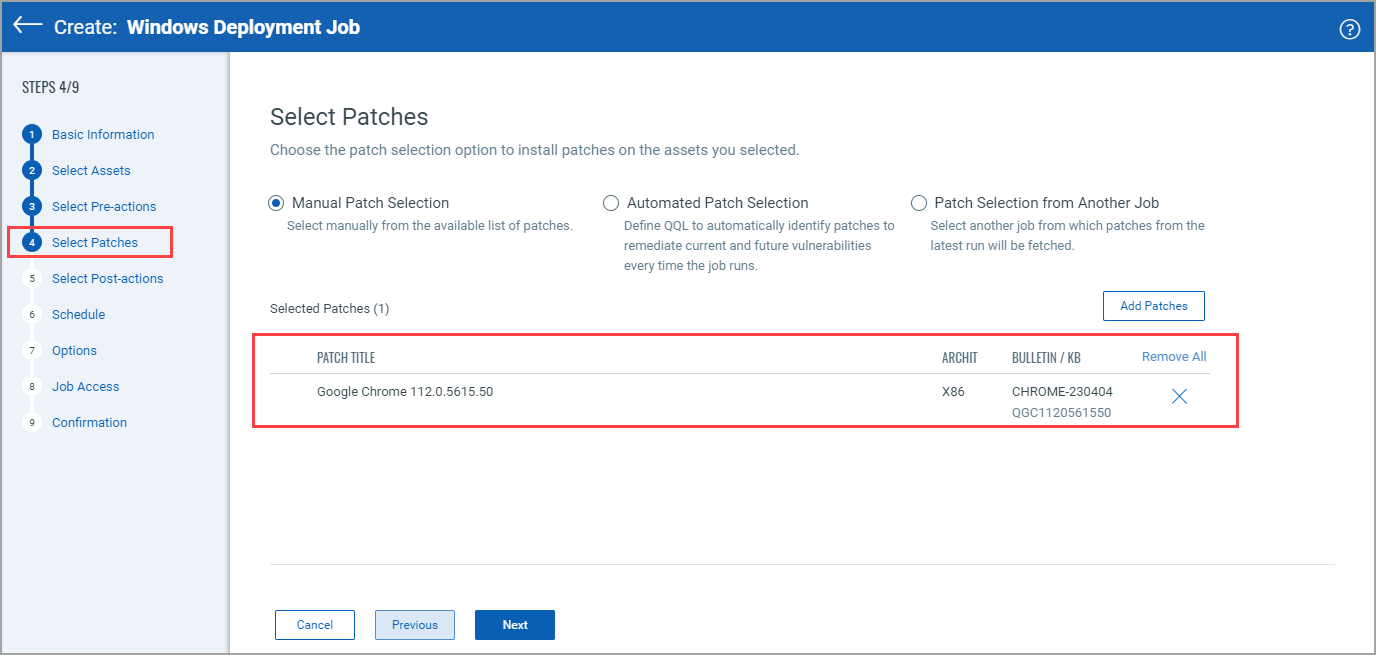
- If you click Add to New Job, you are navigated to the "Create: Windows Deployment Job" page. Complete the Windows Job creation steps, and the patch is added to the new Windows deployment job.
Note: Refer to the following screen capture. While completing step 4 - Select Patches, you can see the patch you enabled is automatically added to the new job that you are creating.
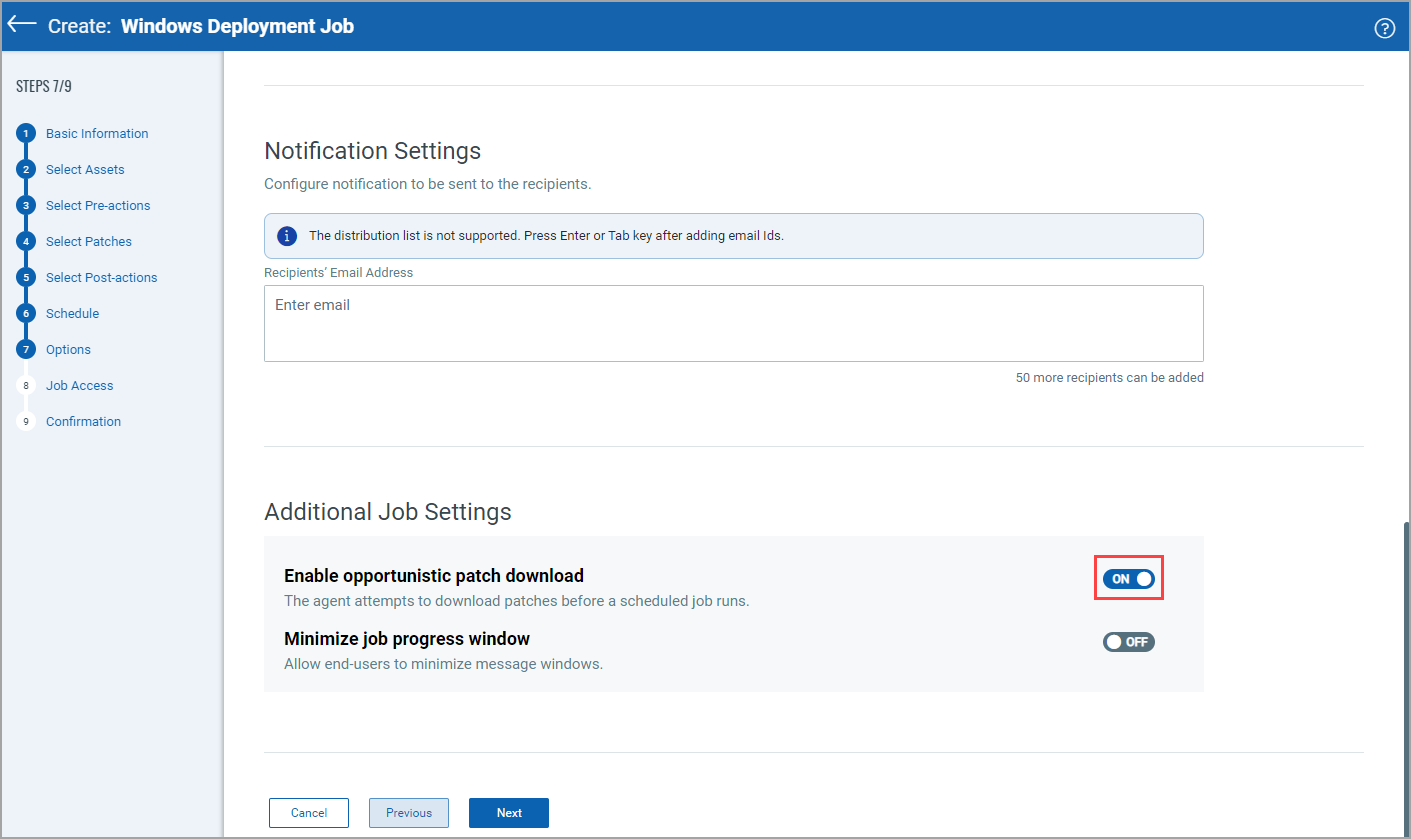
While completing step 7, make sure you turn the Enable opportunistic patch download toggle to ON.
Adding Patch to Mac Deployment Job
After enabling the patch, you can add it to an existing or a new Mac deployment job.
Complete the following steps:
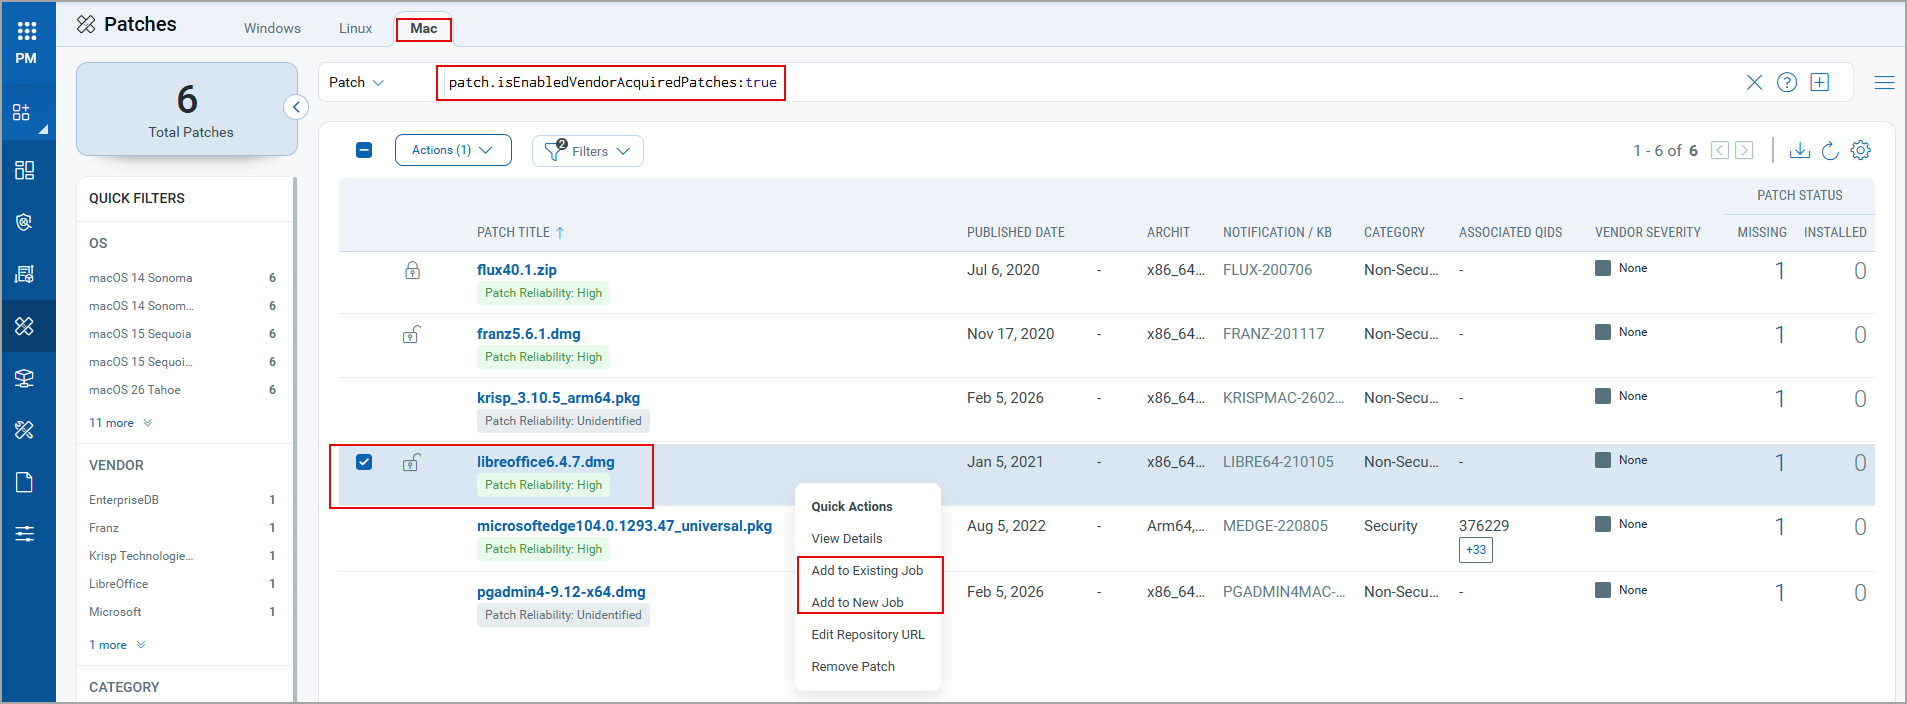
- Go to the Patches > Mac tab, and run the "enabledVendorAcquiredPatches:true" QQL query. The patches with the Unlock
 icons are enabled for adding to patch jobs.
 - Select the check box next to the patch you want to add to the deployment job, and click Add to Existing Job or Add to New Job as required.
-
(Optional) You can also add multiple patches to an existing job or a new job.
If you click Add to Existing Job, you are navigated to the "Add Patches: Existing Deployment Jobs" page. Select the check box next to the job and click Add. The Adding Patches window is shown, wherein it's mentioned that the patch has been successfully added. Click Continue. -
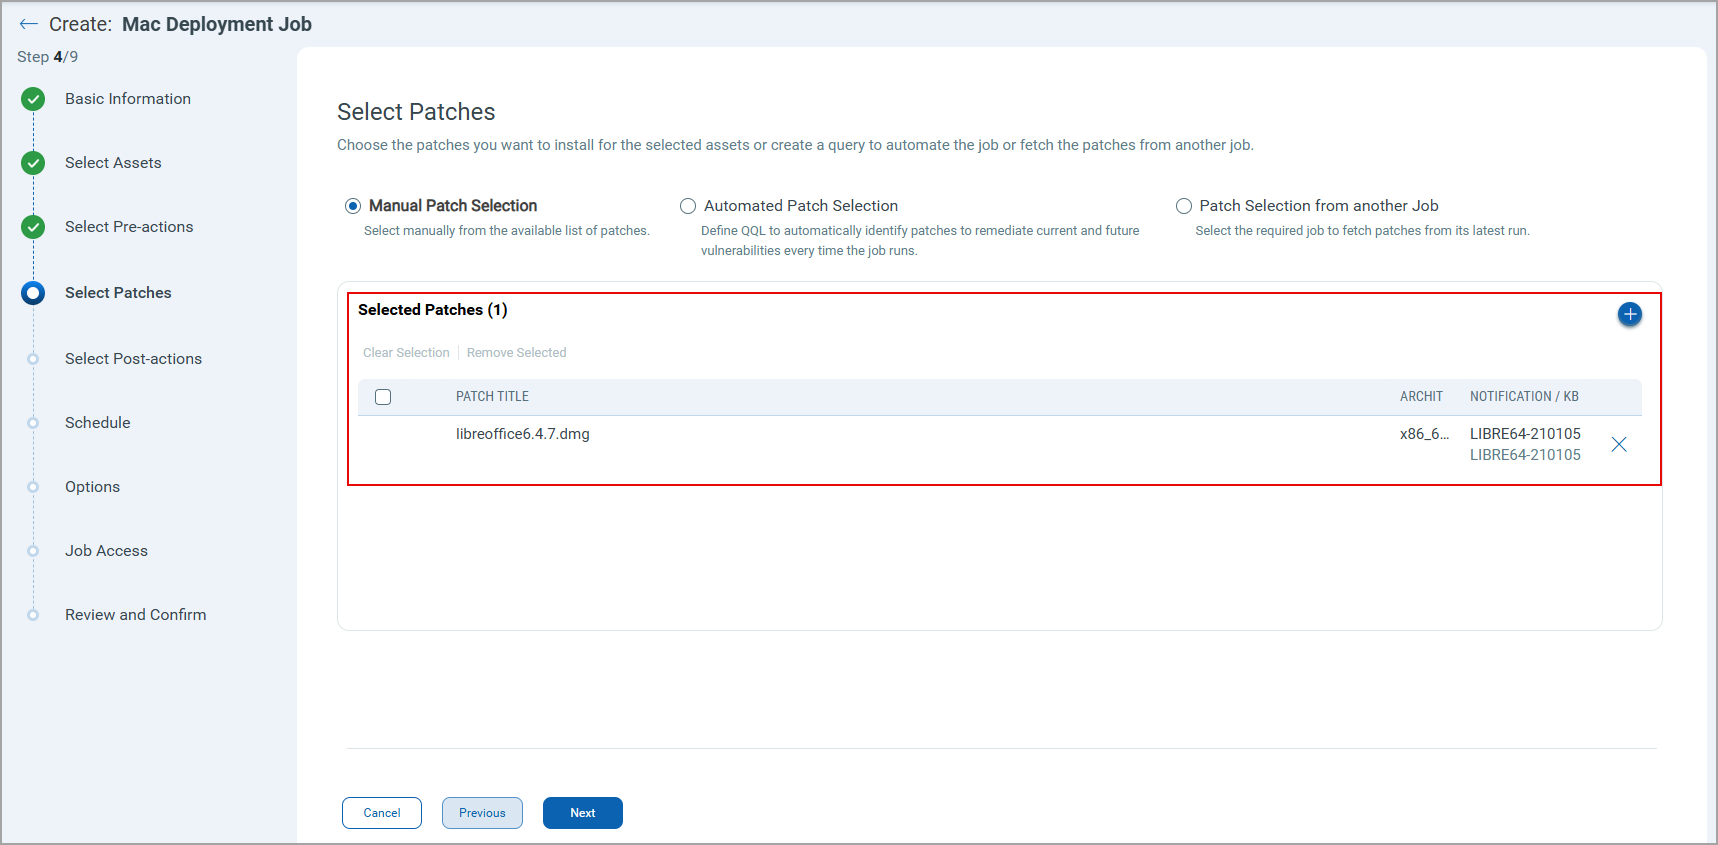
If you click Add to New Job, you are navigated to the "Create: Mac Deployment Job" page. Complete the Mac Job creation steps, and the patch is added to the new Mac deployment job.
Note: Refer to the following screen capture. While completing step on Select Patches tab, you can see the patch you enabled is automatically added to the new job that you are creating.
Important to Know
After you enabled a patch, added it to the job, and want to modify it, the edits will be reflected if and when the job manifests are triggered for active or ongoing jobs. The active or ongoing jobs are the ones for which we are still waiting to receive results from the agent.