Generating Job Progress Reports
You can generate the job progress report for Windows, Linux, and Mac jobs. The details about the installed and failed patches are included in the report, but the skipped patches details are not included in the report.
Complete the following steps:
- Go to the Jobs tab, click the Windows, Linux, or Mac tab based on the report you want to generate, and then click View Progress from the Quick Actions menu of the job.
- Click the Download
 icon from the "Jobs Progress" page, a Generate Report window is displayed.
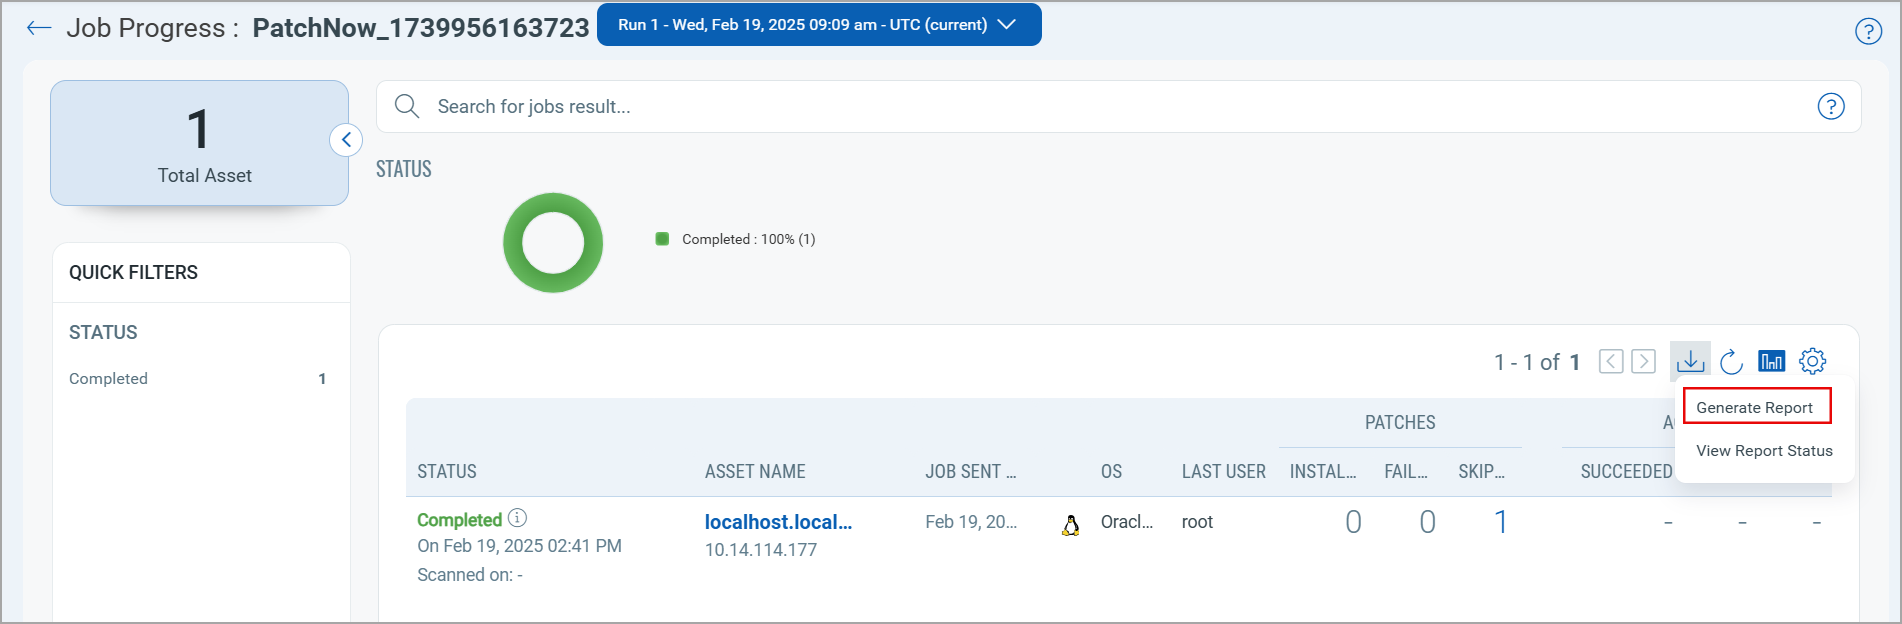
- You cannot generate the fifth report if the four reports you generated are in the "Generating" or "Queued" state.
- You cannot generate the same report again if you apply a filter from the "Job Progress" page and the report is in the "Generating" or "Queued" state. - Enter the name and description of the report.
- Select the report format you want to download. You can download the report either in CSV or PDF format.
PDF reports support the selection of up to 5 columns for optimal readability.
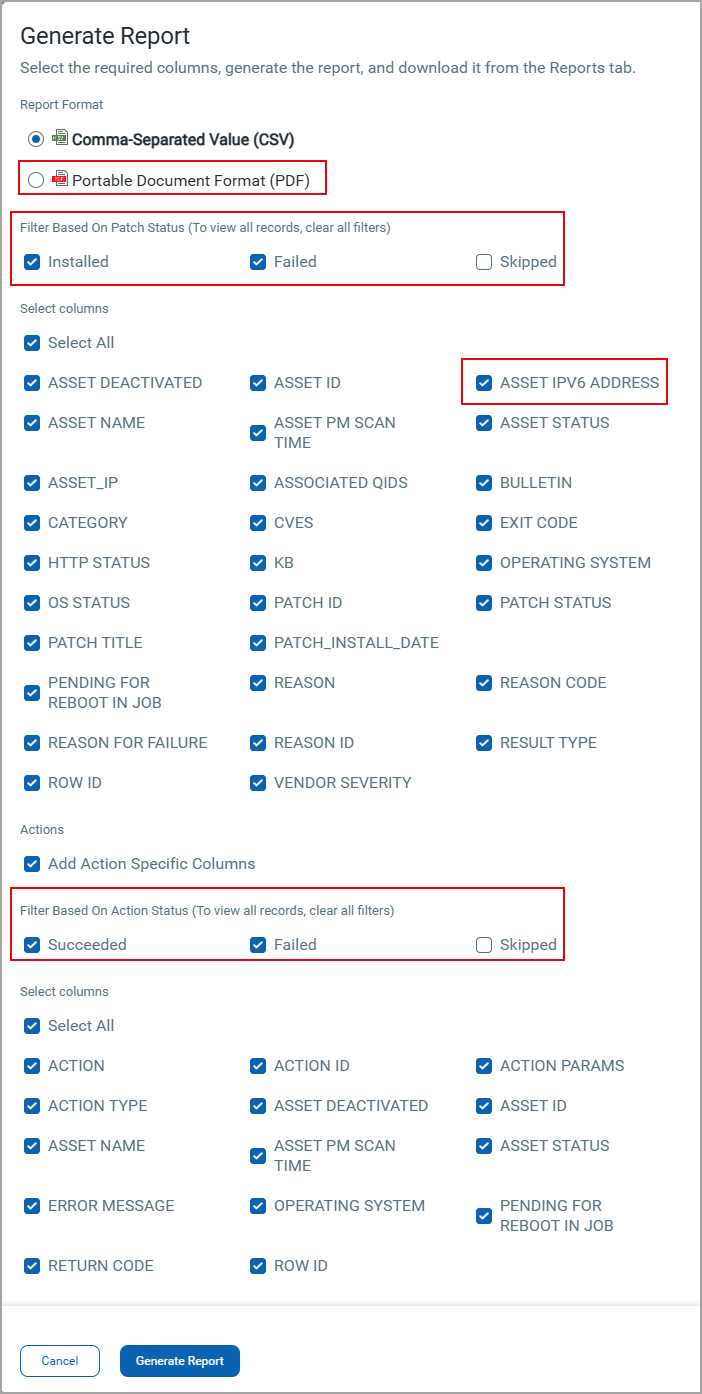
- Select the required Patch Status filters: Installed, Failed, and Skipped. Depending on your selection, the result is displayed in the report. If no filters are selected, by default, all rows are included.
- If you select CSV format, by default, all columns are pre-selected that are generated in the report. To customize your selection, select only the required check-boxes for the columns that you want to generate in the report.
- (Optional) To include the action-specific columns in the report:
- Select the Add Action Specific Columns checkbox.
- Select the required Action Status filters: Succeeded, Failed, and Skipped. Depending upon your selection, the result is displayed in the report. If no filters are selected, by default, all rows are included.
- By default, all action columns are pre-selected that are generated in the report. To customize your selection, select only the required check-boxes for the action columns that you want to generate in the report.
- Click Generate Report. The Report Generation message is shown, which mentions that the data is downloaded in CSV format.

Irrespective of the report type, that is, Aggregate job report, asset report, job progress report, or patch report, if any four reports are in the "Queued" or "Generating" state, the following message is shown:

- Click the Report List link from the Report Generation message (as shown in above image) to see the report's status.
- Click the Download
 icon from the Actions column on the Reports > Reports tab. Note that the Download icon is enabled only when the report status is Ready.
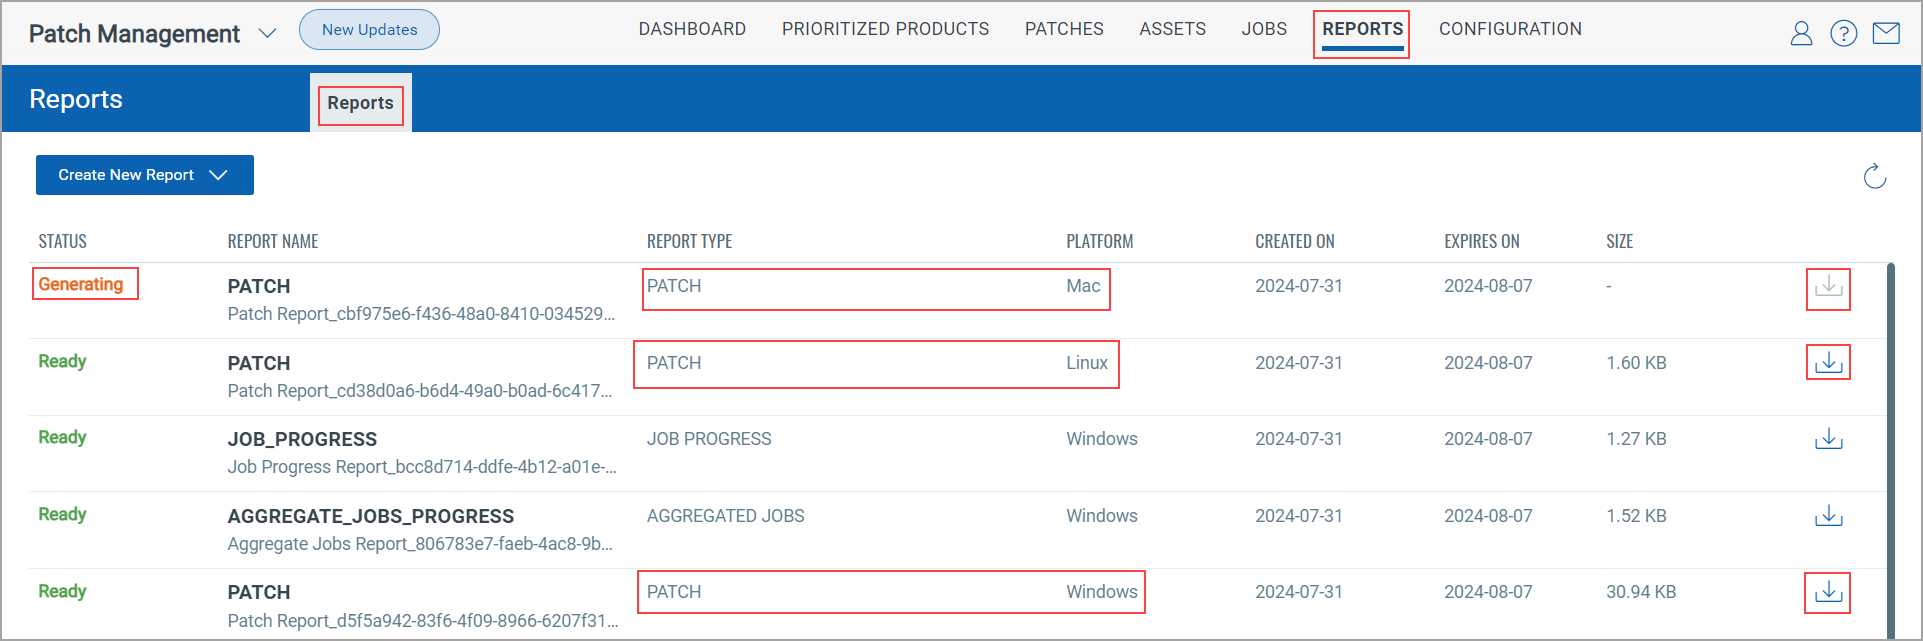
A list of only ten reports is shown and the report shown in the list is available for download only seven days from the report generation date.
The report is downloaded as a zip file. After you extract the zip file, you can see the report in CSV format.