Report Creation from the Reports Tab in Patch Management
You can generate exclusive reports for Windows, Linux, and Mac platforms based on a wide range of parameters or selections, such as the required QQL queries, timeframe or period, and patch installation status. Depending on these selections, you can get vital information like whether the patch installation is successful, which assets are part of how many jobs, and so on.
- Go to the Reports tab, and based on the platform you want to create the report for, select Windows, Linux, or Mac from the Create New Report list.
- Enter the Patch and Asset QQLs as per your requirement.
- Select the required time from the Select Timeframe field. Refer to see the available timeframe options.
Note: When selecting a Specific Range, you can only select the dates within the last 30 days. - Include patches with Failed, Success, or both statuses, but selecting at least one is mandatory.
- (Optional) Click Status from the Group By tile if you want to group by the report based on the statuses mentioned earlier.
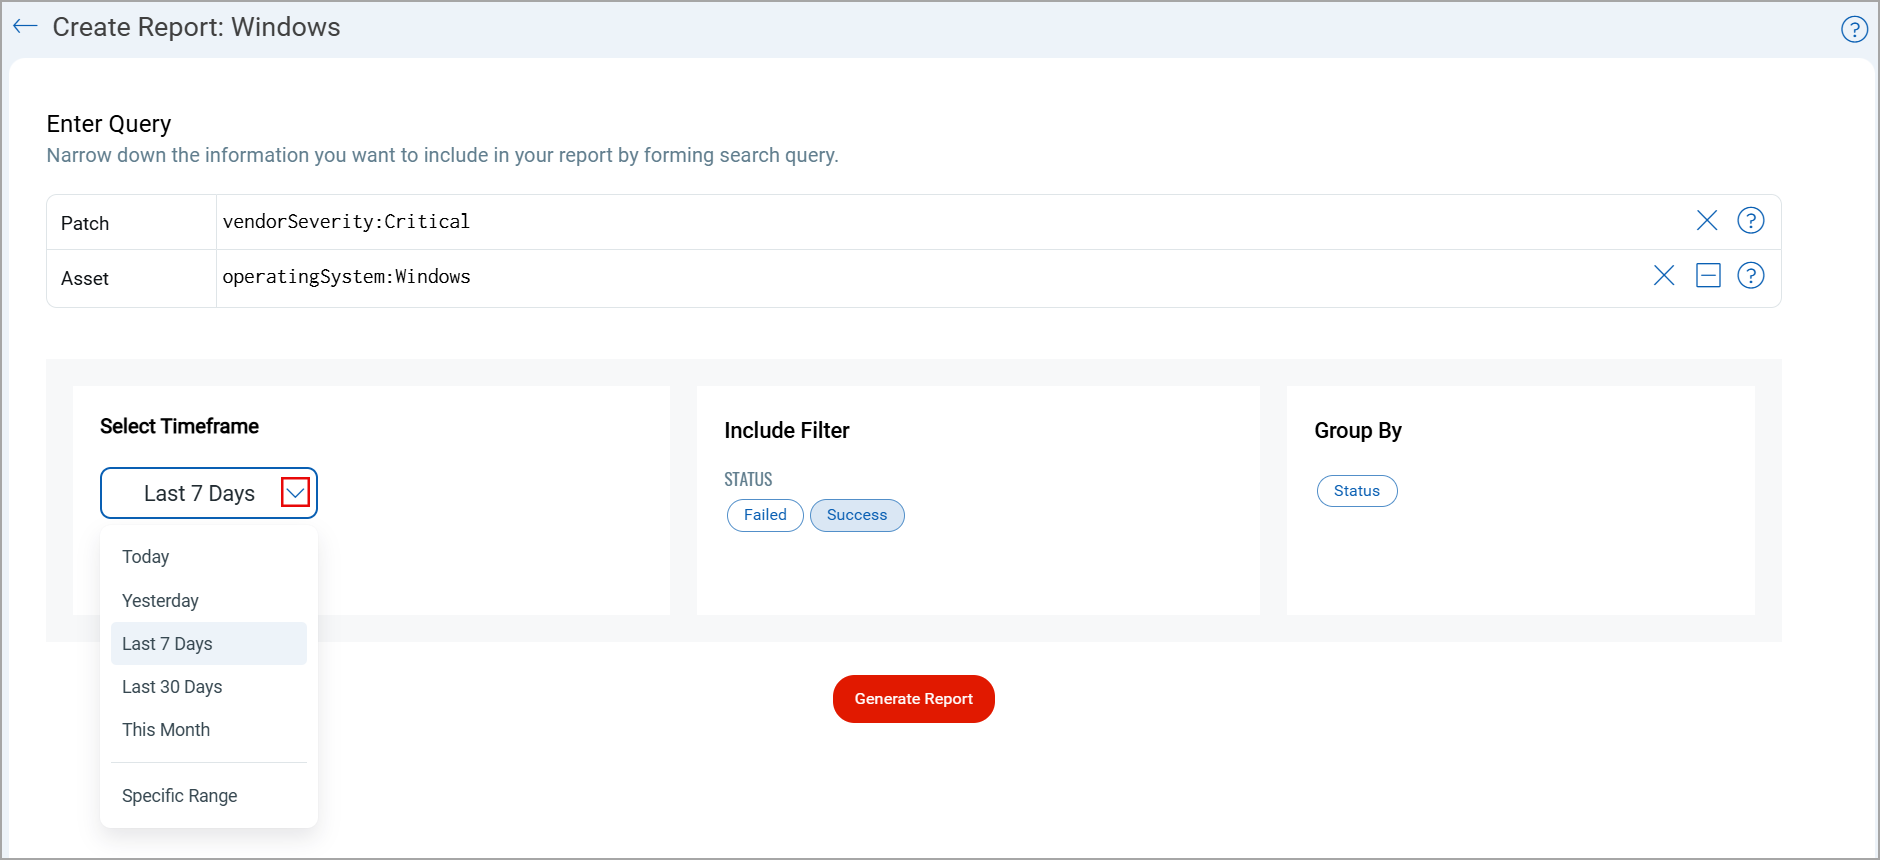
- Click Generate Report.
- Enter report name and description.
- Select the report format you want to download. You can download the report either in CSV or PDF format.
PDF reports support the selection of up to 5 columns for optimal readability.
- By default, all columns are pre-selected that are generated in the report. To customize your selection, select only the required check-boxes for the columns that you want to generate in the report.
- Click Generate Report. The report is generated successfully on the Reports listing page.
- Click the Download
 icon from the Actions column on the Reports > Reports tab. Note that the Download icon is enabled only when the report status is Ready.