Deploy Virtualization Image
You can deploy the image on VMware ESXi or Microsoft Hyper-V. VMware ESXi or Microsoft Hyper-V monitors network activity without active probing of the device to detect active assets on the network. It identifies the key device attributes that help the web services on the cloud catalog the devices into operating systems or hardware.
Deployment on VMware ESXi
You can virtualization image on VMWare ESXi using following methods:
We recommend to use 1st method which is Deployment on VMware ESXi server using Vcenter.
Deployment on VMware ESXi Server Using Vcenter
ESXi server requirements: VMware ESXi 7.0 or later, 50 GB HDD, 16 GB Memory, Octa-Core Processor.
Vcenter client requirements: vSphere Client 7.0 or later.
Perform the following steps to deploy an image on the ESXi server using Vcenter:
- Login to VSphere Client and select the Cluster > select Esxi server > go to Deploy OVF template. It opens the Deploy OVF Template wizard.
- For OVF Template, select the Local file and upload the virtual sensor image that you downloaded in the 1st step.
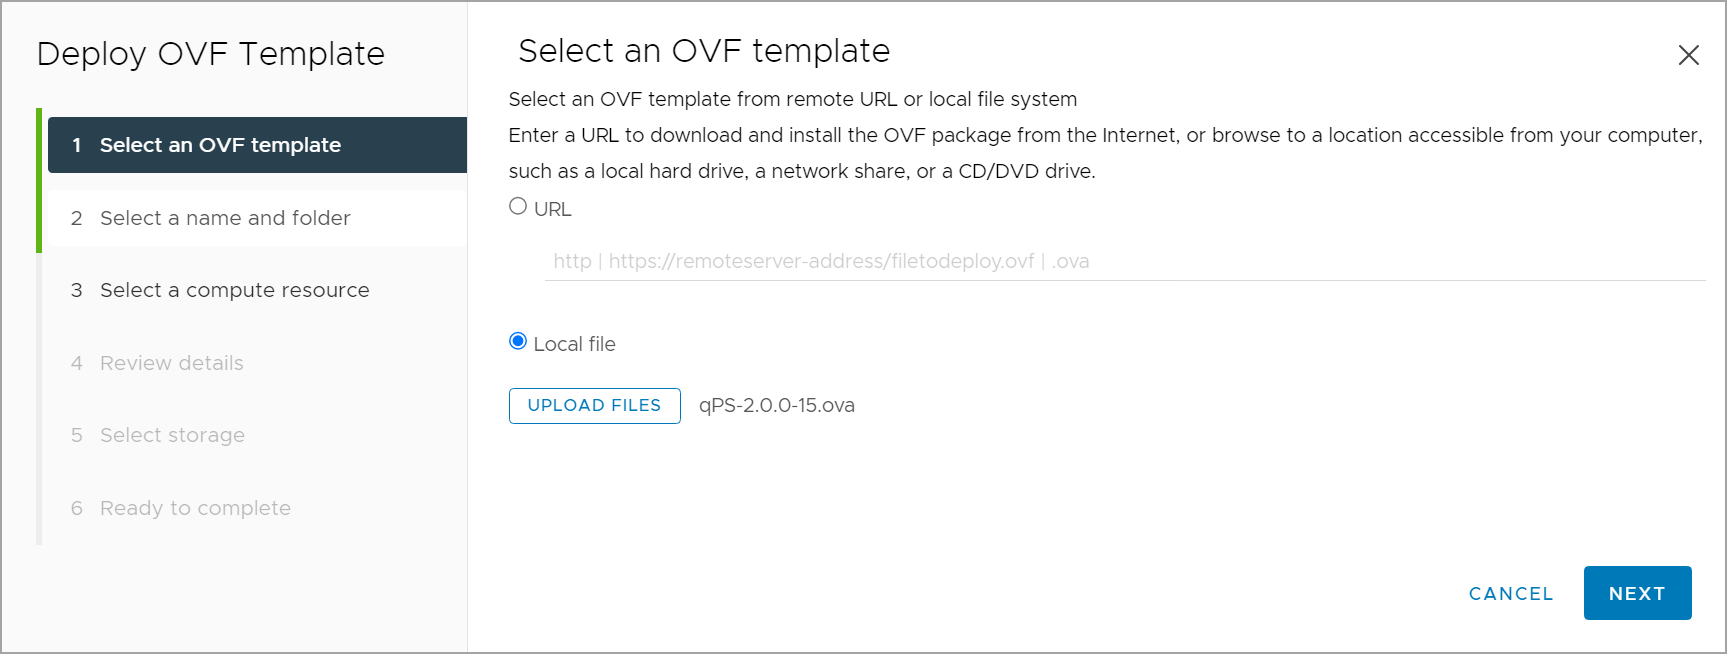
- Click Next and enter Virtual machine name.
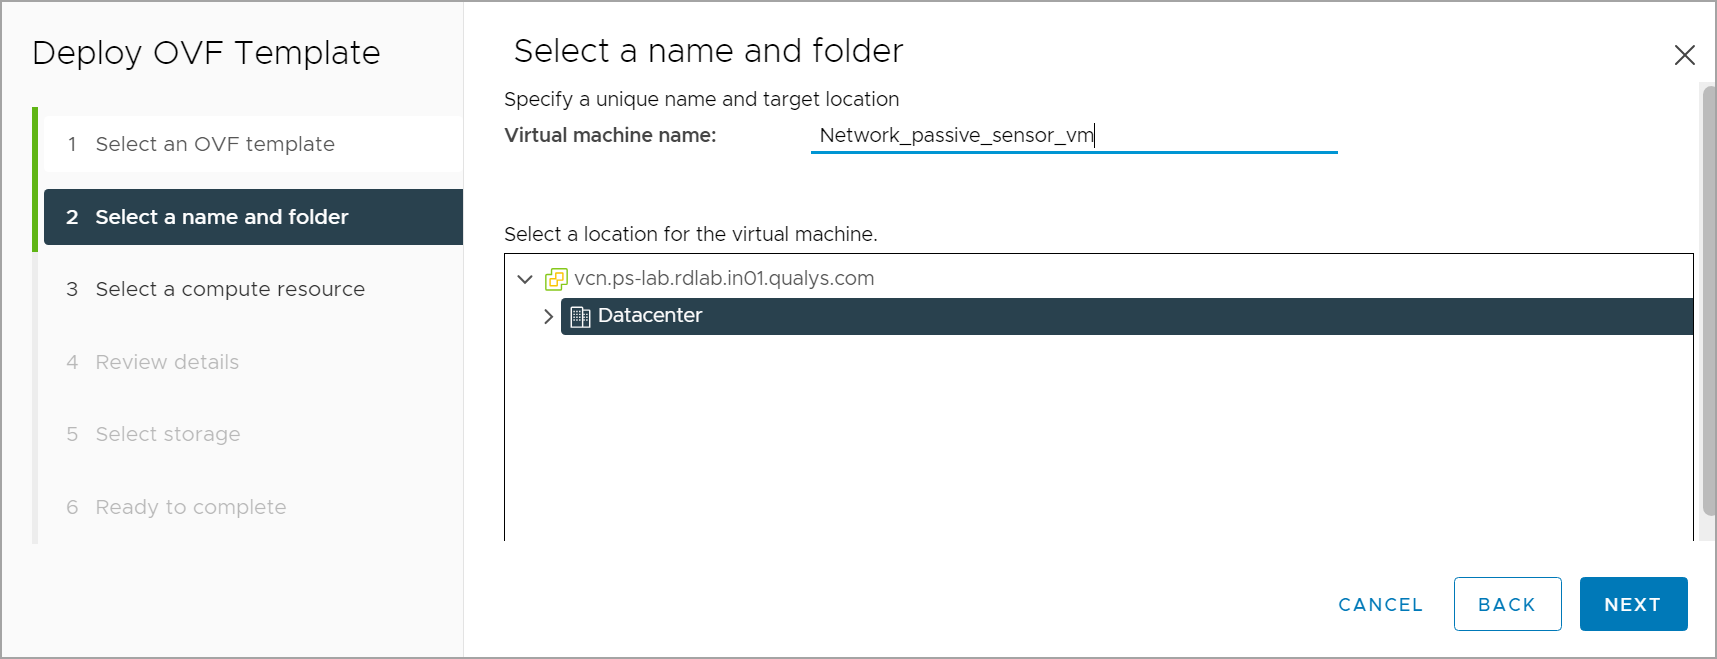
- Click Next and select the destination compute resource.
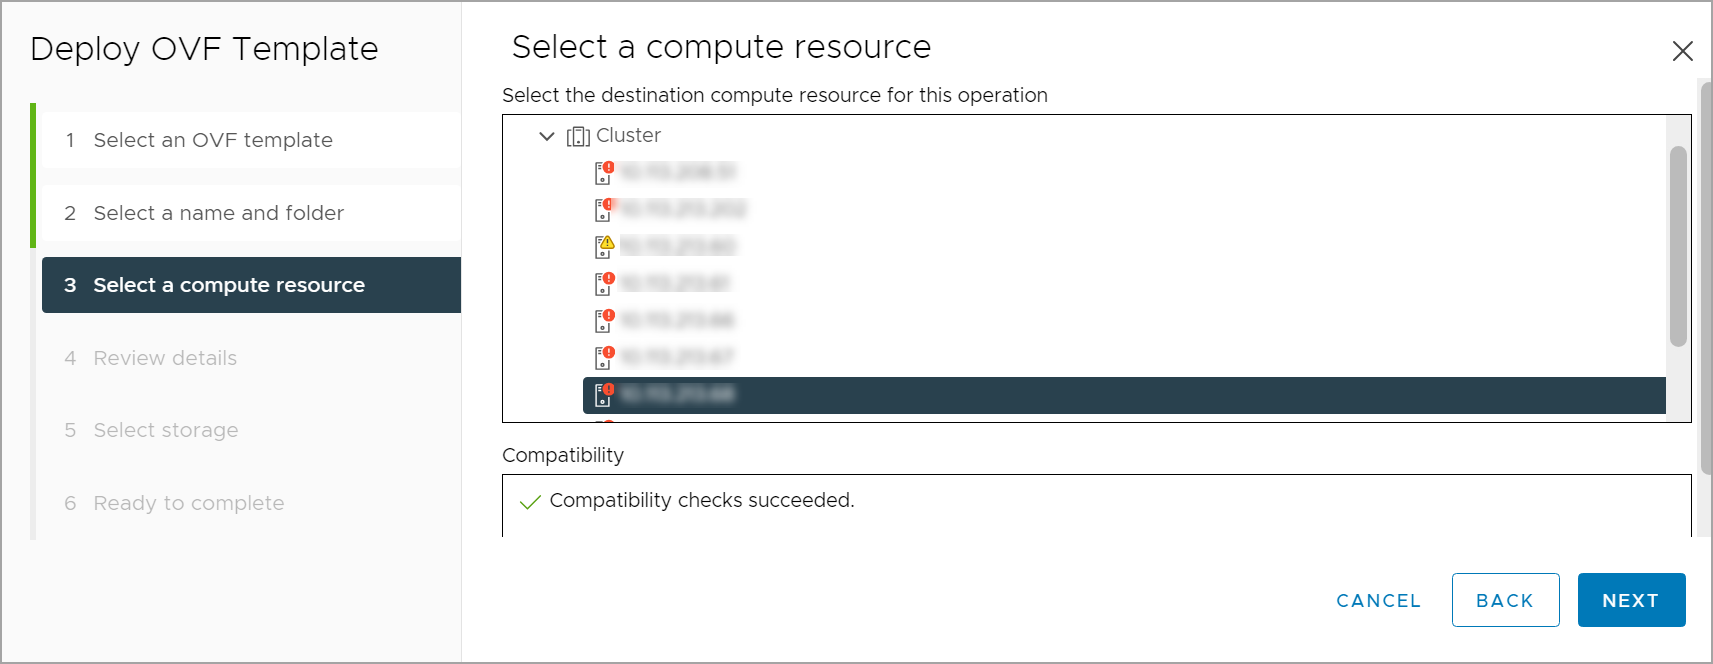
- Click Next and verify the template detail on Review details page.
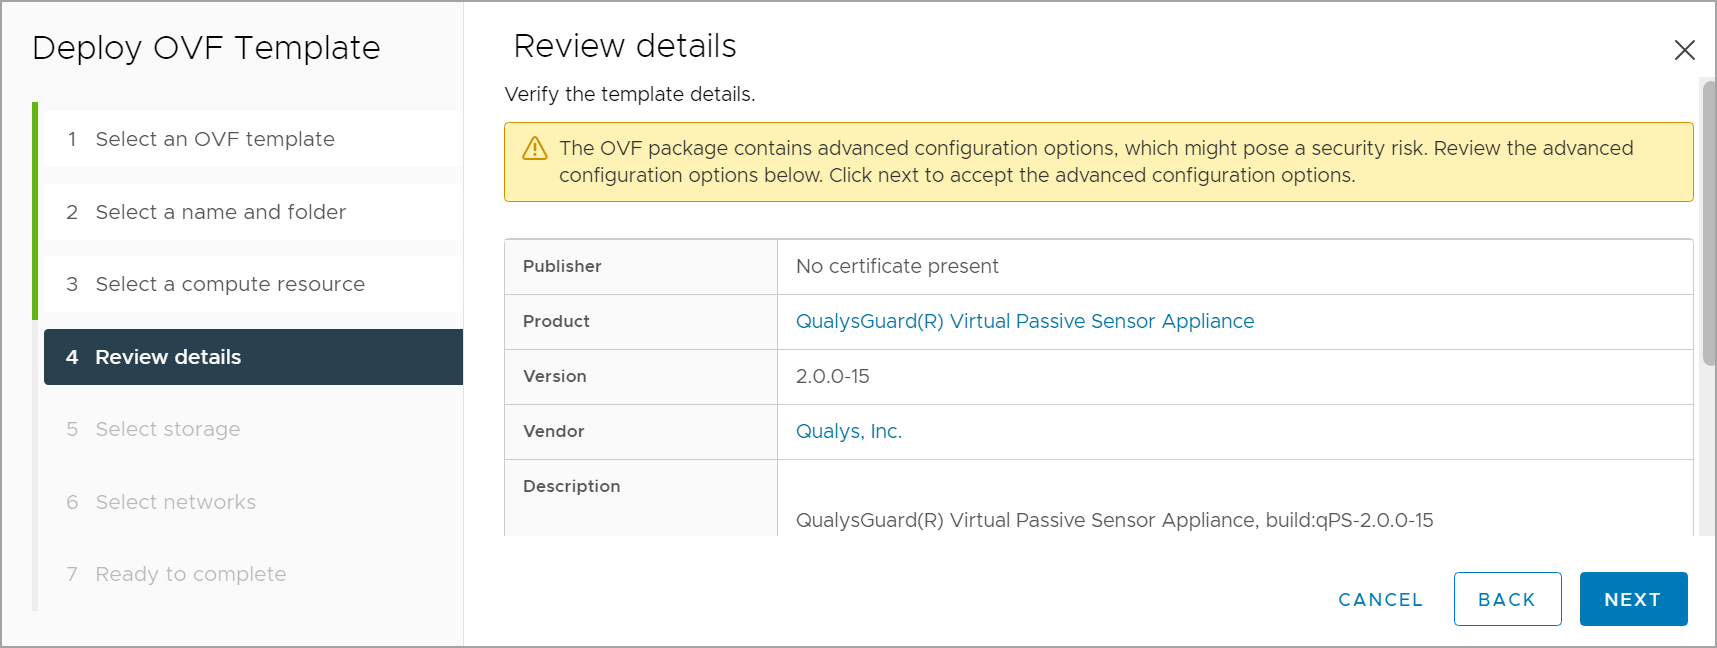
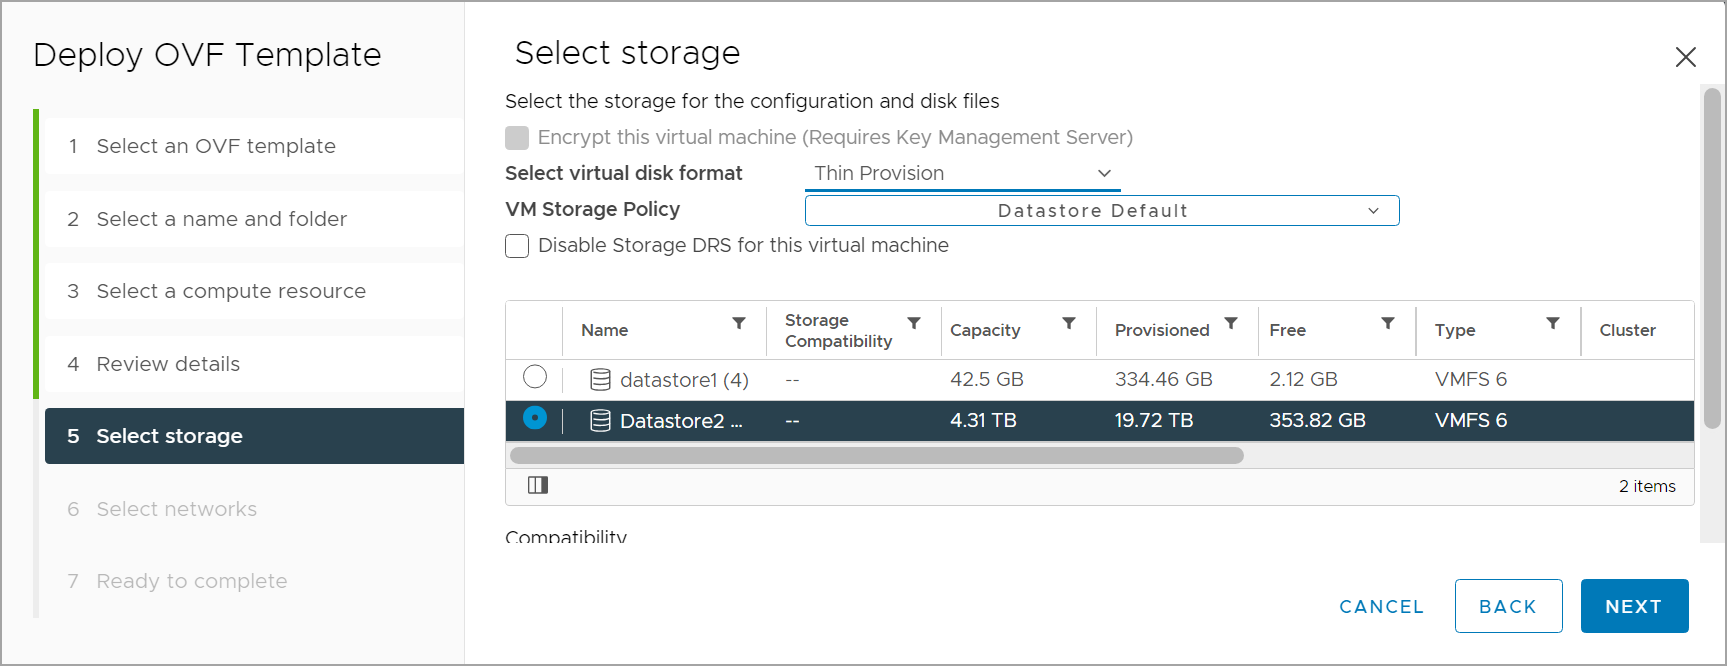
- Click Next and select the destination Datastore for the virtual machine configuration files.
- Click Next to go to the Select networks tab. Choose Management and Sniffing Interface port groups for the corresponding interfaces.
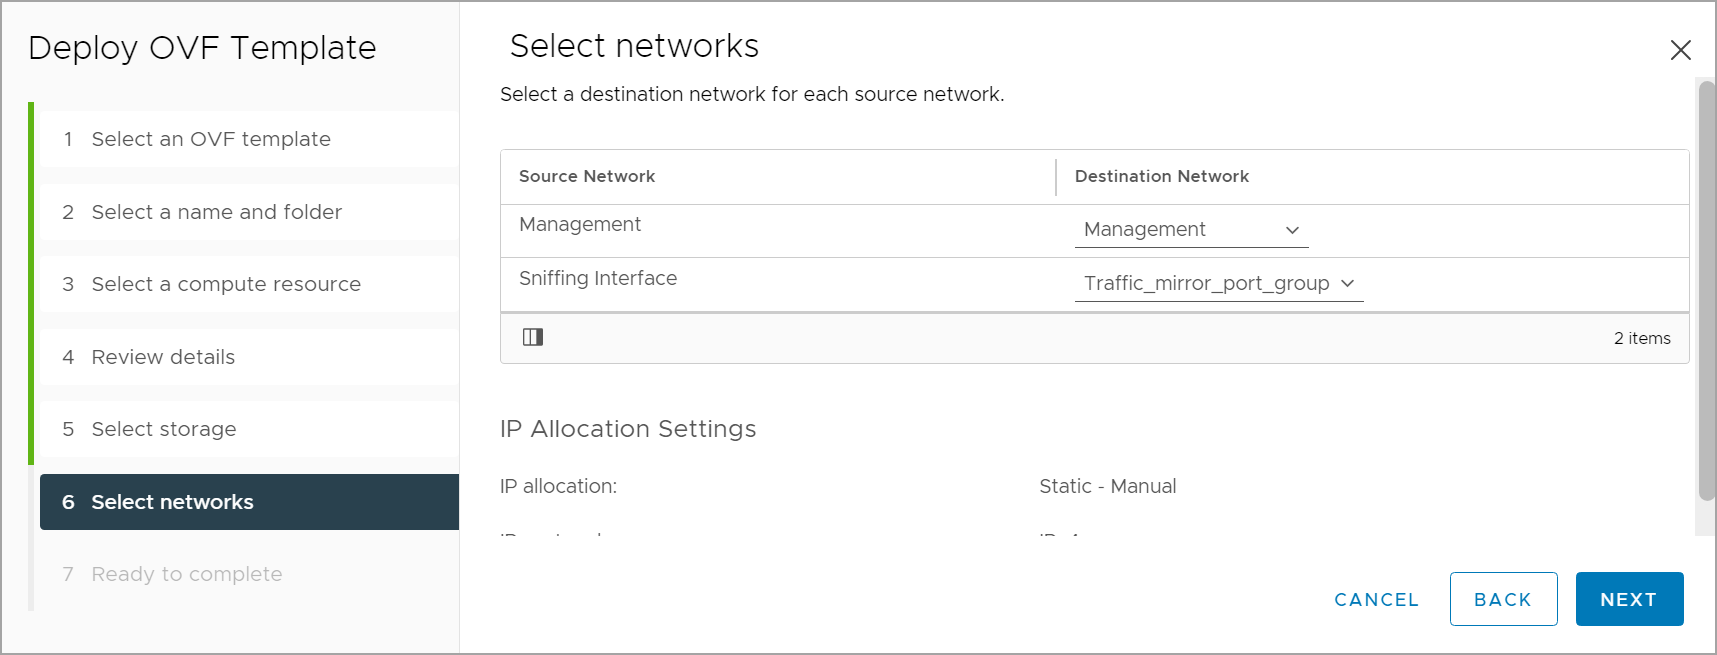
The Management interface is required to connect the NPS virtual appliance to the Qualys Cloud Platform. Make sure the Management interface is connected to the preconfigured port group having WAN or Internet connectivity.
The Sniffing interface is used by the appliance to inspect the traffic. Make sure the Sniffing interface is connected to the preconfigured port group having TAP/TUN interface. Also, ensure that Promiscuous Mode is enabled on respective vSwitch and port group.
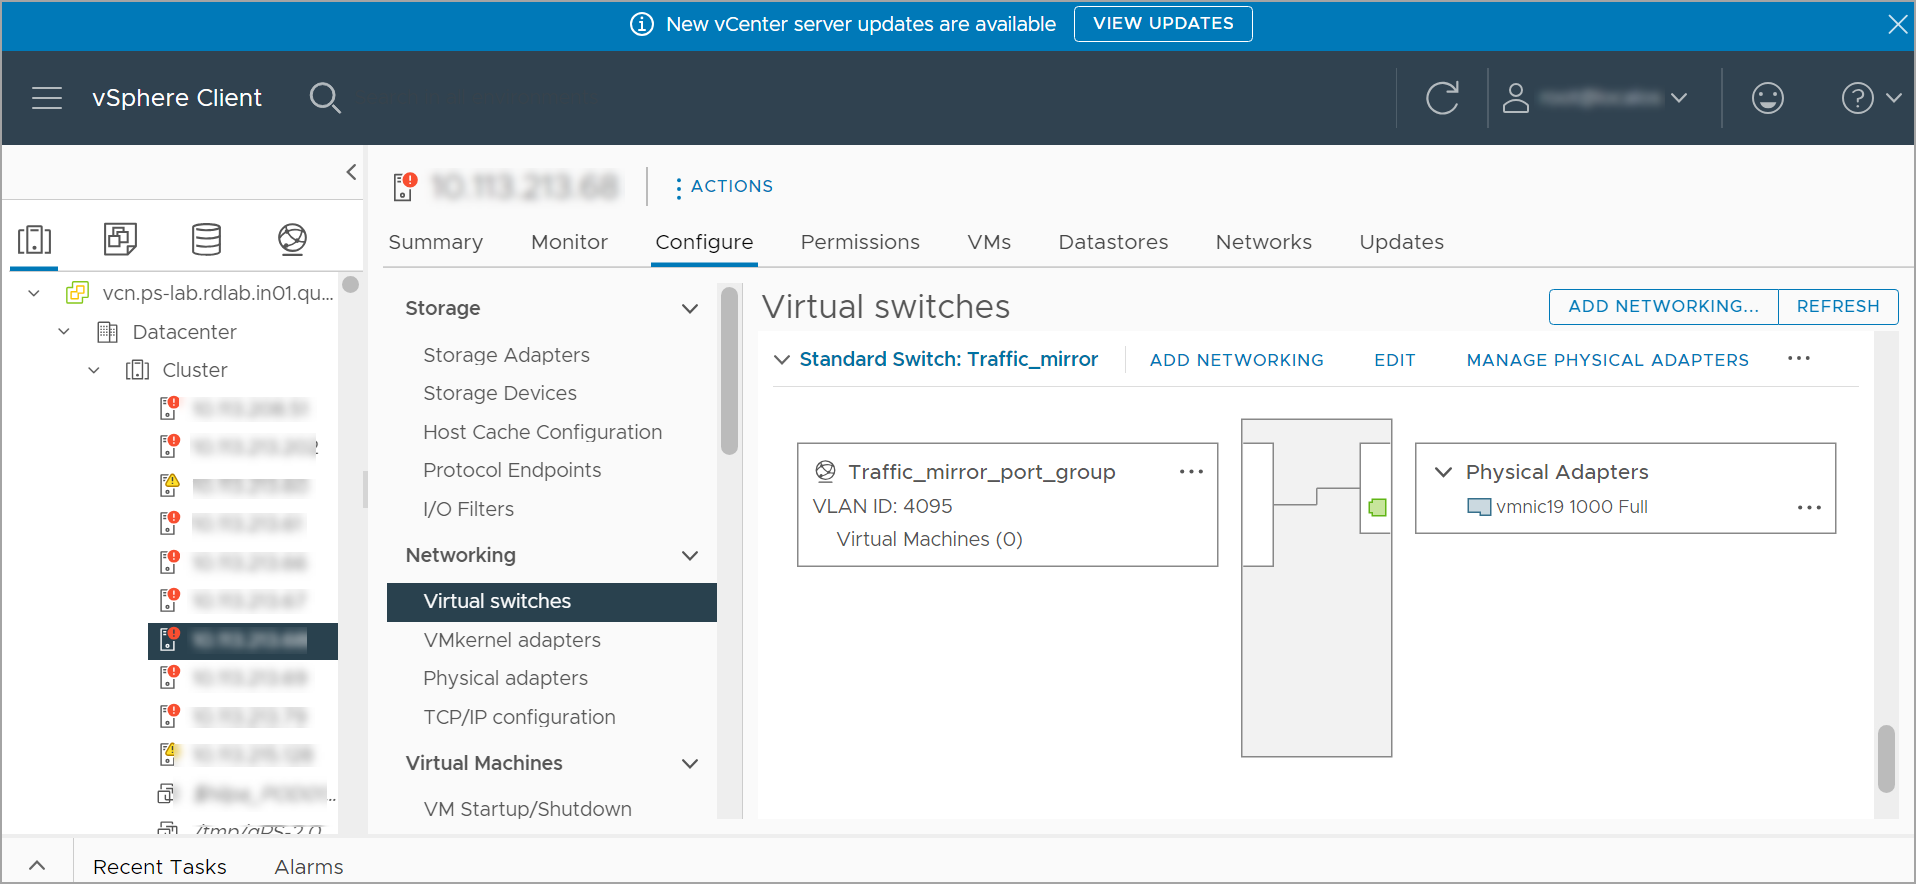
Create a standard virtual switch and port group dedicated to mirror traffic connection to the NPS sniffing interface.
The following image shows typical vSwitch topology with port group settings.
Traffic Morror Port Group settings.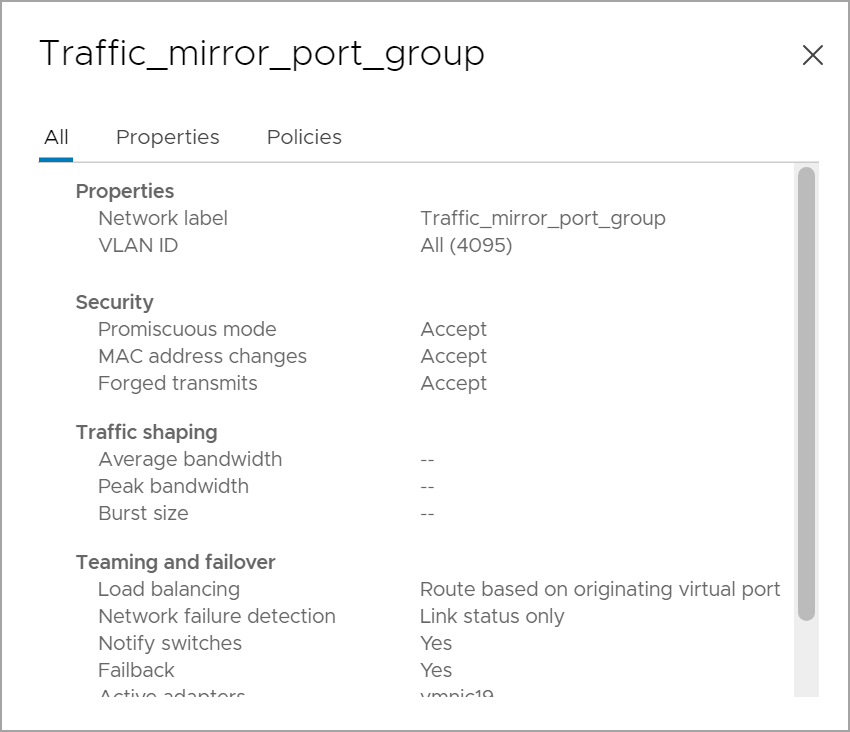
- Click Next and review the settings configured earlier. Click Finish and wait for some time to complete the virtual appliance deployment using OVA.

- Once the deployment is complete, open the virtual appliance console by selecting the VM and navigating to Console > Open browser console. Wait while the VM boots up.
- The minimum requirement is to have two network adapters: one for management and the other for the sniffing interface.
- Do not add any additional sniffing interface until appliance is registered.
- In case of additional sniffing interface is required, it is recommended to power off the appliance and add the network adaptor & then power on the appliance.
Deployment on VMware ESXi Server Using OVF Tool
In case of vcenter is not available, you can deploy NPS image on the ESXi server using OVFtool
ESXi server requirements: VMware ESXi 7.0 or later, 50 GB HDD, 16 GB Memory, Octa-Core Processor.
The ovftool (OVF Tool) is a command-line utility provided by VMware that facilitates the import and export of virtual machines (VMs) between various virtualization platforms.
The following are the steps to deploy NPS image on the ESXi server using OVFtool:
- Download the latest version of VMware's OVF Tool from the official website for Windows or Linux. Install it on your machine.
- Ensure you have the OVA file that you want to deploy. Use the virtual sensor image you downloaded in Step 1 - Download Virtualization Image
- Ensure that the Virtual switch and port group are created on Esxi server for connecting the management & sniffing interface.
- Command syntax:
"<\Path\To \OVFtool_binary> " --diskMode=thin --name=”<Appliance name>” --powerOn=false --X:injectOvfEnv --acceptAllEulas --noSSLVerify --datastore=<” Datastore_name_of_ESXI_server”> --net:"Management"=<"Port_group_name_of_management_interface"> --net:"Sniffing Interface"=<"Port_group_name_of_sniffing_interface"> --X:logLevel=verbose "<\Path\To\Your_OVF_File.ovf>" "vi://<username>:<password>@<esxi_server_ip>"The following are the parameters used in the above command:
Parameter Description <\Path\To \OVFtool_binary> Path to the ovftool binary on your system. <\Path\To\Your_OVF_File.ovf> Path to the NPS OVA file you want to deploy. --name Specify the name of the NPS VM. --datastore Specify the datastore where the NPS VM will be stored. --net:"Management” The Management interface is required to connect the virtual appliance to the Qualys Cloud Platform. Make sure the Management interface is connected to the preconfigured port group having WAN or Internet connectivity. --net:"Sniffing Interface” The Sniffing interface is used by the appliance to inspect the traffic. Make sure the Sniffing interface is connected to the preconfigured port group having TAP/TUN interface. Also, make sure that Promiscuous Mode is enabled on respective vSwitch and port group. --X:injectOvfEnv This flag indicates that the OVF environment should be injected into the deployed VM. It is used to pass environment variables defined in the OVF (Open Virtualization Format) --diskMode=thin Sets the disk mode to thin provisioning for the deployed virtual machine. --acceptAllEulas Automatically accepts all End User License Agreements (EULAs) during deployment. --noSSLVerify Disables SSL certificate verification. Use it with caution as it bypasses security checks. --X:logLevel=verbose Sets the log level to verbose, providing more detailed output during deployment. -
Run PowerShell as administrator to ensure you have the necessary permissions.
Esxi server ip: 10.10.10.10, username:"testuser" & password: "test@123"
Deployment Command:
& "C:\Users\Administrator\Desktop\New folder\ovftool\ovftool.exe" --diskMode=thin --name="NPS_VM" --powerOn --X:injectOvfEnv --acceptAllEulas --noSSLVerify --datastore="Datastore2" --net:"Management"="mgmt_portgroup" --net:"Sniffing Interface"="mirror_portgroup" --X:logLevel=verbose "C:\Users\Administrator\Desktop\qPS-2.0.0-12.ova" "vi://test:test@[email protected]" -
Esxi server ip: 10.10.10.10, username:"testuser" & password: "test@123"
Deployment Command:
ovftool --noSSLVerify --name="NPS_VM" -dm=thin --datastore="datastore1" -o --powerOn --net:"Management"="mgmt_portgroup" --net:"Sniffing Interface"="mirror_portgroup" /psweb/ova_files/qPS-2.0.0-15.ova 'vi://'testuser:test%40123'@'10.10.10.10'/'
Deploy Virtualization Image on Hyper-V Server
Hyper-V server requirements: Microsoft Hyper-V 2016 or later, 50 GB HDD, 16 GB Memory, Octa-Core with a total 14 GHz dedicated CPU Clock Processor.
Follow these steps to deploy an image on the Hyper-V server:
- Extract the zip file downloaded from Passive sensor UI.
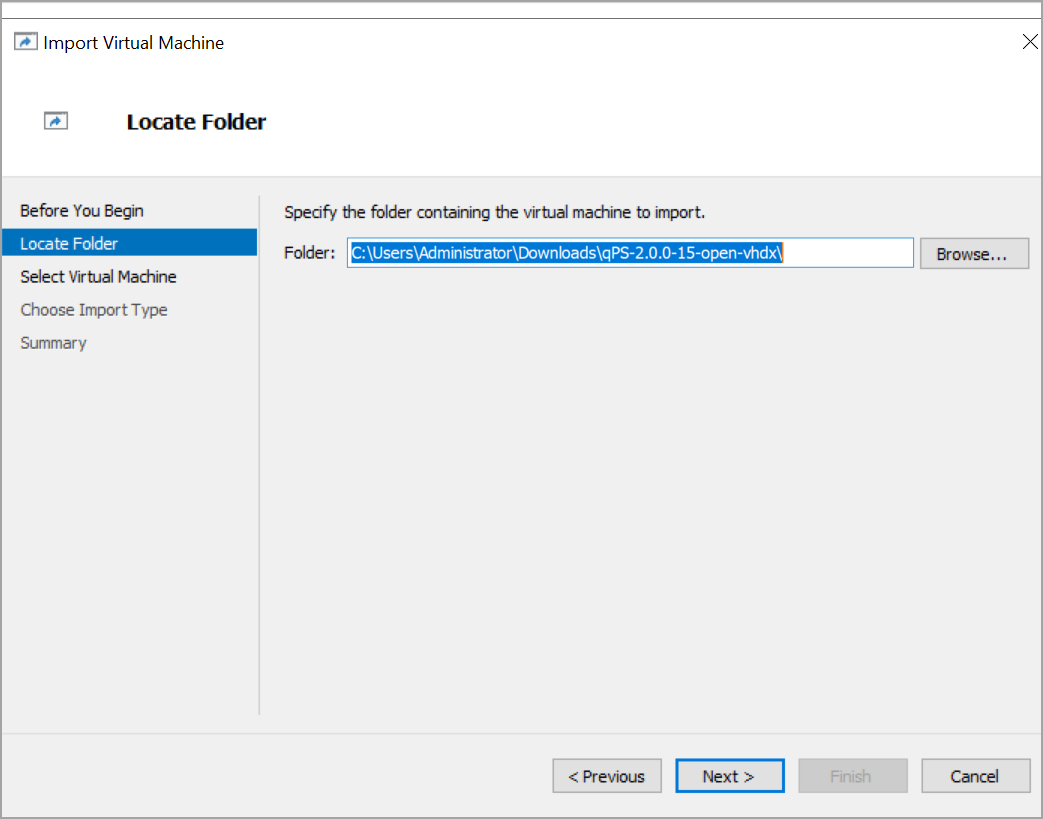
- Login to your Hyper-V Server and go to Start > Server Manager > Tools > Hyper-V Manager. Right-click your Hyper-V host and select Import Virtual Machine.
Specify the folder containing the virtual machine.
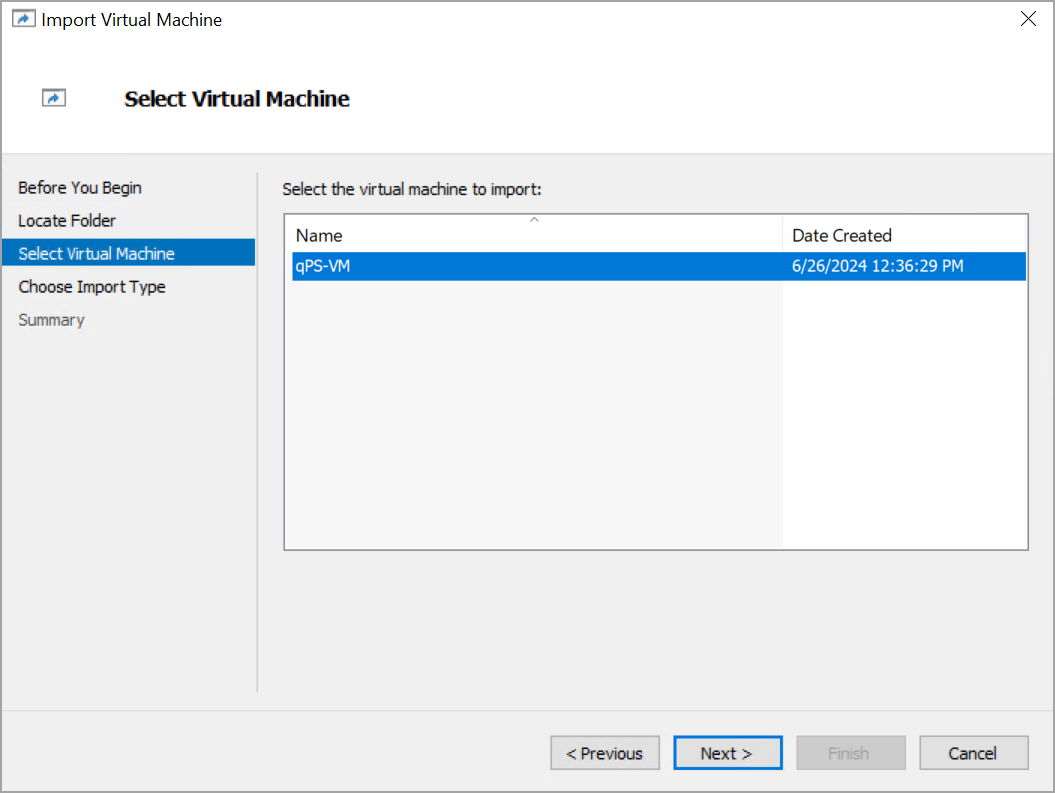
- Select the virtual machine. The default template name is qPS-VM.
- Go to Choose Import Type tab and select the type of import to perform.

- Click Next and review Summary. Click Finish and your virtual machine is ready. Rename the virtual machine.

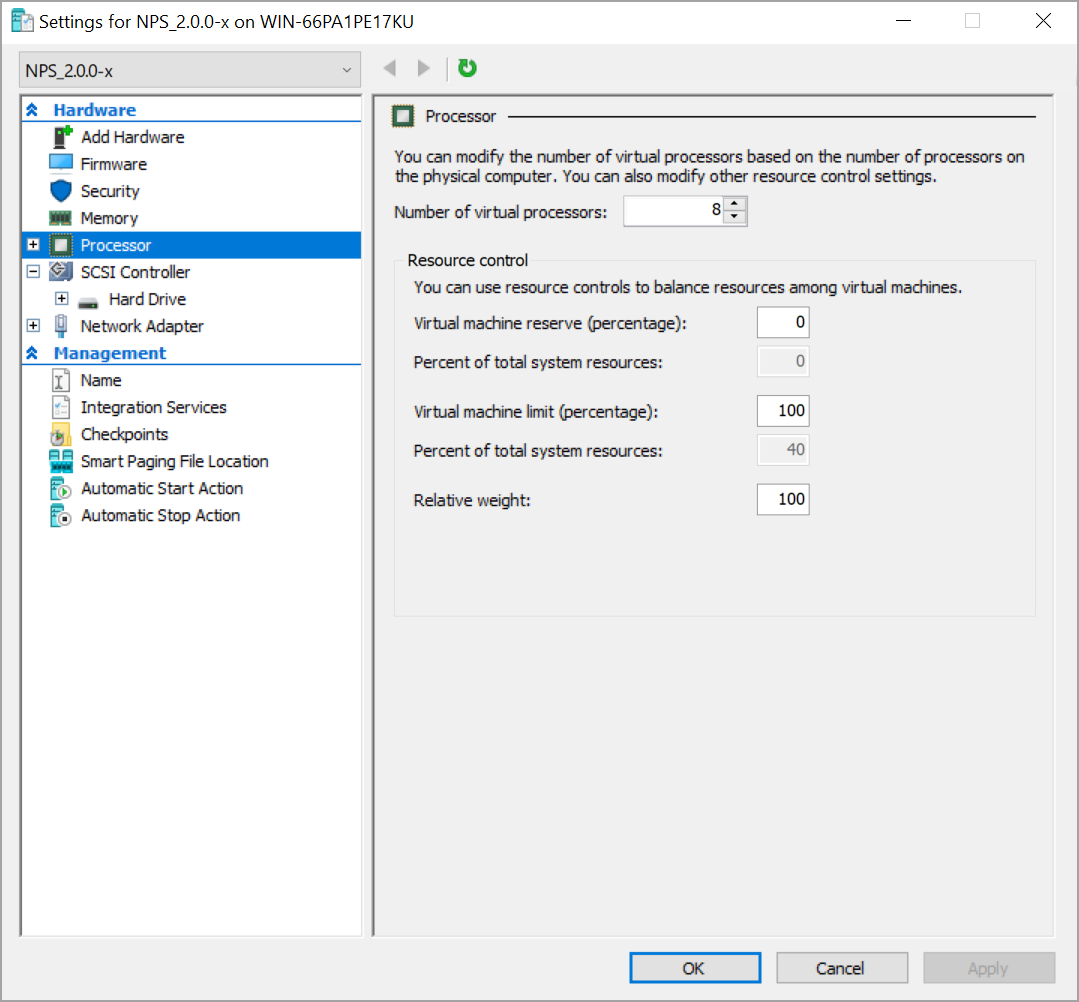
- Select the virtual machine and navigate to Settings. Change the default Number of virtual processors to 8.
- Provide appropriate memory (RAM) for the virtual machine. The minimum recommended RAM is 16384 MB.
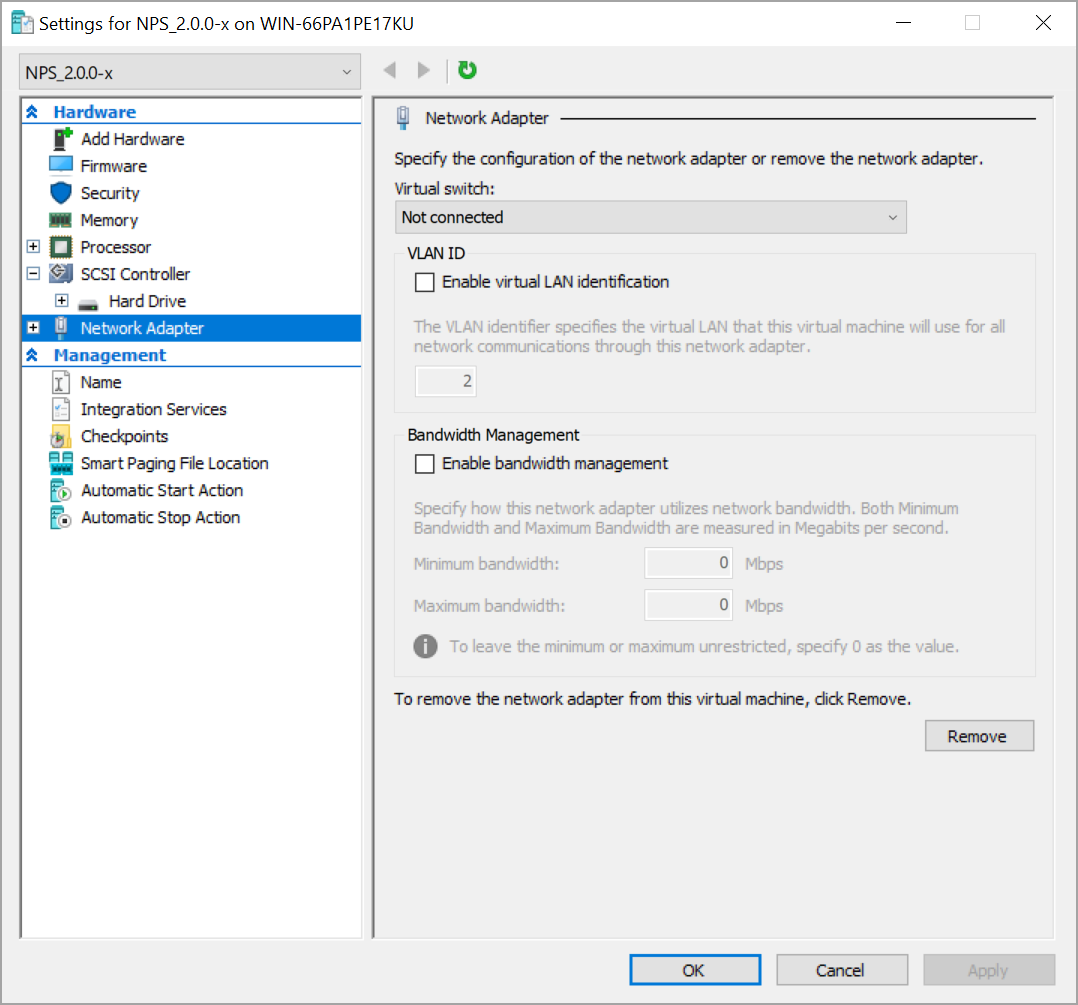
- By default, Network adapter is Not connected, Select the management virtual switch of your Hyper V server.
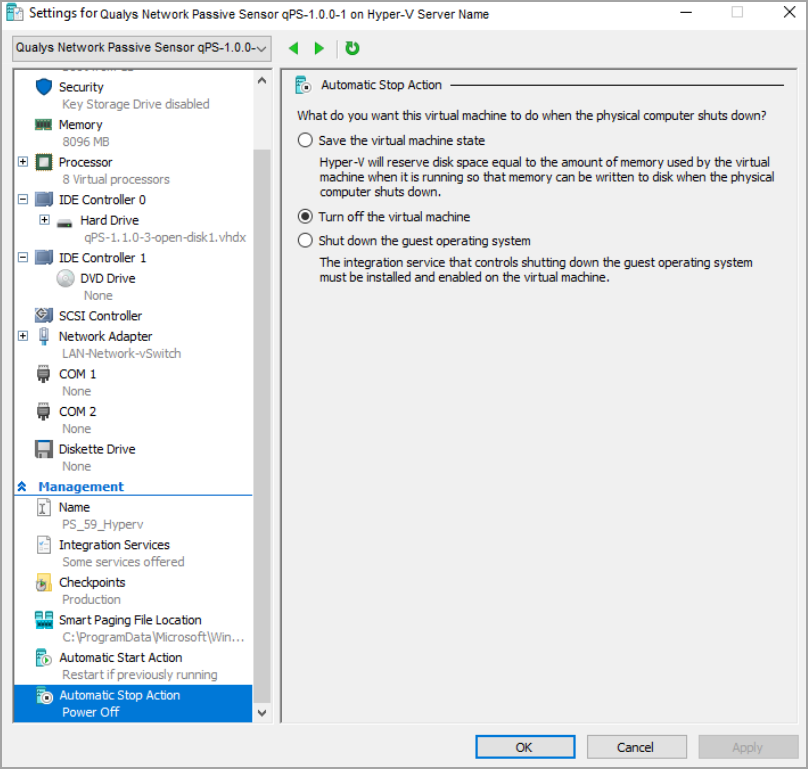
- Make sure that Automatic Stop Action the VM is set to Turn off the virtual machine and apply changes.
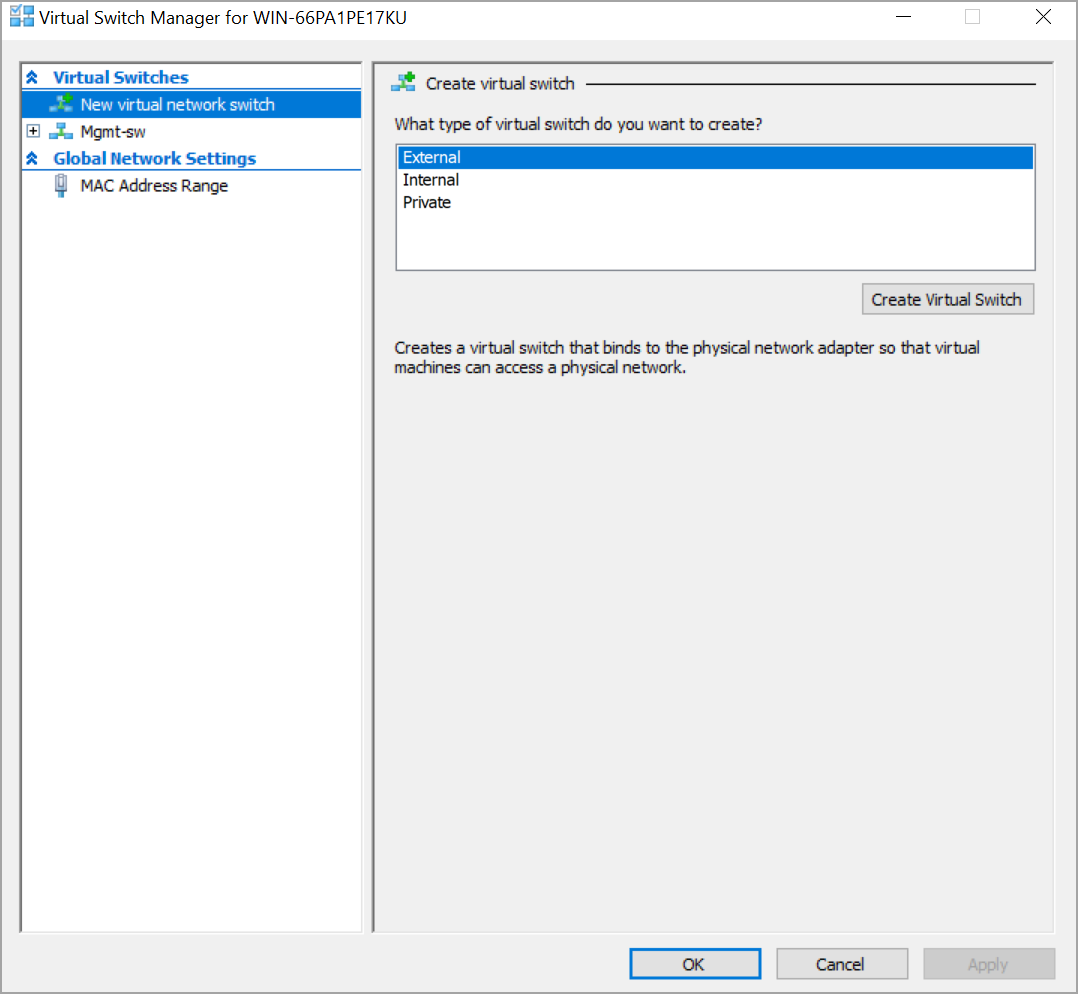
- Navigate to Virtual Switch Manager and create a New Virtual Network Switch > select type of switch as External. This switch is required for connecting the mirror traffic to NPS VM sniffing interface.
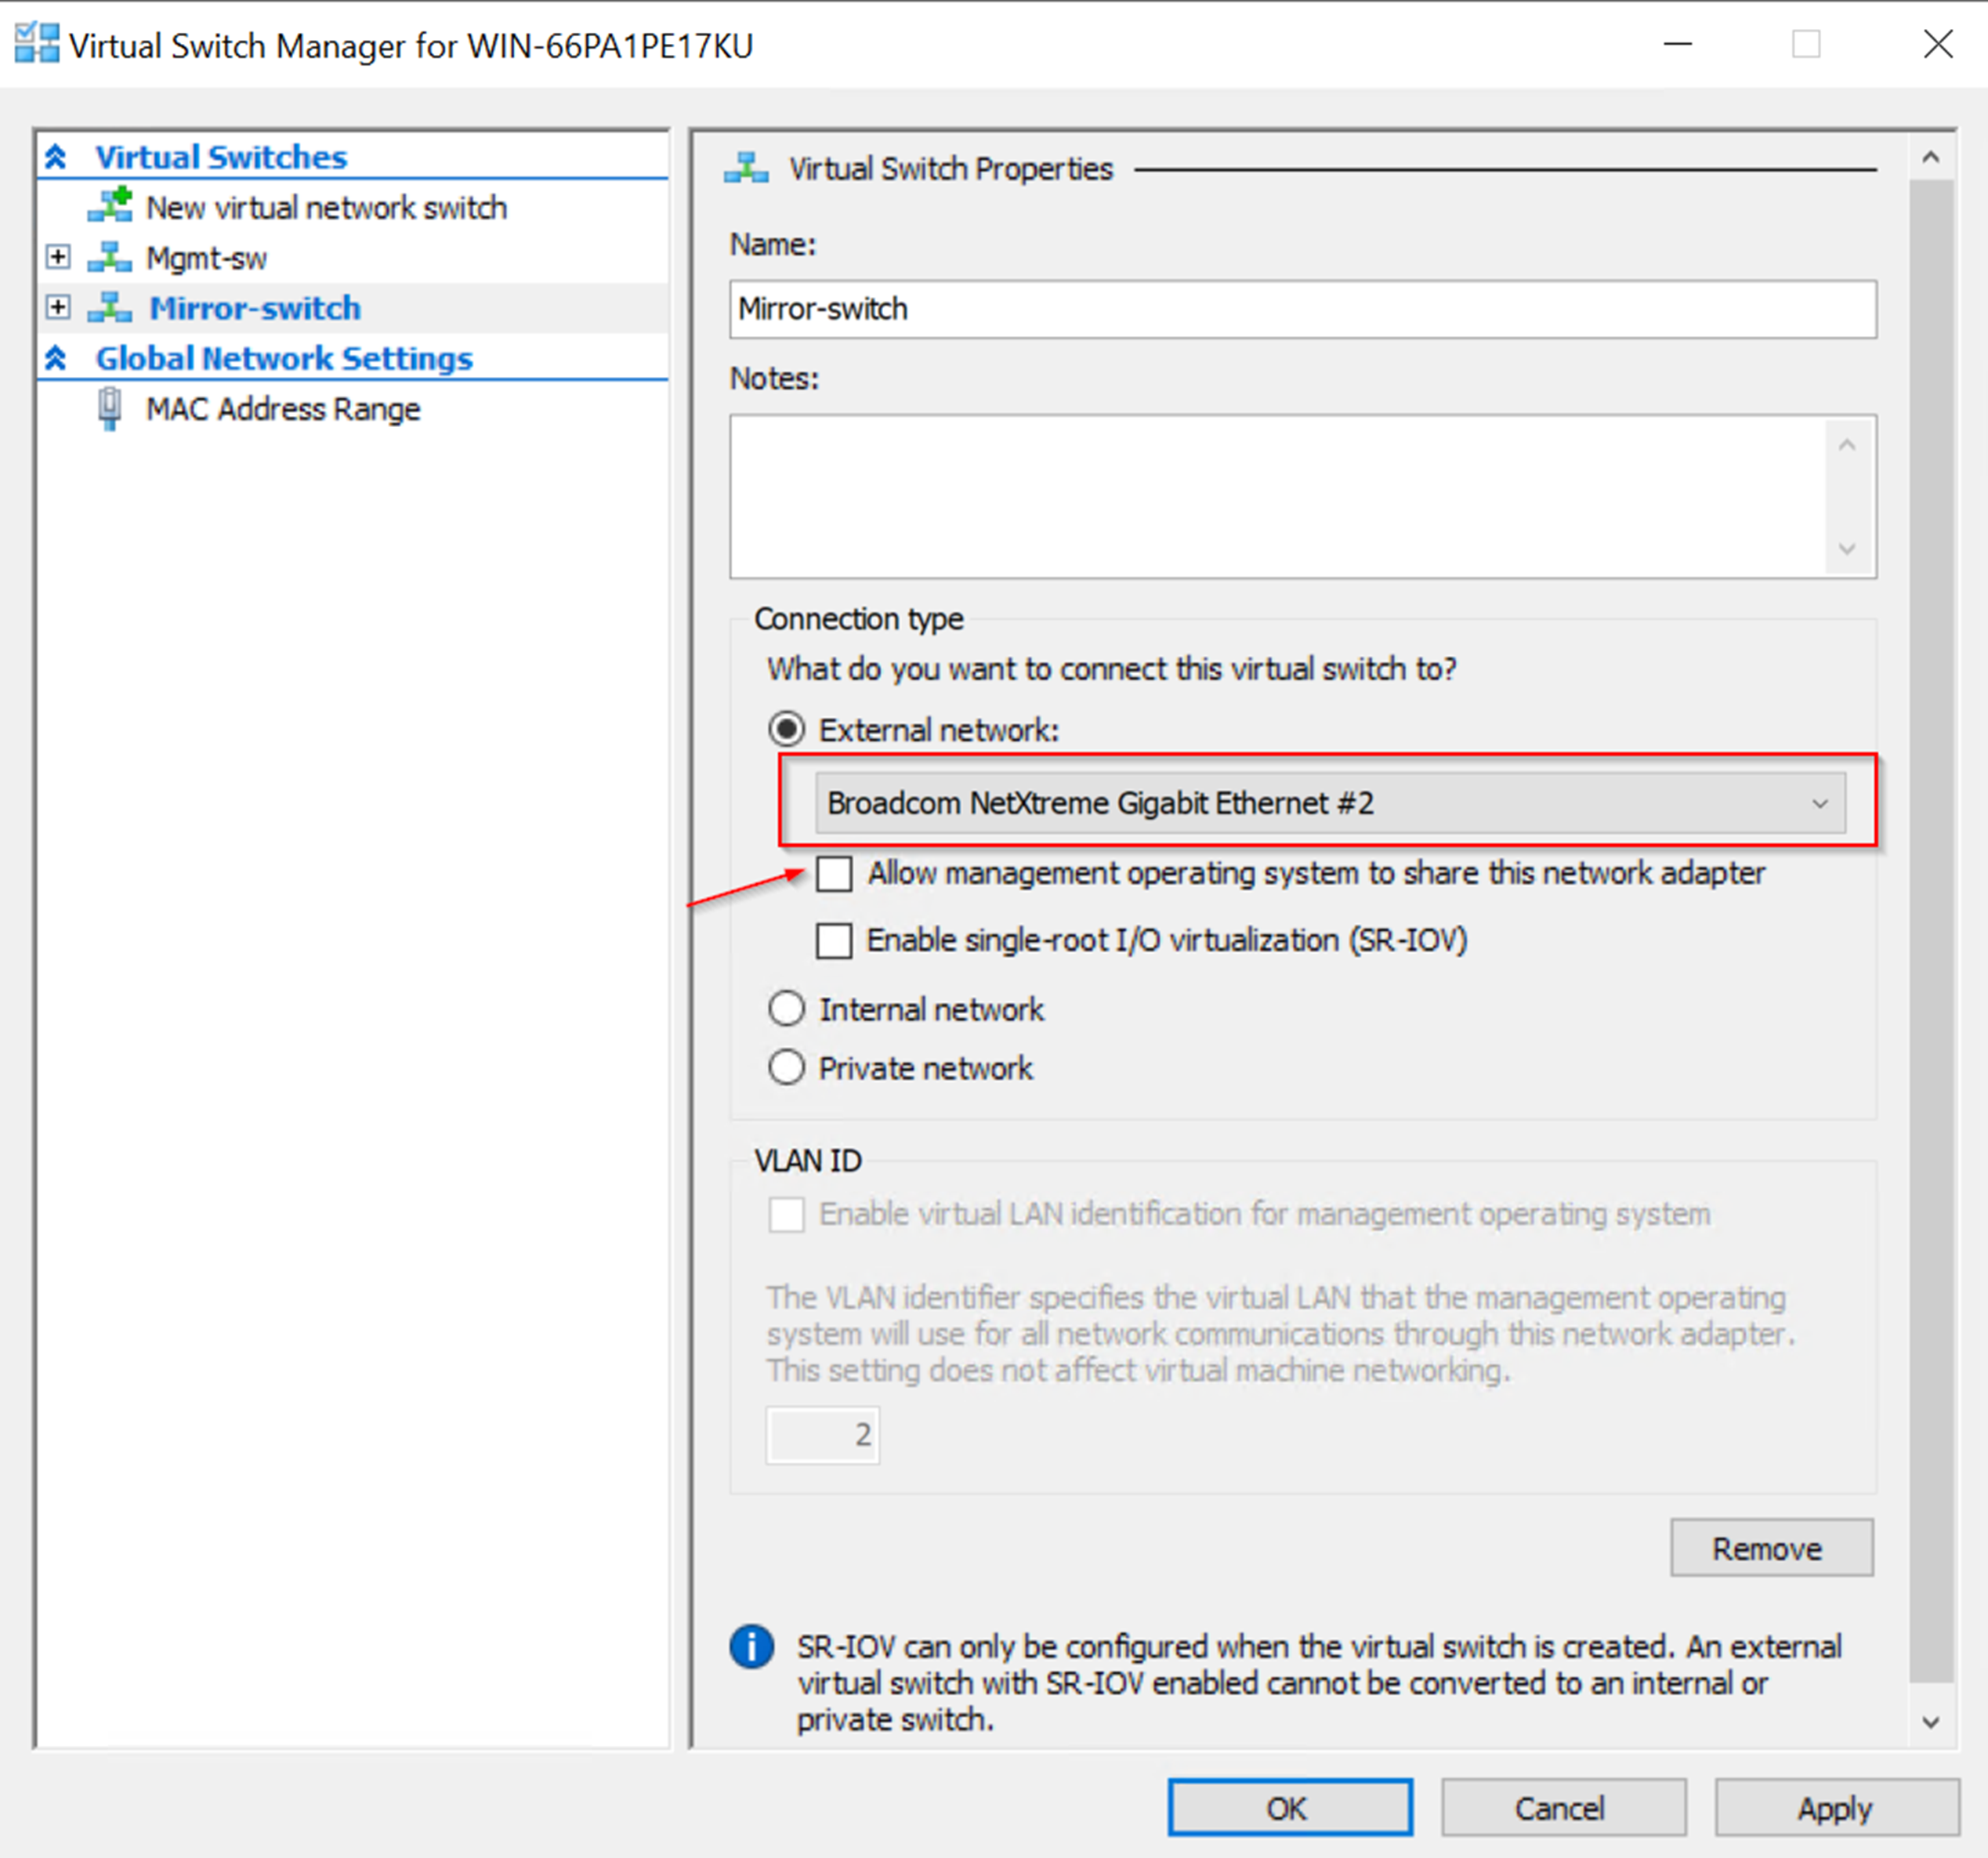
- Give a name to the virtual switch, for example, Mirror-switch.
- Select the appropriate external physical NIC interface to connect the virtual switch from the drop-down menu.
- Uncheck the option Allow management operating system to share the network adapter & click OK.
- In Powershell, execute the following commands:
- Set the port feature property to the virtual switch created.
$portFeature = Get-VMSystemSwitchExtensionPortFeature -FeatureName "Ethernet Switch Port Security Settings" - Configure the port monitor mode.
$portFeature.SettingData.MonitorMode = 2 - Use the same switch name as defined earlier
Add-VMSwitchExtensionPortFeature -ExternalPort -SwitchName Mirror-switch -VMSwitchExtensionFeature $portFeature
- Set the port feature property to the virtual switch created.
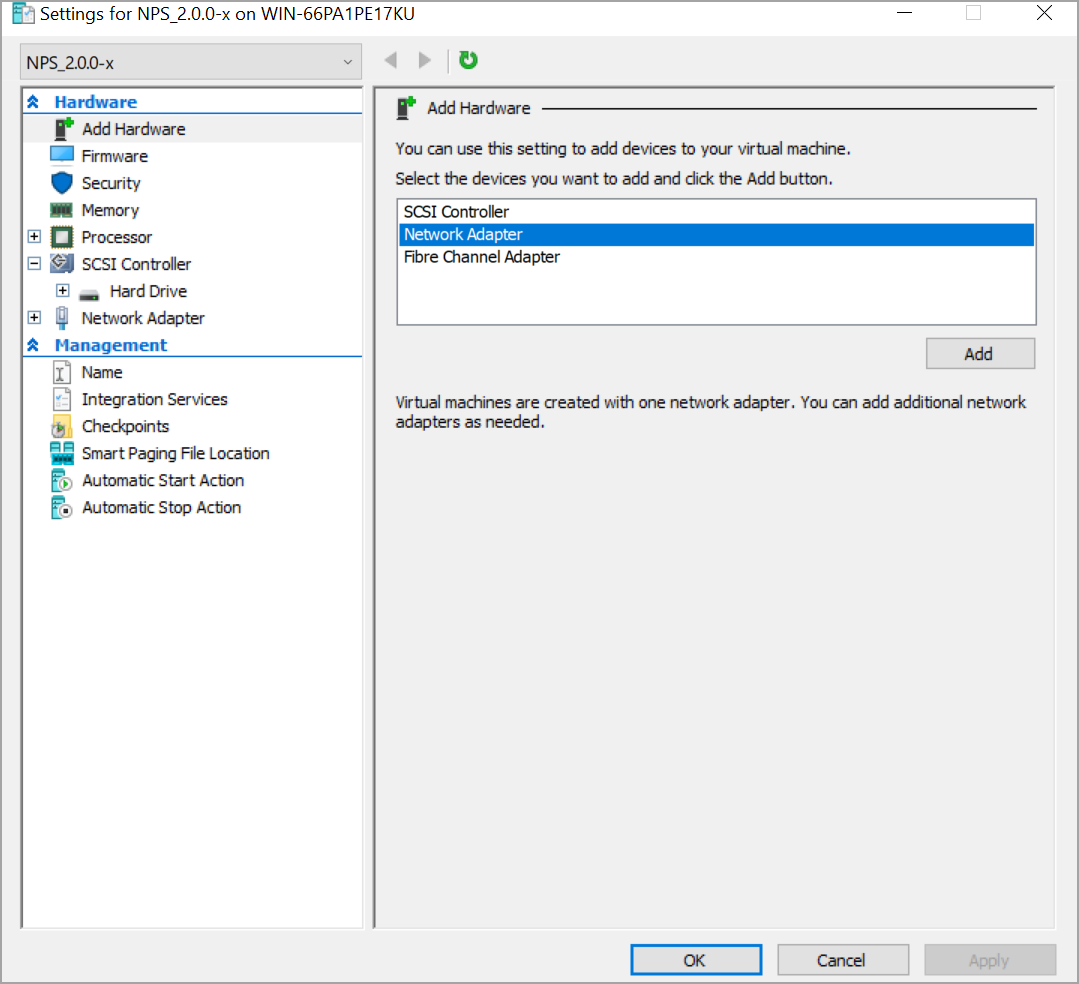
- Select the virtual machine and go to Settings.
- Go to Add Hardware > Select Network Adapter > Click Add > Click OK to add new network adapter in Hyper-V.
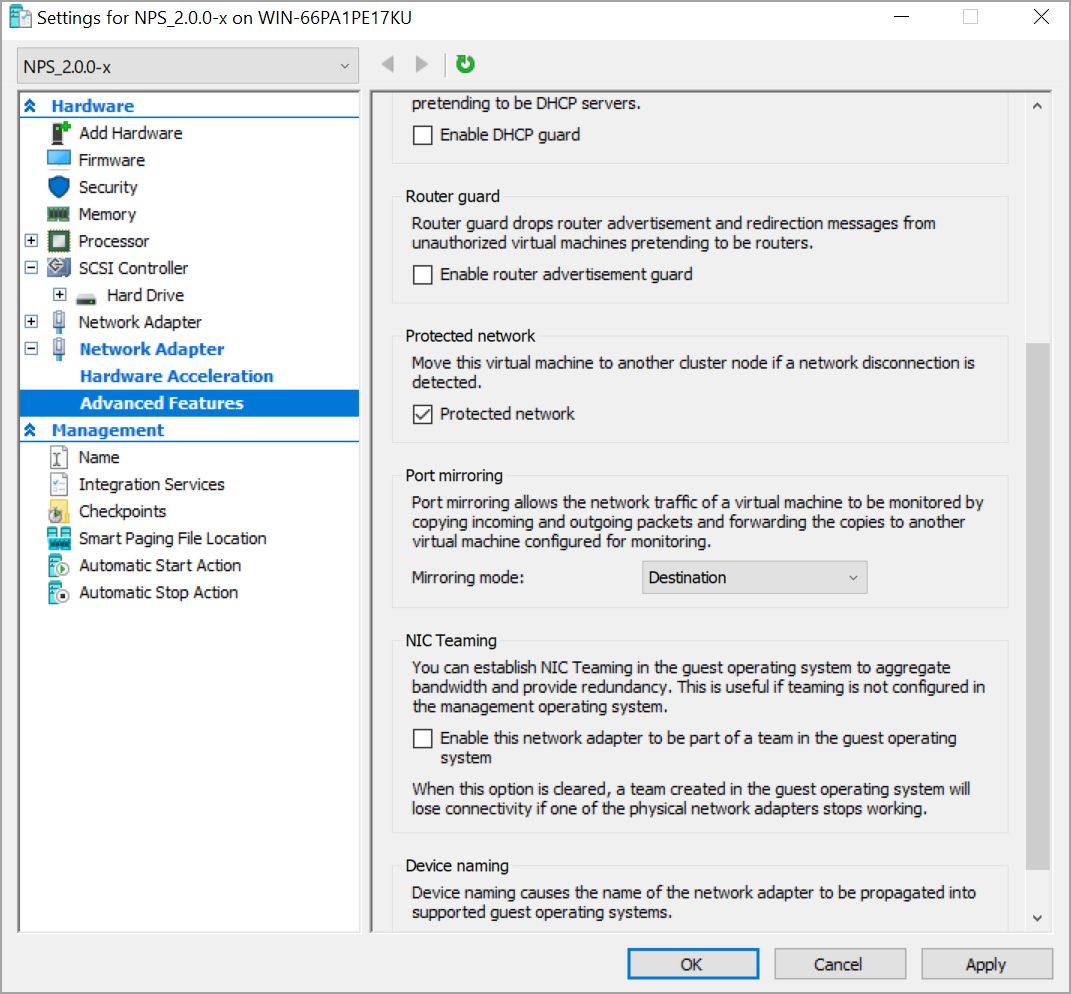
Adding Mirror Switch in Network Adapter.

- Go to Advanced Features > Select Destination from Mirroring Mode drop-down in Port Mirroring Section.
- Power on the VM.
- There are some network configuration settings (static IP, proxy) you need to set before proceeding to the next step. Complete Network Configurations.
Deploy Multiple NPS VM’s in the Same Hyper-V
Perform the following steps to deploy multiple NPS VM's in the same Hyper-V:
- Create a new folder.
- Copy the downloaded zip file to the newly created folder and unzip the zip file.
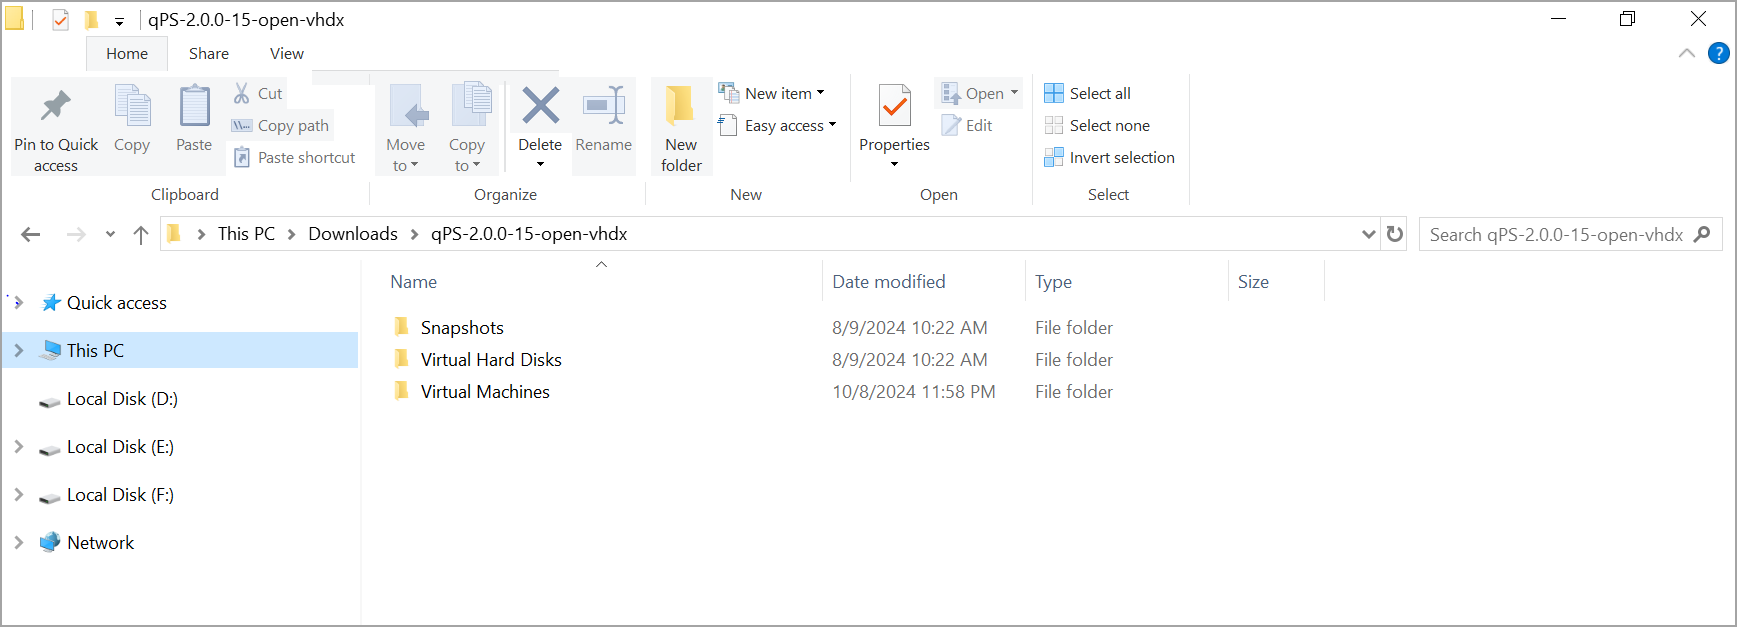
For example, unzip qPS-2.0.0-15- vhdx.zip to obtain the virtual hard disk folder qPS-2.0.0-15.vhdx
- Go to the New folder\qPS-2.0.0-15-vhdx\Virtual Machines\.
- Rename the 2 configuration files and make sure both the file names are the same.
For example, rename ABCD1234-0002-0000-0000-001500000000.vmcx and ABCD1234-0002-0000-0000-001500000000 to ABCD1234-0002-0000-0000-001500000001.vmcx and ABCD1234-0002-0000-0000-001500000001
-
Then follow all the steps from section Deployment on Microsoft Hyper-V for deployment.
-
Always rename the virtual machine name.
-
Once you delete the Virtual machine then delete the folder accordingly.
Configuring VLAN Tagging for the NPS Sniffing Interface on Hyper-V
If the mirrored network traffic includes VLAN tags, you must configure the network adapter connected to the NPS sniffing interface as a trunk and allow VLANs.
Follow these steps:
- Use the following powershell command to check the VLAN mode and information of VM's network adapters.
Get-VMNetworkAdapterVlan -vmname <NPS VM Name> - Power off the NPS VM and rename the sniffing interface using the following powersell command.
$VMNetAdap = Get-VMNetworkAdapter -vmname <NPS VM Name>

rename-VMNetworkAdapter -VMNetworkAdapter $VMNetAdap[1] -newname "Sniff_Adapter1" - Configure the trunk and allow VLANs on the network adapter connected to the sniffing interface.
Below is an example command to allow vlan 10 & 20:Set-VMNetworkAdapterVlan -VMName <NPS VM Name> -VMNetworkAdapterName Sniff_Adapter1 -Trunk -AllowedVlanIdList "10,20" -NativeVlanId 0 - Verify the VLAN mode and information of the VM's network adapters and then power on the VM.
Get-VMNetworkAdapterVlan -vmname <NPS VM Name>