Manage Sensors
You can easily manage your physical or virtual sensors from the Sensors tab.
Navigate to the Sensors tab and from the Quick Actions menu you can perform actions like view details, deregister sensor, delete assets discovered by the sensor, delete sensor, and similar.

For more detailed information about the Sensors tab, refer to Online help.
Assigne or Remove IP Addresses to the Appliance Sniffing Interfaces
Perform the following steps to assign or remove IP address to the appliance Sniffing Interface:
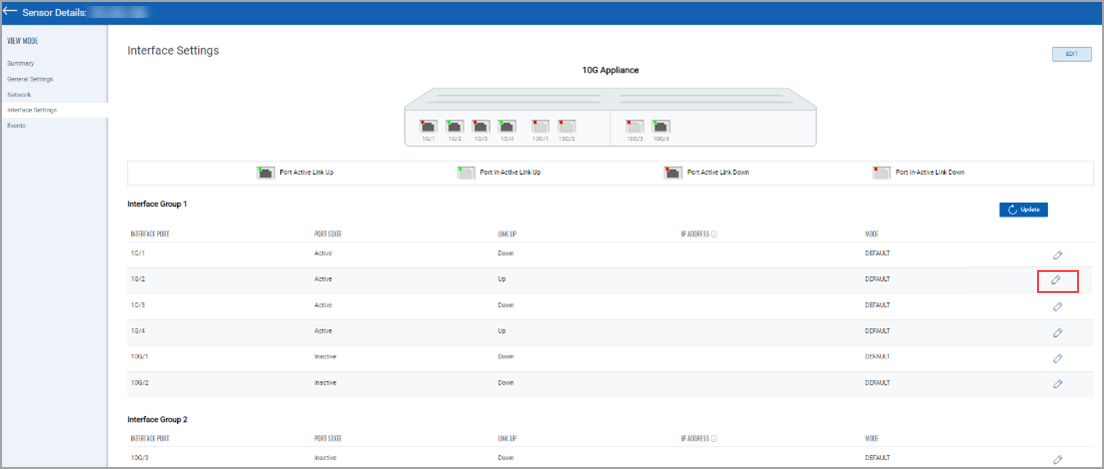
- To assign or remove the IP address from the appliance sniffing interface, go to the Sensors tab, and from the Quick Actions menu of a sensor, click View Details > Interface Settings.
Alternatively, you can click on the sensor to go directly to the sensor view details page. - Click the
 (edit) icon of the desired sniffing interface, as shown in the following screenshot
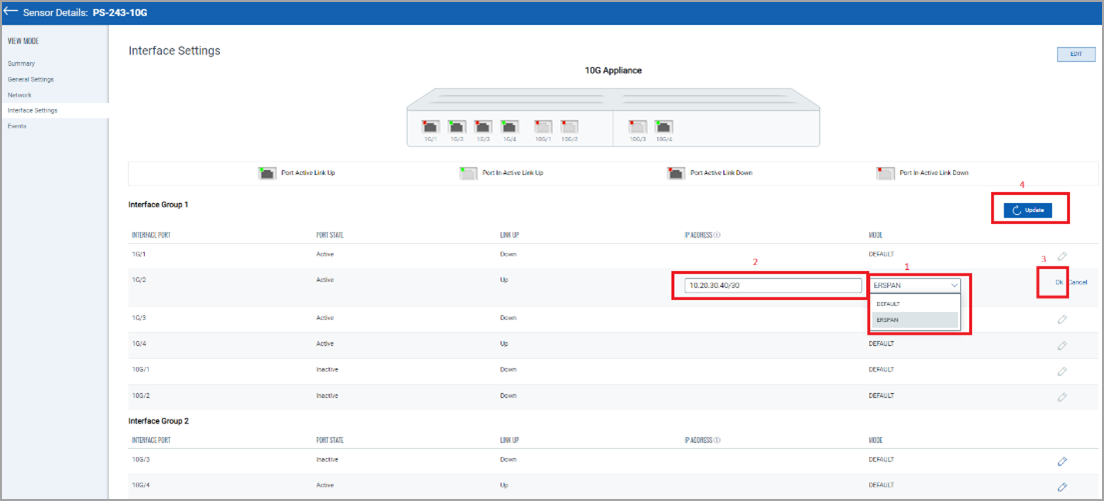
- Select ERSPAN mode and assign IP to the interface along with subnet mask.
- Click Ok > click Update to save the configuration. Refer to the following screenshot
.
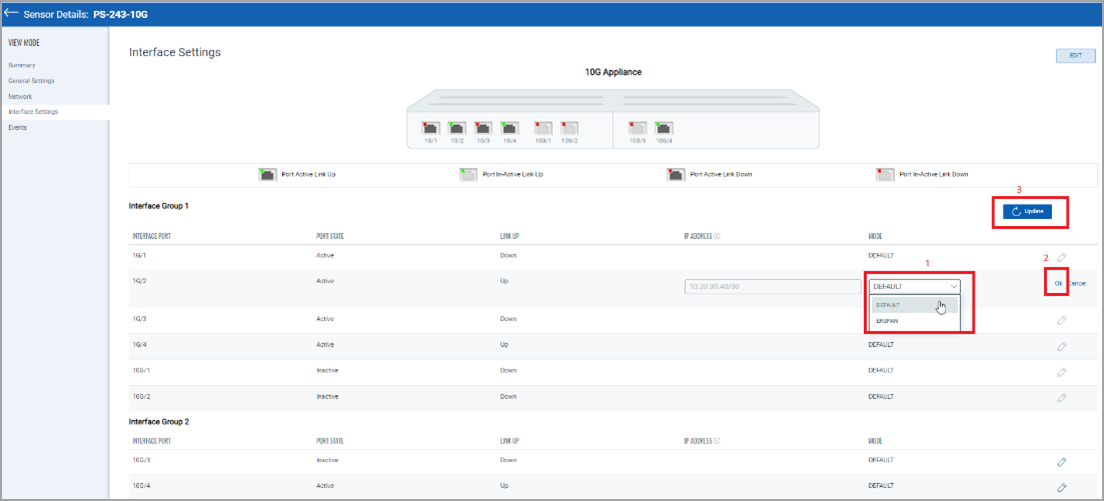
- To remove the IP Address from the sniffing interface, click the edit icon of the desired sniffing interface. As shown in the above screenshot.
- Select DEFAULT mode, click Ok > click Update to save the configuration. Refer to the following screenshot.
The Network Passive Sensor (NPS) appliance reboots once after adding/editing/deleting the sniffing interface's IP address.
The Network Passive Sensor (NPS) appliance version 1.3.6-12 supports assigning IP addresses on the sniffing interface. So before assigning an IP address to the sniffing interface, ensure that the NPS appliance version is 1.3.6-12 or above.
Related Topic