Alibaba Cloud Deployment Guide
This deployment guide contains the information for deploying, interacting, and configuring Centralized Appliance Management Service (CAMS) QGS Appliance on Alibaba Cloud.
Prerequisites
- You need an active Alibaba account to set up CAMS QGS.
- Ensure to cover the minimum system requirements recommended in the Qualys Gateway Service User Guide.
Steps to Configure the CAMS Appliance
- Launch QGS from the Alibaba Marketplace
- Access the Serial Console
- Add a Secondary Hard Disk to use Patch Mode
Launch QGS from the Alibaba Marketplace
- Click Create Instance from the home page, or navigate to ECS (Elastic Compute Service).
- In the left navigation pane, click Instances.
- Click Create Instance.
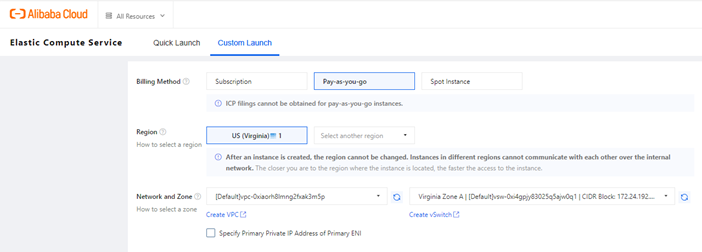
- Select the billing method supported by your organization.
- Select the region in which you want to deploy the appliance.
- Configure the network settings as required for your environment. For supported configurations, see the QGS User Guide.
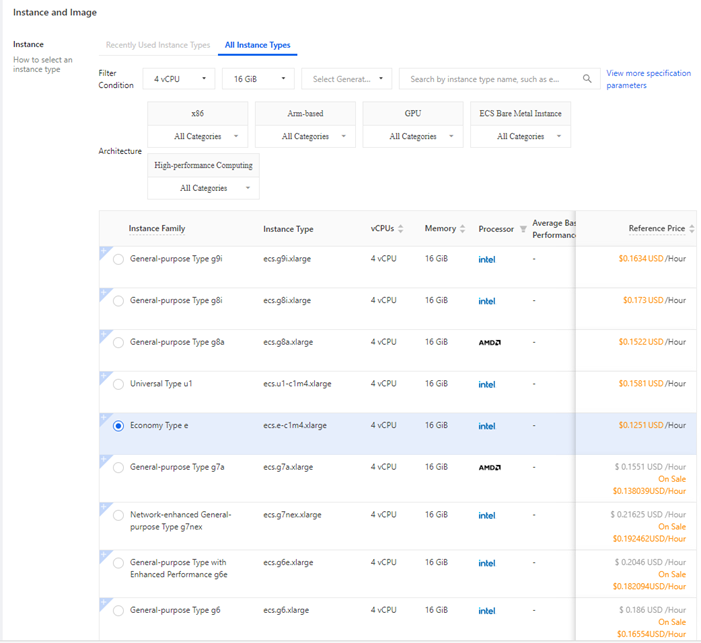
- Select an instance type with 4 CPUs and 16 GB RAM. Refer to the QGS User Guide for supported system requirements.
- Select the QGS appliance image from the marketplace.

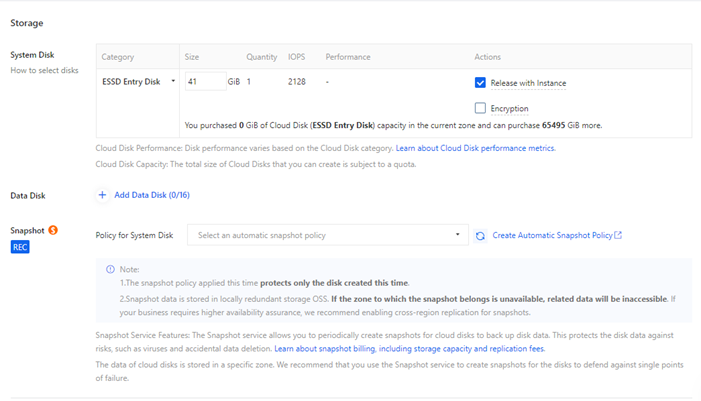
- Keep the primary disk size set to 40 GB. For disk requirements, see the QGS User Guide.
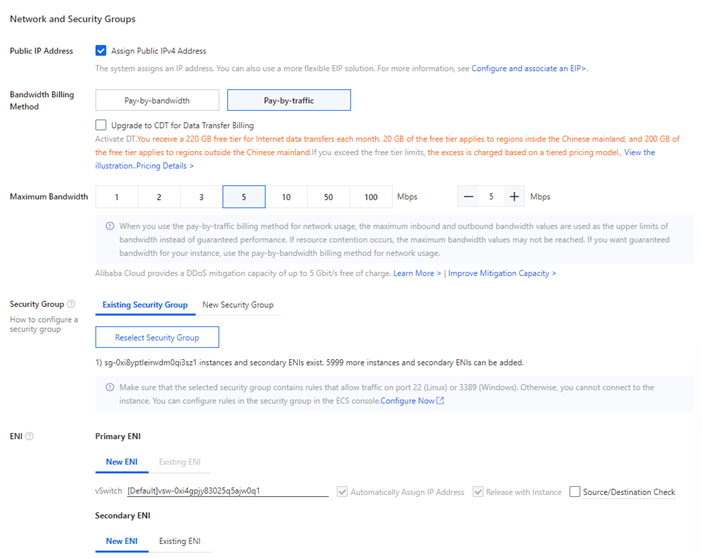
- Assign a public IP address, if required. This step is optional.
- Select a new/existing security group and allow the following ports.
- Select an existing security group and allow the following ports:
- SSH: 22
- Tunnel port: 1080 (default)
- Cache port: 8080 (default)
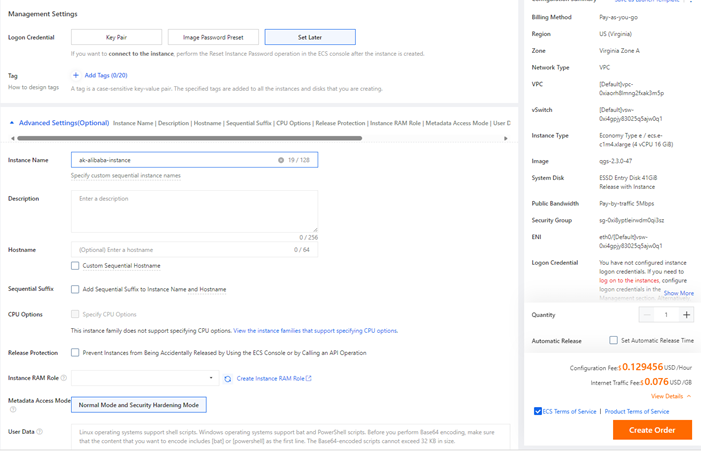
- Set the key pair as None.
- In Advanced Settings, enter a name for the instance.
- Accept the terms and conditions, and then click Create Order.
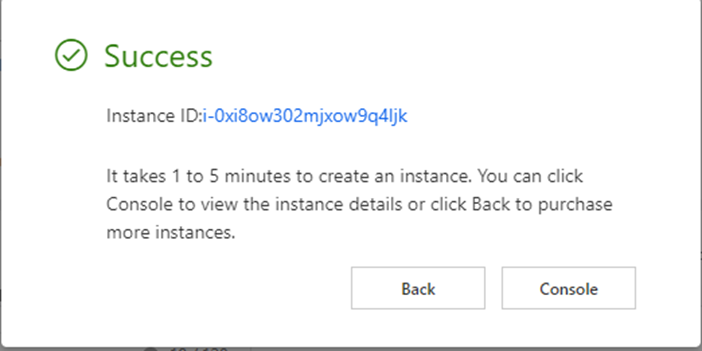
- After the order is submitted successfully, a confirmation message is displayed.
How to access the serial console
This section explains how to access the QGS appliance text-based interface by using the Alibaba Cloud serial console.
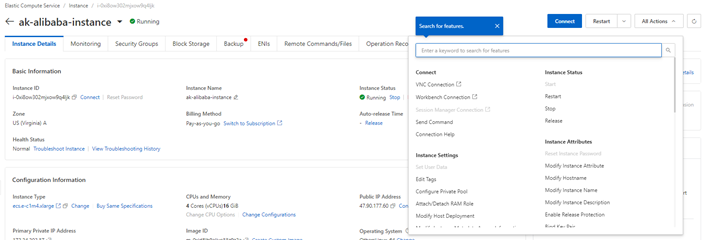
- Click the ID of the created instance to open the instance details page.
- Click All Actions, and then select VNC Connection to access the serial console.
- The appliance text-based UI is displayed in the console.
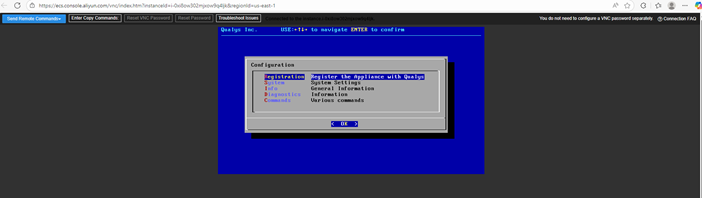
For network configuration and appliance registration steps, see the QGS User Guide.
How to attach a secondary disk to enable patch mode
This section describes how to create and attach a secondary disk required for cache and patch mode operations.
- Before attaching the secondary disk, shut down the appliance.
- From the left navigation pane, click Block Storage.
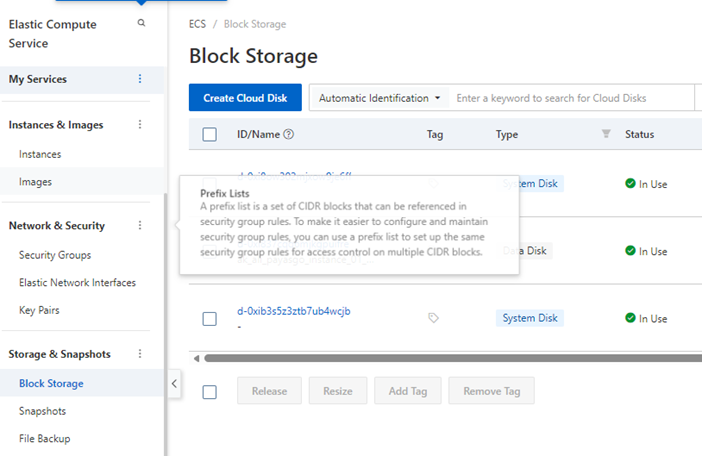
- Click Create Cloud Disk.
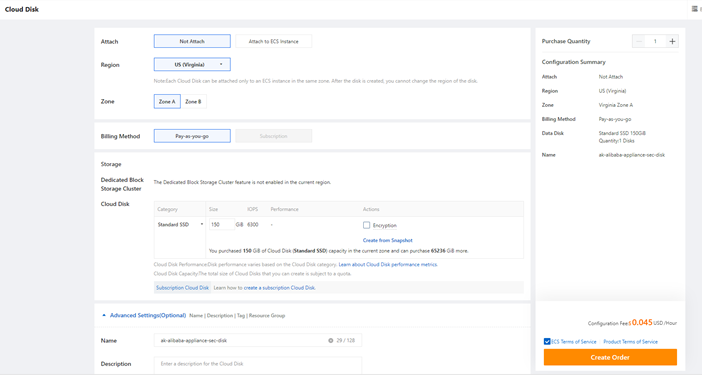
- In the Attach section, select Not Attach.
- Select the region where the appliance is deployed.
- Select the availability zone based on your subscription.
- Select the billing method based on your subscription.
- Select the disk category and specify a size of 150 GB, which is the minimum requirement for a secondary disk. Refer to the QGS User Guide for supported configurations.
- Enter a name for the secondary disk, if required.
- Accept the terms and conditions.
- Click Create Order.
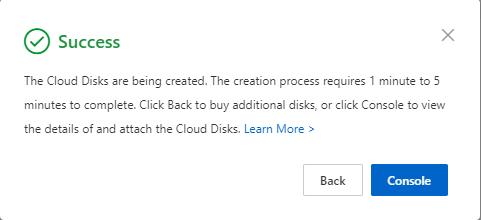
- After the disk is created successfully, verify that it appears in the disk list.

- Click Attach from the actions column.
- From the Destination Instance list, select the QGS appliance instance.
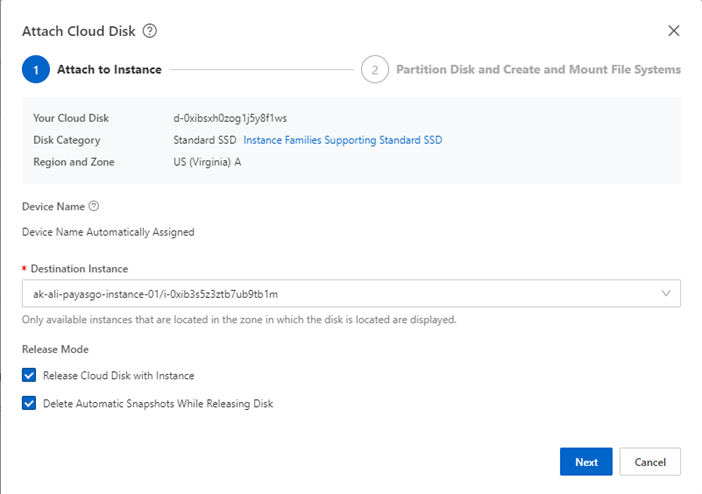
- Click Next. When the disk status changes to In Use, close the dialog.

- Start the appliance and wait approximately 30 minutes for the system to detect the secondary disk.
- After the disk is detected, follow the QGS User Guide to enable cache or patch mode.