Amazon Web Services Deployment Guide
This deployment guide contains the information for deploying, interacting, and configuring Centralized Appliance Management Service (CAMS) QGS Appliance on AWS Cloud. Also, it outlines the details on launching the QGS instances using AWS Command Line Interface (CLI).
Pre-requisite
- To set up the CAMS QGS appliance on AWS Cloud, you need an active AWS account.
- Ensure to cover the minimum system requirements recommended in the Qualys Gateway Service User Guide.
Deploy and Configure CAMS QGS Appliance on AWS Cloud using AWS User Interface
You can get and launch the QGS AMI from the AWS marketplace or from a custom AMI shared with your AWS account. You can also launch an AMI instance using the AWS Management Console.
Launch QGS Instance from AWS Marketplace
The following are the steps you must follow to get and launch QGS AMI from the AWS marketplace.
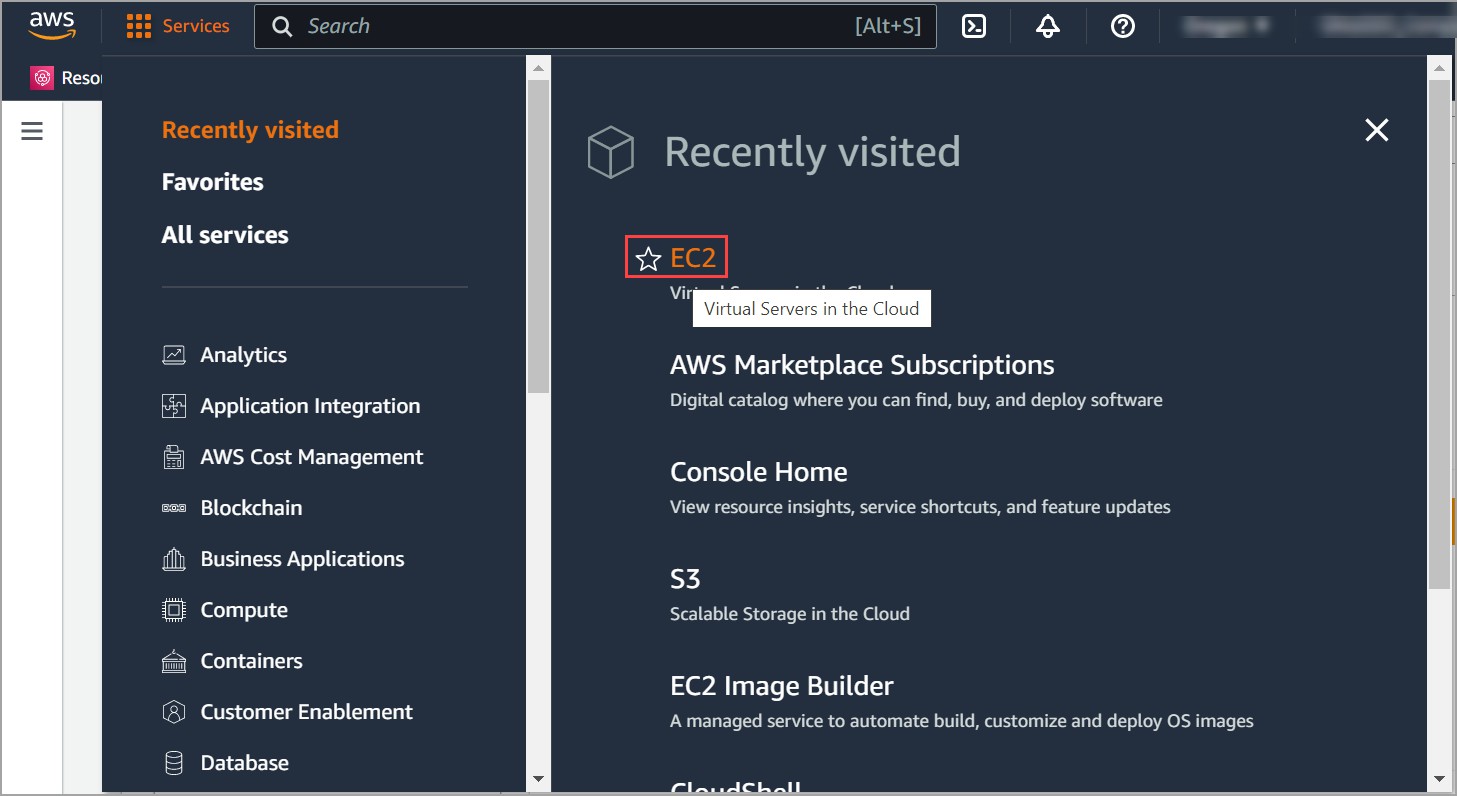
- Navigate to the AWS Marketplace > Services > EC2.
- On the EC2 page, navigate to AMI Catalog > AWS Marketplace AMI.
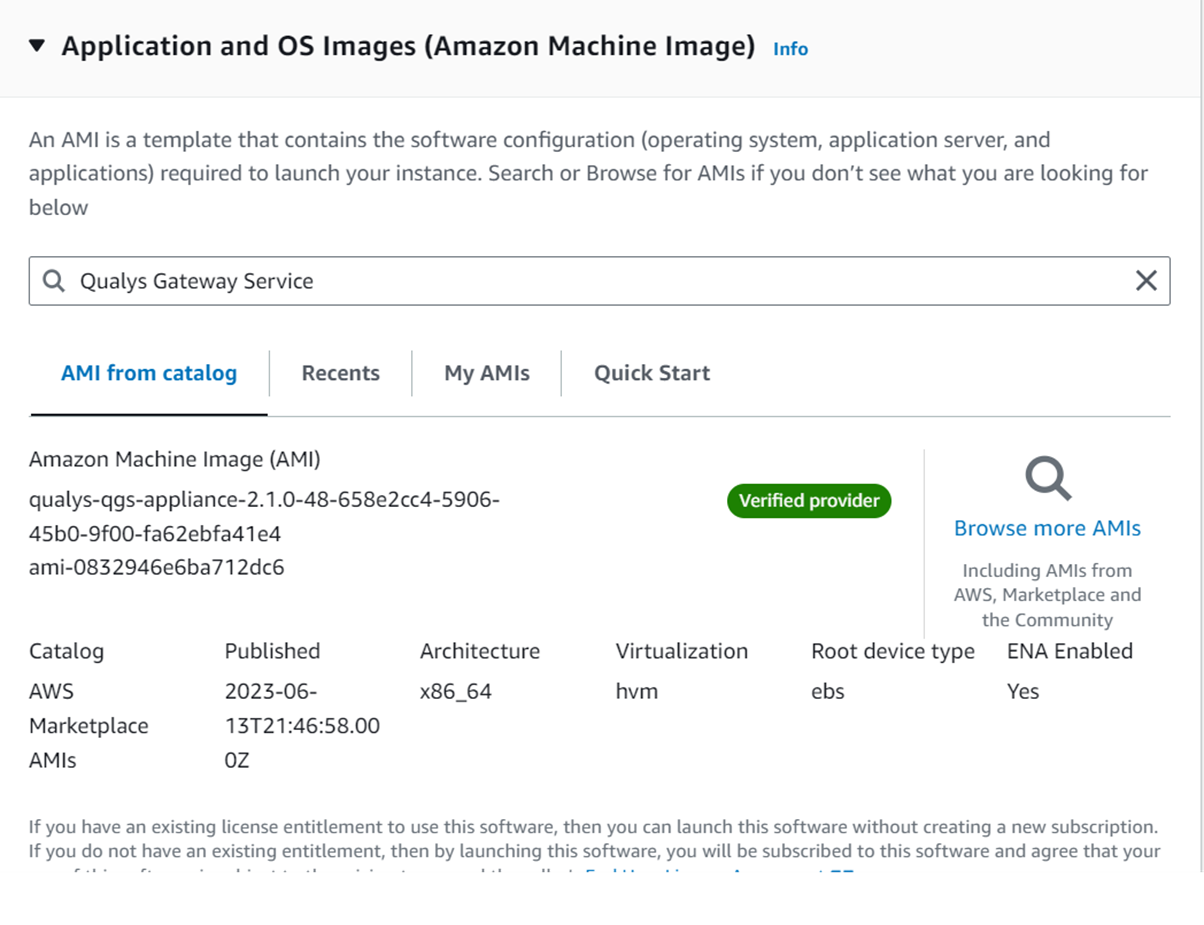
- Search Qualys Gateway Service in the search box and select the listed Qualys Gateway Service Appliance.
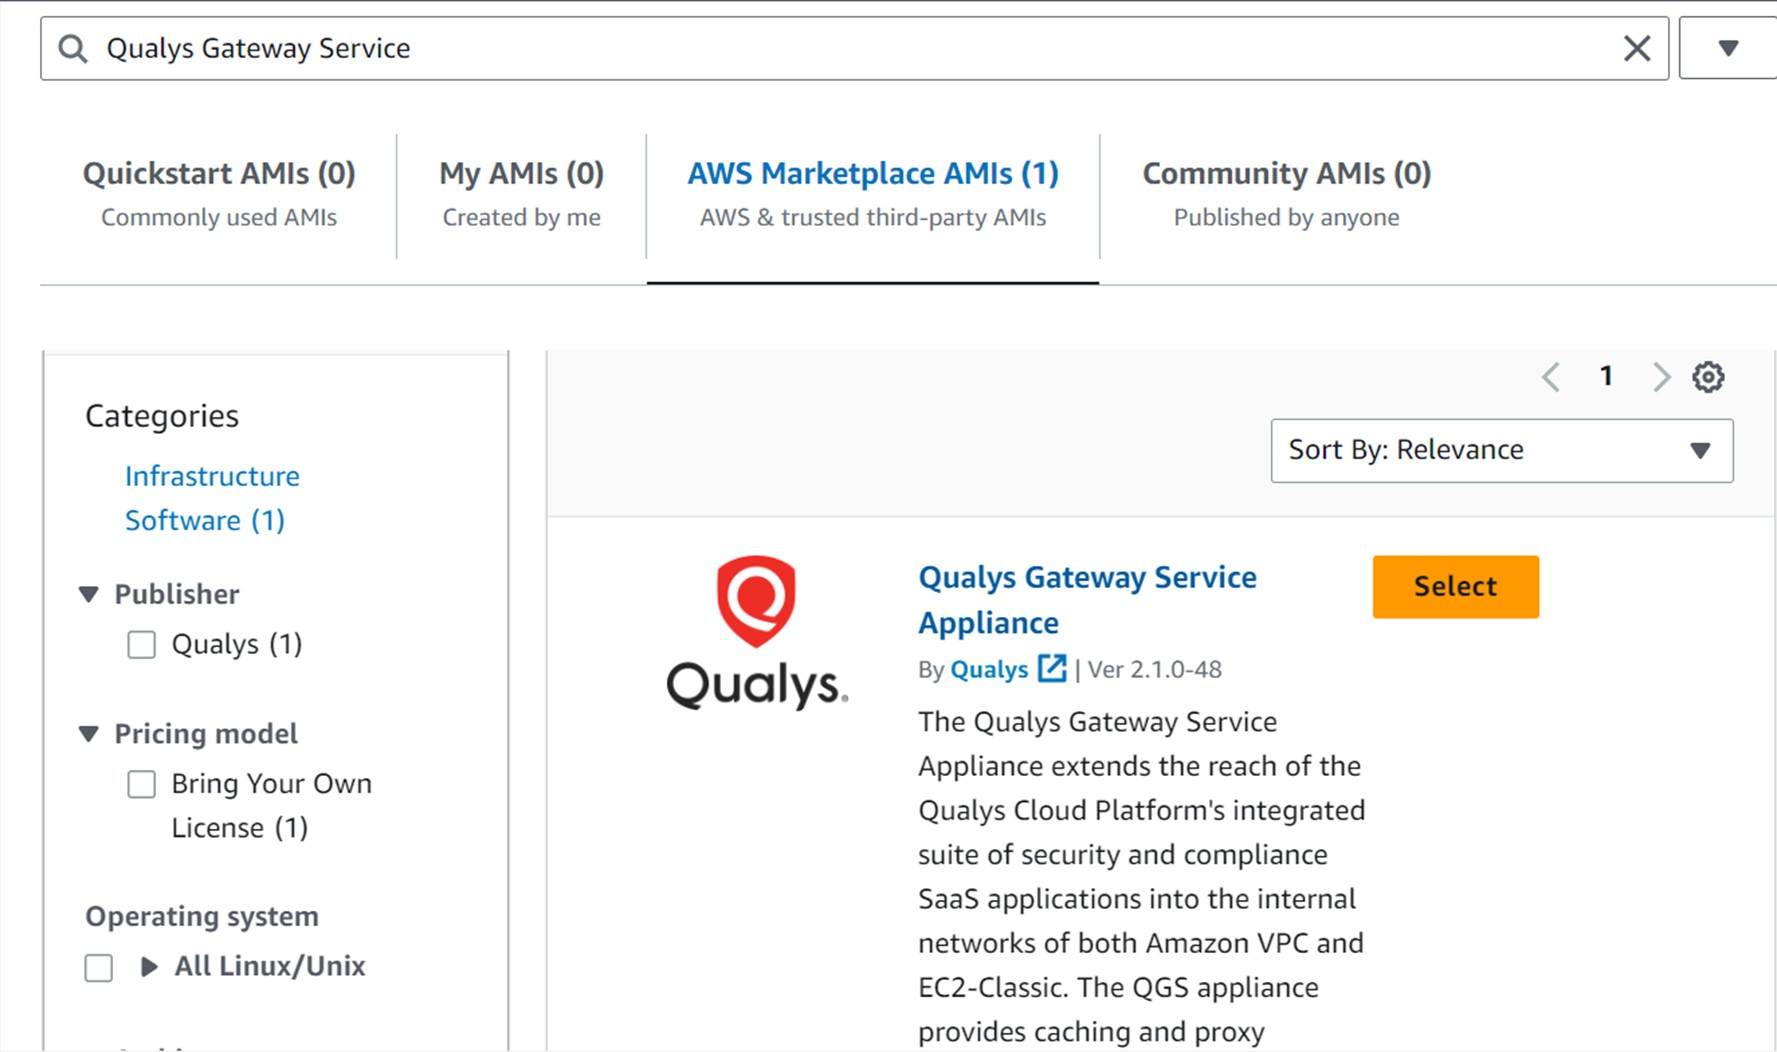
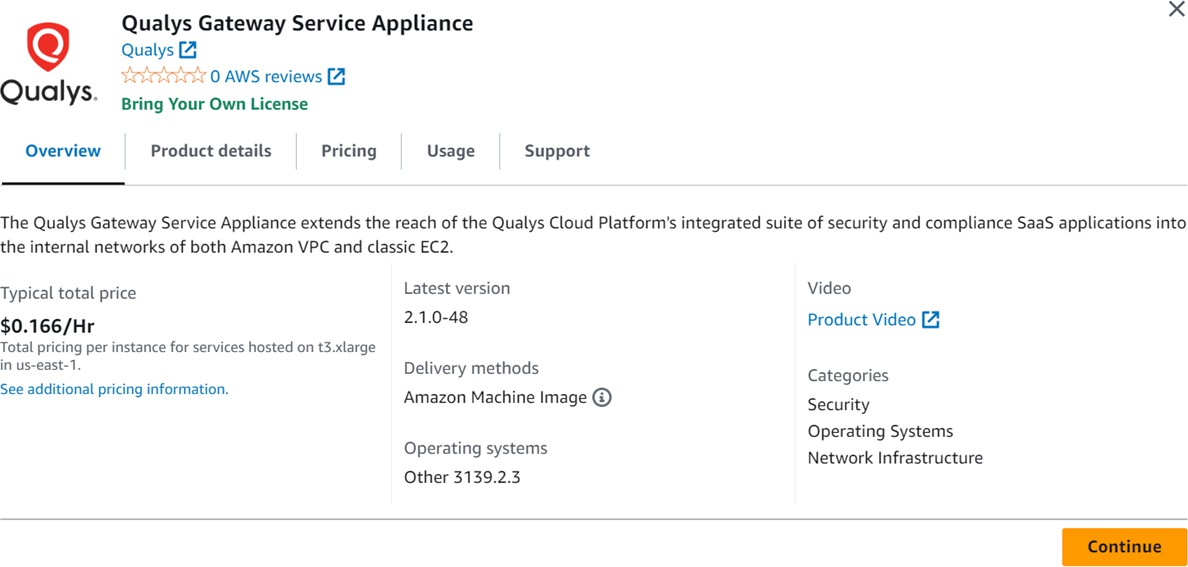
- Check the Qualys Gateway Service version and click Continue.
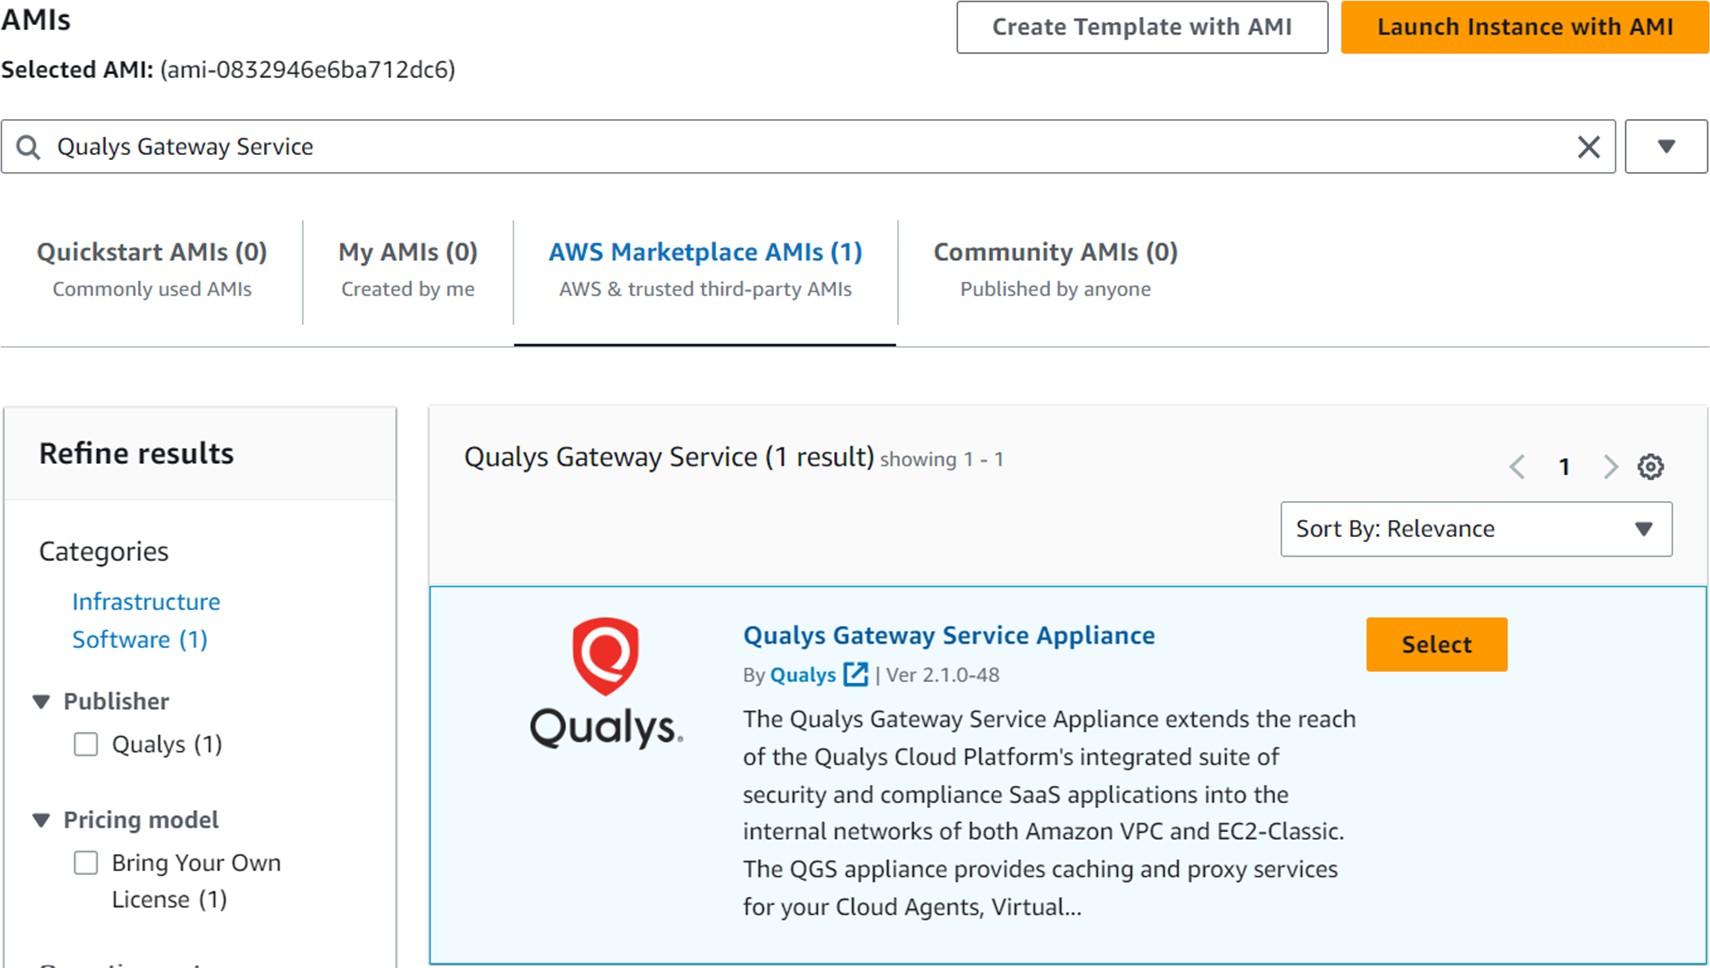
- Select the Qualys Gateway Service AMI and click Launch Instance with AMI to launch an EC2 instance.
If you have an existing instance with an old AWS AMI image, you do not have to deploy a new instance.
Create an AWS QGS Instance
Follow these steps to configure an AWS QGS instance.
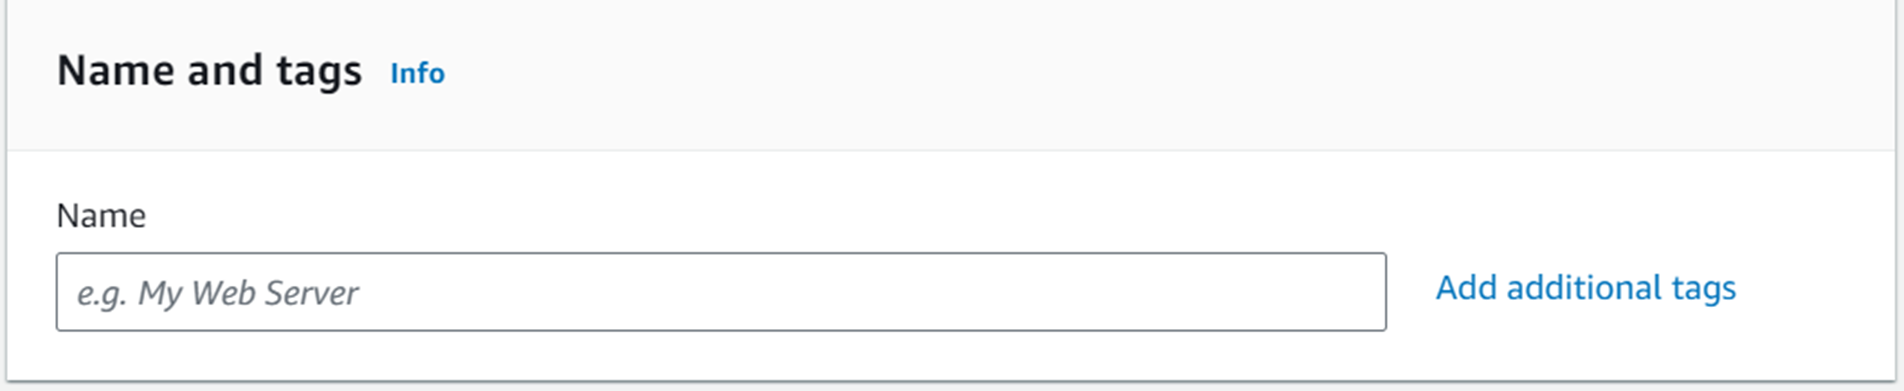
- Provide the name of the QGS Instance.
- Verify the selected QGS AMI version.
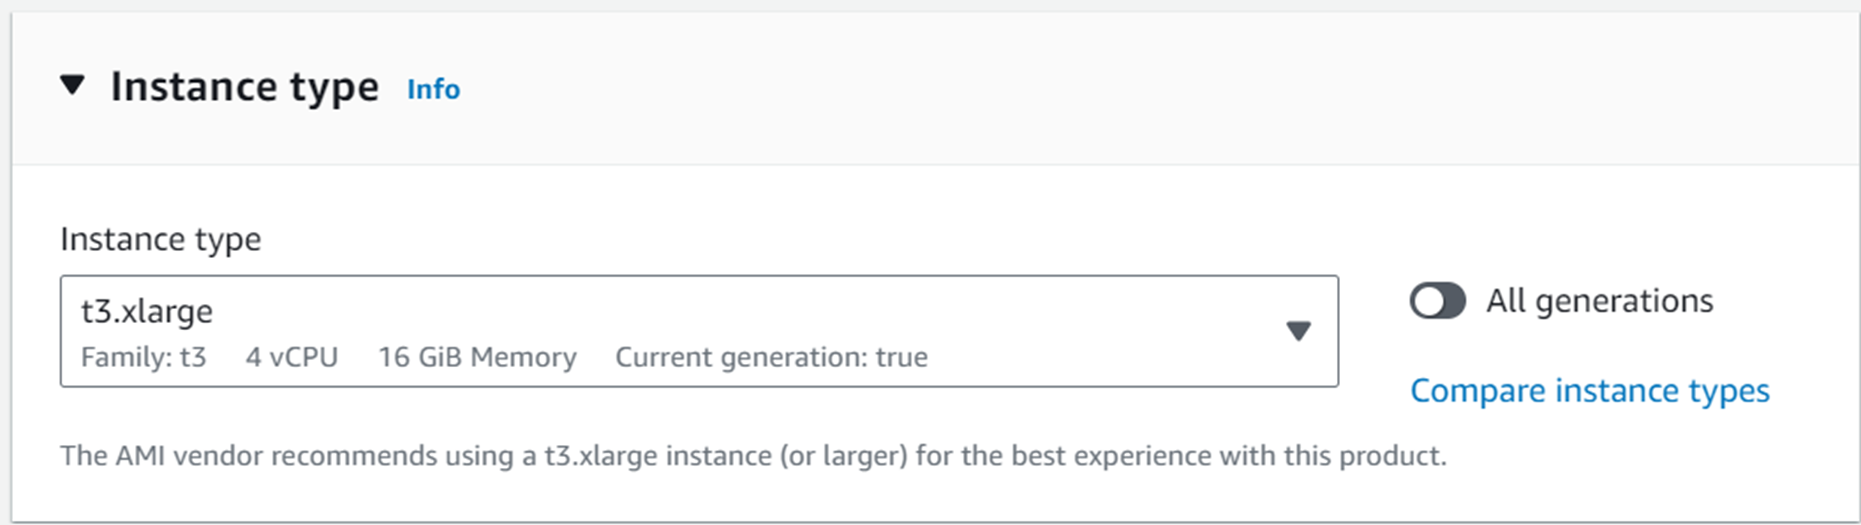
- Verify the default (minimum required) instance type.
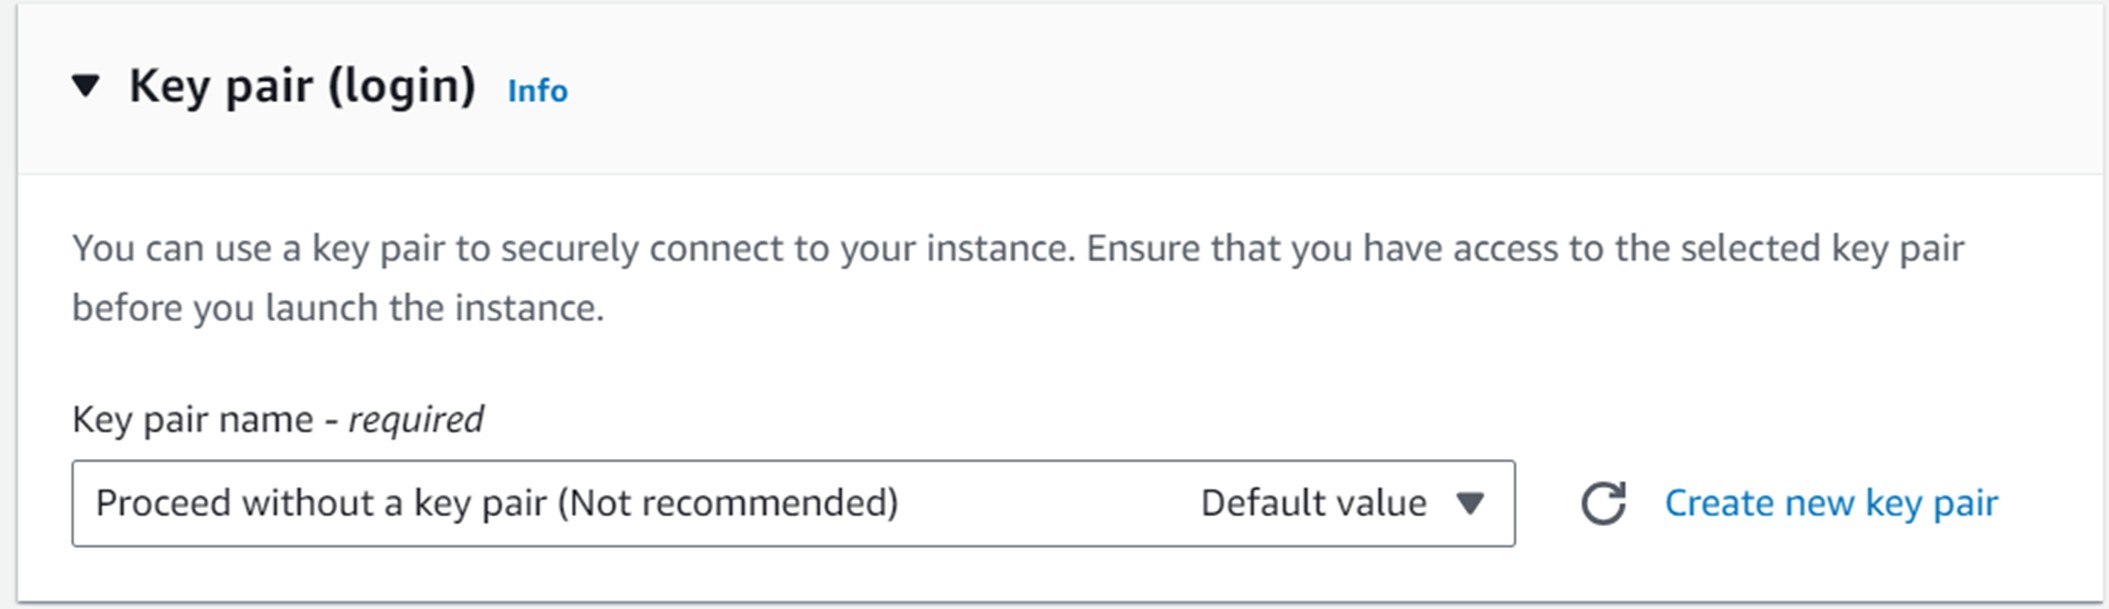
- Select ‘Proceed without a key pair’ from the dropdown. Select the checkbox and click Launch Instances.
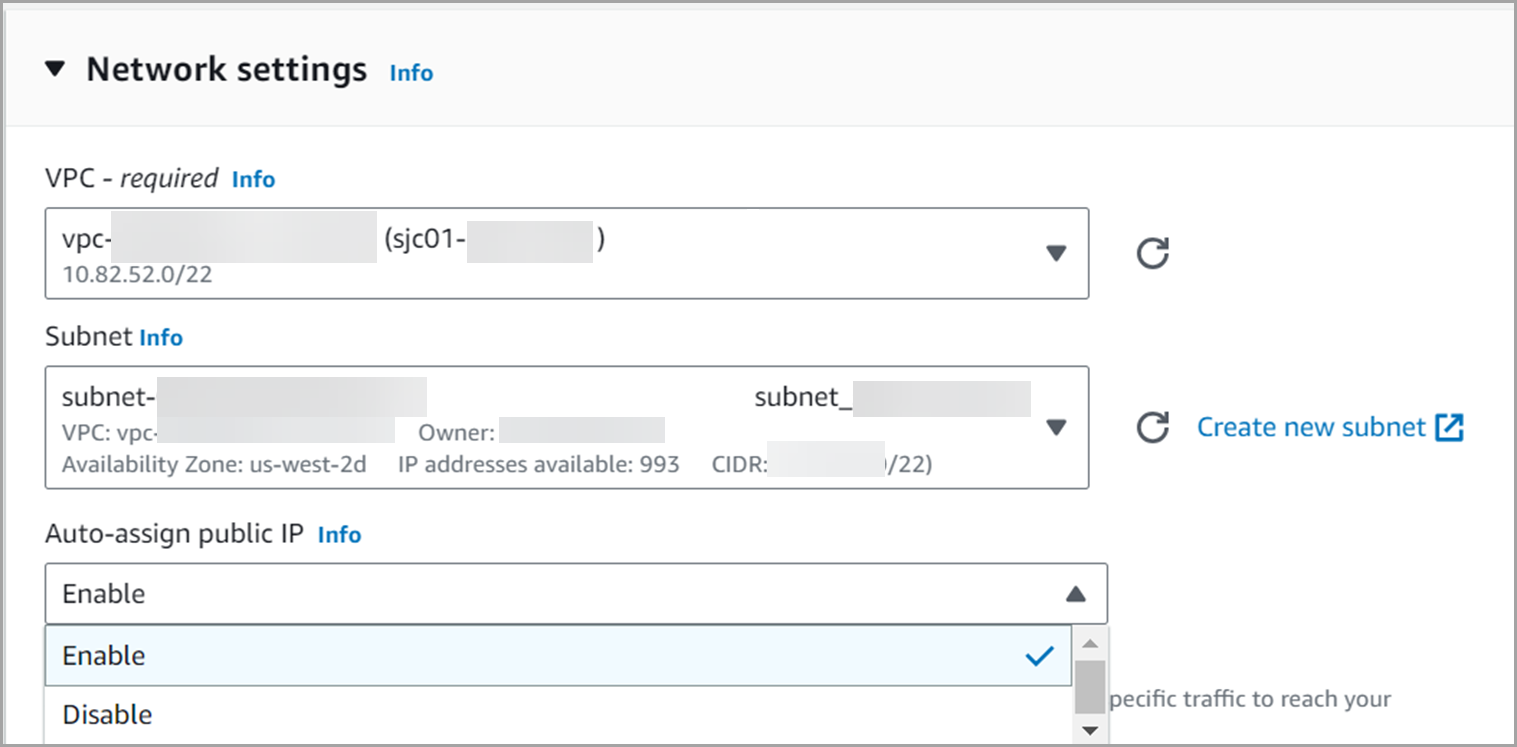
- Click Edit in the Network settings and configure the VPC and Subnet according to your user environment.
- To assign a public IP to the QGS appliances, enable the "Auto-assign Public IP" field.
- To assign a private IP to the QGS appliances, disable the Auto-assign Public IP option.
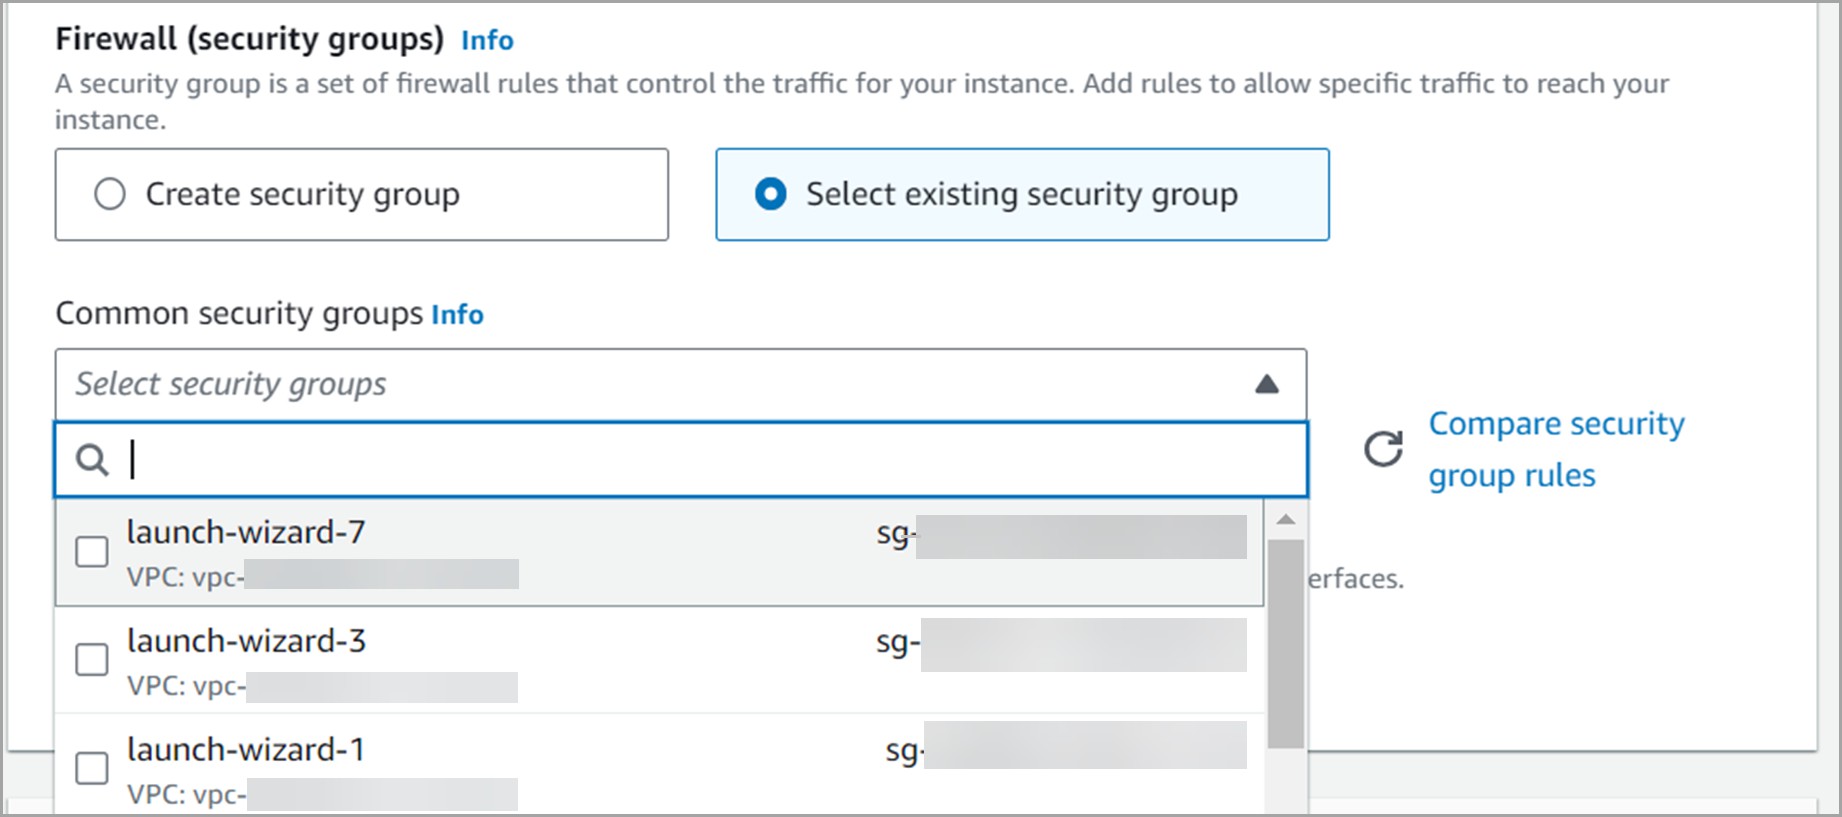
- In the Firewall (Security Groups) section, either create a new Security Group or select an existing one.
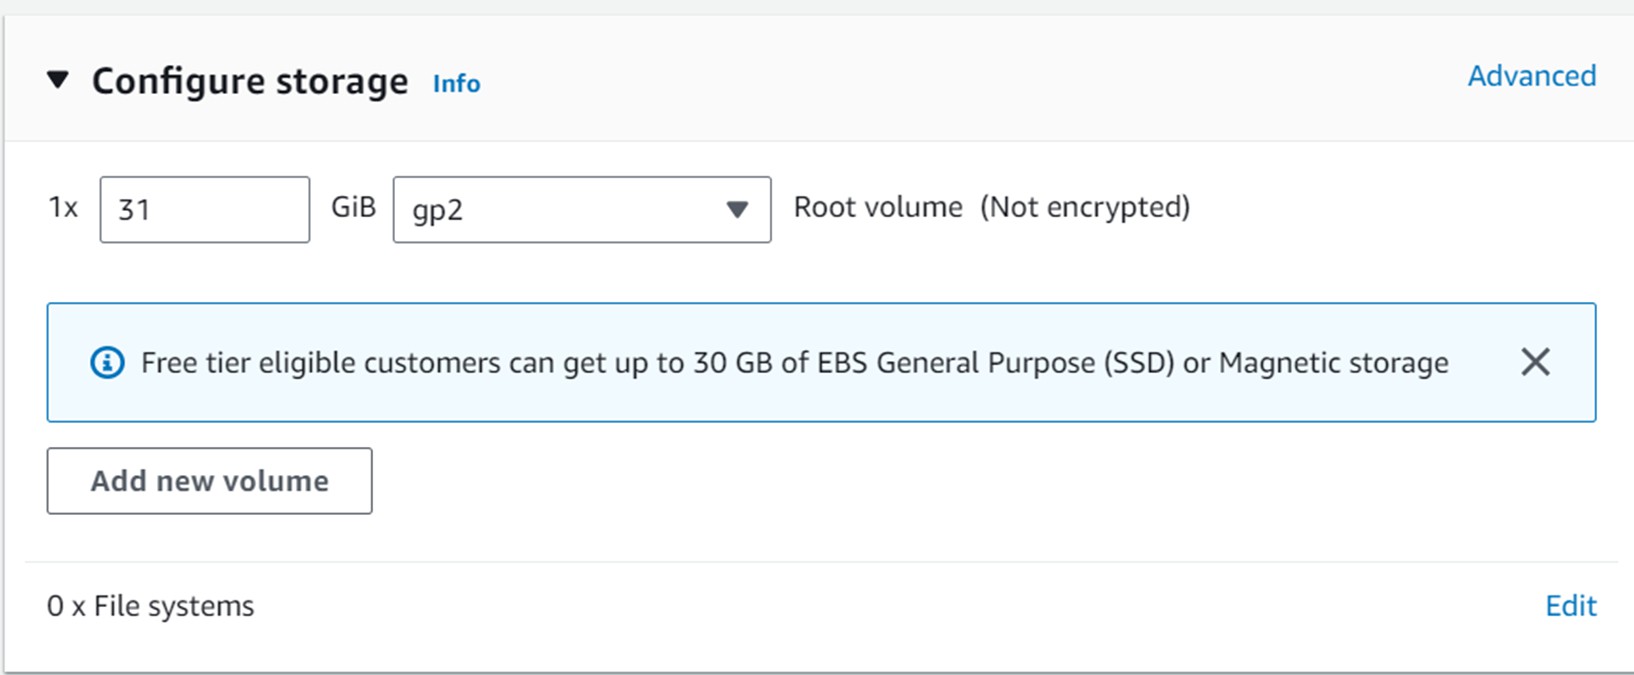
- In the Configure Storage section, verify that the default primary disk size is 30GB or greater.
A security group is a set of firewall rules that control the traffic for instance. You can add rules to allow specific traffic to reach your instance.
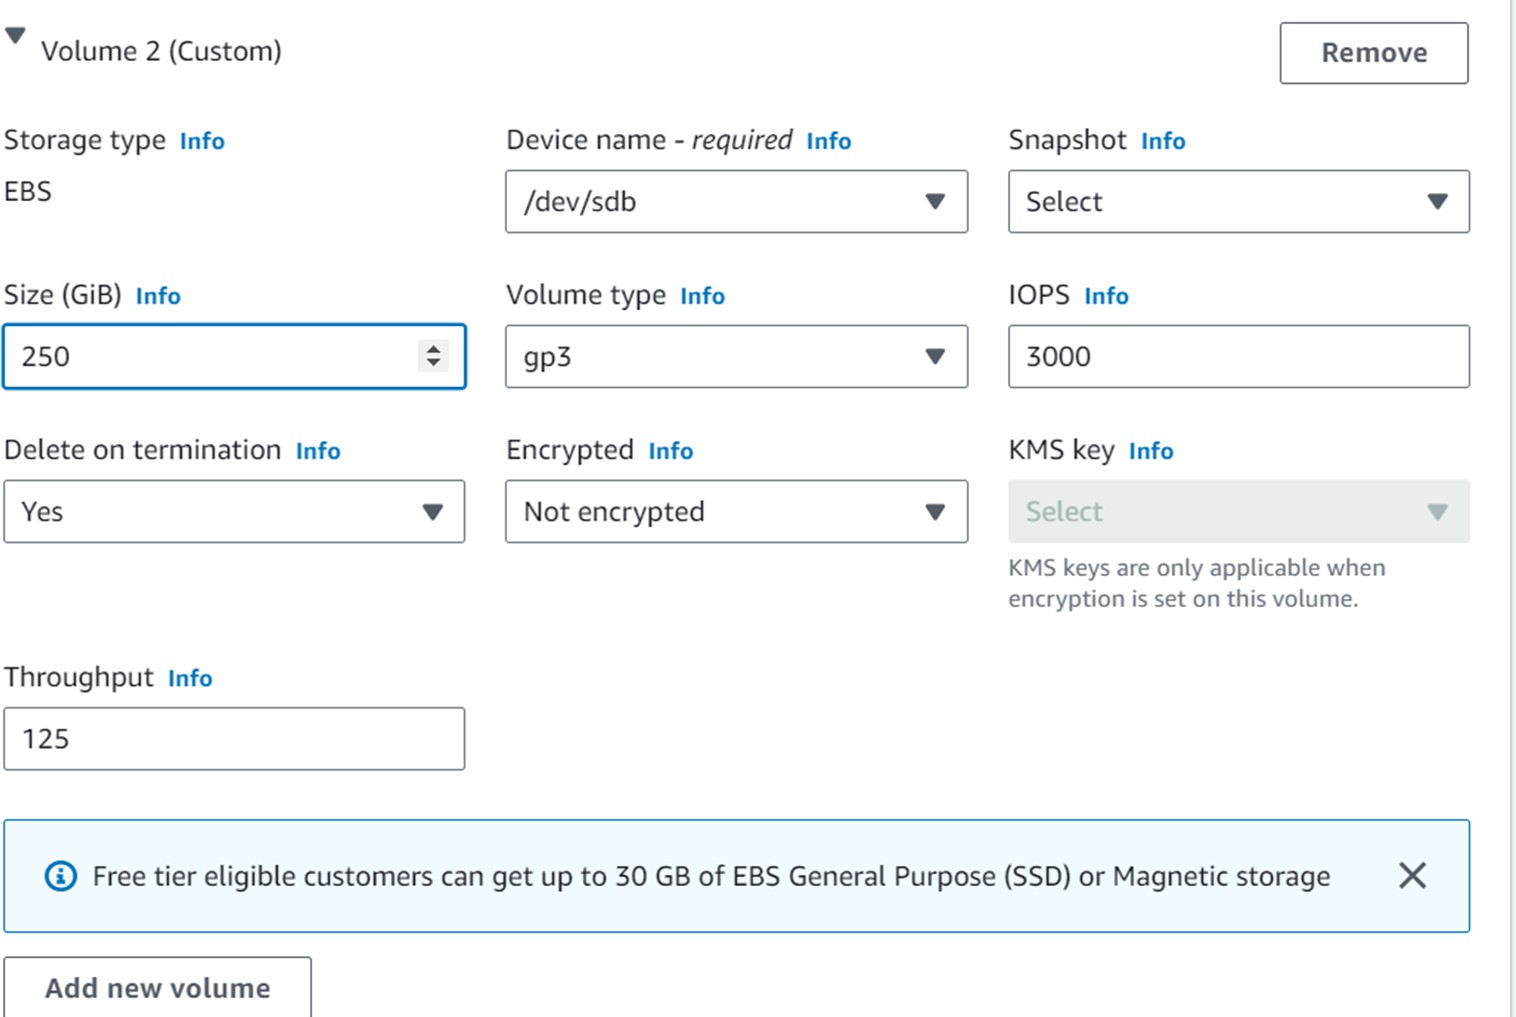
- If you plan to use your appliance for Patch caching, add a secondary storage volume of at least 250 GB.
- To add a secondary disk, go to Configure Storage > Advanced > Add New Volume.
- Additionally, select Yes to delete the disk upon instance termination.
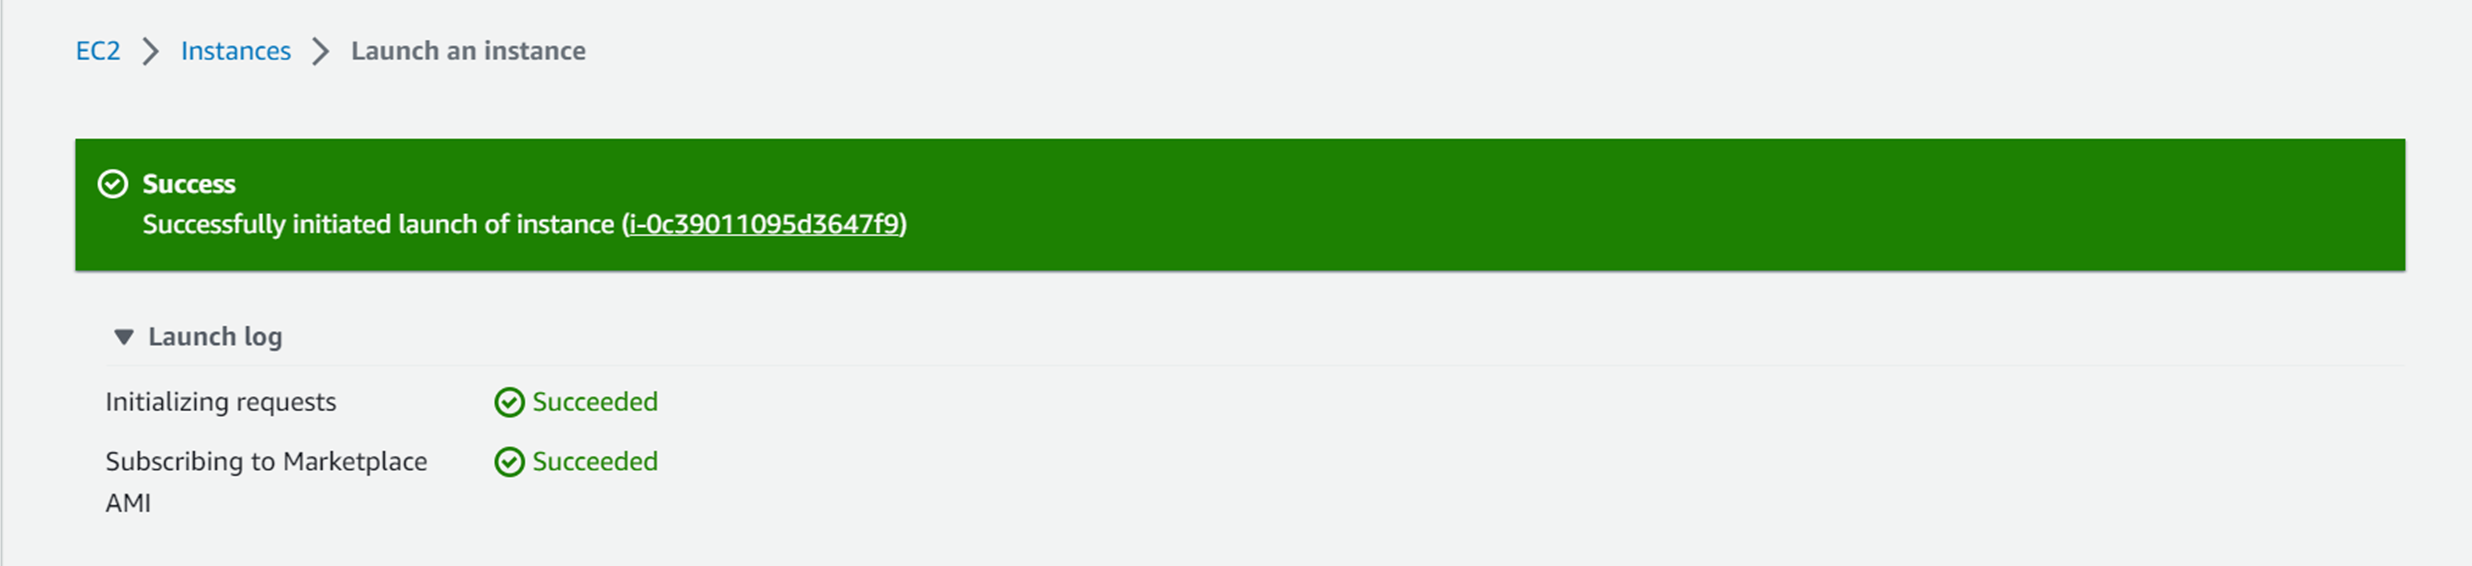
- Verify the summary and click Launch Instance.
Launch QGS Instances Using AWS CLI
You can also configure AWS QGS instance using the User Data setting. We recommend using the User Data option only when the instance is launched using the scripts. The following script can be used to launch one or more QGS instances in the AWS cloud. You can use AWS CLI to launch the below command.
You must have CLI installed on your machine to use AWS CLI to launch and execute the below command.
Command to Launch QGS Instances in the AWS Cloud
Follow the steps below to create an instance using User Data:
aws ec2 run-instances ok
--image-id ami-xxxxxxxxxxxxxxxxx
--instance-type t3.large \
--security-group-ids sg-0********** sg-0********** \
--subnet-id subnet-0*************** \
--user-data file://ec2-userdata.yml \
--associate-public-ip-address \
--count 1 \
--block-device-mappings 'DeviceName=/dev/sdb,Ebs={DeleteOnTermination=True,VolumeSize=256, Encrypted=False}' \
--tag-specifications 'ResourceType=instance,Tags=[{Key=Name,Value="QGS Appliance"}]'
Content of ec2-userdata.yml file used in previous command
If configuring the instance using the latest image version 2.1.0-48, you can directly configure the POD suffix using the TextUI by selecting the options System Settings > POD Suffix without using the User Data option. To know more detailed steps to configure the POD suffix without using the User Data option, Refer to the Appendix section of the Qualys Gateway Service User Guide.
However, we recommend using the User Data option only when the instance is launched using the scripts while creating the instance.
On the Instance Detail Configuration screen, scroll down to the User data section and add the following user data and click Next: Add Storage.
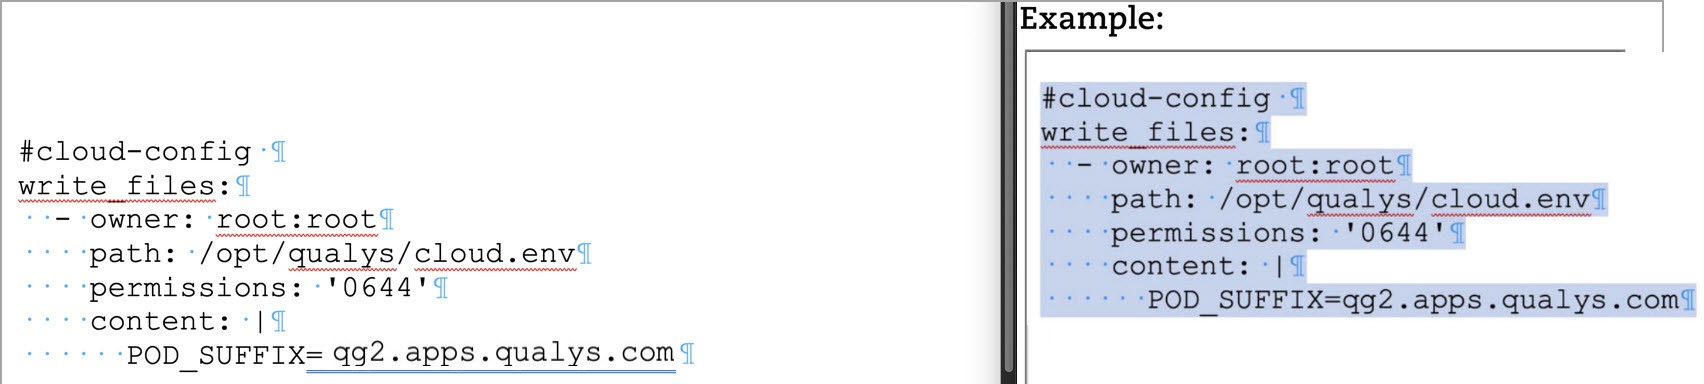
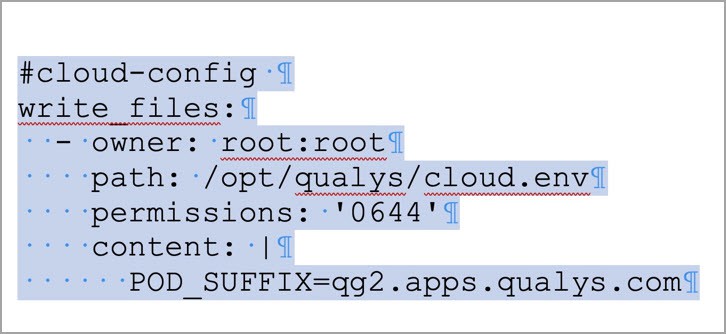
#cloud-config write_files:
- owner: root:root
path: /opt/qualys/cloud.env permissions: '0644' content: |
POD_SUFFIX=Add your QGS Platform URL here
Note: If the instance does not accept pod suffix without double quotes, then add the pod suffix between the double quotes, e.g., POD_SUFFIX="Add your QGS Platform URL here"
Important
Perform the following steps precisely to ensure a valid YAML configuration:
- As you know, 'MS Word' is used as an example of a popular word-processing application. You can use it but make sure you 'show formatting marks'.
- Use any web 'Browser' or 'PDF Viewer' to view/open Qualys AWS Deployment Guide.
- Open MS Word and your Browser, side-by-side
- In MS Word, enable Paragraph markers and choose font 'Courier New' (a monospaced font).
- In your Browser, open the QGS AWS Deployment Guide to page 8, step 8.

- Select the text that begins '#cloud-config' and ends 'Add your corresponding POD suffix here.'
- Paste this into MS Word; you should see the YAML config file, monospaced, with space and paragraph markers clearly visible.
- Now in your Browser, scroll to the last page of the QGS AWS Deployment Guide and the table, 'POD Suffixes'.
- Find your POD suffix from the 'Platform URL' column; paste this into MS Word, after the entry 'POD_SUFFIX=', do not use any quotation marks.
- Scroll back to page 10, 'Example.' Verify that the YAML file configuration you have in MS Word matches exactly, including all the space marks '.' and paragraph markers '?', your POD_SUFFIX Platform URL value needs to match where your subscription is located.
- Go to your Browser, open the website, 'www.yamllint.com'.
- In MS Word, select all text and copy it with Ctrl-C or Command-C.
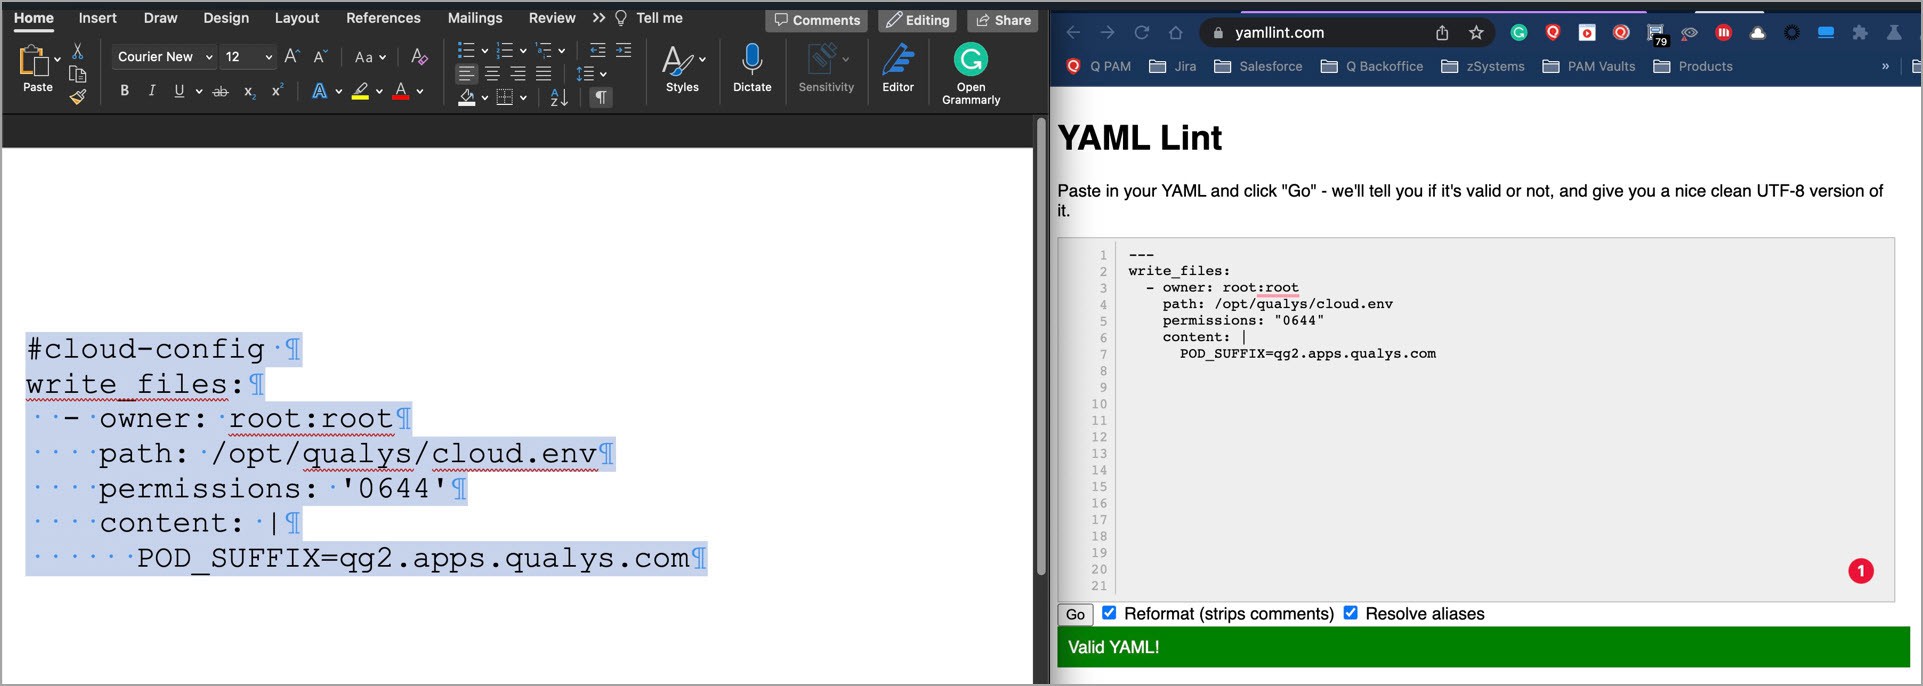
- In your Browser, paste the text into the blank YAML window and click 'go'. You should see a green bar saying 'Valid YAML!'. Refer to the following screenshot.
- It is now possible to copy that validated YAML from yamllint.com into your AWS Console. For example,
How to Interact with the Appliance?
To communicate with the QGS appliance, use the AWS EC2 Connect feature. This is a secure and straightforward method of connecting to your instances. It shortens the time required to boot and obtain new instances.
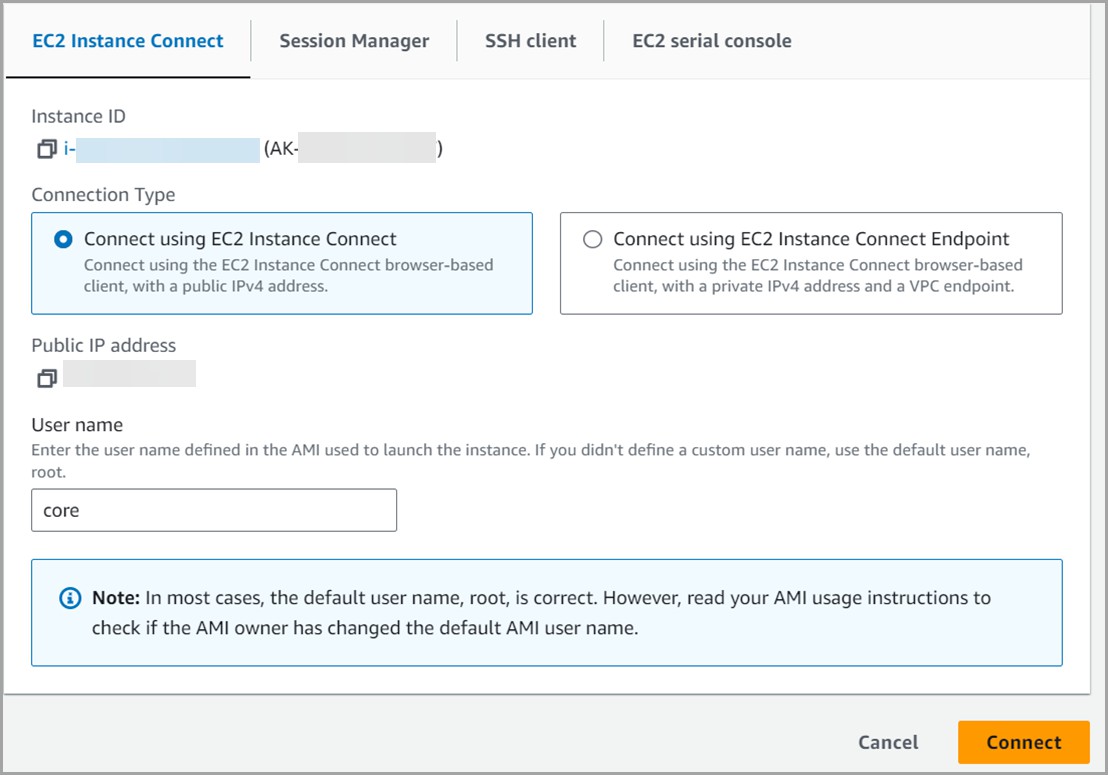
- Go to your AWS account, select the running instance, verify the instance status is ‘Running’ and click Connect.

- Go to EC2 Instance Connect and change the Username to core and click Connect.
If you want to assign a private IP to your QGS appliances then use the EC2 Serial Console option to connect your instance.
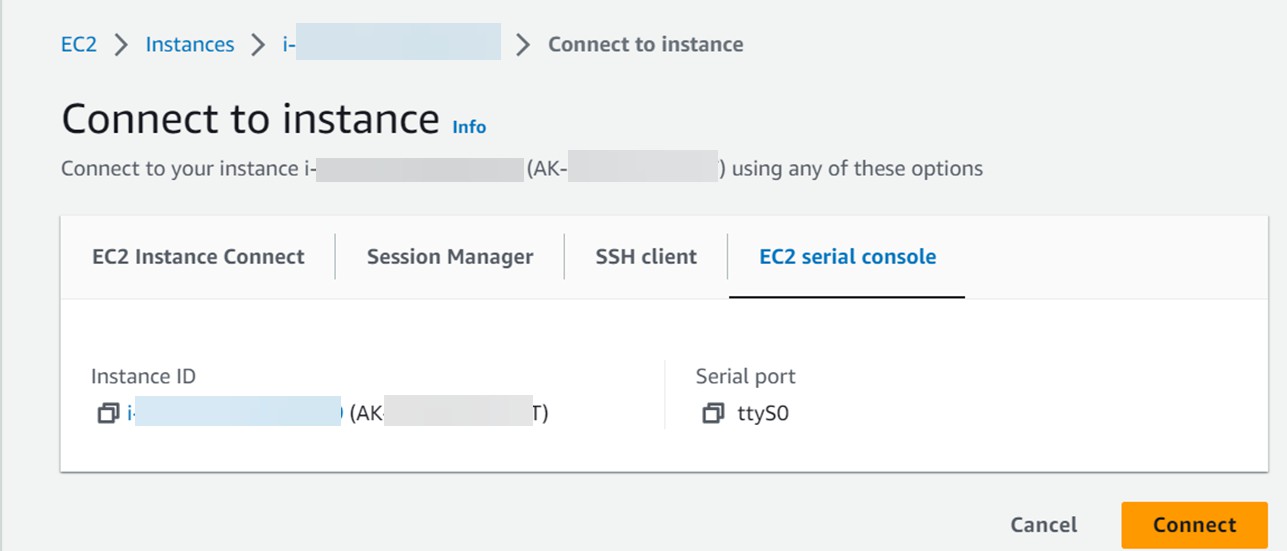
- Once you connect your instance, you are redirected to the appliance console.
Note: If it takes longer to connect to your instance, we suggest that you continue attempting to establish the connection.
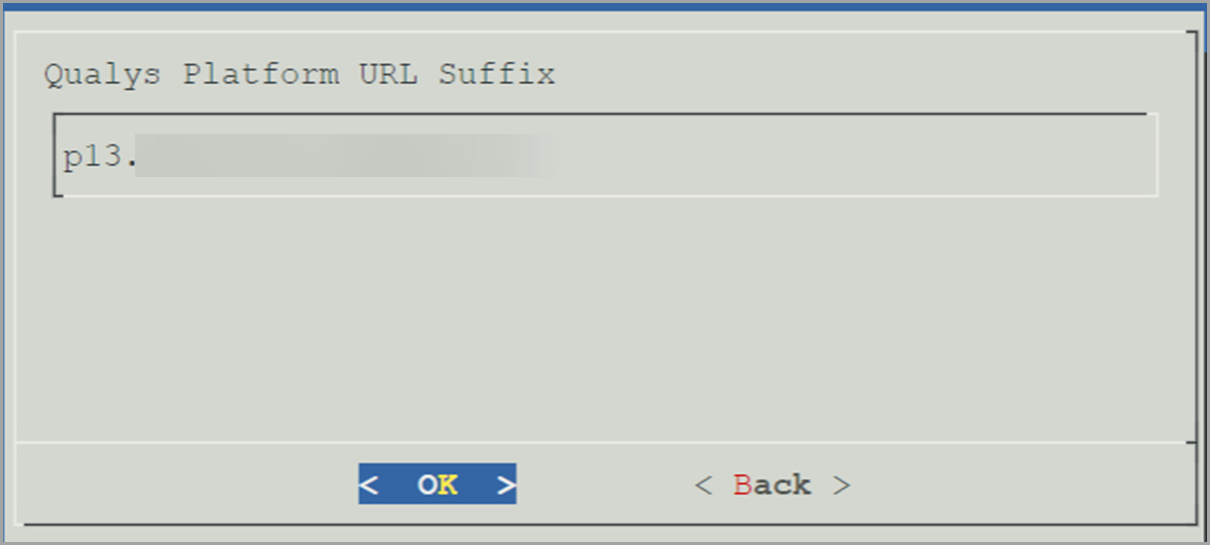
- After you have launched your EC2 instance, add the Pod Suffix from the System > Pod_suffix
Click here to know the POD suffixes for corresponding PODs. If a user facing error while connecting to the pod, check the user network and environment can reach the Qualys Backend services.
- Navigate back to the home page.
- We recommend running a connectivity test to ensure all Qualys backend services are reachable.
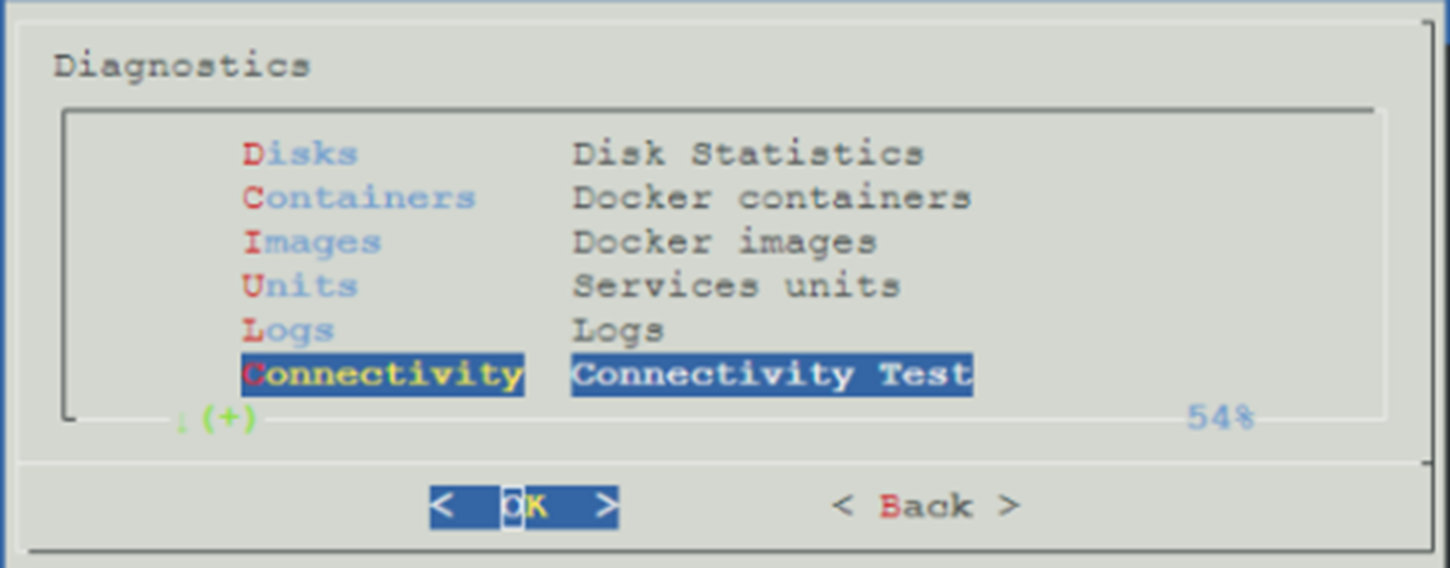
To run a connectivity test:
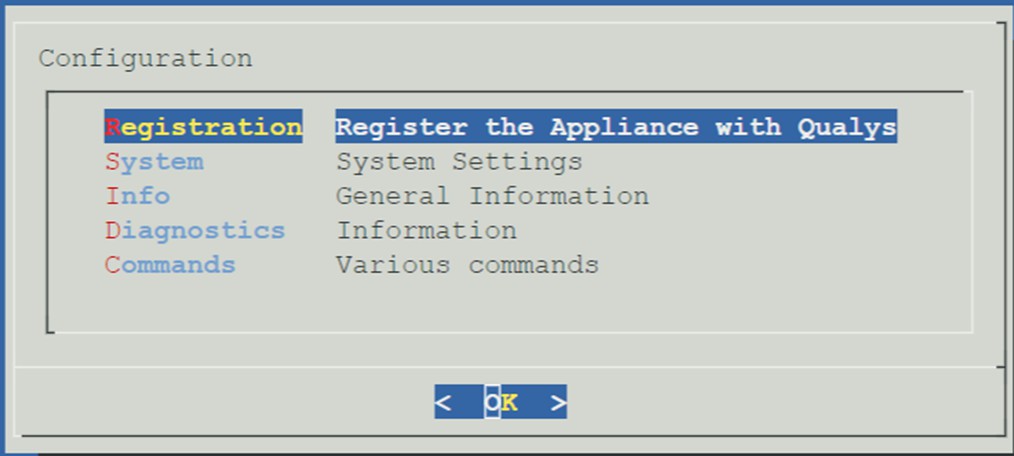
- Navigate back to Configuration screen
- Click Diagnostics > Connectivity Test > Pod Suffix
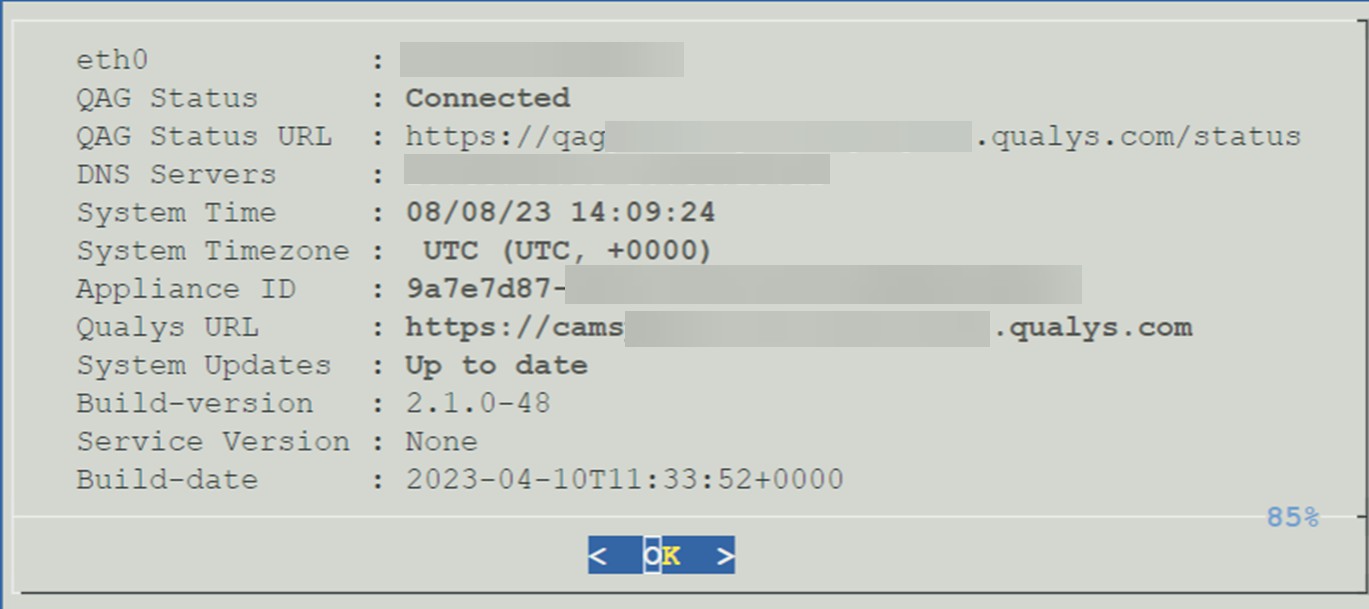
- Once the Pod Suffix is registered, verify from the Info tab that the QAG Status is shown as Connected.
- Register the appliance with Qualys. For detailed steps on registration of the appliance, refer to Qualys Gateway Service User Guide.
- To know the POD suffixes for corresponding PODs, refer to the Platform URL Suffix section of Platform Identification.
Things to Note
We have fixed a vulnerability for regreSSHion where SSH is deactivated by default on the appliance - Read More.
As a core user is required for SSH to access the QGS appliance console, after the vulnerability fixes, you will be unable to access the appliance console with Core user.
Please use serial console to access the QGS appliance console.