Google Cloud Platform Deployment Guide
This deployment guide contains the information for deploying, interacting, and configuring Centralized Appliance Management Service (CAMS) QGS Appliance on GCP Cloud.
Prerequisites
- You need an active GCP account to set up CAMS QGS.
- Ensure to cover the minimum system requirements recommended in the Qualys Gateway Service User Guide.
Steps to Configure the CAMS Appliance
Launch a QGS Instance from the GCP Marketplace
The first step in setting up a CAMS appliance on GCP is to launch a QGS instance from the GCP marketplace.
To get started, follow these steps.
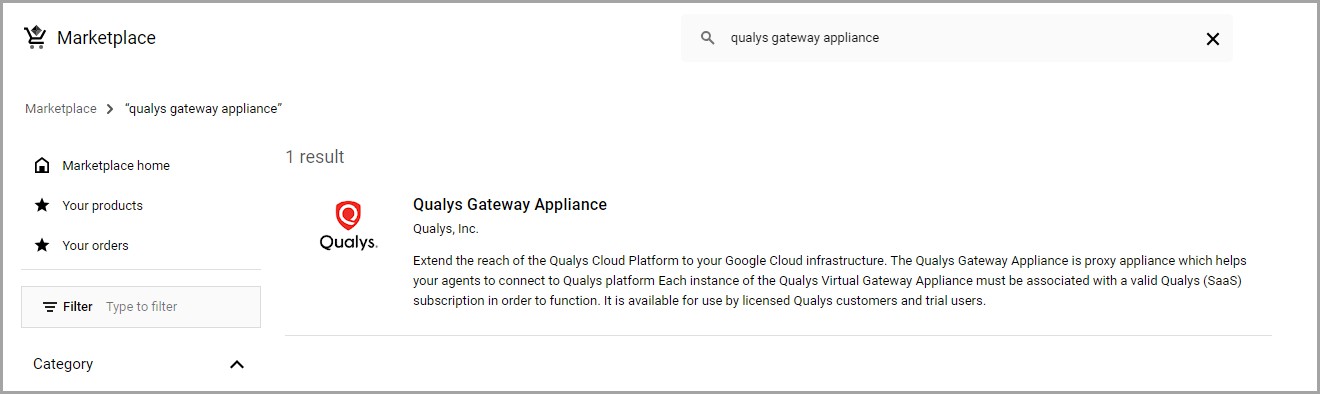
- Log in to your Google Cloud Platform account via Google Marketplace. Alternatively,
- Search for Qualys Gateway Appliance in the Marketplace search bar.
- Select Qualys Gateway Appliance from the search results.
- Click Launch to start the Qualys Gateway Appliance.
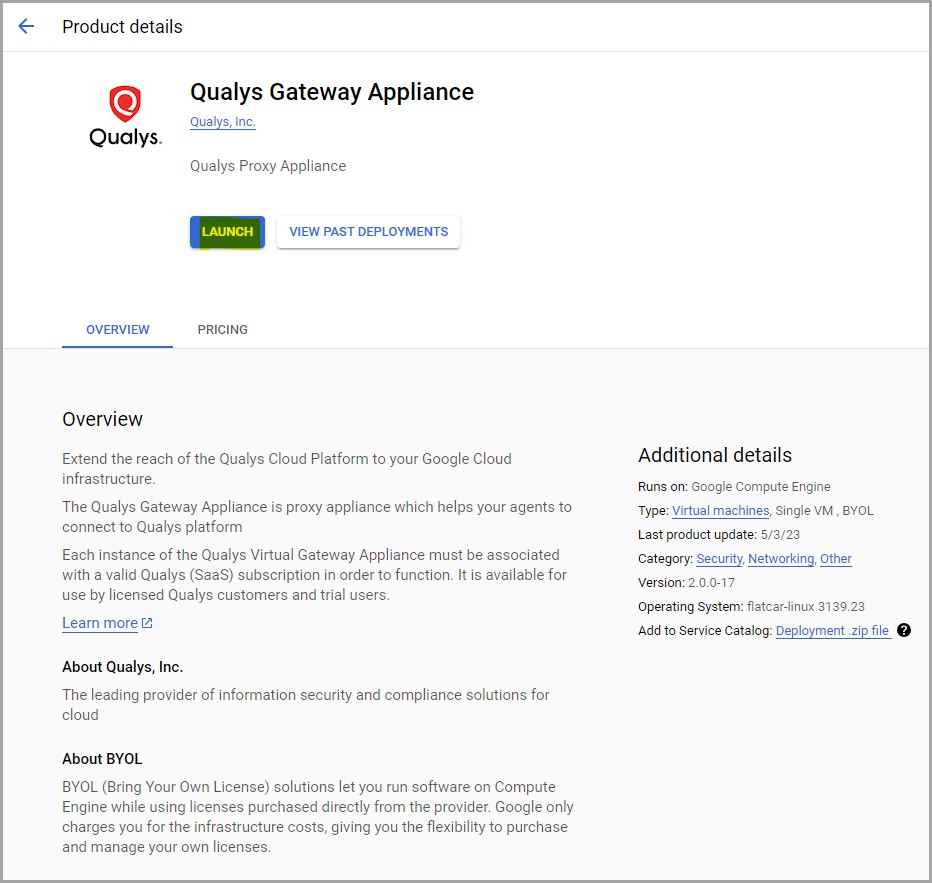
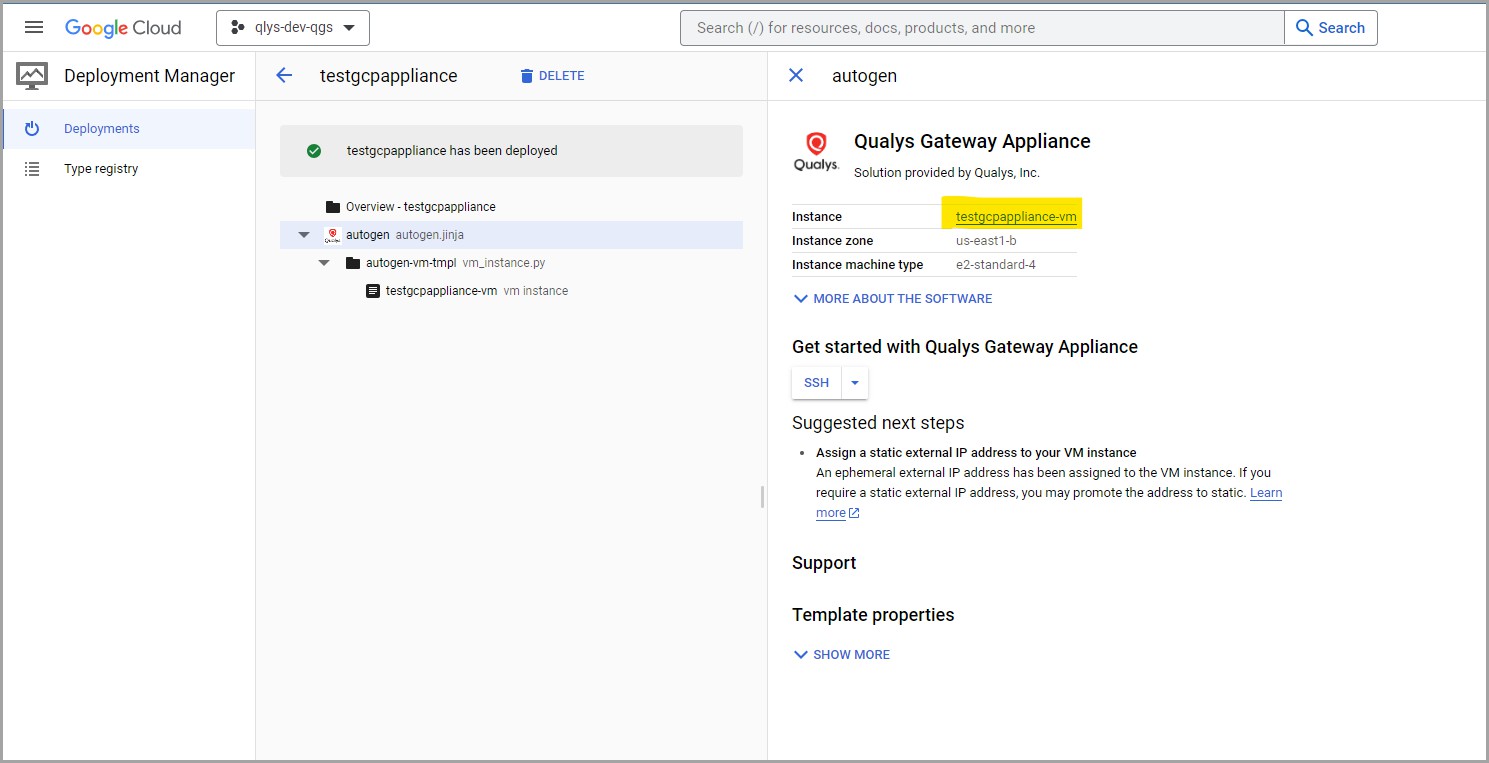
The CAMS appliance is registered on a GCP VM instance. A GCP VM deployment page appears after launching the appliance from the marketplace.
Create a GCP VM Instance
The following steps are required to create a GCP VM Instance.
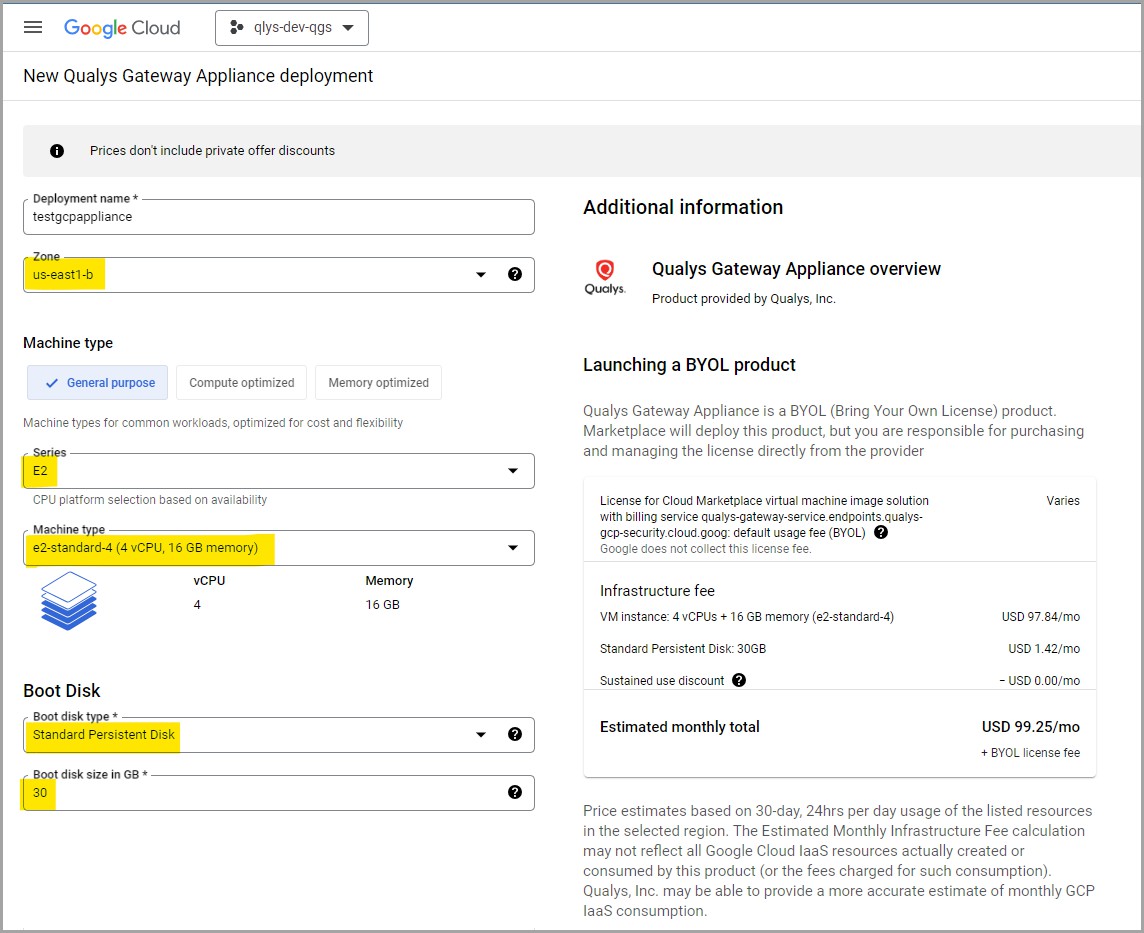
- Provide the following details on the VM deployment page.
We recommend only using the values suggested in Series, Machine type, Boot disk type, and Boot disk size in GB fields for the VM Instance configuration.
- Deployment name: Provide a name for your VM Instance.
- Zone: Provide the region where the VM Instance must be created.
- Series: Provide the series as E2.
- Machine type: Provide machine type as e2-standard-4 (4 vCPU, 16GB memory).
- Boot disk type: Provide boot disk type as Standard Persistent Disk.
- Boot disk size in GB: Provide disk size as 30.
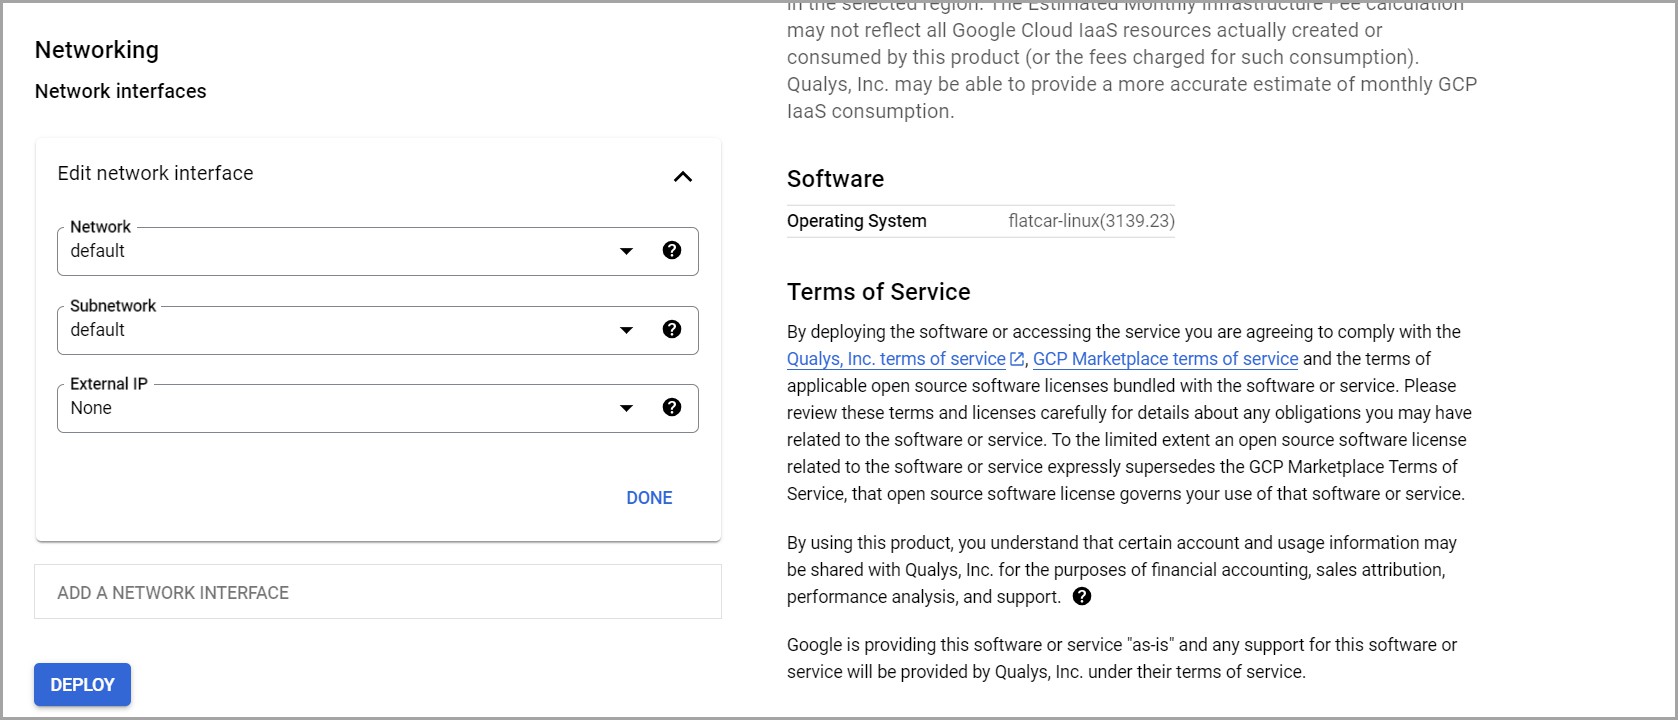
- In the Network Interface configurations of the VM deployment page, do the following:
- Network: Select Default for Network.
- Subnetwork: Select Default for Subnetwork.
- External IP: Select from the default Ephemeral for external IP or None for private IP. We recommend selecting private IP for additional network security.
The Text UI requires an upstream proxy to be configured for private IP. The appliance can only reach the Qualys server if it includes the URLs listed in the Network Configuration section of the QGS User Guide.
- Click Deploy after verifying the configurations. Wait for the VM Instance to deploy.
After deployment, you can see the GCP VM Instance listed on the Deployment Manager.
Add a Secondary Hard Disk to use Patch Mode
You can add a secondary disk of 250 GB to enable patch mode during or after creating the VM Instance. Ensure that the minimum VM requirement is met. For more details, see the Virtual Machine Configuration section of the QGS User Guide.
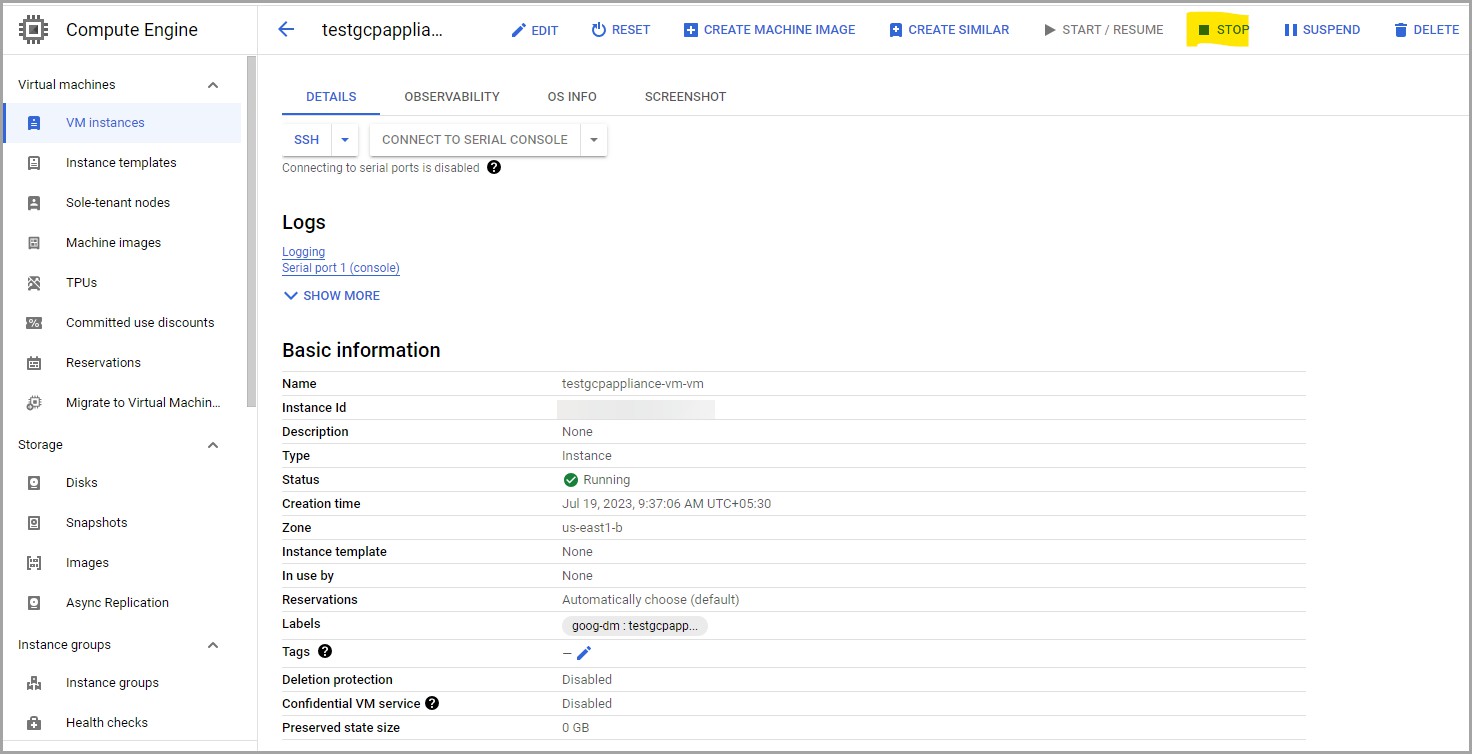
- Click the newly created VM Instance to add a secondary disk.
A detailed list of information on your VM Instance is displayed with edit options.
- Click Stop on the VM Instance page to stop the VM instance before moving to the next steps.
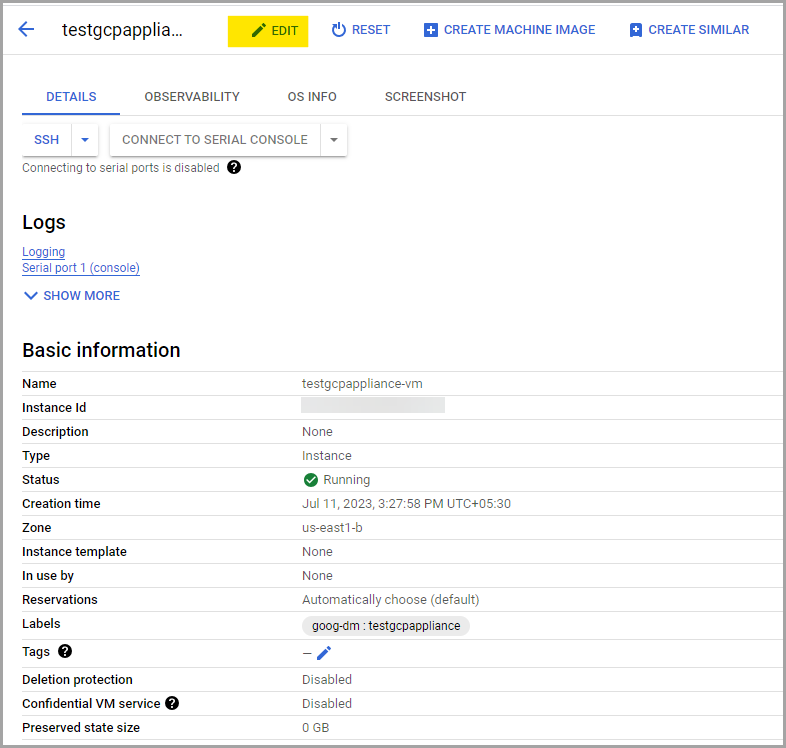
- Click Edit to add a secondary hard disk to the virtual machine.
 You can edit your previous configurations and add disk information on this page.
- In the Additional disks section, click Add New Disk.
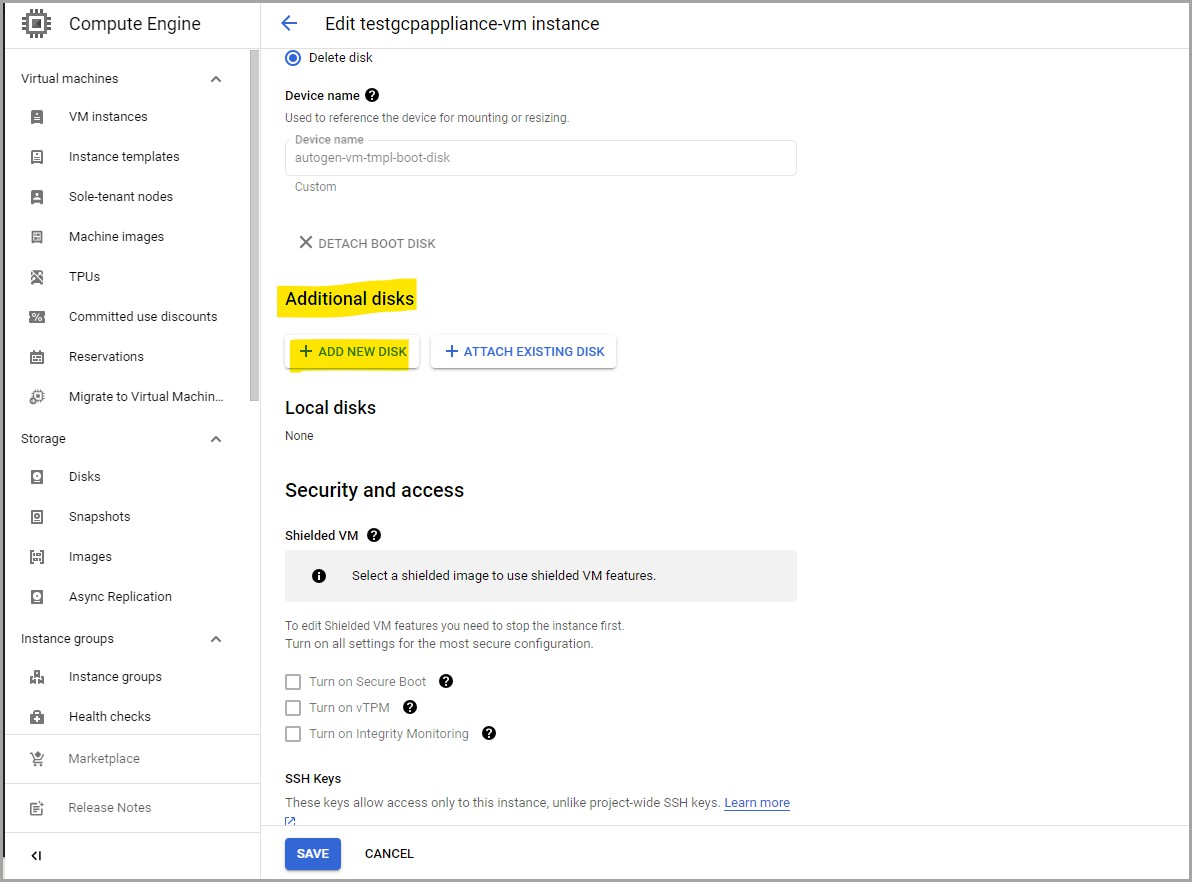
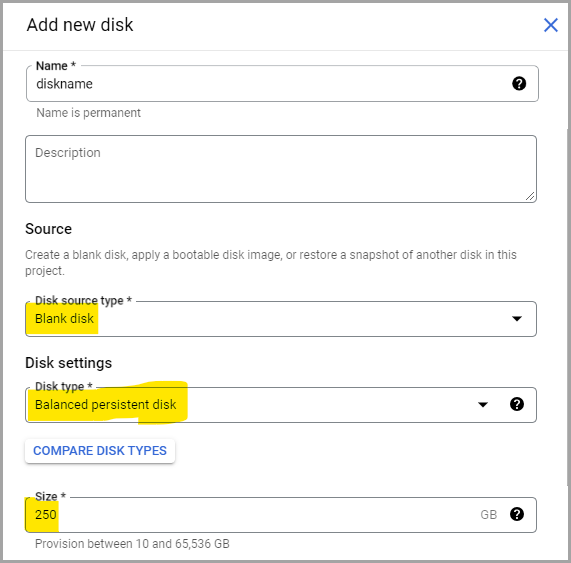
The Add new disk page is displayed. You can configure your secondary disk here. - Perform the following:
- Enter a name.
- Select Disk source type as Blank Disk.
- Select Disk type as Balanced Persistent Disk.
- Provide the disk size. The minimum size for a Patch Disk is 250 GB. The size can be increased when there is too much cache attrition.
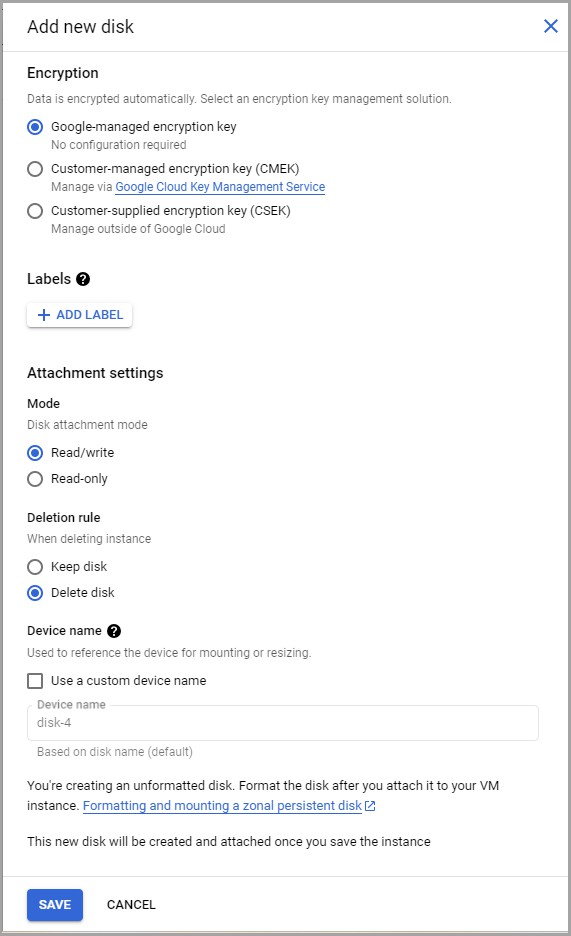
- Keep the Encryption Type as Google-managed encryption key.
- Select the Mode as Read/write.
- Select the Deletion rule as Delete disk. The secondary disk is deleted when the VM instance is deleted.
By default, the device name is the configured disk name. If needed, you can add a custom device name.
- Click Save.
- Click Save on the Edit Instance page and save the changes to the instance.
Access the QGS Text UI
The CAMS Appliance must be registered using the QGS Text UI. To launch the Text UI, follow the steps below.
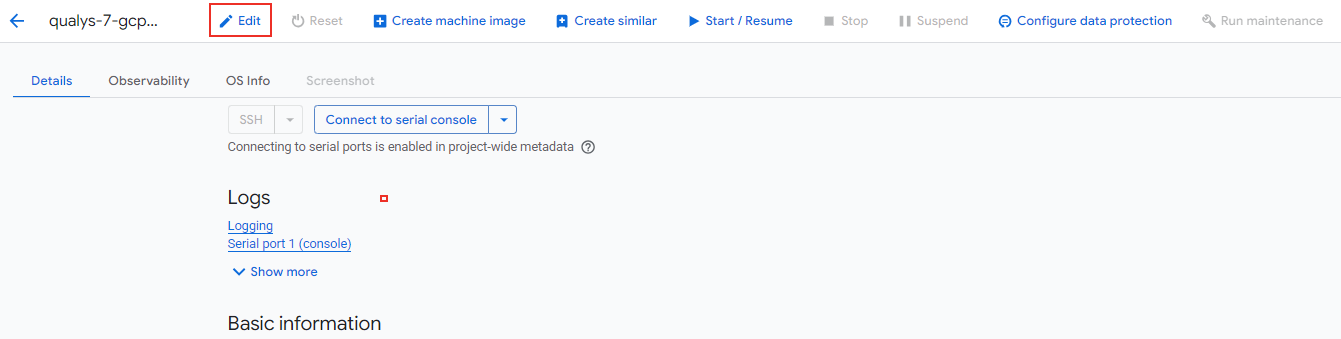
- After successfully creating the appliance, stop the appliance.
- Click on the instance, then click Edit.
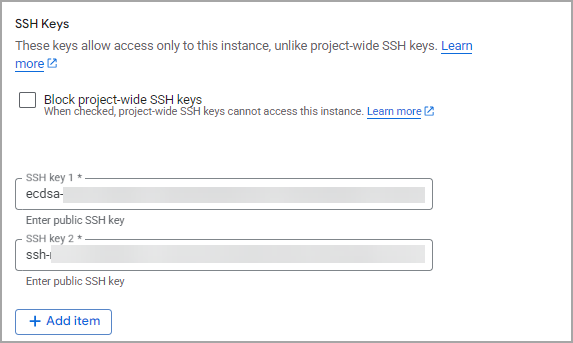
- Go to the SSH keys section at the bottom of the page.
- Add the public SSH keys to the SSH keys section as shown below, and save the changes.
- Select the newly created GCP VM Instance, and click Edit.
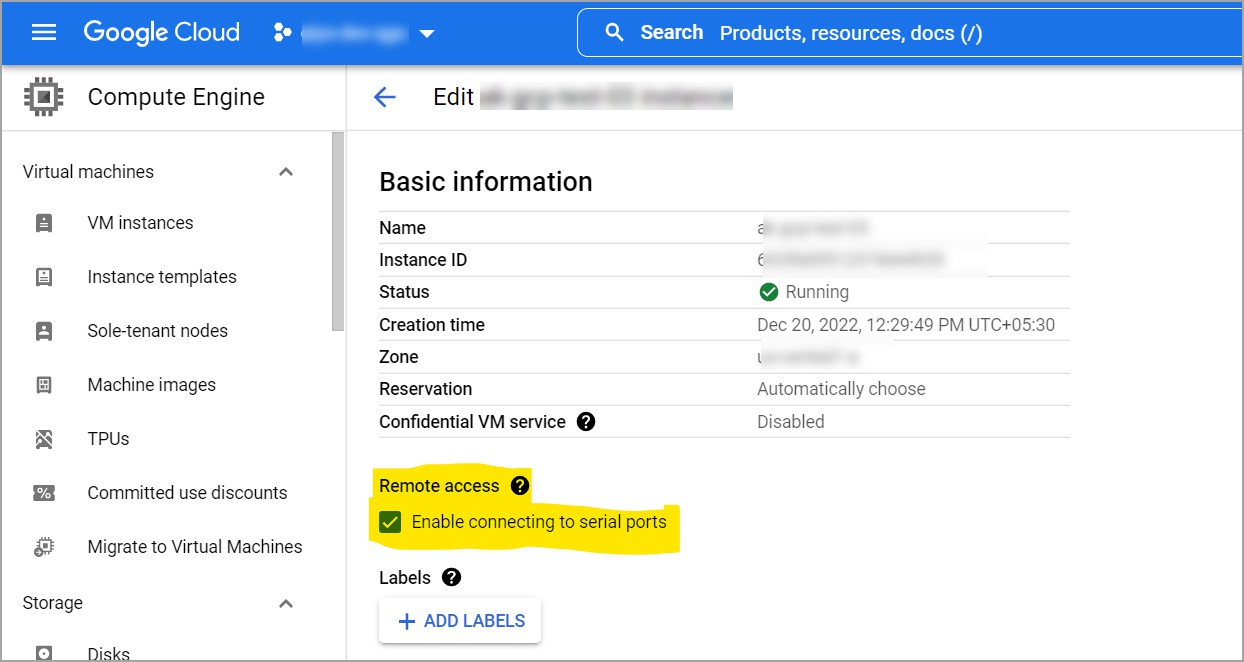 Select the Enable connecting to serial ports checkbox and click Save.
-
After saving the details, click the Connect to Serial Console option to access the Text UI of the QGS Appliance.
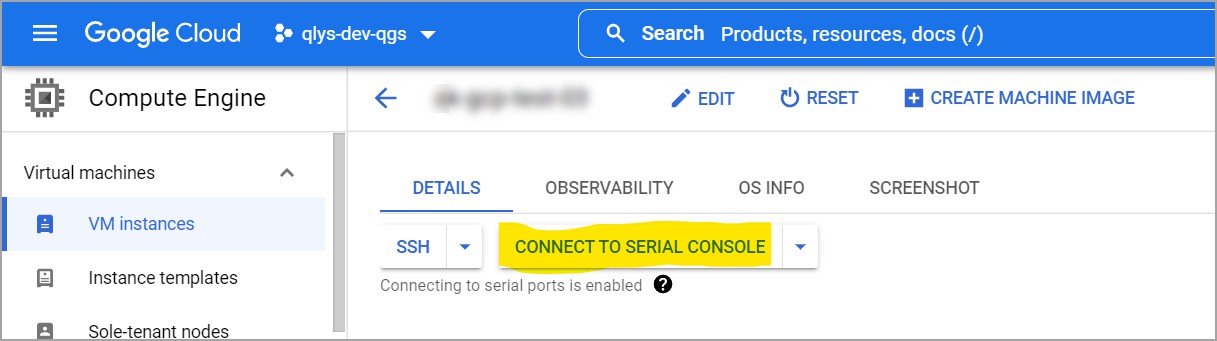
Press any key if the Text UI is not displayed within 10-15 seconds. You can view the Configuration screen once the QGS Text UI is visible.
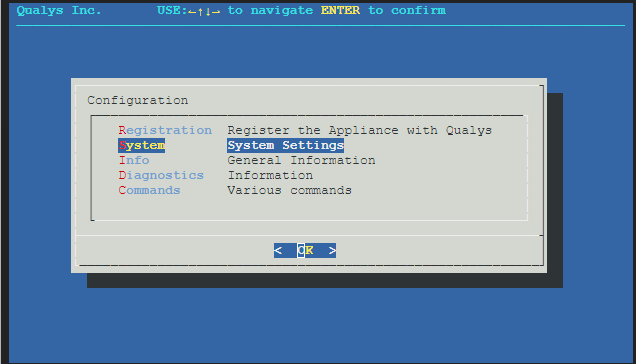
- Click System to access the System Configuration.
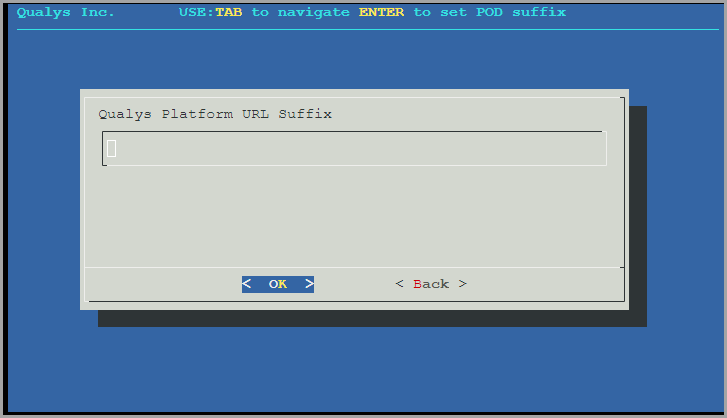
- On System Configuration, click POD Suffix.
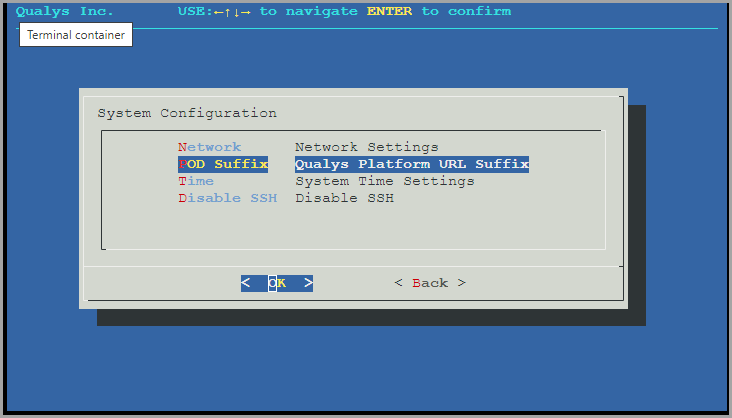
An input field is displayed to provide the Platform URL Suffix (POD Suffix). - Enter the Qualys Platform URL Suffix corresponding to the platform where your subscription is hosted. To identify the Platform URL Suffix for your subscription, refer to the Platform URL Suffix section of the Qualys Platform Identification.
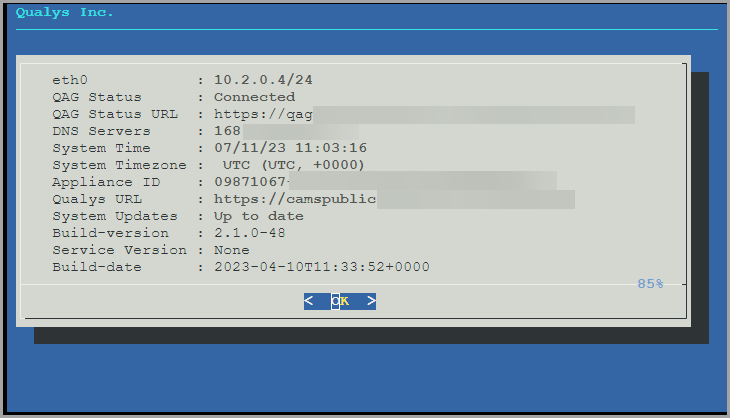
- Once the POD Suffix is successfully updated and network settings are configured, the appliance should display as below. Verify that the QAG Status shows Connected to ensure your appliance runs successfully.
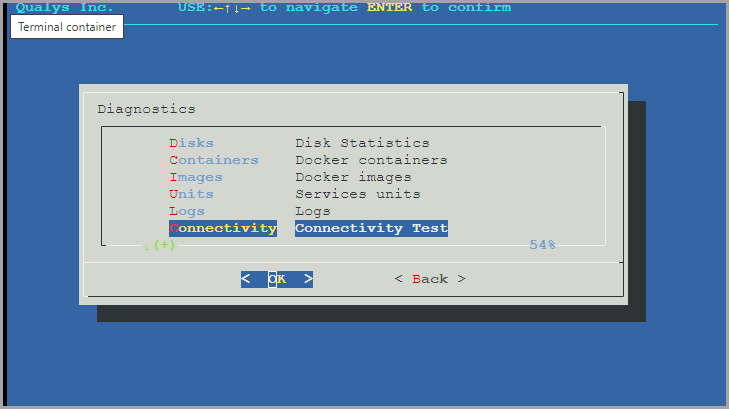
- We recommend running a connectivity test to ensure all Qualys services are reachable.
To run a connectivity test, follow these steps.
- Navigate back to the Configuration screen.
- Click Diagnostics > Connectivity Test.
If the VM Instance is configured on a private IP network, configure your upstream proxy network before appliance registration. Refer to the Proxy Servers section of the Qualys User Guide.
- Click Registration to register the appliance.
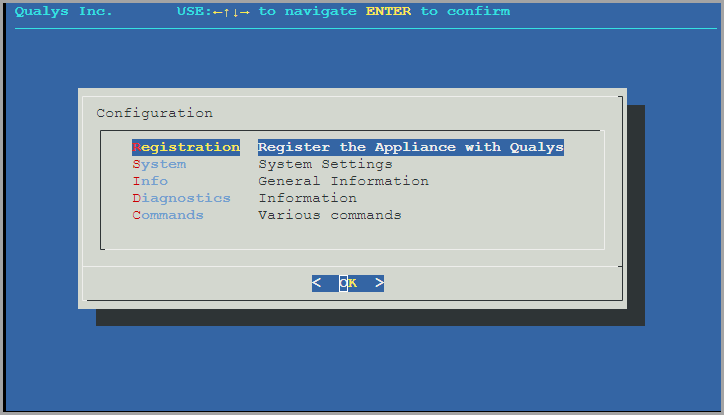
Follow the steps instructed in the Registration section of the QGS User Guide to complete the appliance registration.
Create VM Instance Using User Data
You can also configure a GCP VM Instances using the User Data setting. We recommend using the User Data option only when the VM Instance is launched using scripts.
Follow the steps below to create a VM using User Data.
- Navigate to the Advanced options on the VM deployment page during the GCP VM Instance creation.
- Click Management.
- In Metadata, click Add Item.
- Set the Key as user-data (Setting this key is mandatory).
- Keep the other settings as default.
- Add the following user data in the value field.
#cloud-config write_files:
- owner: root:root
path: /opt/qualys/cloud.env permissions: '0644' content: |
POD_SUFFIX= “Add your corresponding POD suffix here”
 The Text UI can be launched after you have created a VM using these steps. Refer to Access the QGS Text UI.