Nutanix Deployment Guide
This deployment guide contains the information for deploying, interacting, and configuring Centralized Appliance Management Service (CAMS) QGS Appliance on Nutanix Hypervisor.
Before You Start
Instance Snapshots/Cloning is not Allowed
Using a snapshot or clone of a Qualys Gateway Service instance to create a new instance is strictly prohibited. The new instance does not function as a proxy. All configuration settings and platform registration information is lost. This could also lead to failure of downloading patches.
Moving/Exporting Instance is not Recommended
Moving or exporting registered QGS instances from a virtualization platform (Hyper-V, VMWare, Xen Server) in any file format to the Nutanix cloud platform is not recommended.
Things to Consider
The following features are not supported in all cloud (private and public) platforms:
- WAN/Split network SETTINGS - “WAN Interface” option for split network settings is not supported. Only LAN/single network settings from text UI (hypervisor console), used for connecting to Qualys servers, are supported
- NATIVE VLAN - “VLAN on LAN” option for configuring Native VLAN is not supported
- STATIC VLAN (IPV4 AND IPV6) - "VLANs" option for configuring static VLANs is not supported
- STATIC ROUTES (IPV4 AND IPV6) - Option to configure “Static Routes” is not supported
- IPV6 ON LAN - Option to configure “IPv6 on LAN” is not supported
Prerequisites
- To get the latest version of QGS image, you need access to Qualys Cloud Platform. Contact Qualys Support to subscribe or sign up on the Qualys website.
- Qualys Gateway Service Appliance VM must be able to reach the Qualys backend services.
- Ensure to cover the minimum system requirements recommended in the Qualys Gateway Service User Guide.
|
Virtual Server |
Supported Versions |
File Format |
|---|---|---|
| Nutanix Hypervisor | AHVVERSION NUTANIX 20170830.453 and later | VHD |
Steps to Deploy Nutanix Hypervisor on QGS
This section outlines the step-by-step process for deploying Qualys Gateway Services on Nutanix Hypervisor.
Download the Virtualization Platform Image for Nutanix Hypervisor
Navigate to the QGS application > Click the Download dropdown > Select Download Virtualization Platform Image.
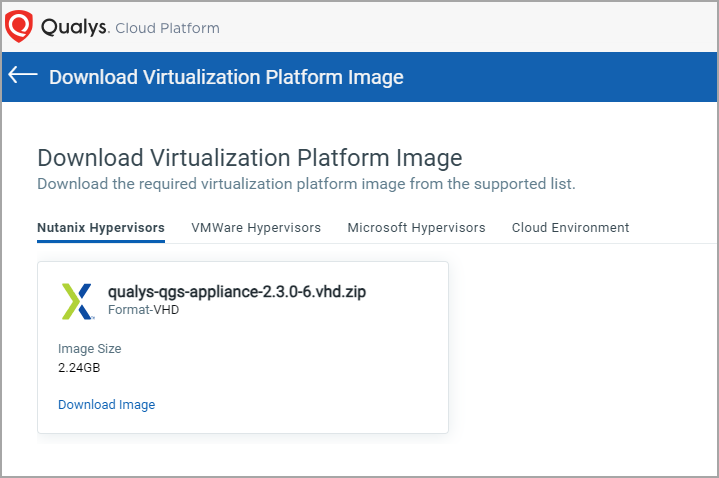
Select Nutanix Hypervisor and click Download Image.
A zip file is downloaded to your local system.
Extract the VHD File
Follow the steps for Linux or Windows to extract the VHD.zip file.
Linux
Run the #unzip qualys-qgs-appliance-2.3.0-6.vhd.zip command
The version mentioned above (2.3.0-6) is only for demonstration. Before you deploy the QGS appliance, check the latest Qualys appliance version.
This extracts a file in VHD format. For example, qualys-qgs-appliance-2.3.0-6.vhd
Upload this VHD file to the Nutanix Web Console. Follow the steps here.
Windows
You can extract the zip file using either a built-in or third-party extract tool.
After extraction, you can see the .vhd files. For example, qualys-qgs-appliance-2.3.0-6.vhd
The version mentioned above (2.3.0-6) is only for demonstration. Before you deploy the QGS appliance, check the latest Qualys appliance version.
Upload the Qualys Gateway Service Appliance Image (VHD Disk) in Nutanix Web Console
The Qualys Gateway Service Appliance image can be uploaded using the Nutanix Web Console.
- From the Home menu, go to Settings > Image Configuration.
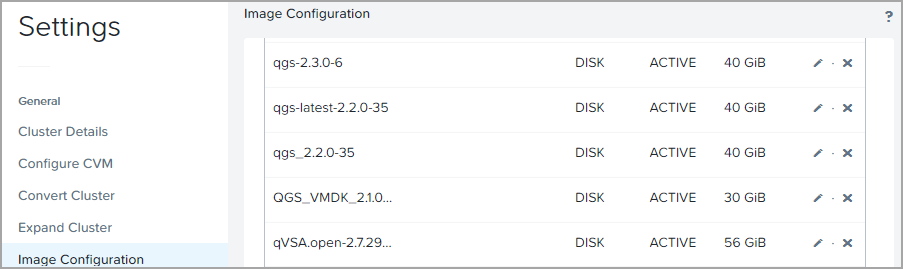
- Click the Upload Image button.
-
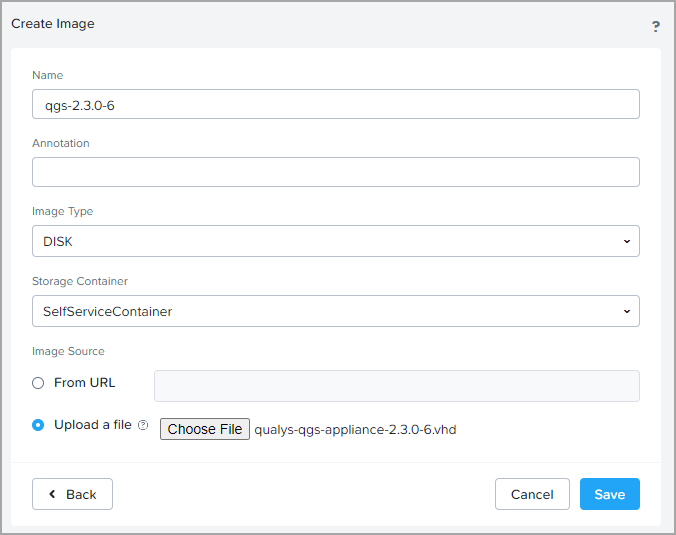
On the Create Image page, provide the following settings, and then click Save.
-
Image Type: DISK
-
Select a Storage Container
-
Image Source: click Upload a File and select the VHD disk image extracted earlier.
-
It will create the QGS Appliance image in the Nutanix environment.
Steps to Create the Qualys Gateway Service Appliance VM
The Qualys Gateway Service Appliance can be deployed using the Nutanix Web Console.
Deploying QGS appliance using Nutanix Web Console
Refer Qualys Gateway Service user guide for the system requirements.
- Go to VM and click Create VM.
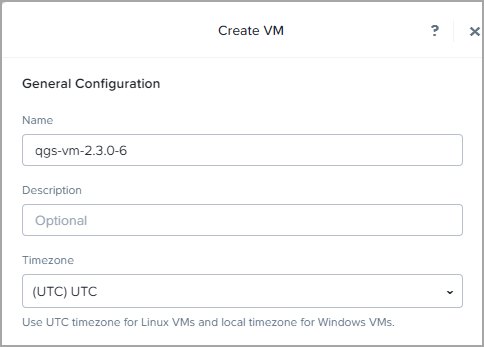
- For General Configuration, enter values for Name, Description (optional), and select a Timezone.
- For more on Compute Details, check the Qualys Gateway Service user guide.

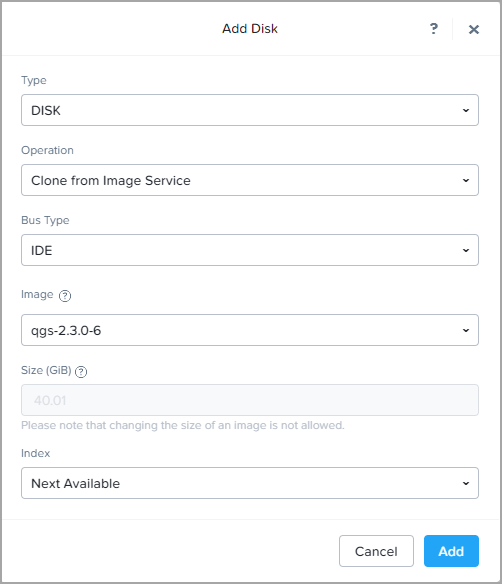
- For Disks, click Add New Disk.
-
Make the following settings, and then click Add.
-
Type: DISK
- Operation: Clone from Image Service
- Bus Type: IDE/SCSI
- Image: Select the uploaded Qualys Gateway Service Appliance image
-
- Click Add
-
If want to attach the secondary disk, then again Add New Disk link(Optional).
Check the Qualys Gateway Service user guide for secondary disk size and supported type requirements.
-
Again make the following settings,
- Type: DISK
- Operation: Allocate to Storage Container
- Bus Type: IDE/SCSI (select same as primary disk type)
- Storage Container: select the Storage container
- Size: Provide the 250GB
- Click Add.
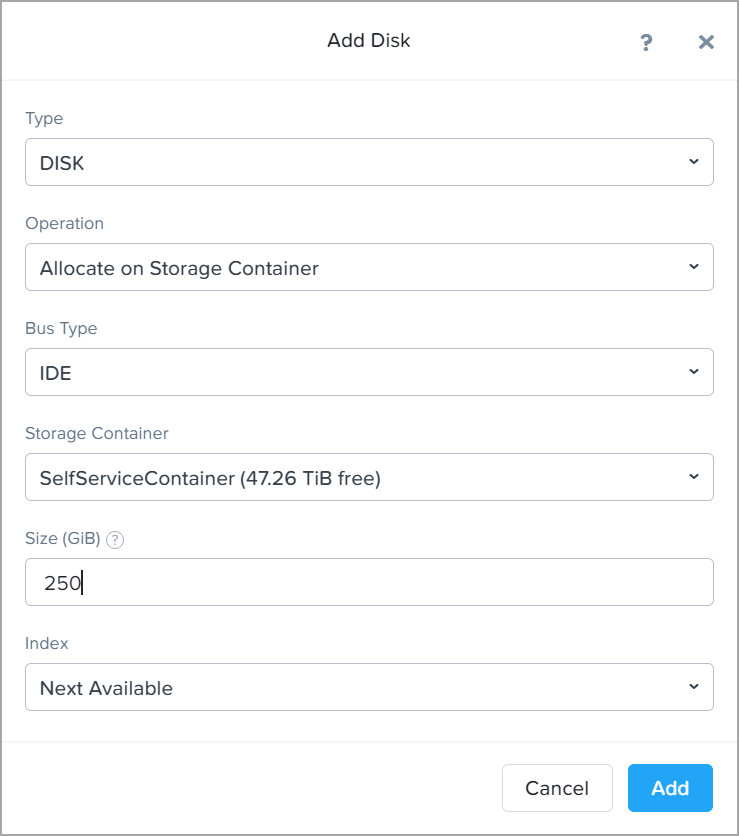
You can find the disk details after successfully adding the disk.

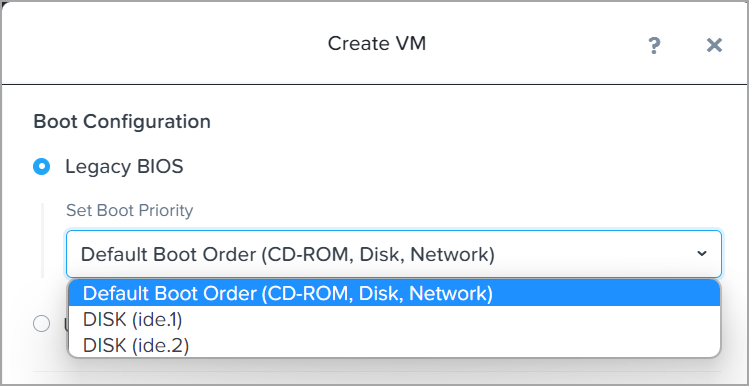
- For Boot Configuration, keep the default boot order or select the QGS bootable disk.
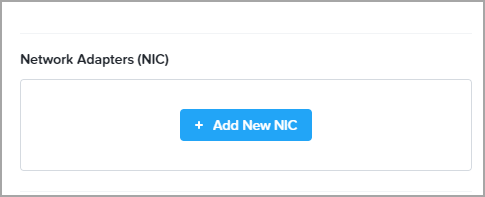
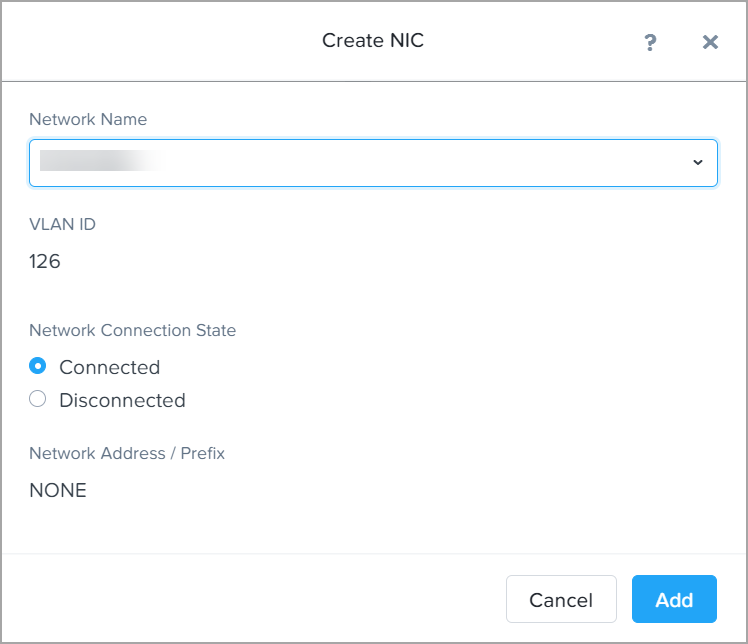
- For Network Adapters, click on Add New NIC. Select the VLAN Name and click Add.
- For Static IP configuration, select a VLAN name and click Add.
-
Click Save, and check the VM list for the created appliance.
-
Select the VM and Click Power ON, It will start the VM.
-
Launch the console to access the QGS Text UI.
Refer to the Qualys Gateway service user guide - Appliance to get the personlization code.
Refer to Qualys Gateway service user guide - Network Configuration to configure the network details (IP, DNS, etc.), and registration of the appliance.