OpenStack Deployment Guide
This deployment guide contains information on deploying, interacting, and configuring the Qualys Gateway Service (QGS) in the OpenStack environment. This document outlines the steps required to set up a Centralized Appliance Management Service (CAMS) Qualys Gateway Service (QGS) appliance for OpenStack. This process includes the installation of the VHD file in the OpenStack environment.
To learn more about the QGS application and its features, refer to the Qualys Gateway Service User Guide.
Pre-requisites
- To get the latest version of QGS image, you need access to Qualys Cloud Platform.
- Ensure to cover the minimum system requirements recommended in the Qualys Gateway Service User Guide.
Deploy the QGS Appliance in OpenStack Environment
Before initiating the QGS deployment, refer to the QGS User Guide to review the system requirements and other necessary configurations for customer environments. These requirements are essential to proceed with the deployment.
OpenStack Configuration
Follow the steps below to deploy the QGS Appliance Text User Interface from your OpenStack Console.
- Login to your OpenStack console.
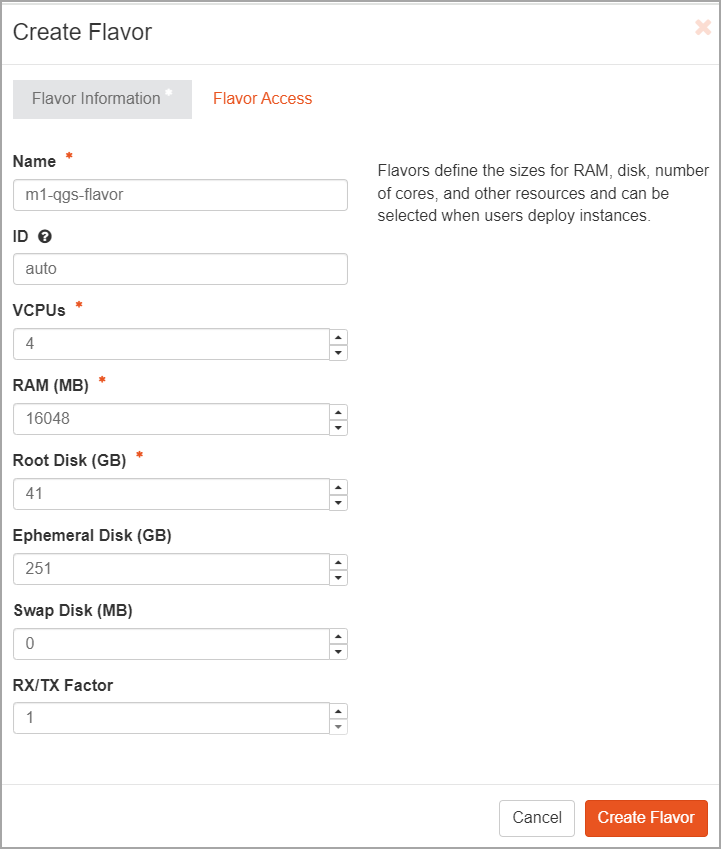
- Navigate to Admin > Compute > Flavor and create the flavor by providing the values in the following image. Next, click Create Flavor
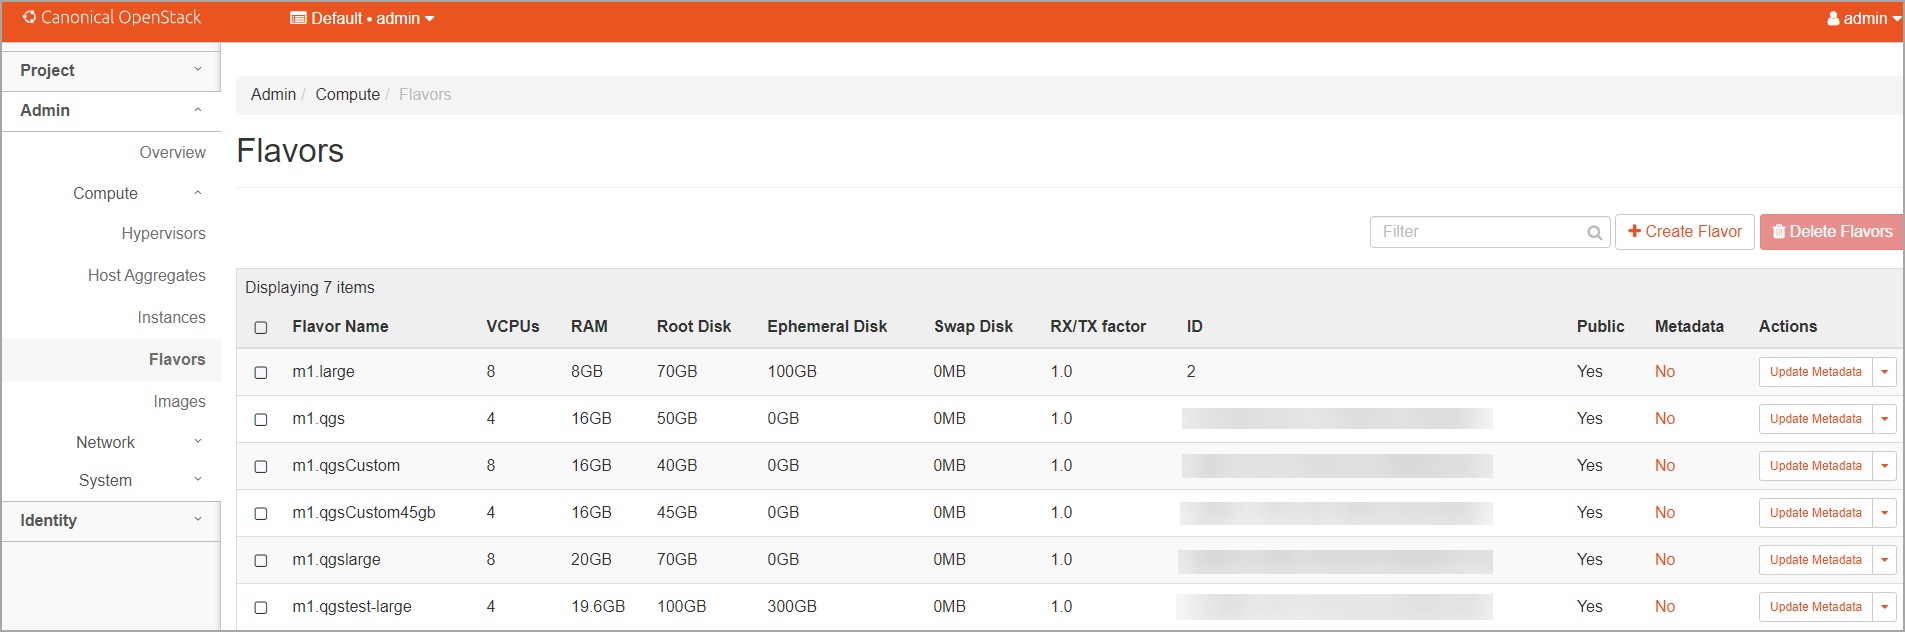
- The new flavor for the QGS Appliance is displayed.
- Navigate to Admin > Compute > Image and create the new image by uploading the latest QGS VHD image.
- Provide the Image Name.
- Choose the QGS VHD Image file from location.
-
Select the file format as VHD.
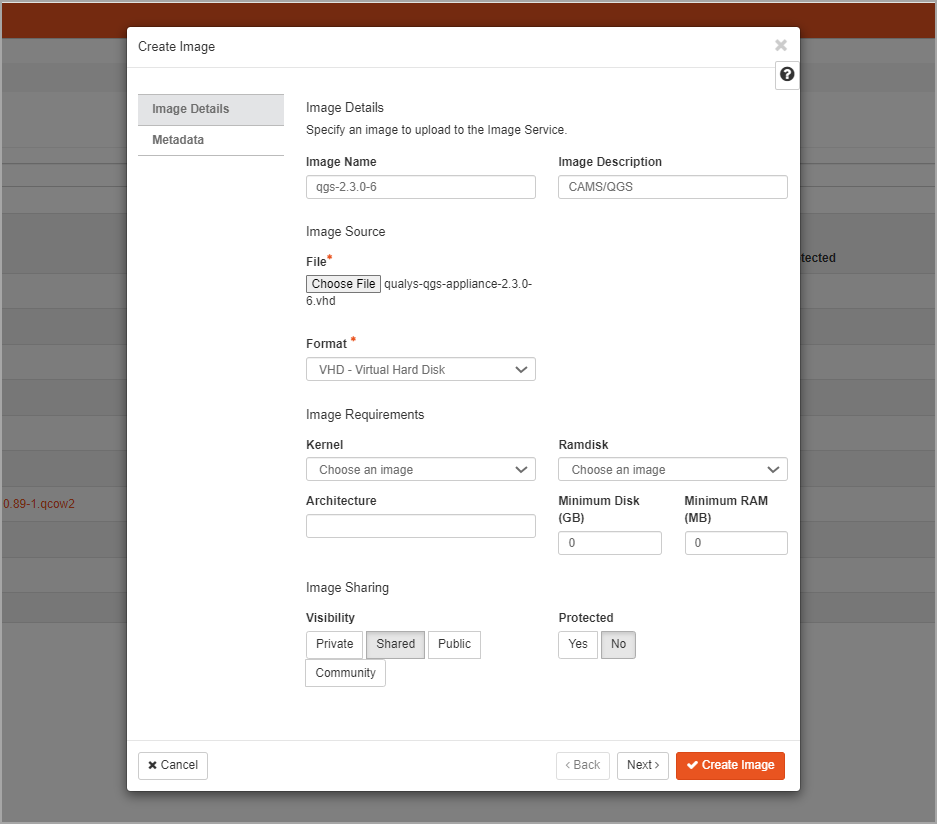
- Click Create Image.
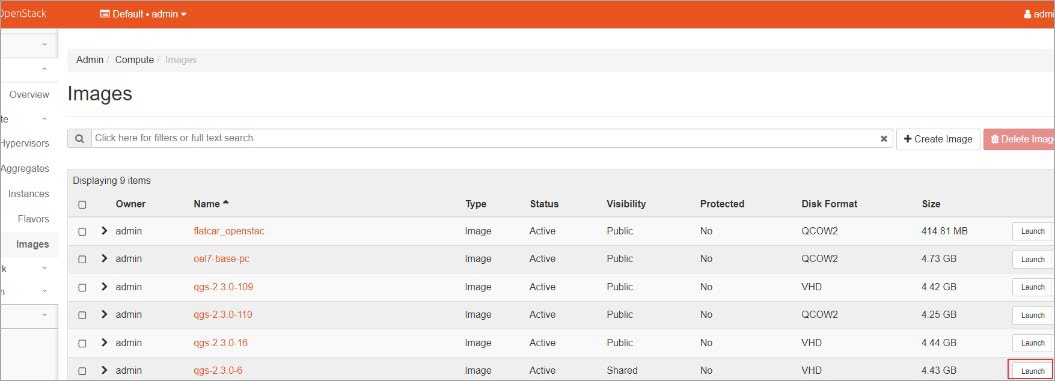
- Then select the created Image and launch the instance.
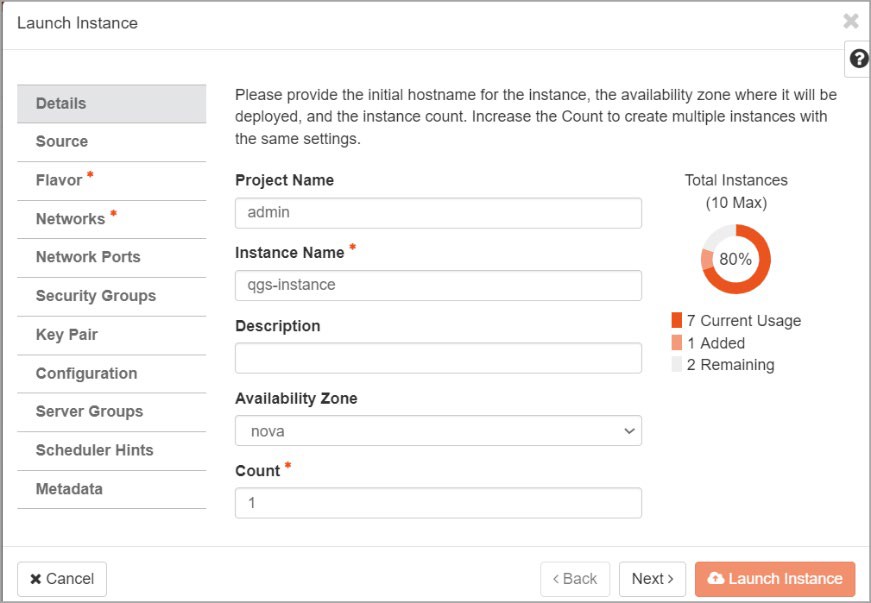
You must configure the following sections from the Launch Instance window. Start with providing values in the Details page.
- In the Details page, provide the instance name and description (optional). Click Next.
- In the Source page, select the boot source as Image and the QGS Image should be listed under the Allocated section. Click Next.
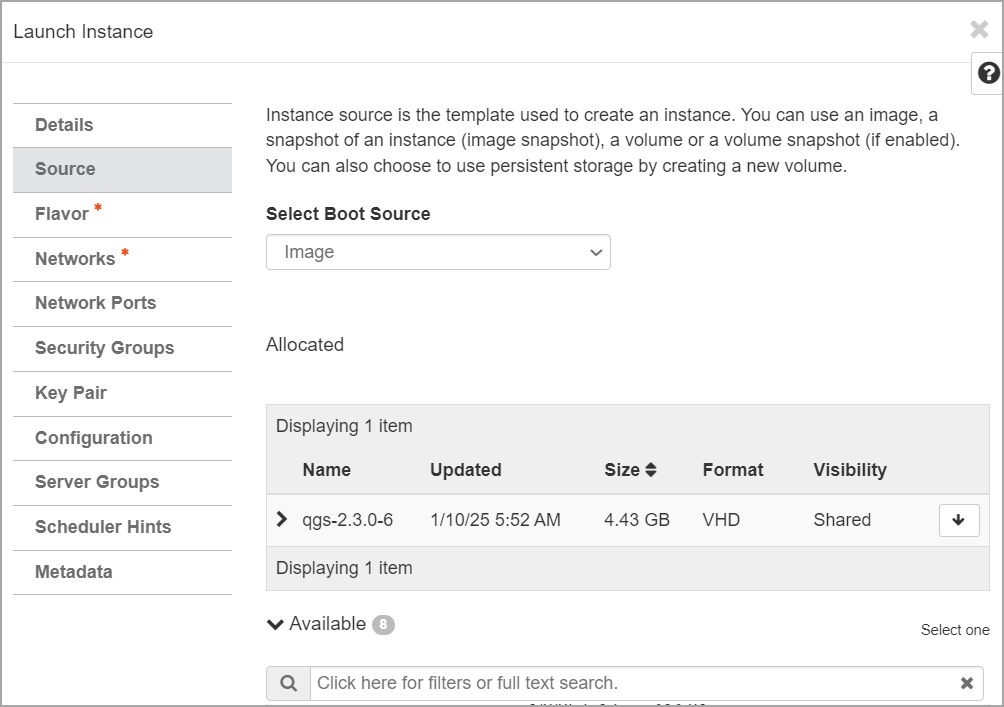
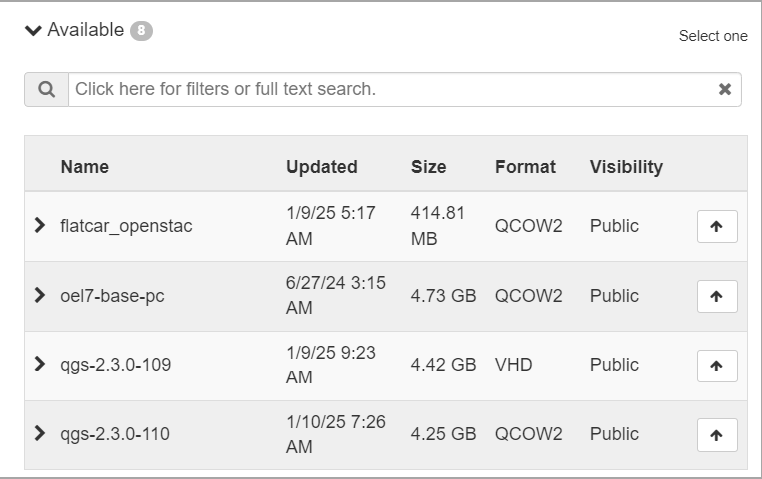
- If you are unable to find your image listed under the Allocated section, then scroll down to the Available section and select or search the list.
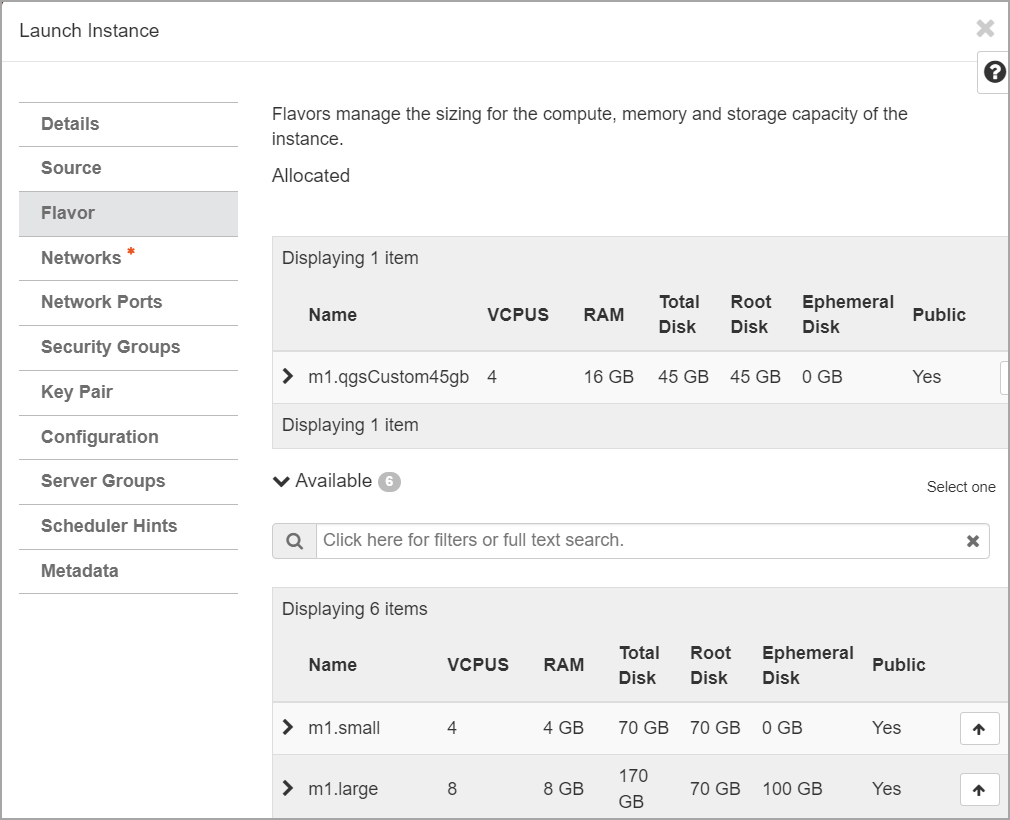
- In the Flavor page, the Flavor created according to the system requirements of the QGS should be listed under the Allocated section. If not, select or search for the Flavor from the Available section. Click Next.
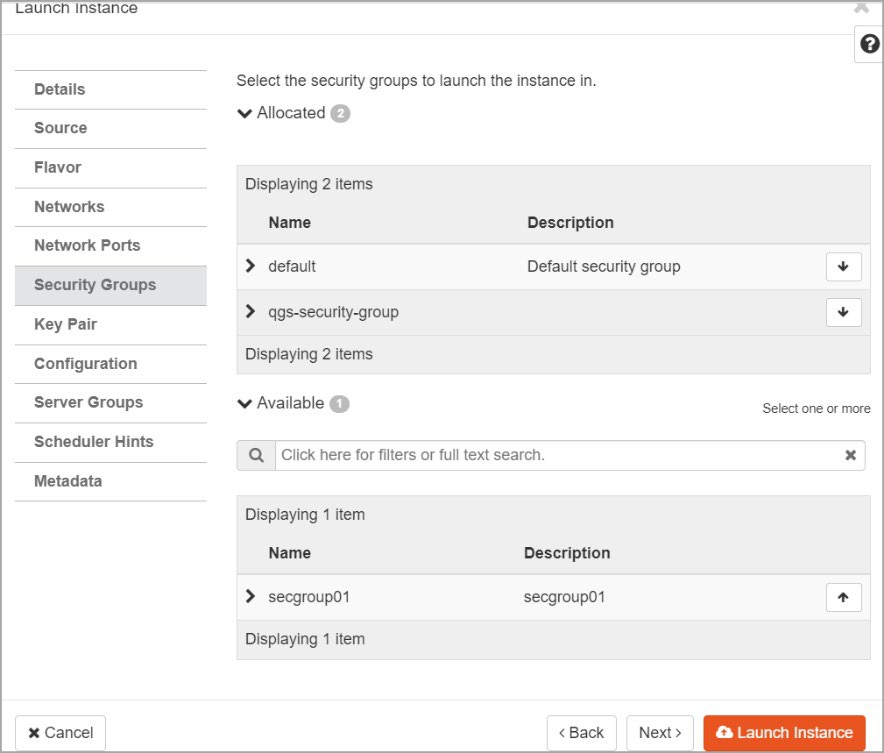
- In the Networks section, select the network and click Next. You can proceed to the Security Groups section.
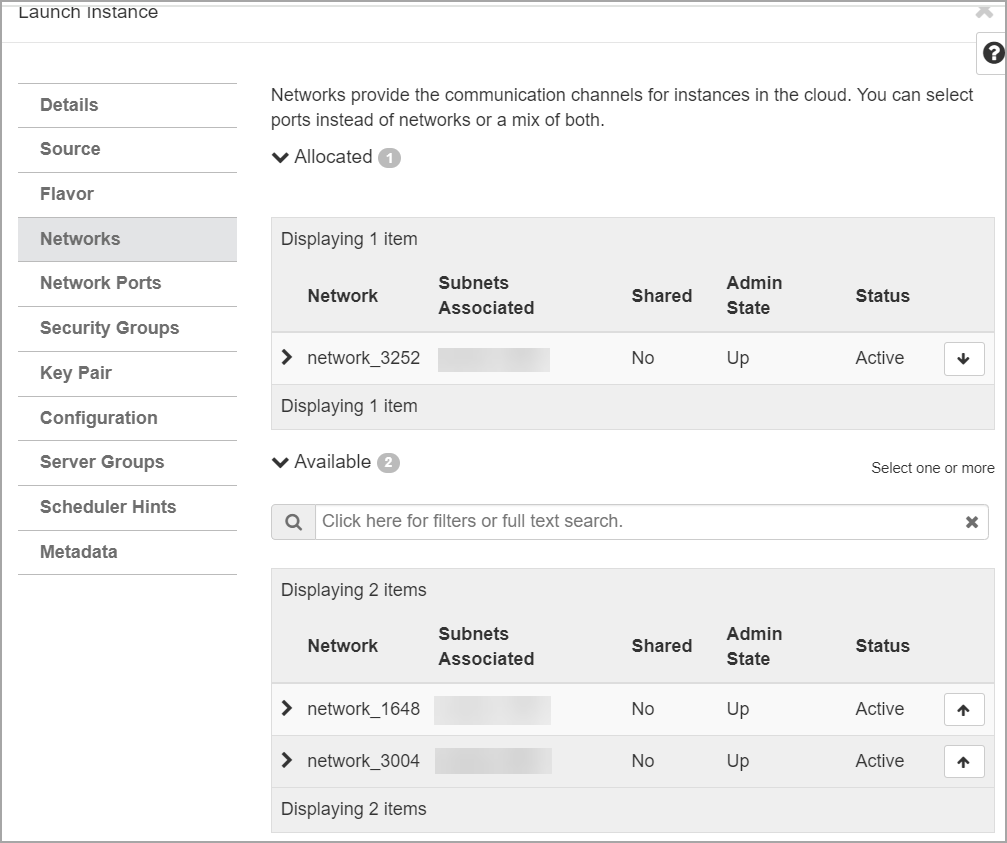
- In the Security Groups section, select the security group and ensure it allows the following ports:
- 1080 (default QGS Tunnel port)
- 8080 (default QGS Cache port)
- 22 (for SSH access)
(refer the “QGS Appliance Cache and Patch Mode Configuration” section of the QGS User Guide for more information on the required ports)
Once verified, click Next.
-
Skip the Key Pair page. It is not required for the deployment process.
-
Click Launch Instance. The instance is created in some time.
-
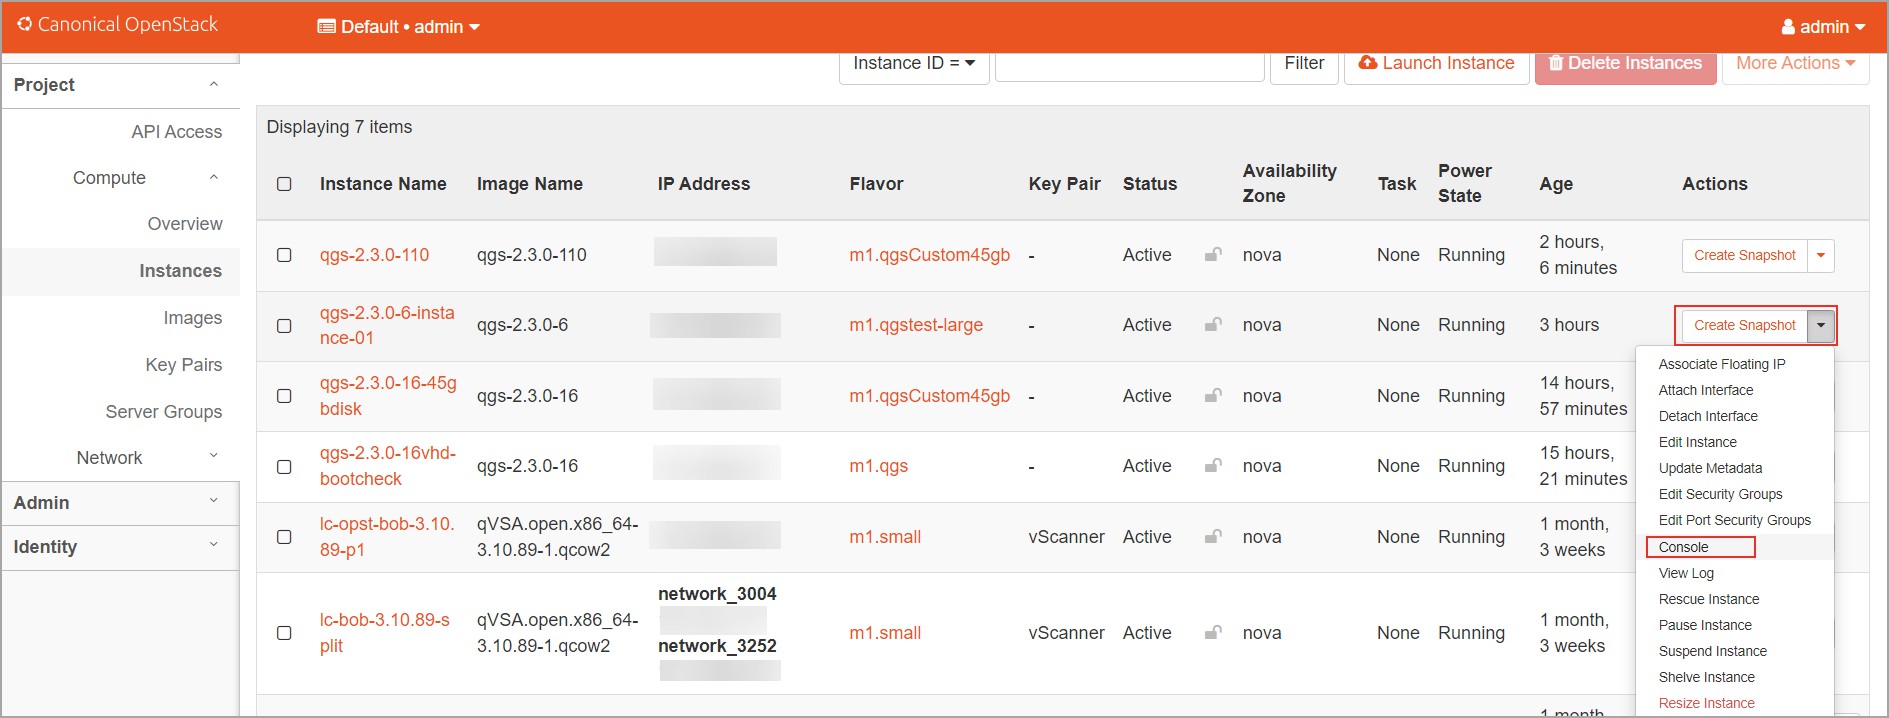
Now, navigate to Project > Compute > Instances.
-
Select the instance and access the console.
-
Another method to access the QGS Appliance Console is via the command line. Run the following commands.
.root@saqa-openstack01 ~(keystone)#
root@saqa-openstack01 ~(keystone)# openstack console url show qgs-2.3.0-6-instance-01
--insecure
++
+
| Field| Value ............................................................. |
++
+
| protocol | vnc|
| type| novnc ............................................................. |
| url| https://saqa- openstack01.eng.qualys.com:6080/vnc_auto.html?path=%3Ftoken%3Dxxxxxxxx-xxxx-xxxx-xxxx-xxxxxxxxxxxx |
++
+
root@saqa-openstack01 ~(keystone)#
Copy the highlighted URL from the above output and open it in a web browser. This provides access to the QGS Appliance Text UI.
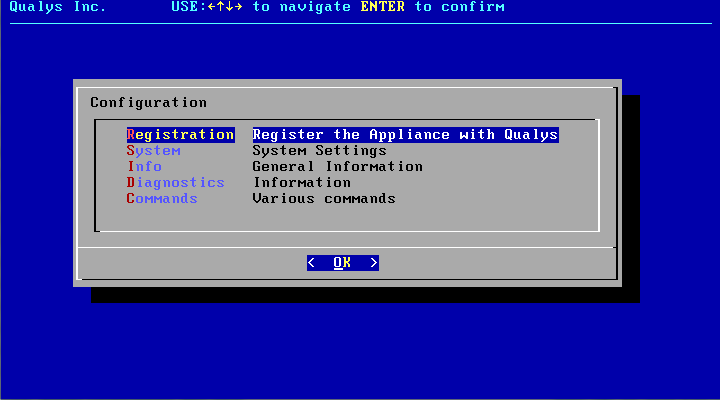
Once the QGS Text UI is successfully loaded, you can then configure the network and pod details by following the steps in the “Virtual Appliance Local Configuration” section of the Qualys Gateway Appliance User Guide - Local Configuration. The images and steps mentioned in the user guide are applicable to the OpenStack configuration. You can follow them exactly as mentioned to successfully configure the appliance.