Qualys Gateway Service User Interface Module
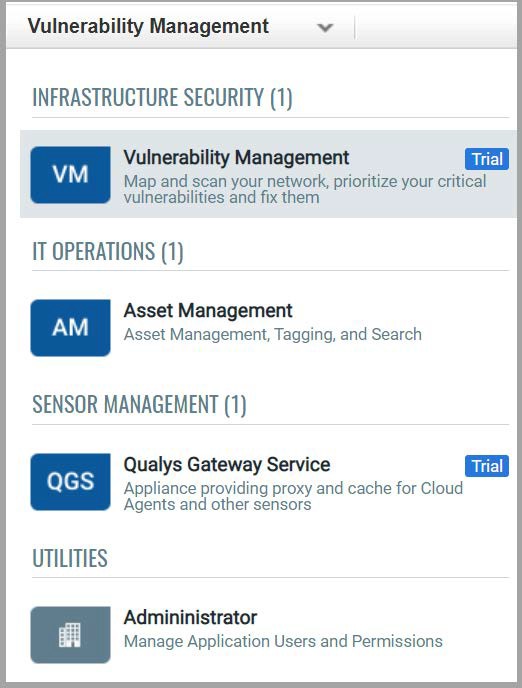
Qualys Gateway Service has a user interface module on the Qualys Platform. Customers with purchased or trial accounts see the QGS module in the module picker.
Use the QGS UI to create, configure, monitor, disable, and delete QGS appliances deployed in your organization.
In order to deploy a QGS virtual appliance, log into the Qualys Platform, select the QGS module, and follow the steps below. By default, QGS is configured as a proxy server only when deployed. Cache Mode and Patch Cache Mode are additional explicit configuration options to be performed to enable this functionality.
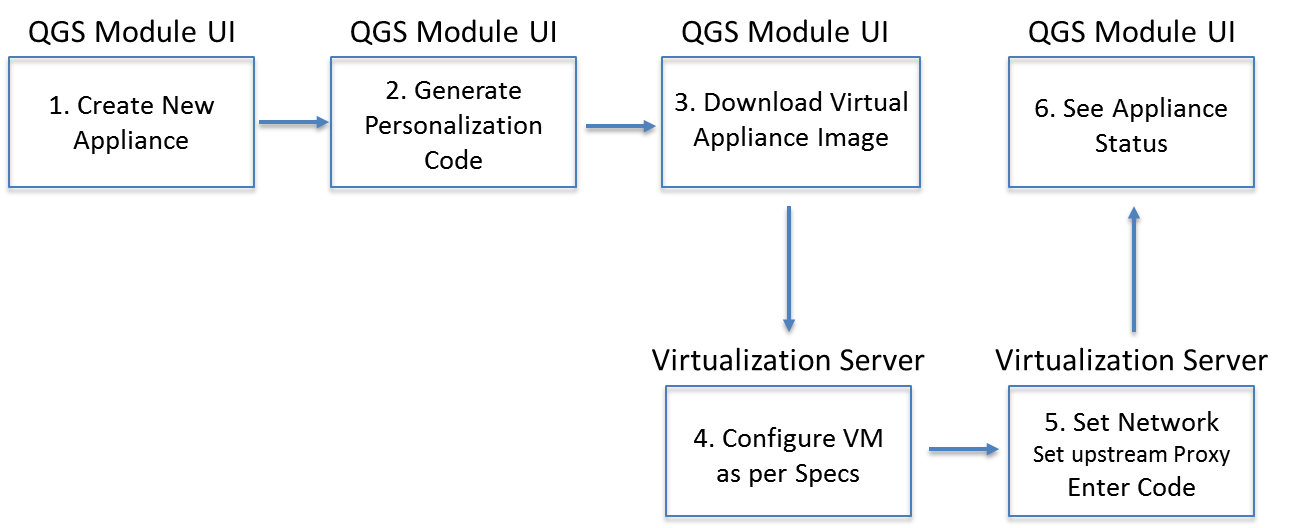
Qualys Virtual Appliance Configuration
Qualys Virtual Appliance Configuration
- Create a New Appliance. Give the appliance a name and enter a location, if desired.
- Generate a Personalization Code. Similar to the virtual scanner, you will need to enter this Personalization Code in the QGS virtual appliance local user interface to fully configure the appliance.
- Select Download Image and chose the appropriate file format for your environment
- Download/copy the virtual appliance image to your virtualization server.
- Configure the Virtual Machine properties following the specified resources.
Important: Enabling Patch Mode so that QGS can cache patches requires a second virtual hard drive to be added to the virtual appliance before Patch Mode can be enabled.
Note: The third hard disk is not supported and would not be recognized on the CAMS/QGS appliance to use the patch mode. We recommend using only one extra hard disk of 250GB or more to use the patch mode.
- A minimum disk size of 250GB is required.
- Only a single secondary virtual hard drive will be recognized as available capacity; extending the second QGS volume via multiple virtual hard drives is not supported.
- Start the image.
Note: Console access to the running image is required to configure the appliance.
- Use the console-based user interface to configure the virtual appliance for networking, DNS, time server, and optional upstream proxy configuration (see instructions below).
- Validate that the appliance can successfully communicate with the Qualys Platform.
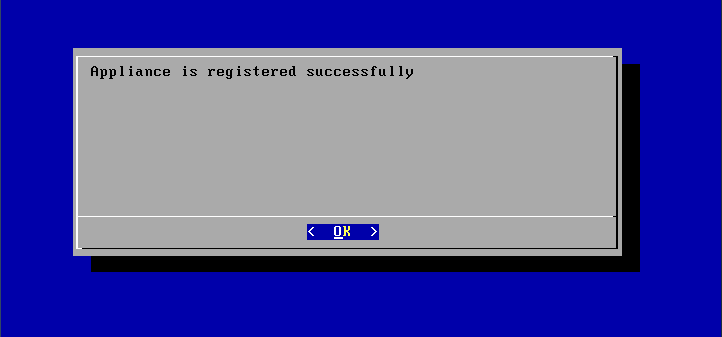
- Register the Appliance with the Qualys Platform.
The QGS Appliance supports a Diagnostic mode to help accelerate Qualys Customer Support troubleshooting and problem resolution, primarily for initial network setup and registration issues. Refer to the section below on Diagnostics Mode.
Qualys Gateway Service Module User Interface
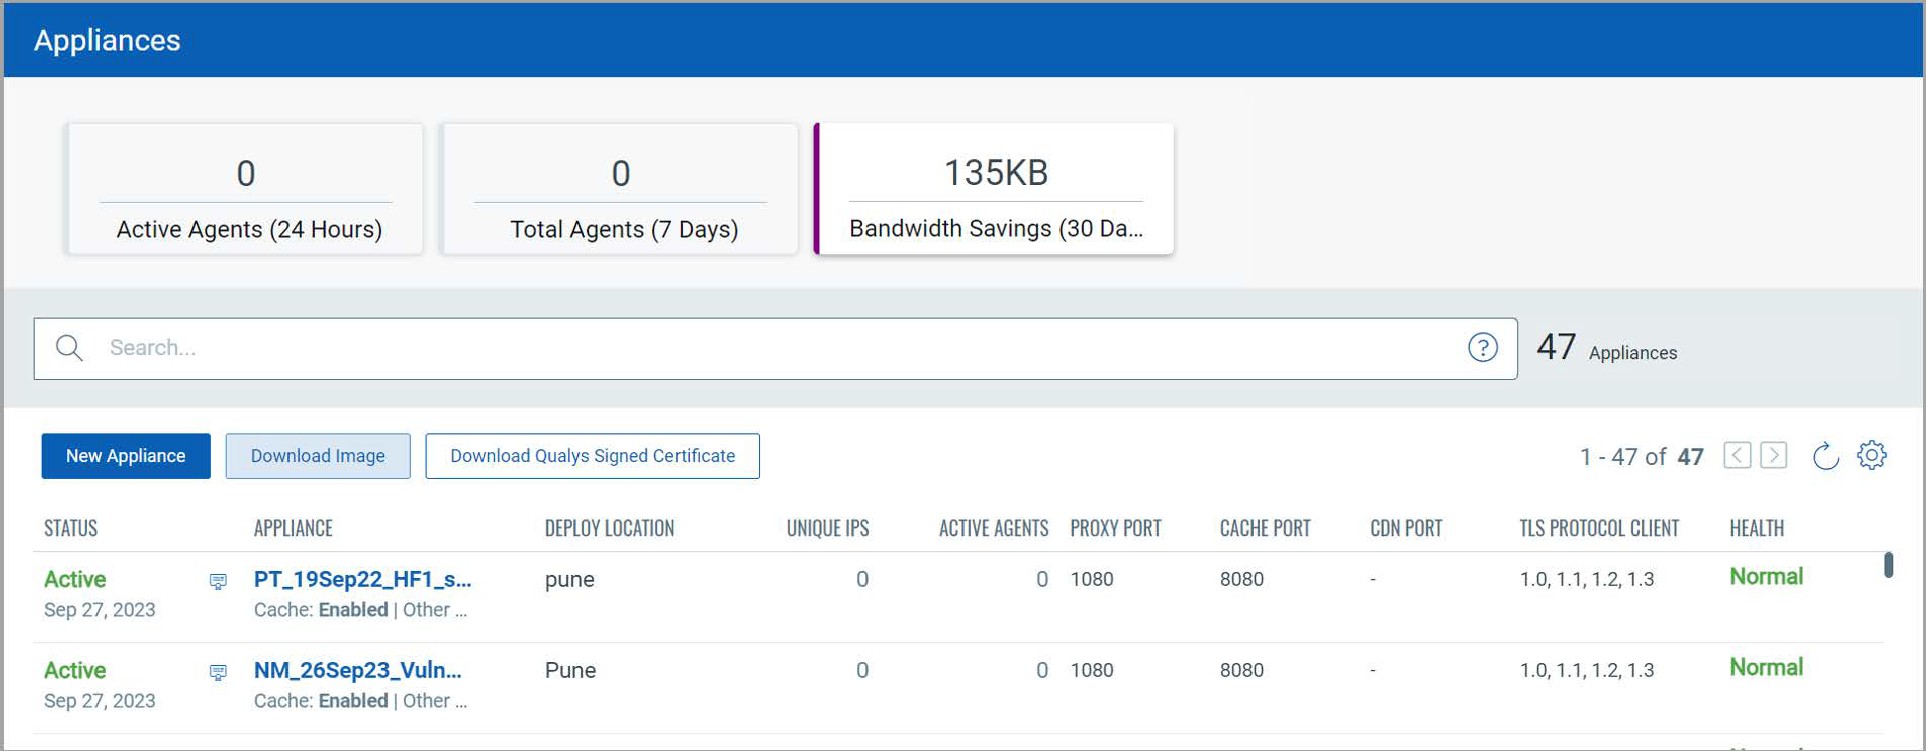
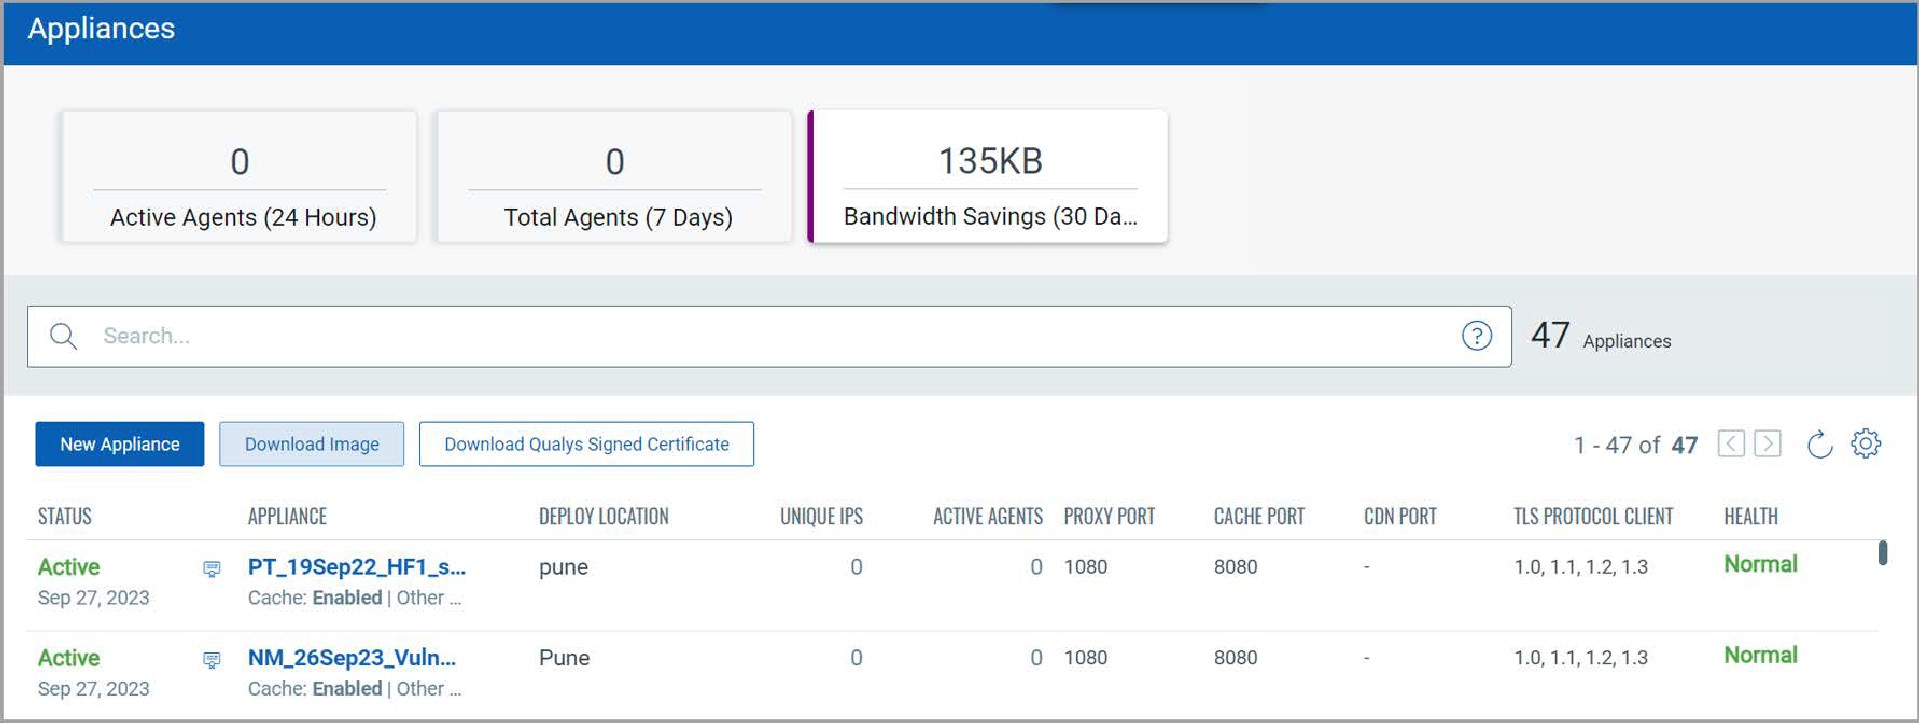
The Activity Summary widgets provide aggregate activity information for all QGS appliances in the subscription. Active Agents and Total Agents count the number unique agent IPs connecting through all appliances. Bandwidth Savings is calculated in cache mode.
- Status: This column shows the current status of your appliance. Appliances with common CA certificate enabled will be shown an icon (Highlighted) on the appliance list page.
- Unique IPs: This column shows the count of unique IPs which have communicated through the QGS appliance proxy port during the last 60 minutes.
- Active Agents: This column shows the number of active agents which have communicated via the QGS appliance cache port during the last 60 minutes, with QGS and Cloud Agent configured to use Cache mode.
In Proxy mode, you’ll see only unique IPs count on QGSUI, while in Cache mode you’ll see count of active agent and unique IPs on QGSUI.
To create a new appliance, click New Appliance.
Create a New Appliance
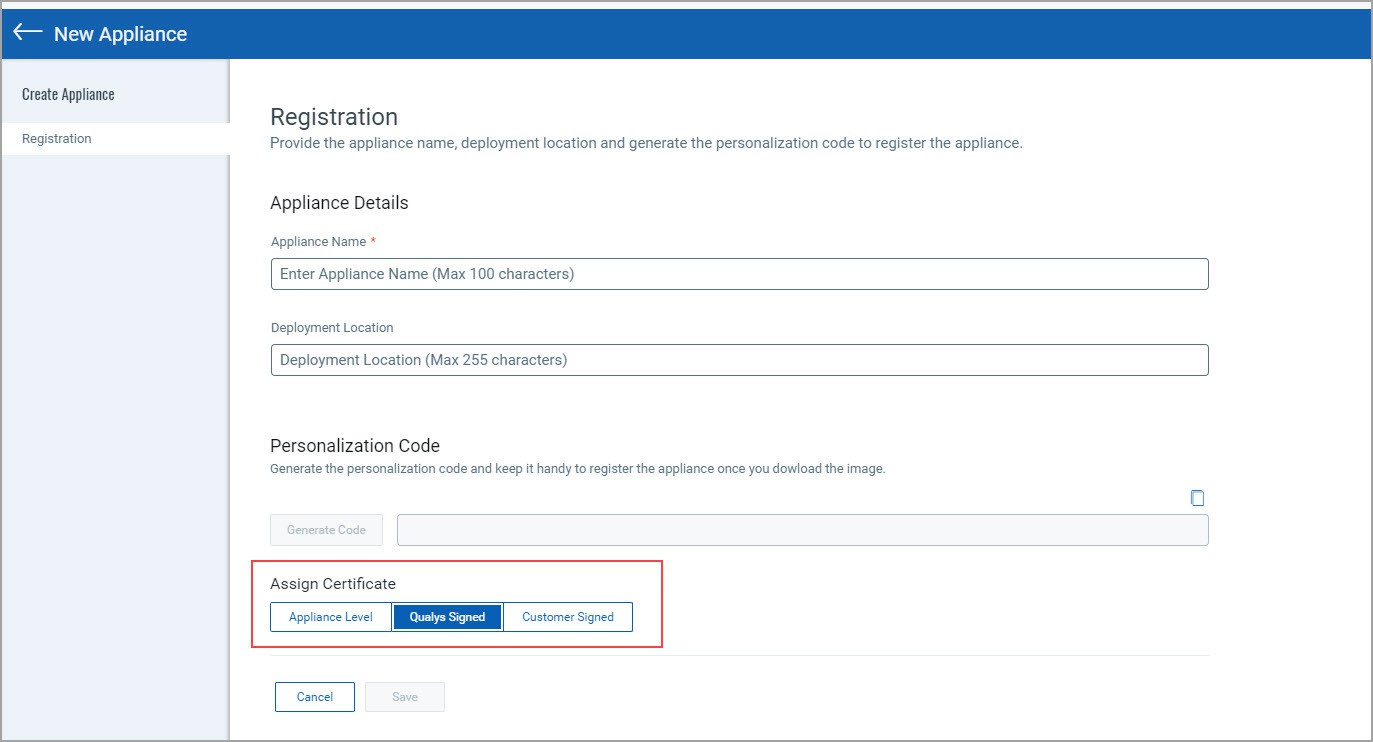
While creating a new appliance/personalization code, you can chose the appliance certificate type from the "Assign certificate" section.
A Qualys Signed certificate is a common certificate. It can help you to deploy a single certificate across all the cloud agents meant for the particular appliance.
If you want to use a common certificate while registering the appliance, then click Use Common Certificate checkbox.
Note: We recommend to use the Common CA certificate for all the appliances. An Appliance Signed certificate is a certificate specific to that appliance.
A Customer Signed certificate is signed by the customer from the Certificates tab of the QGS UI. Read more about creating Customer Signed certificates at Upload Certificates.
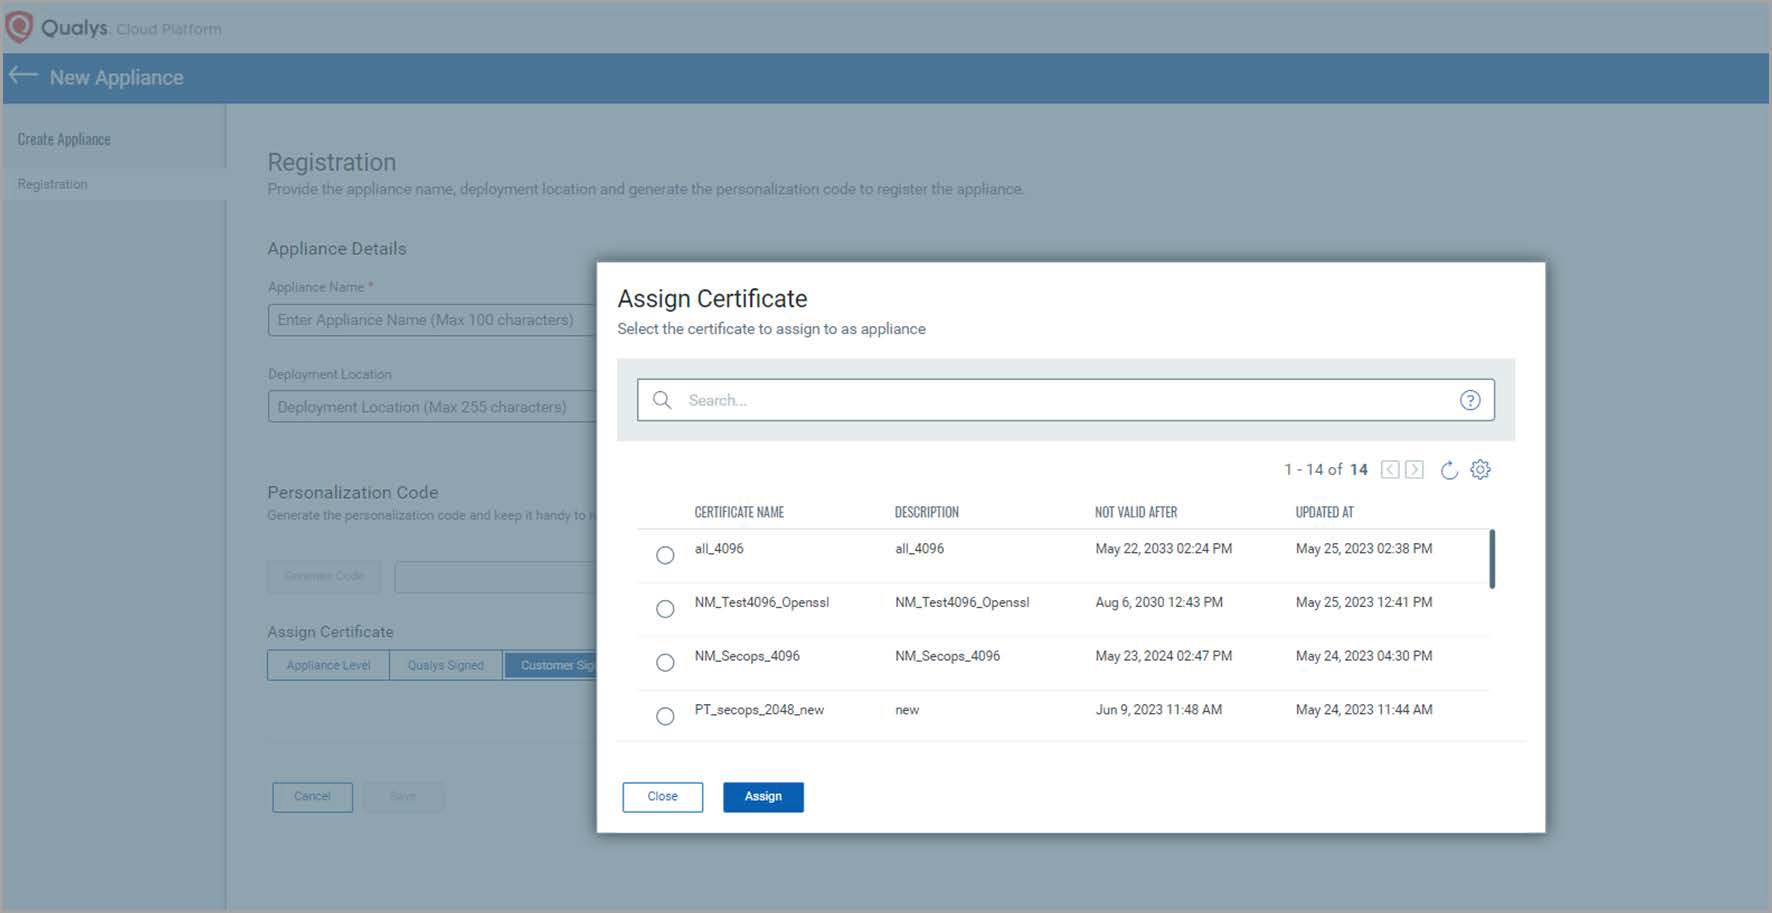 When you select the customer-signed certificate, you can see the below window to assign the custom certificate while generating the personalization code.
View List of Appliances and their Status

The newly created appliance status is shown as Unregistered until you follow the registration steps. Refer to Virtual Appliance Local Configuration to learn more.
A subscription-level common CA is available instead of appliance specific certificate on the appliance list if appliances are registered with the Qualys Signed certificate option.
Appliances with Qualys Signed or Customer Signed certificate enabled will be shown an icon as highlighted on the appliance list page. Appliance-level certificates do not have the icon displayed.
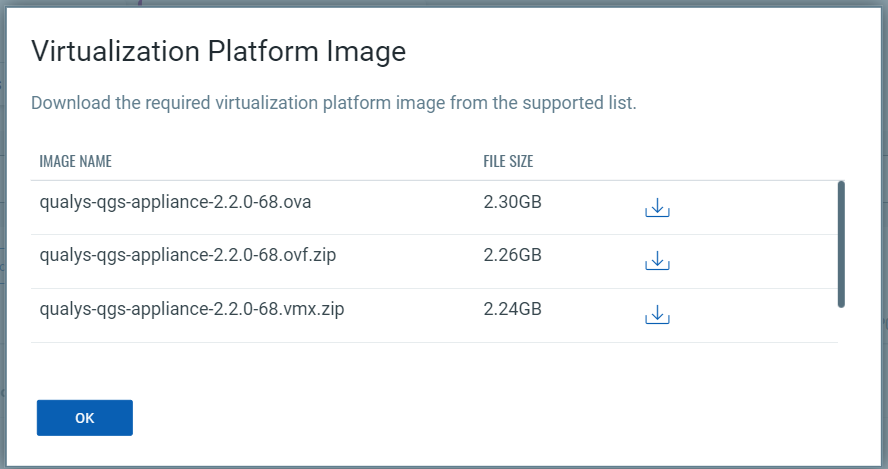 Download Image of the Virtual Appliance
Download the virtualization platform image for the appliance from the given list.
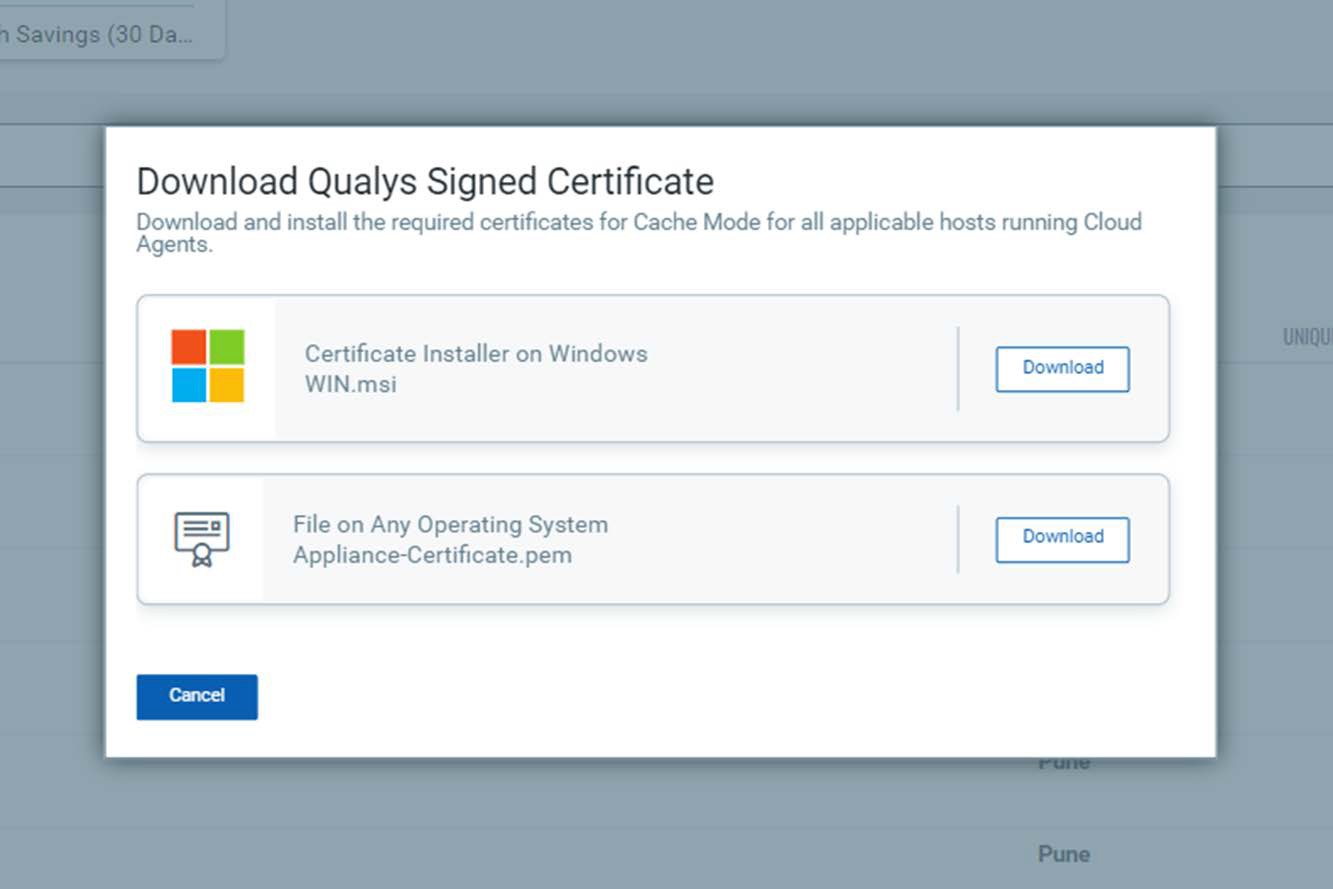
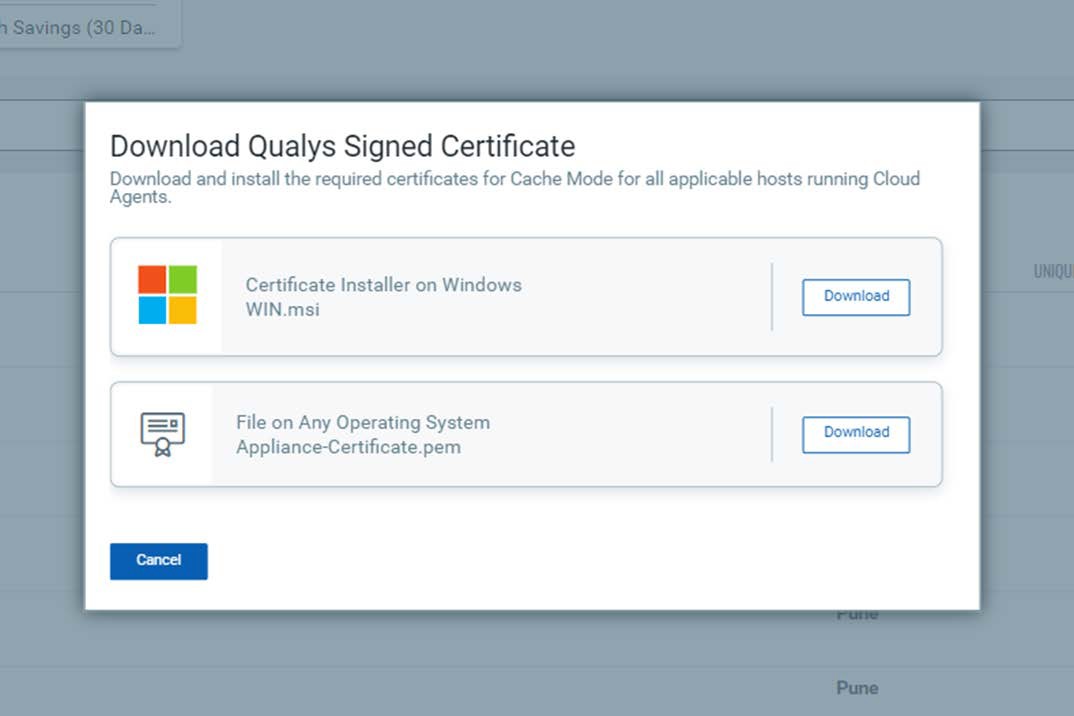
Download Qualys Signed Certificate
You can download the Qualys Signed certificate from the appliance details page or the appliance list page.
Note: To download the Qualys Signed Certificate, you must create and register a new appliance with the Qualys Signed certificate option enabled. After registering the appliance with a Qualys Signed certificate, it takes approximately 15 to 20 minutes to generate the Qualys Signed certificate.
After Successful Setup and Registration, the Appliance has Active Status
 To know more about registering your appliance, refer to Virtual Appliance Local Configuration.
Identifying the Appliance Certificate
 The appliances registered with custom certificate displays a different icon on the appliance list page.
Click the appliance name to identify the Certificate Name and Certificate Type associated with it.
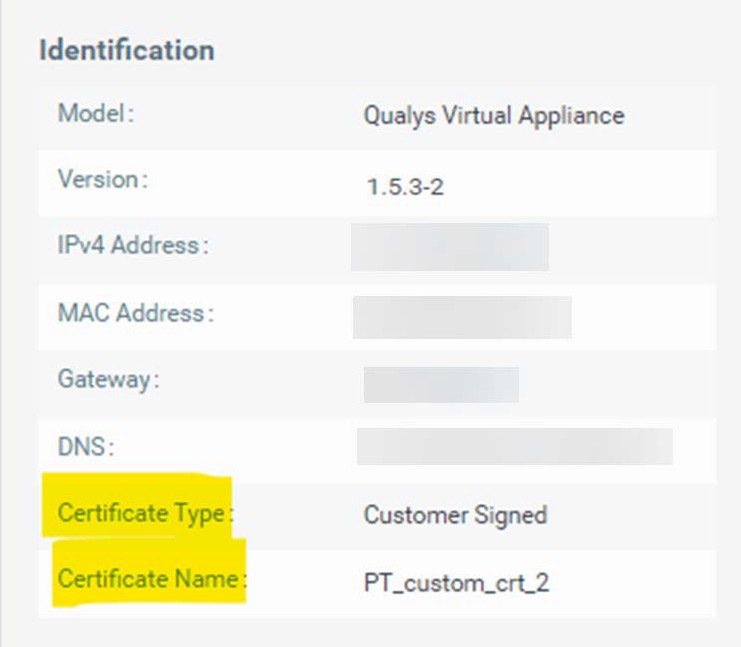
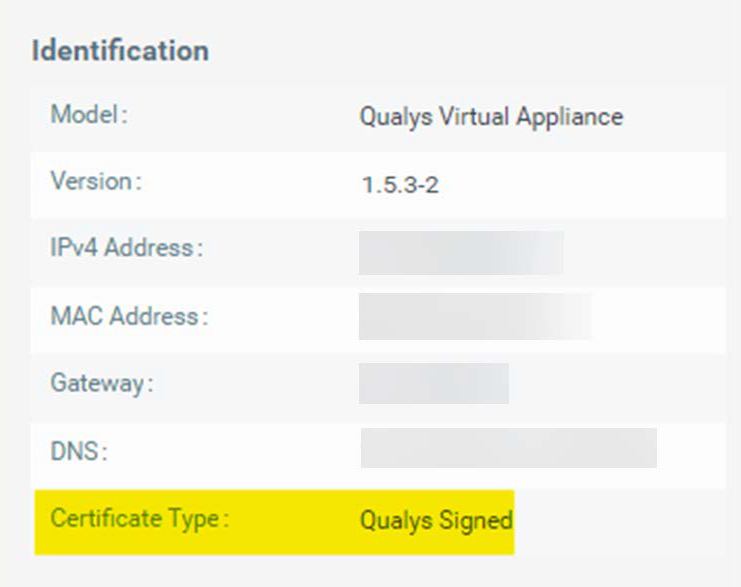 Appliances with Qualys Common CA will display the certificate type as “Qualys Signed”. Appliances with Appliance level certificate shows the certificate type as “Appliance level”.
View Details, Stats, and Logs of an Active Appliance
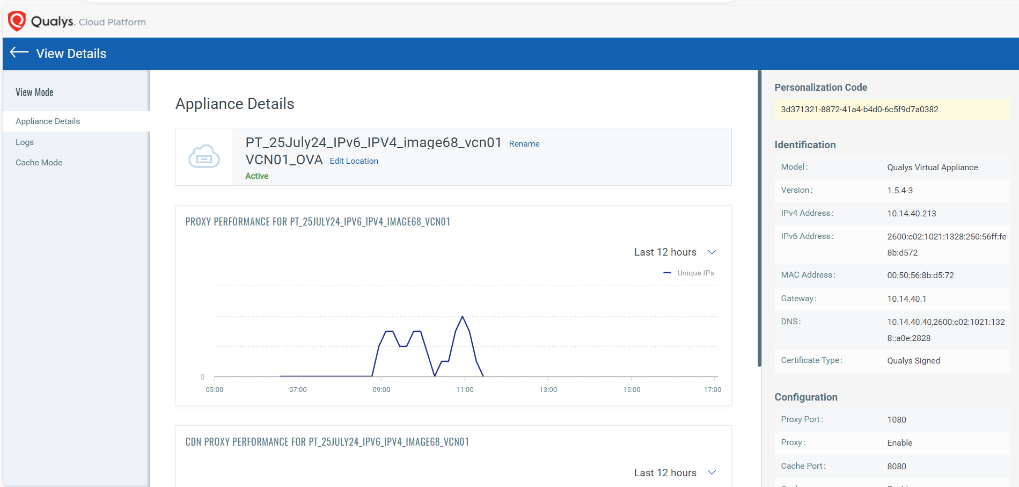 The Performance graph shows connection counts by unique agent IP addresses over the time period selected.
Allowed Domains: This option displays your allowed domain's information.
Authorized IPs: This option displays the IPs of the agents allowed to interact with the appliance.
IPv4/IPv6 Address: This option displays which internet protocol this appliance is configured in and its address.
Upload Certificates
 You can also choose to add your own certificates to the appliance instead of using the Qualys Common CA or appliance-level certificates. The QGS UI offers the Certificates tab, which allows you to upload your organizational certificates (including root certificates, intermediate certificates, and issuing certificates) and your private key, which is required to decrypt the traffic encrypted with your public key.
To upload the certificates to the QGSUI, click the Upload Certificate button on the certificates page.

The Upload Certificate screen appears. You can upload the intermediate certificate's Root, Intermediate, and Private keys in the respective upload sections.
You can find the list of uploaded certificates listed on the Certificates tab. Provide the following values:
Common name - A unique name given to the certificate to identify the certificate.
 Description - Provide the description of the certificate.
Upload Certificate - You can upload the Root certificate, Intermediate certificate and Private Keys of the Intermediate certificate on the Upload Certificate section. The Intermediate certificate is obtained from the Root certificate and the Private Keys can be generated from the Intermediate certificate.
Note: QGS supports only sha256 based certificates.
Click on Save to save the uploaded certificate. You can find the list of uploaded certificates listed on the Certificates tab.
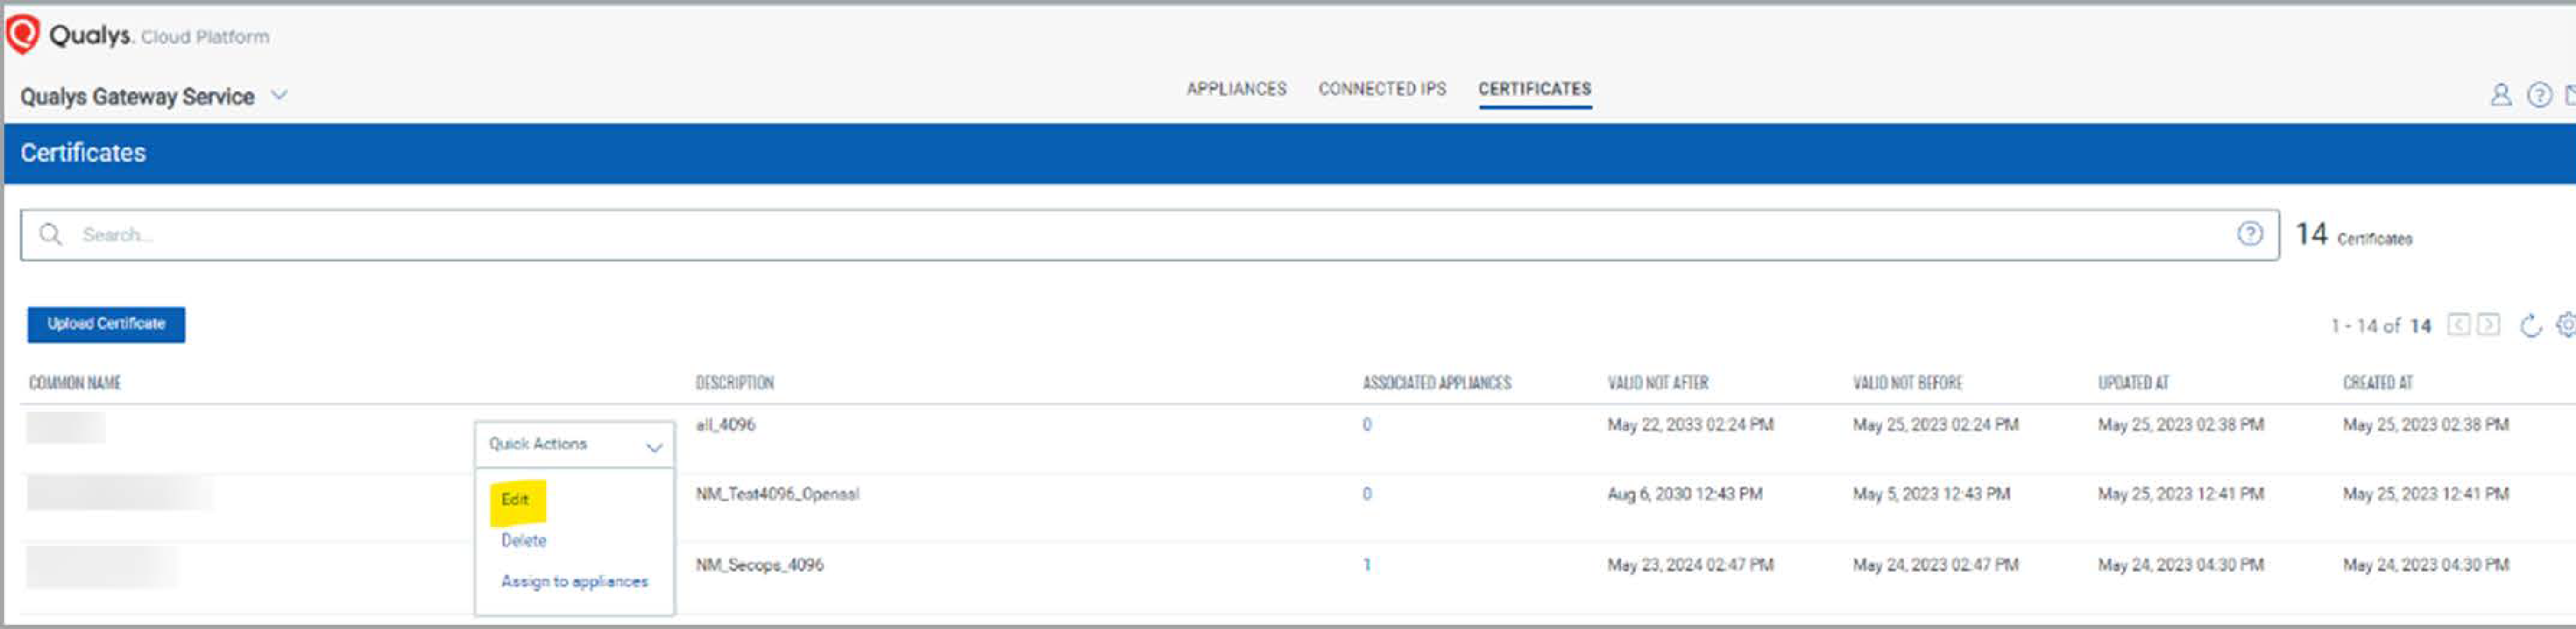 You can edit the certificate from the quick actions menu.
Note: When uploading your certificate, ensure that a new valid set of CA certs is uploaded before the existing ones have expired. Failure to do this results in the agents being unable to communicate with the platform via QGS.
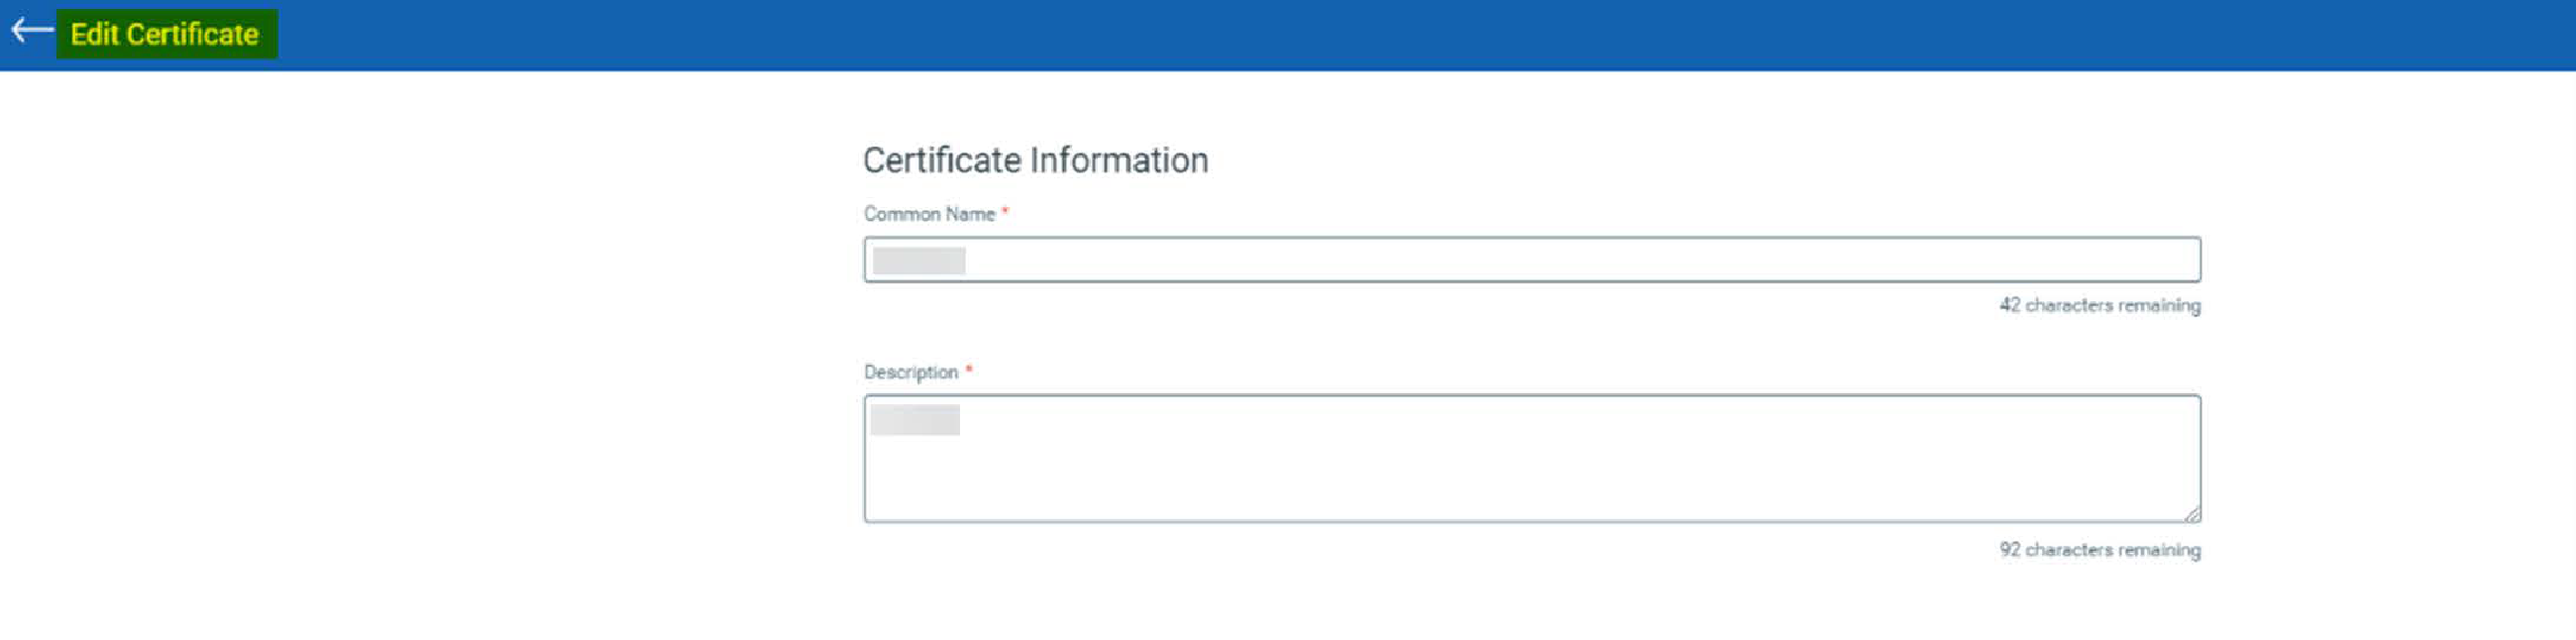
You can only edit the common name and description of the uploaded certificates.
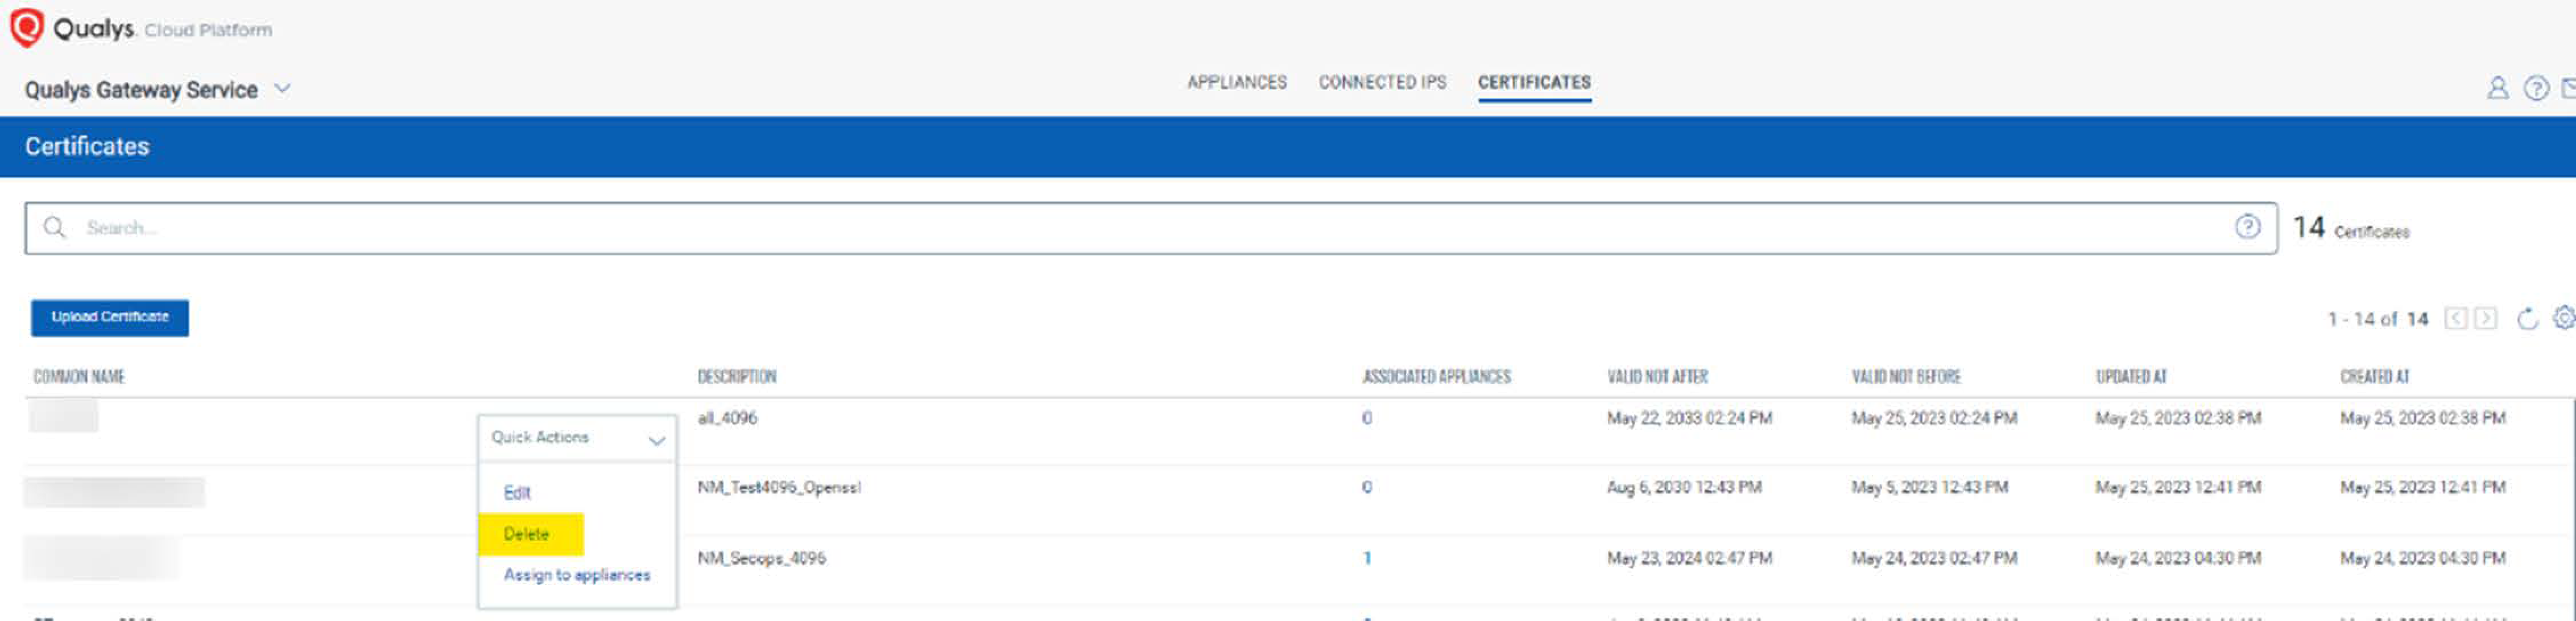 You can also delete the certificates from the quick action menu.
Assign Certificates
Once you have successfully uploaded your certificates, you can assign them to any appliance. The Uploaded certificates can be assigned to the Qualys-signed, Appliance- level appliances from the Assign to appliances option of the Quick Action menu.
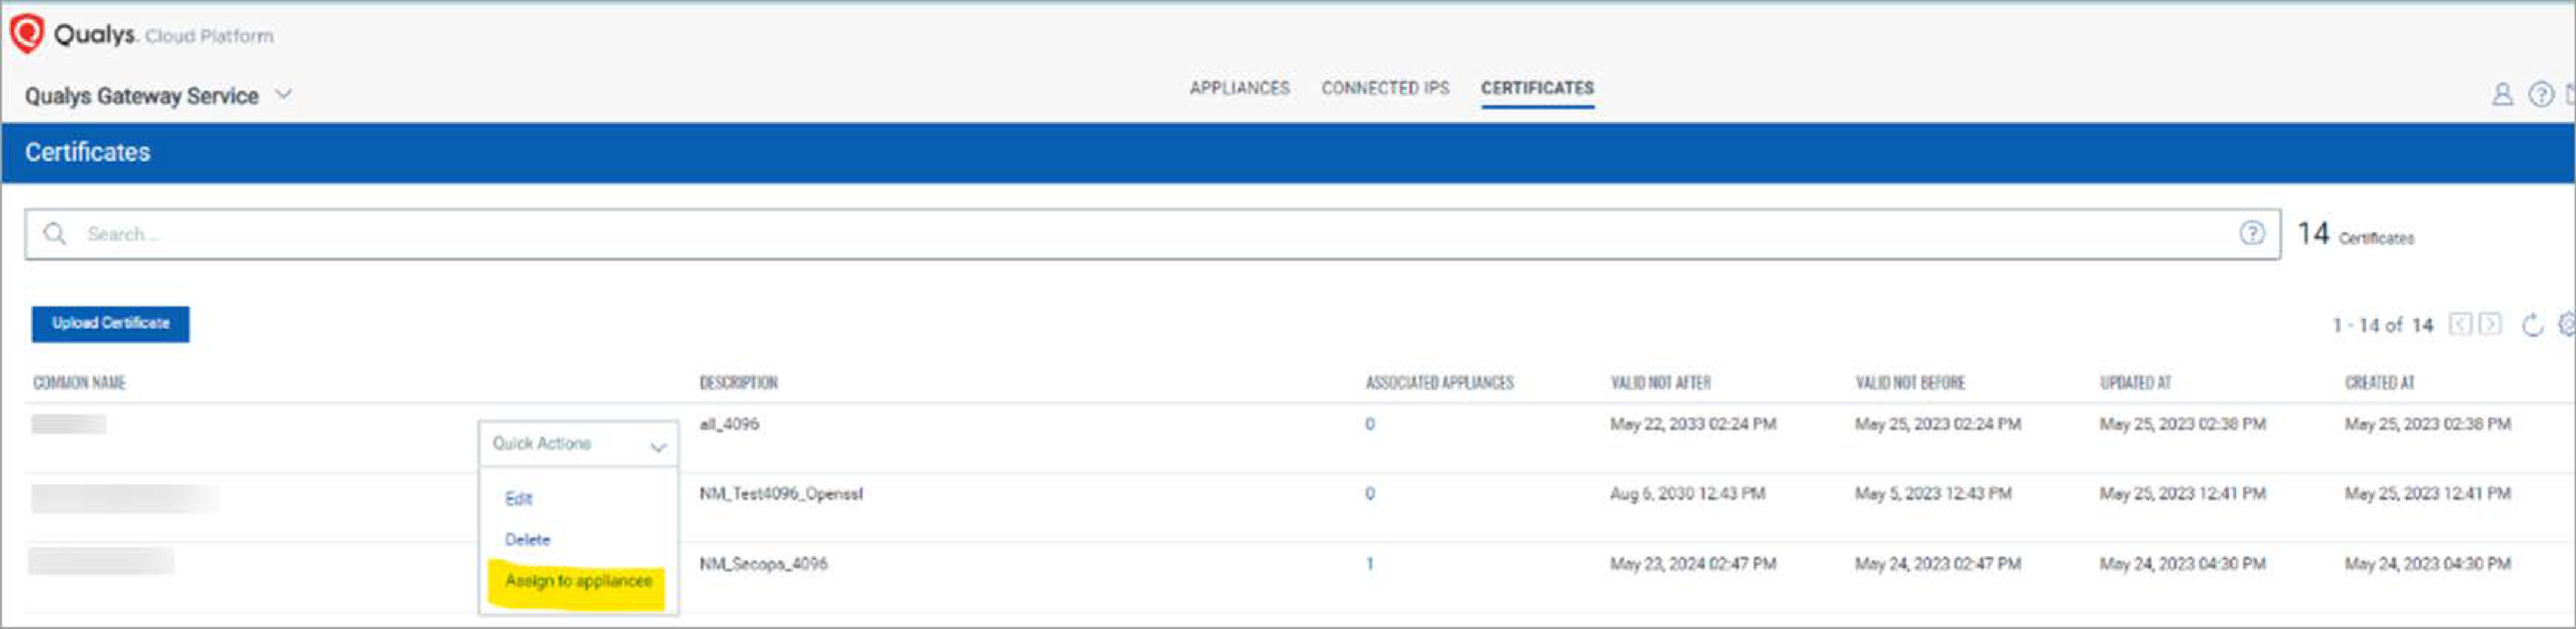
After clicking Assign to appliances, a list of the appliances with the cert_type as Qualys- signed and Appliance-level certificate are listed on the appliance.
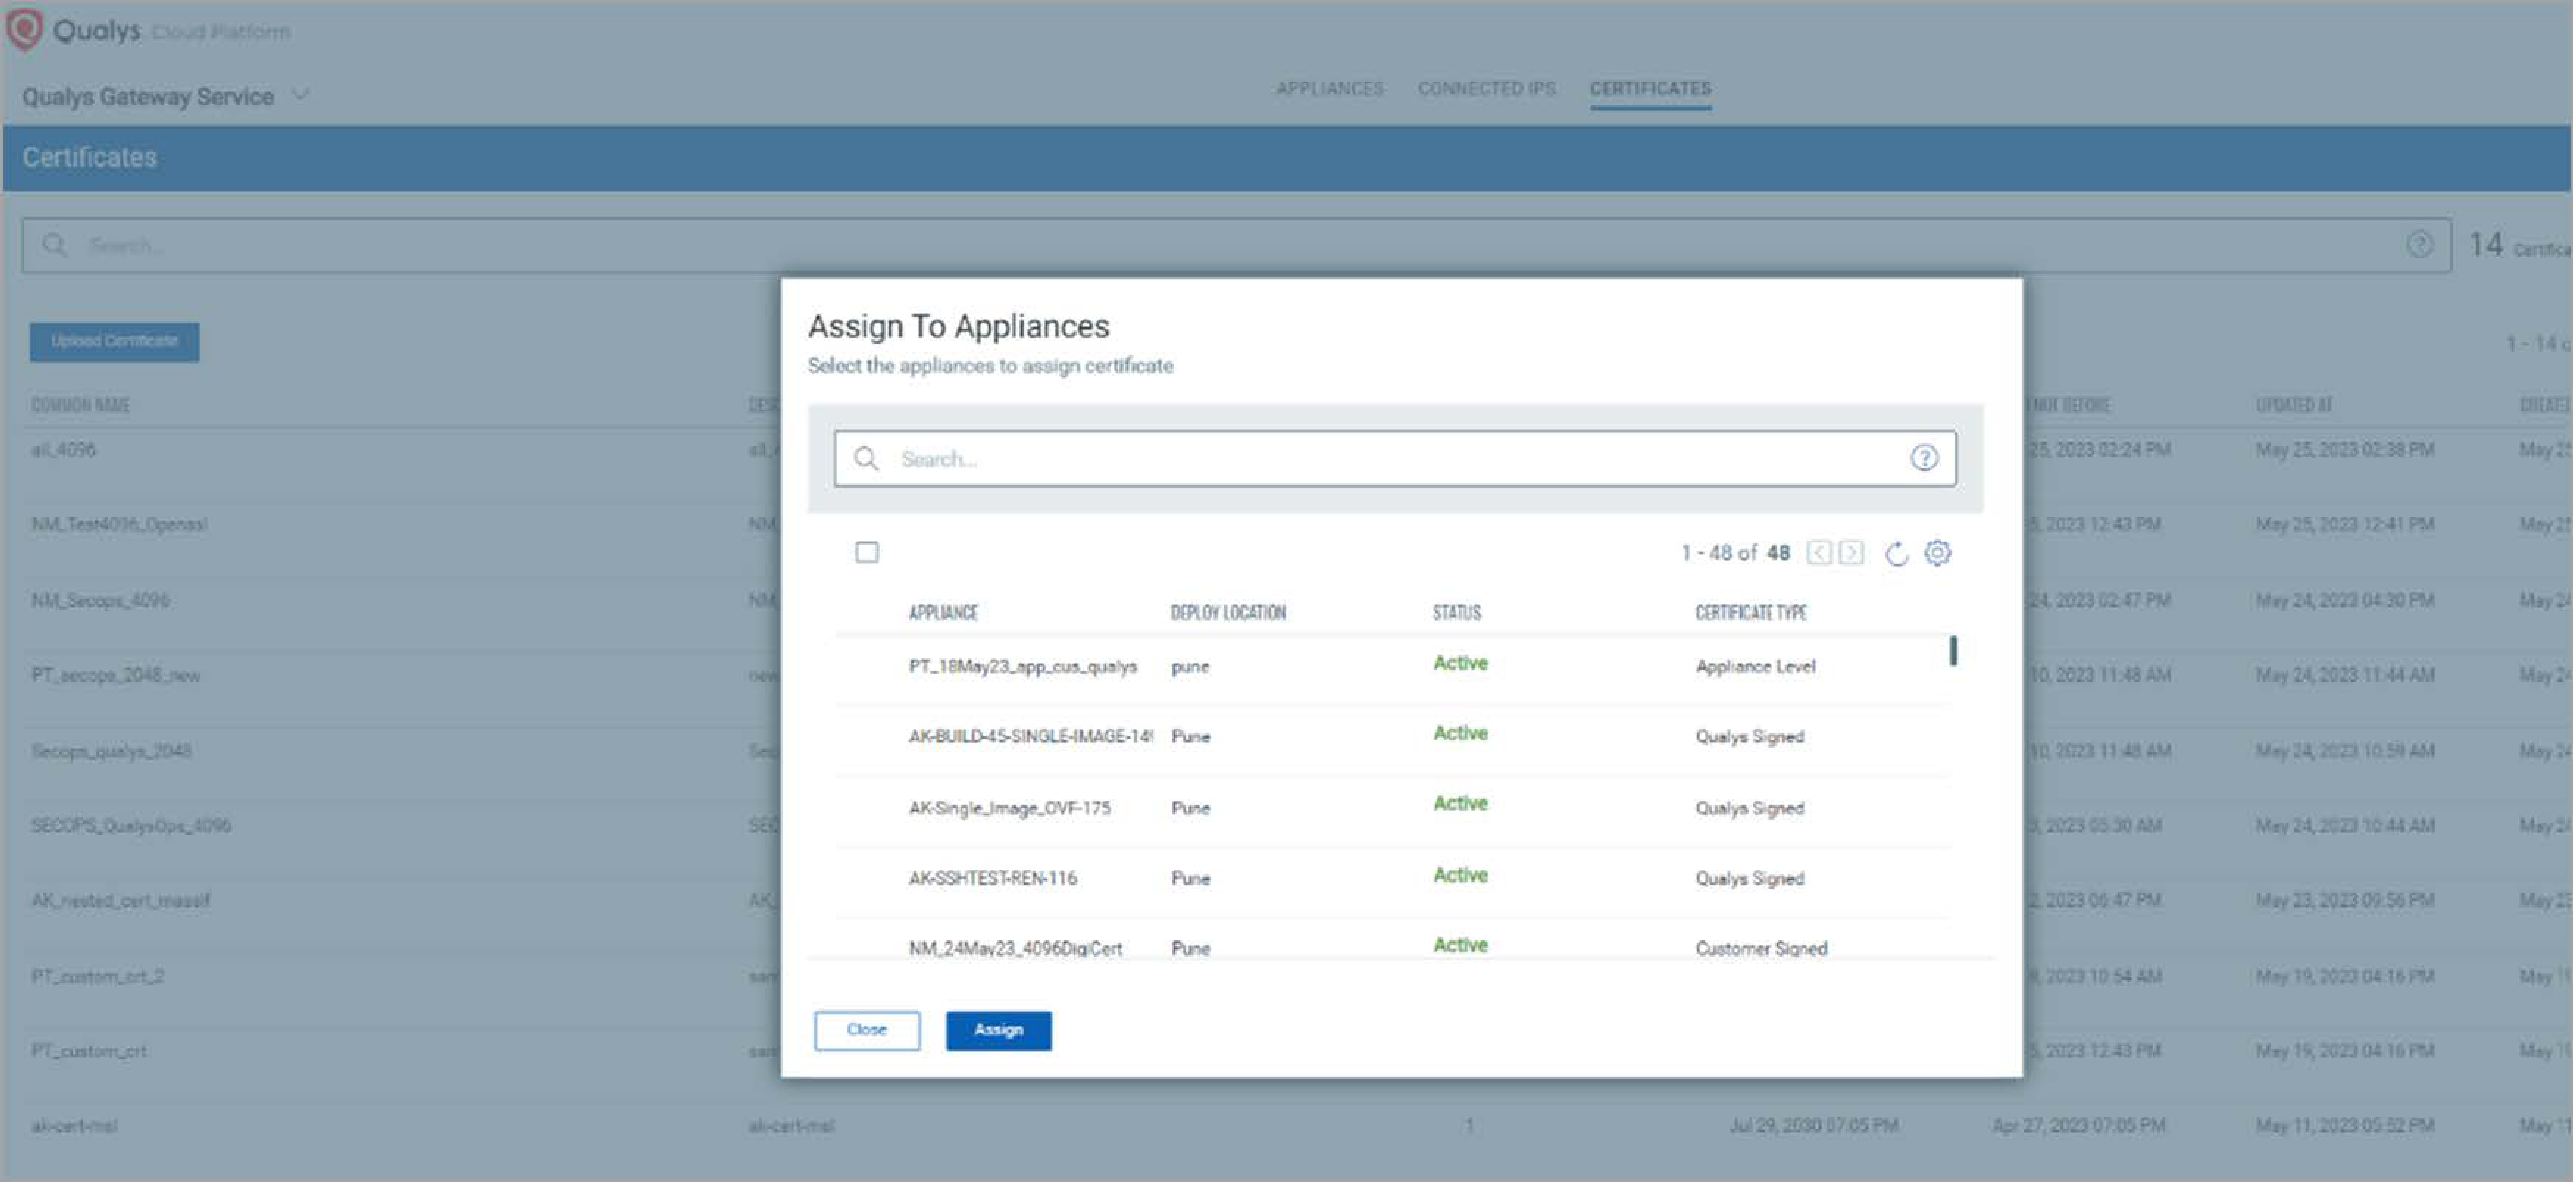
You can select multiple appliances for assigning a single set of custom certificates together.
Note: Custom certificates can be assigned/modified on the appliance which is configured with another custom certificate with the same steps as above.
Things to Remember
- No passphrase should be assigned to the certificates while creating the CSR or any certificate.
- You can configure QGS appliances to receive your custom signed certificates instead of Qualys signed certificates. Refer to “Upload Certificates” section to learn more.
The QGS feature does not validate the certificate, so you must upload a valid one.
Note: CAMS/QGS is not supported for leaf, concatenated/chain certificates.
- Only the PEM format is supported while uploading the certificates on the Certificates tab.
- A certificate size over 3MB cannot be uploaded in the Certificate section.
- When using a QGS appliance with a customer-signed certificate, begin by registering up to two agents for initial validation. This controlled approach is safer than migrating all agents simultaneously and helps verify proper certificate configuration.
- Ensure to complete and validate the agent communication flow successfully before moving all the agents to a QGS proxy with a customer-signed certificate to avoid agent failure.
Generate a Custom Certificate
Follow the instructions below to generate a root certificate authority and an intermediate certificate using OpenSSL. The example presented below is just for reference, you will need an authorized certificate for successfully signing your custom certificates.
Create an OpenSSL configuration file:
Create an OpenSSL configuration file which defines the settings for generating certificates. Refer to the below example of an OpenSSL configuration file:
HOME = .
RANDFILE = $ENV::HOME/.rnd
oid_section = new_oids
extensions = v3_req
[ new_oids ]
####################################################################
[ ca ]
default_ca = CA_default # The default ca section
####################################################################
[ CA_default ]
dir = /tmp/pkioutput.TtrEdwnrXU
certs = $dir/certs # Where the issued certs are kept
crl_dir = $dir/crl # Where the issued crl are kept
database = $dir/index.txt # database index file.
new_certs_dir = $dir # default place for new certs.
certificate = $dir/CA_crt.pem # The CA certificate
serial = $dir/serial # The current serial number
crl = $dir/CA_crl.pem # The current CRL
private_key = $dir/CA_key.pem
RANDFILE = $dir/.rand # private random number file
x509_extensions = usr_cert # The extentions to add to the cert
default_days = # how long to certify for
default_crl_days= # how long before next CRL
default_md = sha256
preserve = no # keep passed DN ordering
policy = policy_match
# For the CA policy
[ policy_match ]
countryName = match
stateOrProvinceName = match
organizationName = match
organizationalUnitName = optional
commonName = supplied
emailAddress = optional
[ policy_anything ]
countryName = optional
stateOrProvinceName = optional
localityName = optional
organizationName = optional
organizationalUnitName = optional
commonName = supplied
emailAddress = optional
[ req ]
default_bits = 2048
prompt = no
default_md = sha256
distinguished_name = dn
[ dn ]
C = US
ST = California
L = Foster City
O = Qualys
OU = qualys
emailAddress = [email protected]
CN = qgs.proxy
[ req_ext ]
subjectAltName = @alt_names
[ alt_names ]
DNS.1 = qgs.proxy
attributes = req_attributes
x509_extensions = v3_ca # The extentions to add to the self signed cert
string_mask = nombstr
req_extensions = v3_req # The extensions to add to a certificate request
[ req_distinguished_name ]
countryName = <Provide Country Name>
countryName_default = <Provide Default Country Name>
countryName_min = 2
countryName_max = 2
stateOrProvinceName = <Provide State or Province Name>
stateOrProvinceName_default = <Provide Default State or Province Name>
localityName = <Provide Locality>
localityName_default = <Provide Default Locality>
0.organizationName = O
0.organizationName_default = Qualys
organizationalUnitName = OU
organizationalUnitName_default = qualys
commonName = CN
commonName_default = qgs.proxy
commonName_max = 64
emailAddress = email
emailAddress_max = 40
emailAddress_default = [email protected]
[ req_attributes ]
challengePassword =
challengePassword_min = 0
challengePassword_max = 20
unstructuredName = qualys
[ usr_cert ]
nsComment = "OpenSSL Generated Certificate"
keyUsage = digitalSignature, nonRepudiation, keyEncipherment
[ v3_req ]
basicConstraints = CA:false
keyUsage = digitalSignature, nonRepudiation, keyEncipherment
subjectAltName = @alt_names
[ v3_ca ]
subjectKeyIdentifier=hash
authorityKeyIdentifier=keyid:always,issuer
basicConstraints = critical, CA:true
keyUsage = critical, digitalSignature, cRLSign, keyCertSign
[ v3_intermediate_ca ]
subjectKeyIdentifier = hash
authorityKeyIdentifier = keyid:always,issuer
basicConstraints = critical, CA:true, pathlen:0
keyUsage = critical, digitalSignature, cRLSign, keyCertSign
[ crl_ext ]
authorityKeyIdentifier=keyid:always,issuer:always
Generate Root CA Key Pair and Certificate:
Generate a private key and certificate for the root CA using OpenSSL's req command with the -x509 option.
openssl req -x509 -days 3650 -nodes -config <OPENSSL_CONFIG_PATH> -newkey rsa:4096 -extensions v3_ca -keyout <PATH_TO_ROOT_CA_KEY> -out <PATH_TO_ROOT_CA>
Generate Intermediate CA Key Pair and Certificate Signing Request (CSR):
The following command generates an intermediate private key and Certificate Signing Request (CSR) for the intermediate CA using OpenSSL's genrsa and req commands, respectively.
# Generate Intermediate Key
openssl genrsa -out <INTERMEDIATE_KEY_PATH> 4096
# Generate Intermediate Certificate Signing Request (CSR)
openssl req -new -sha256 -key ${Intermediate_PATH_KEY} -config <OPENSSL_CONFIG_PATH> -out <INTERMEDIATE_CSR_PATH>
Generate Intermediate CA Certificate:
The script uses OpenSSL's ca command to generate a certificate for the intermediate CA based on the CSR and root CA certificate.
openssl ca -extensions v3_intermediate_ca -config <OPENSSL_CONFIG_PATH> -batch -create_serial -days <CERT_VALIDITY_DAYS> -keyfile <PATH_TO_ROOT_CA_KEY> -cert <PATH_TO_ROOT_CA> -in <INTERMEDIATE_CSR_PATH> -out <INTERMEDIATE_CERT_PATH> -notext
Things to Remember
The QGS SSL Bump feature requires a specific certificate configuration to enable secure traffic inspection and artifact caching. The following requirements must be met
- Certificate Authority Requirements
A private, self-signed Certificate Authority must be configured with the basicConstraints extension set to CA:TRUE. This setting enables the CA to issue certificates for intercepted HTTPS traffic. All client devices must trust this CA certificate to prevent SSL/TLS errors during traffic interception and decryption.
- Certificate Format Requirements
QGS requires individual certificate configurations. Each certificate must be uploaded and configured separately in the system. The platform does not support concatenated certificate files (multiple certificates combined in a single file). This requirement ensures proper certificate validation during SSL/TLS processing.
When assigning Certificates, verify that the Root and Intermediate certificates are SHA256 hashed and ‘CA:True’ attribute is confirmed.
To check these, you can run the following command on OpenSSL Utility.
openssl x509 -noout -text -in certificate.pem
If the command returns the following values, then you may upload the certificate.
CA:TRUE
Signature Algorithm: sha256WithRSAEncryption
You must also verify whether the Root and Intermediate certificates are valid. To do so, run the following.
openssl verify -CAfile rootcert.pem intermediate.pem
Verify the MD5 checksum of Intermediate certificate, and private key (end key). The MD5 checksum of should match for all three.
intermediate certificate: openssl x509 -modulus -noout -in intermediate.pem/leaf/issuing_cert.pem | openssl md5
private key(end key): openssl rsa -modulus -noout -in private.key.pem | openssl md5
Downloading Cache Certificates to Configure on the Agents
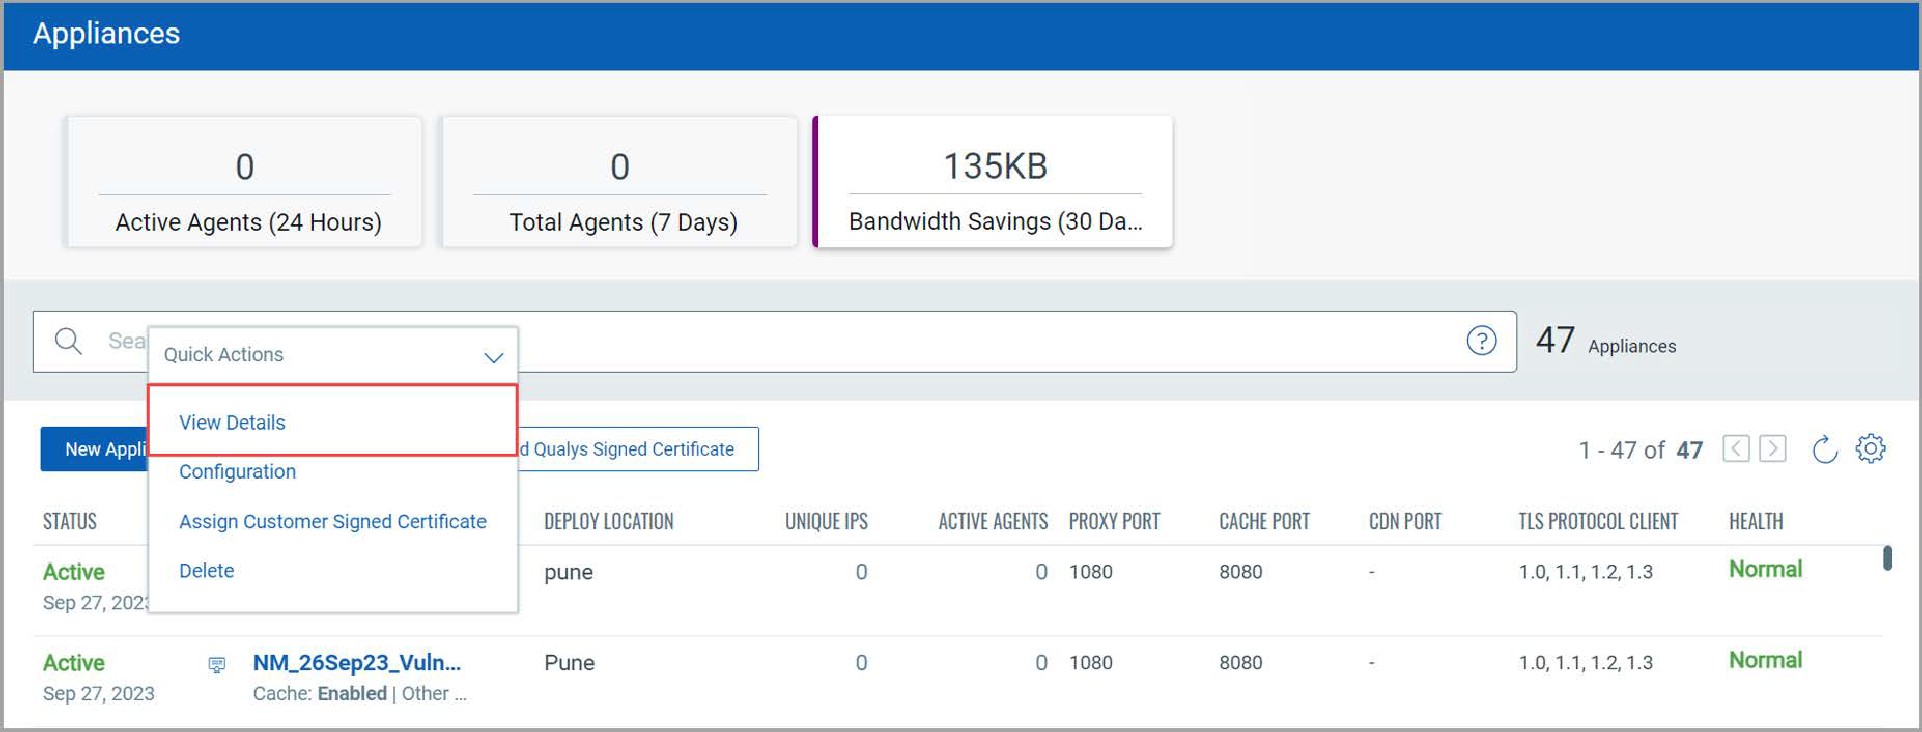 To download the cache certificates to be configured on the agents, click View Details on the quick action menu of the appliance.
 For appliances registered with either the Custom certificate or the Appliance-level certifcate, the cache certificate (MSI,PEM) is available for download in the Cache Mode tab.
For appliances registered with Qualys signed certificate (Common CA), the cache certificate (MSI,PEM) is available for download in either the Cache Mode tab or the Download Qualys signed Certificate option on the Appliance listing page.
Changing the Proxy Port
After successful appliance deployment and registration, you can turn off the proxy port or change it from the default 1080 to any allowable port number.
- Use the Quick Action menu to select Configuration (hover over the appliance name in the appliance list until the Quick Action down-arrow menu appears)
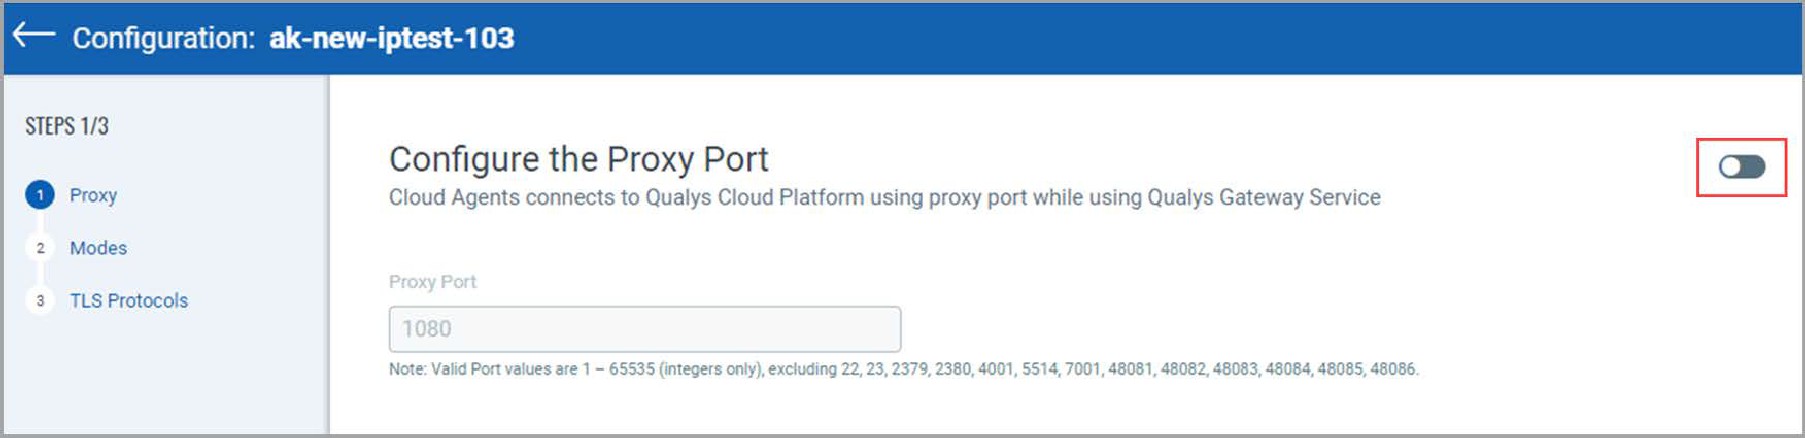
- In the first configuration step (Proxy), you can turn off or enter the new proxy port. By default, the Proxy Port is turned on. Click the toggle to turn it off and restrict the Proxy Port.
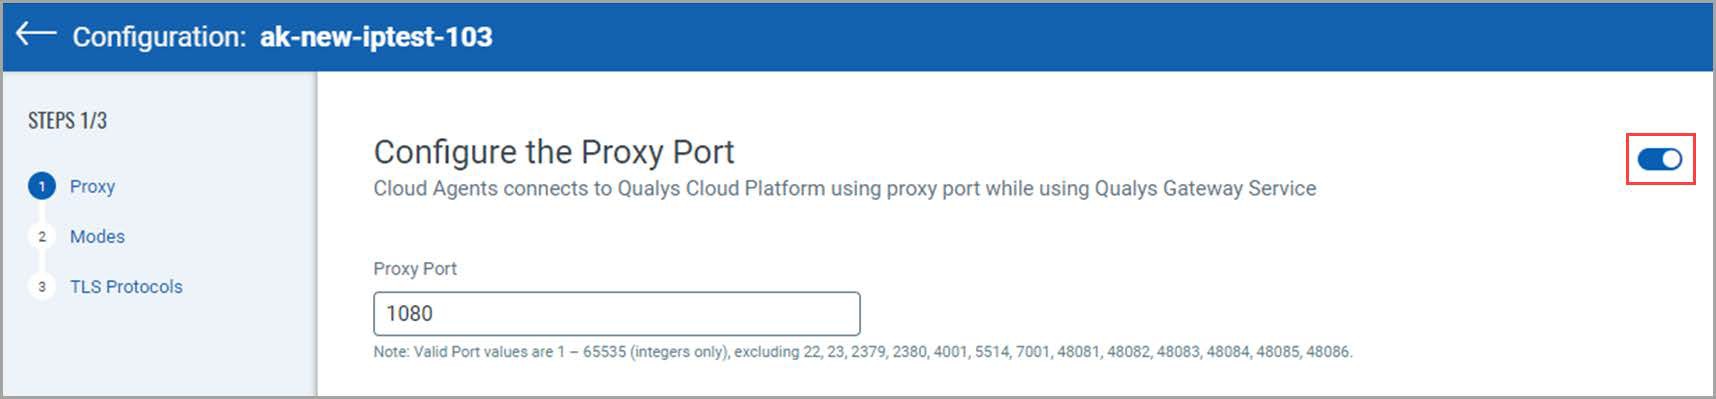
Refer to the image to see the QGS appliance configuration with the proxy port turned off.
Keep the Proxy Port to provide a valid port number.
Note: Valid Port values are 1 – 65535 (integers only), excluding 22, 23, 2379, 2380, 4001,
5514, 7001, 48081, 48082, 48083, 48084, 48085, 48086.
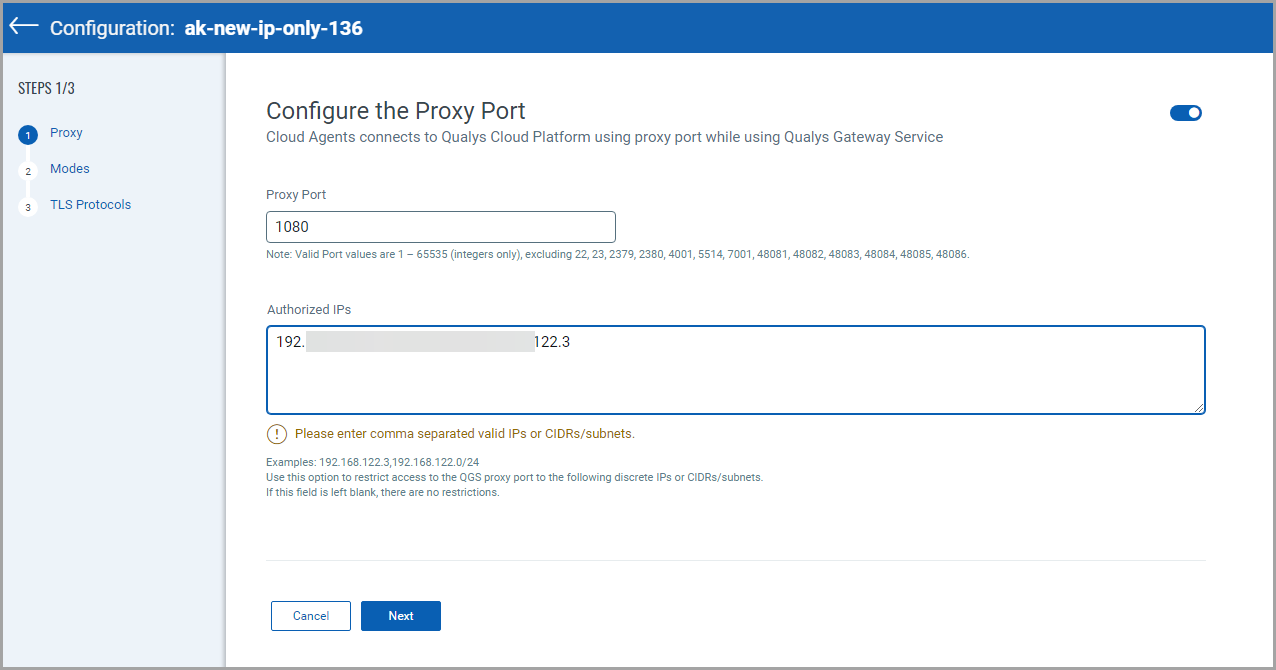
When the proxy port is turned on, you can allow the Proxy Port access to specific agents by adding their IPs in the Authorized IPs field.
Provide single or multiple comma-separated IPs, subnets, or CIDR ranges in the
Authorized IPs field.
- Click Next to the menu, then Finish to save the configuration.
On the next appliance check-in, the appliance will download the configuration and use the new proxy port.
Understanding Cache Mode and Patch Mode
Cache Mode is an optional feature used to optimize the download network bandwidth used by Cloud Agents whereby the QGS appliance caches downloaded Cloud Agent artifacts (installers for platform-initiated upgrades and manifest files).
Files downloaded by the first-connecting agent will be cached on the QGS appliance to be served to any subsequent configured agents requesting the same content. This will save Internet download bandwidth from the Qualys cloud platform to the on-premise network as only one copy of unique files will be downloaded. For environments will large number of Cloud Agents deployed, this can save a significant amount of download bandwidth.
|
File Type |
Interval |
Number of Agents |
Bandwidth without Caching |
Bandwidth with Caching |
|
VM Manifest |
Daily |
1,000 |
2 GB |
2 MB |
|
VM Manifest |
Daily |
5,000 |
10 GB |
2 MB |
|
VM Manifest |
Daily |
10,000 |
20 GB |
2 MB |
|
VM Manifest |
Daily |
25,000 |
50 GB |
2 MB |
Patch Mode extends the caching capability to cache patch files for Cloud Agents activated with the Qualys Patch Management application. Similar to Cache Mode where the gateway appliance caches the downloaded Cloud Agent artifacts, Patch Mode will cache the patch
files downloaded by the first requesting Cloud Agent in order to serve patch files locally to subsequent download request. Patch Mode uses the same port and connection as Cache Mode.
Note: When Patch Mode is enabled, the default Connection Security that only allows outbound connections from the gateway appliance to Qualys platform domains is disabled. Cloud Agents with Patch Management application need to download patch files from the software vendor’s website thus the gateway appliance allows for connections to any Internet resource. When allowing QGS to communicate with third-party vendor patch repositories, these connections must be allowed through customer firewalls. For more details, refer to the “URLs to be added to the Allowlist for Patch Download” section of the Patch Management Getting Started Guide.
In Patch Mode, Connection Security is configured to only allow client connections from Cloud Agent clients as an additional protection method.
Cache Mode and Patch Mode are not enabled by default. Additional configuration is required to enable caching and patch file caching, both on the gateway appliance itself (using the QGS module UI) and on the host the runs the Cloud Agent.
QGS Appliance Cache and Patch Mode Configuration
To enable Cache Mode or Patch Cache Mode on an existing QGS appliance:
- For a specific appliance, use the Quick Action menu to select Configuration (hover over the appliance name in the appliance list until the Quick Action menu appears)
- Click Next through the menu until Caching Modes
- To enable Cache Mode, toggle the On/Off slider to On
- The default cache port is 8080. You may accept or change the cache port to an allowable port number.
Note: Valid Port values are 1 – 65535 (integers only), excluding 22, 23, 2379, 2380, 4001,
5514, 7001, 48081, 48082, 48083, 48084, 48085, 48086.
- To enable Allowed Domains, toggle the On/Off slider to On
Allowed Domains: Selecting this option allows traffic to external domains while operating in cache mode. By default, only Qualys domain URLs are accessible. However, with this feature, you can manually add domain names to allow QGS to reach the required external domains. Note: This toggle allows accessing external domain resources but does not involve artifact caching.
Default Domains Allowed: qualys.eu, qualys.ca, qualys.com, qualys.in
Note: While adding domains in the allowed domain section you should not add a prefix like http(s)://www. For instance, if you want to allow traffic to Microsoft then you should enter only microsoft.com and not https://www.microsoft.com
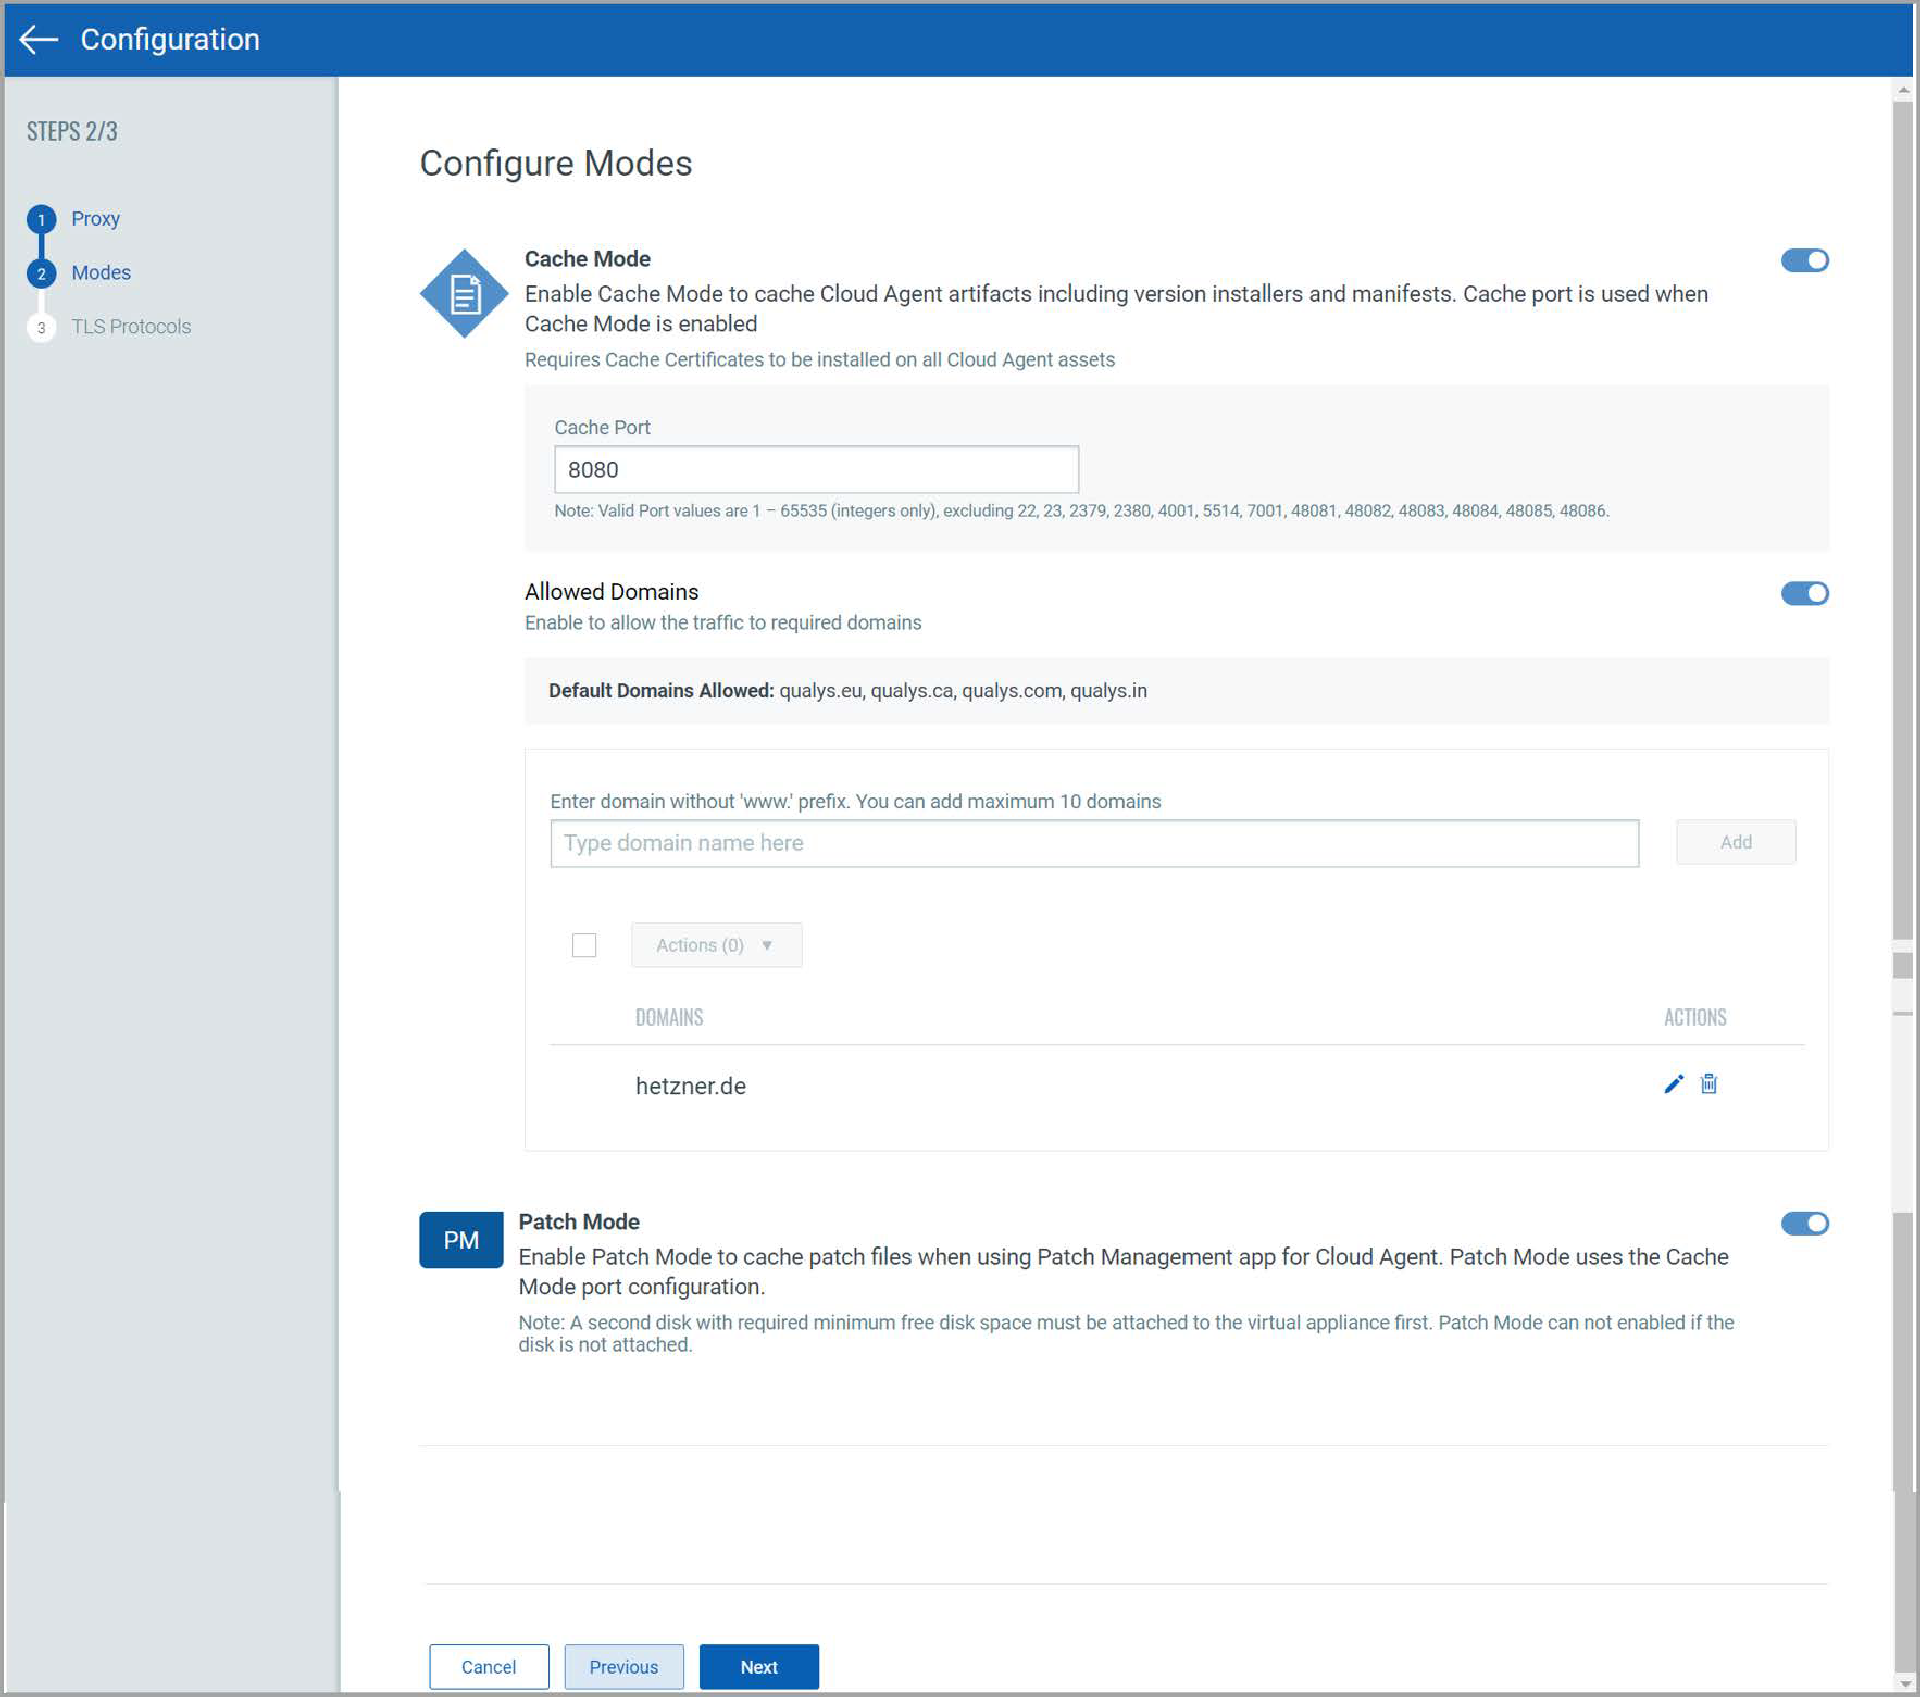
- To enable Patch Mode, toggle the On/Off slider to On.
Important: A second disk with required minimum free disk space must be attached to the virtual appliance first. Patch Mode can not enabled if the disk is not attached.
Note: The third hard disk is not supported and would not be recognized on the CAMS/QGS appliance to use the patch mode. We recommend using only one extra hard disk of 250GB or more to use the patch mode.
- Click Next through the menu until TLS Protocols
- Select the Minimum TLS Protocol Version allowed for agent connections. To support older operating systems that only support TLS, select TLS 1.0 as the minimum protocol version. (Default setting is TLS 1.2 and higher.)
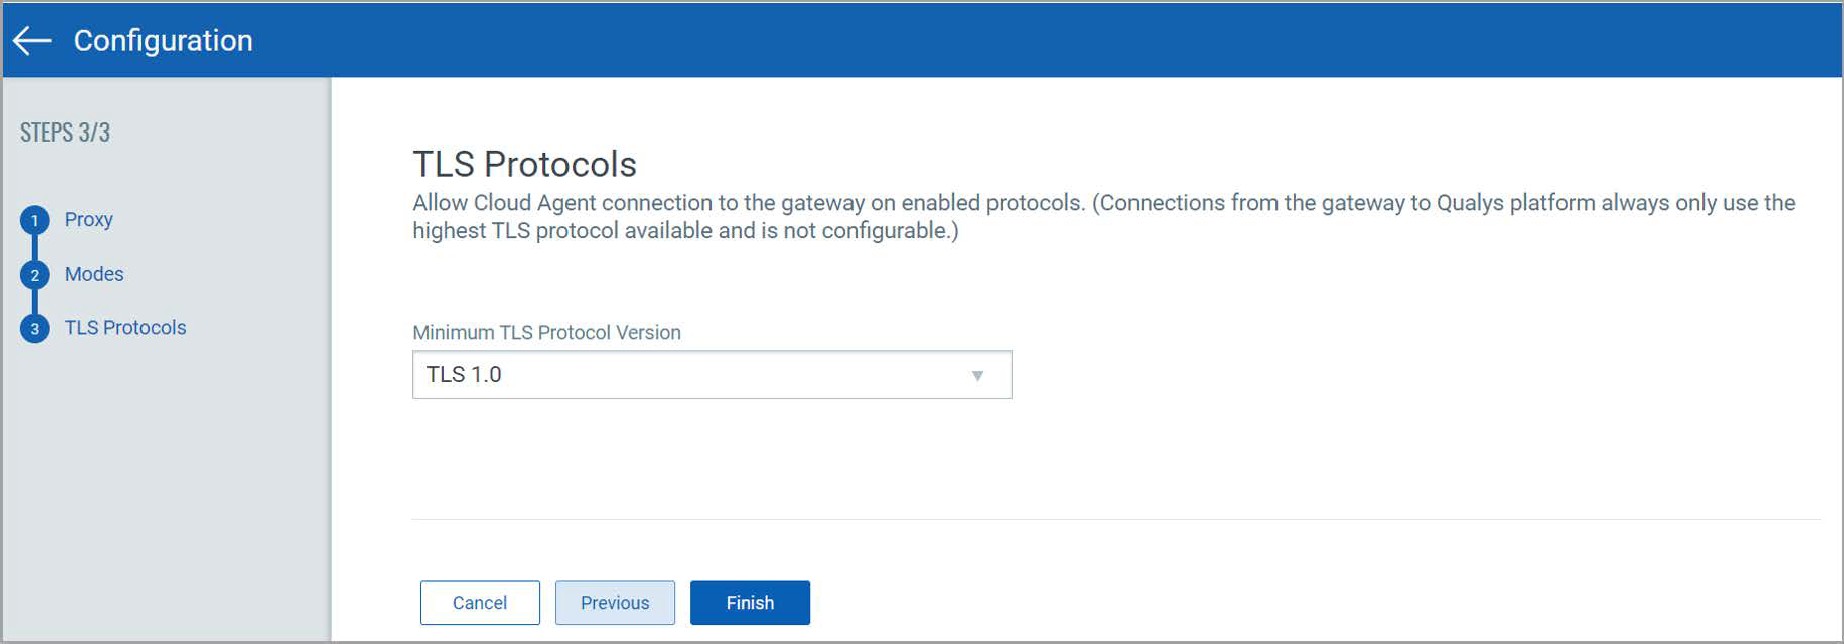
Note: To enable this mode, a second virtual disk drive, minimum capacity 250 GB, is required to be added to the virtual appliance prior to enabling Patch Mode.
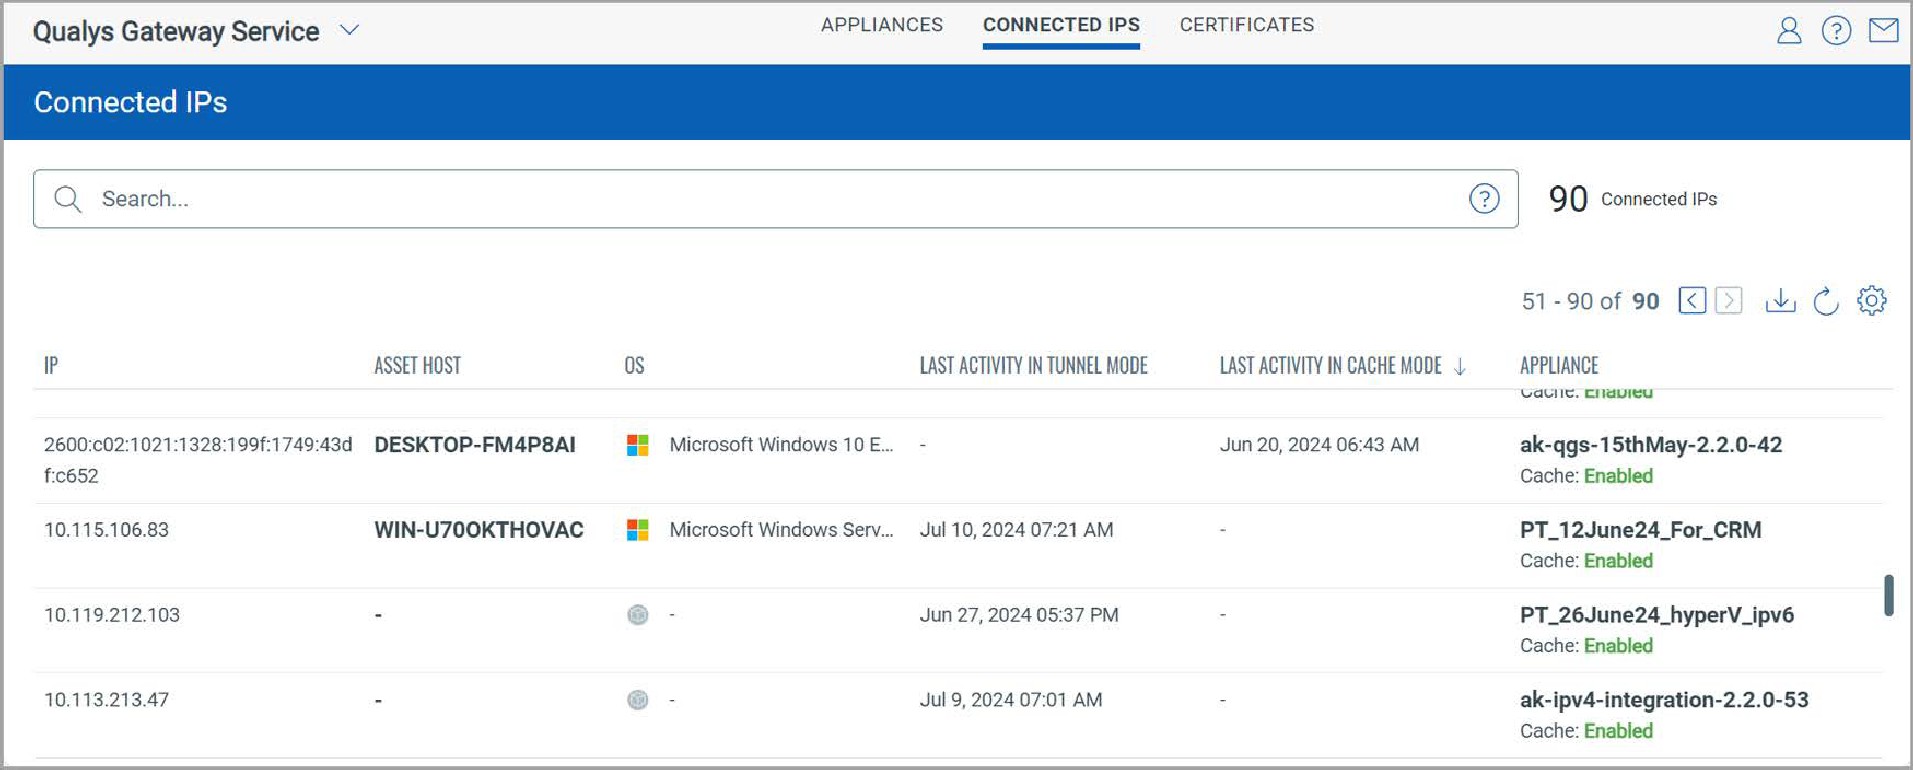
Connected IPs
Connected IPs
The Connected IPs tab shows you a list of the Agent IPs connected to the appliance along with details like the Hostname, Operating Systems, last activity details etc.
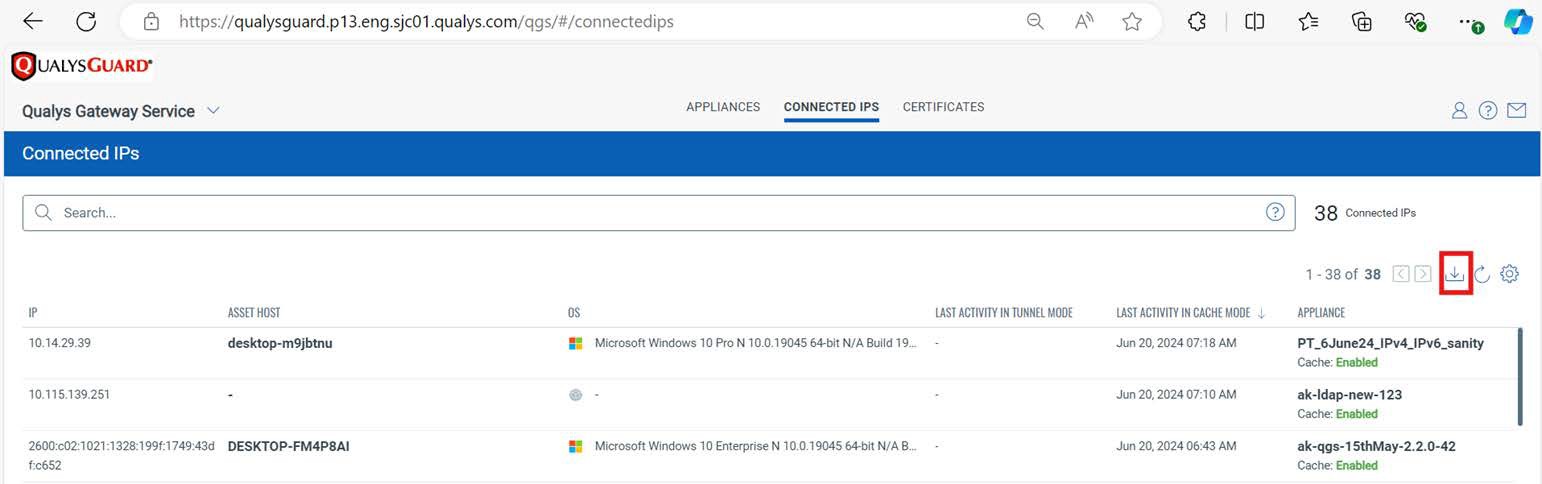
Download Connected IPs
You can download a CSV file of your connected IPs to quickly access critical asset information, eliminating the need to navigate through multiple pages.
Click the download icon on the right side of the Connected IPs tab.
The downloaded CSV file includes:
- UTC timestamp of when the sheet is downloaded.
- Applied QQL search query is added in the sheet.
- Detailed agent information such as Agent IP, Hostname , Operating system, Last Activity via Proxy Port, Last Activity via Proxy Port, QGS Appliance, Agent UUID.

Note: The download limit is set to 10,000 records. For larger datasets, use the QQL search to refine results.
You can use tokens to refine the search and download a CSV file of relevant assets.

You can find the list of available tokens at Search Tokens.
Cloud Agent Configuration
Refer to the Cloud Agent Install Guide to know more about each supported operating system for the appropriate proxy configuration and certificate installation instructions.
Configure Cloud Agents to use the IP or DNS name of the QGS as the agent’s proxy is similar to any other proxy server configuration.
For Cloud Agent for Windows v3.1, or higher / Cloud Agent for Linux, AIX & Mac v2.5, or higher:
-
- Cloud Agent supports up to five (5) proxy servers or QGS appliances (semi-colon separated) and uses them for connection in the order defined.
- If the agent can't connect to the proxy server, the agent will try to connect to the next one in the defined list.
- Once all listed proxy servers or QGS appliances have been tried, Cloud Agent will fall back to attempting a direct connection, if this is supported by network routing and firewalls.
- Proxy server or QGS appliances can be aliased using DNS aliases or abstracted via Network Load Balancer Virtual FQDNs/IPs.
If using QGS appliance(s) behind one or more load balancers, define a compound keepalive configuration that is checking the availability of both QGS proxy + cache ports, periodically, in each case, and marking any QGS appliance that fails the keepalive check as unavailable.
- QGS appliances can be nested to provide two layers of proxy communication:
The QGS immediately upstream from the Cloud Agent connection can be in Proxy, Cache, or Patch mode.
The second QGS layer must be in Proxy mode only.
The second QGS layer sizing must anticipate the overall number of agent communications that need to navigate this second layer and connect to the platform.
In Patch Mode, QGS behaves as an open proxy, with no content or category filtering, so there should always be a general-purpose proxy server, suitable for internet browsing, with the appropriate filters, upstream from QGS.
Note: A Minimum 16GB of RAM is recommended for CAMS/QGS appliances. A total of 3000 concurrent cloud agent requests are supported by a QGS appliance. In case of more than 3000 agents communicating simultaneously, customers should deploy a new appliance instead of increasing RAM on the existing appliance.
Cloud Agent Cache Mode and Patch Mode Configuration
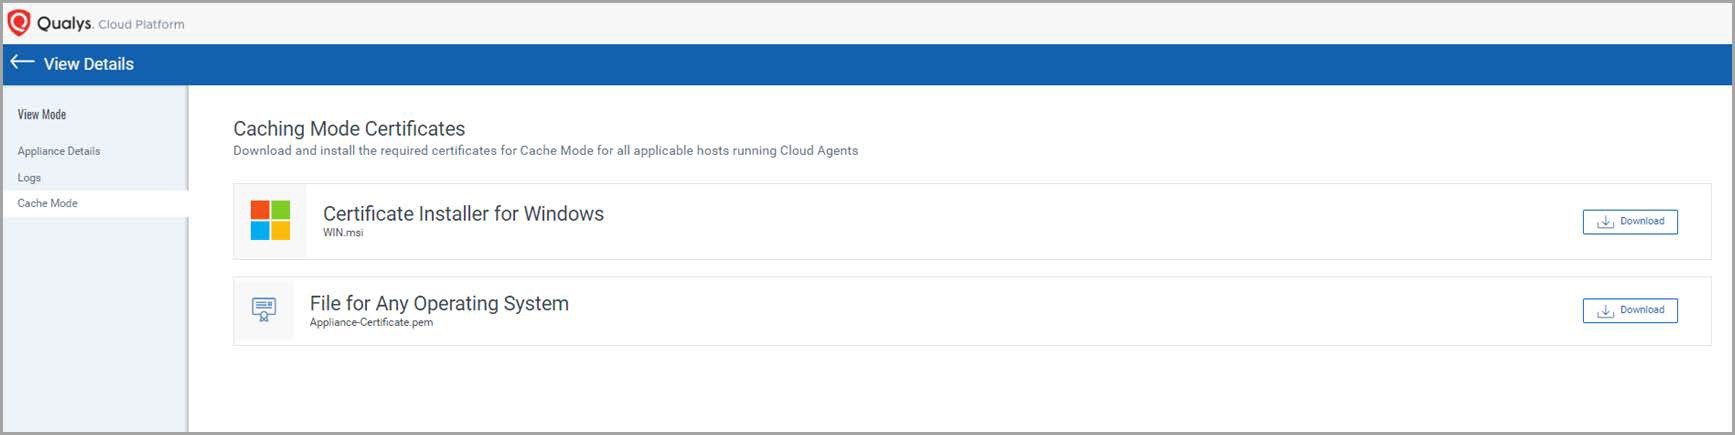
Cloud Agents deployed in Cache and Patch Mode require the public certificate of each QGS appliance installed on the host that runs the Cloud Agent.
There are two certificate deployment options available in the QGS User Interface:
- Certificate File in PEM file format for any operating system
- Use any supported software distribution tool to deploy the certificate PEM to the host certificate store
- MSI Certificate File installer for Windows operating systems
- Use any supported software distribution tool (SCCM, GPO, BigFix, etc.) to deploy the certificate by installing the Win.MSI file
- Install the certificate manually on a single host C:\>msiexec -I <location_to_file\WIN.msi
Virtual Appliance Local Configuration
The Qualys Gateway Service virtual appliance utilizes a text-based user interface available from the appliance console to configure, set networking, view status, perform diagnostics, and reset the appliance.
Local Configuration Menu Structure
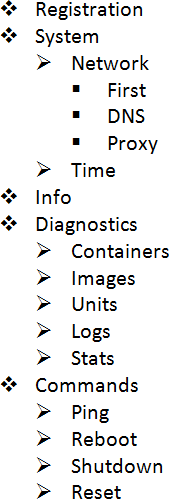
Configuration Screens
Next we’ll document the screens used to configure & manage the Qualys Gateway Service.
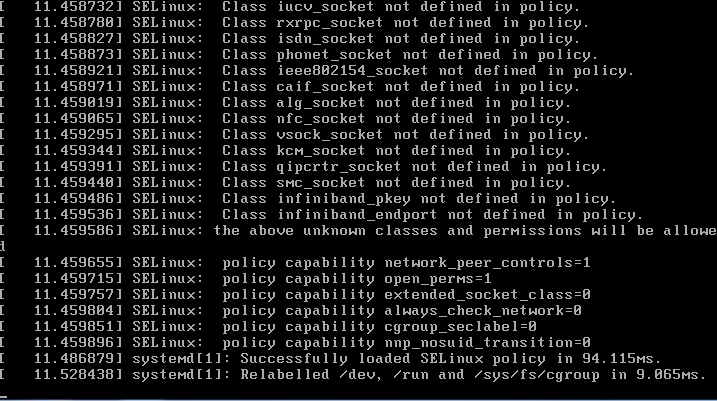
QGS virtual appliance starting up
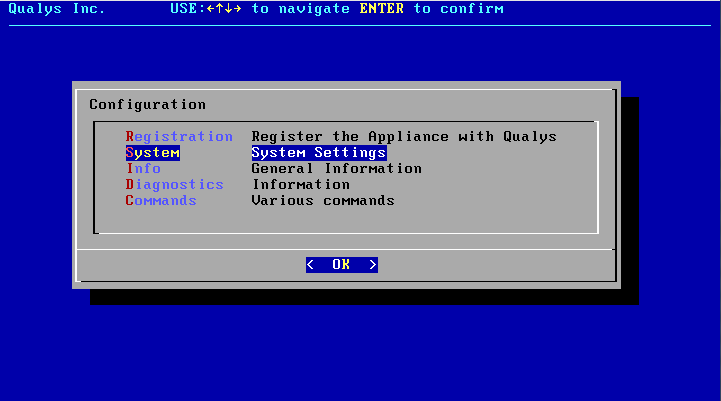
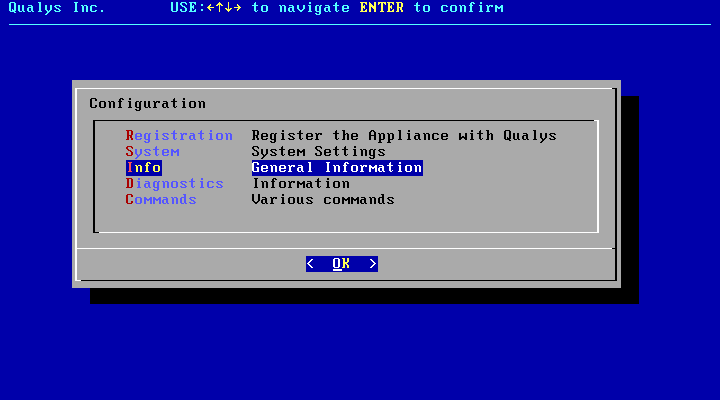
Main Configuration Menu
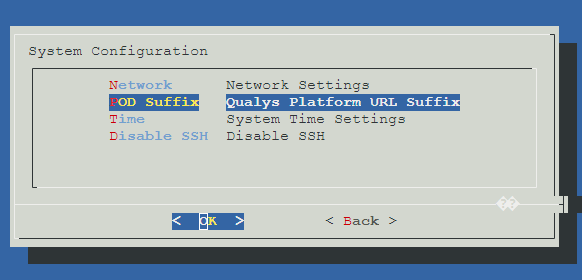
Under System menu, configure Network Settings
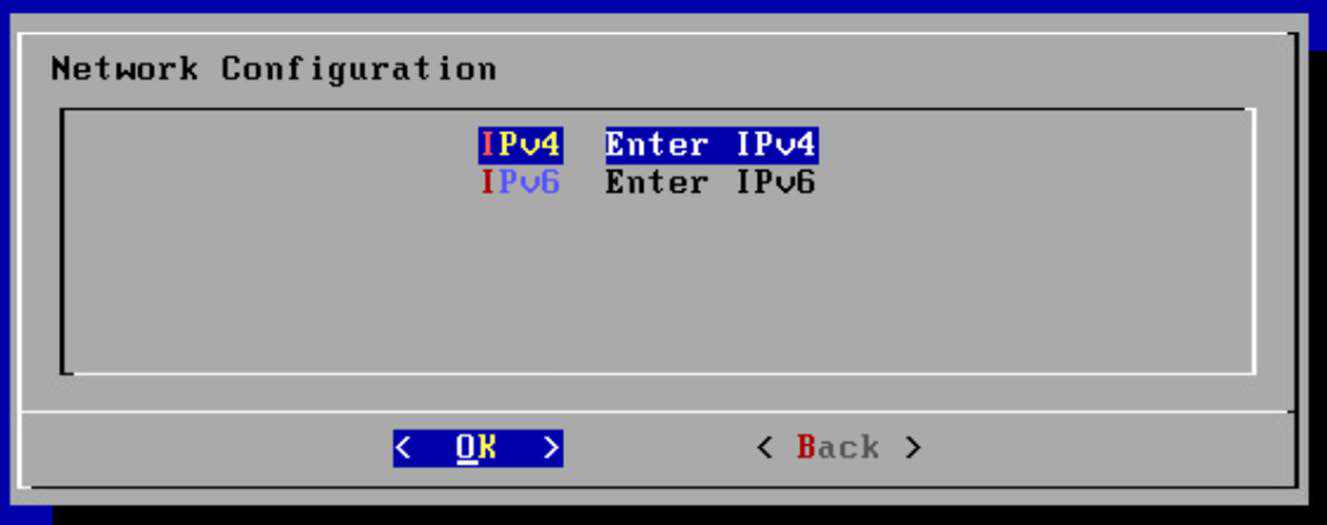
Network Configuration
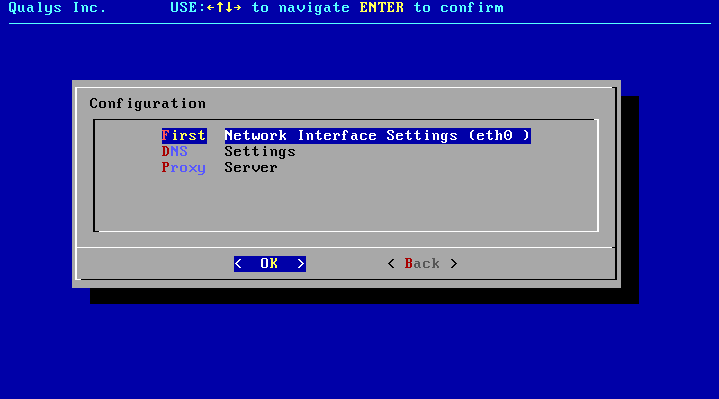
Select the internet protocol to configure the appliance on. Choose from IPv4 or IPv6.
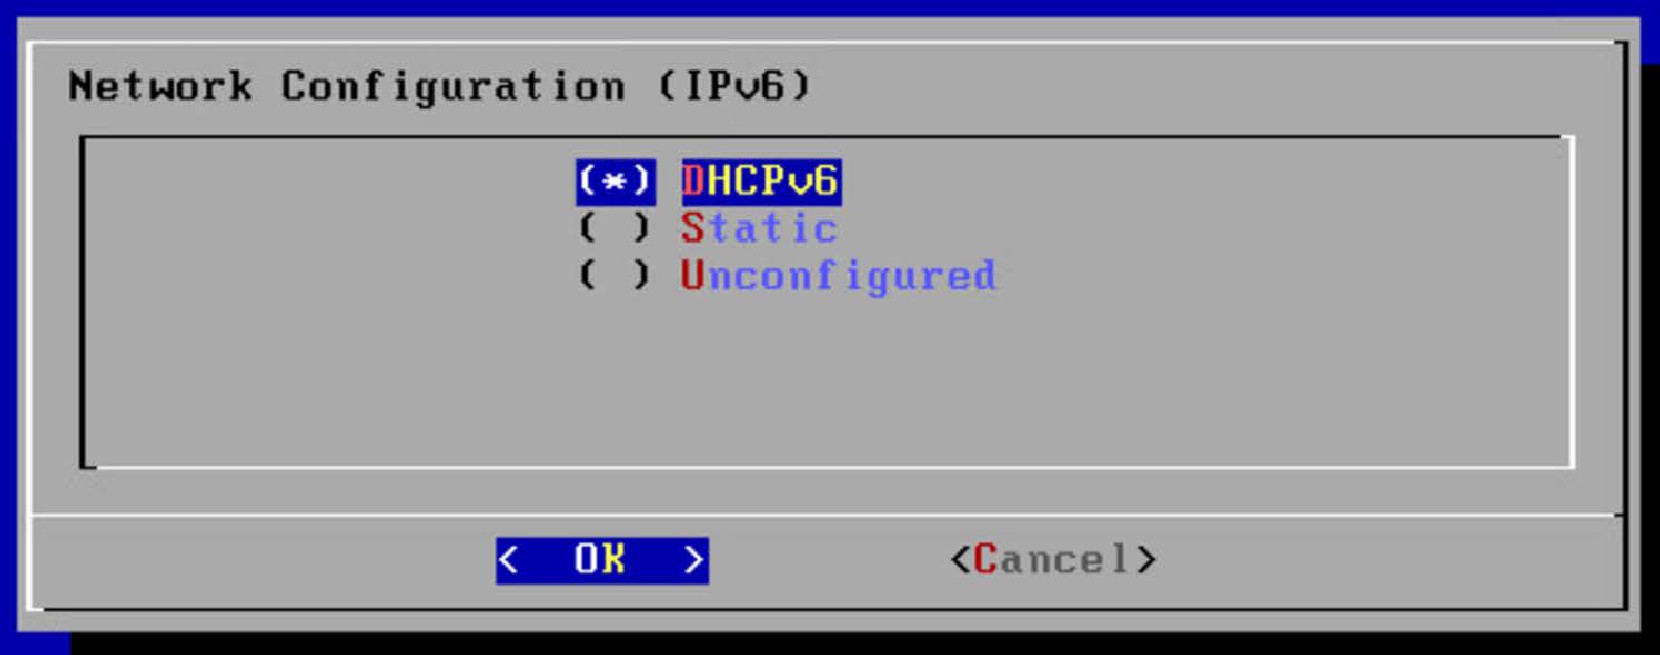
If using DHCP, configure the virtual appliance network interface to use DHCP.
This is the IP of the QGS proxy that Cloud Agents will connect running on the configured port. DHCP is supported for both IPv4 and IPv6.
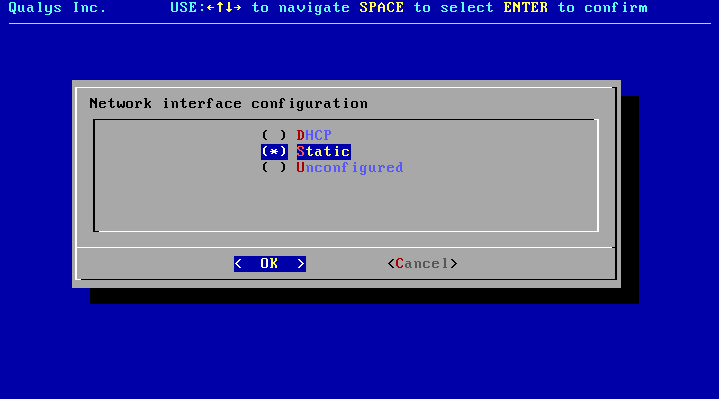
If using Static IP, configure the virtual appliance network interface to use Static IP Address. Cloud Agents connect to the Static IP Address on the configured port.
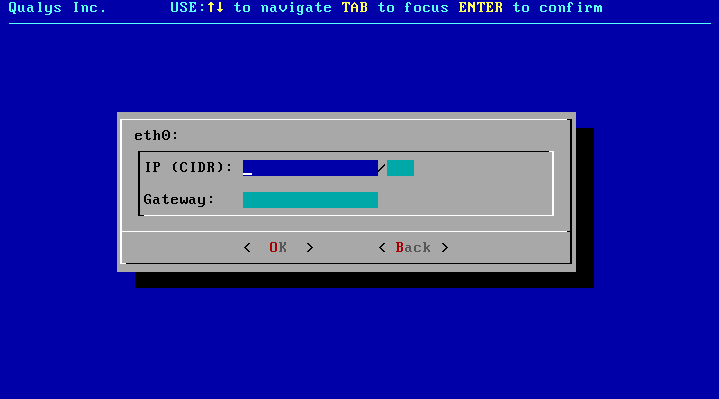
Set static IP address, if used.
IP address uses a 32-bit netmask, e.g. “/24” for 255.255.255.0 Specify the Default Gateway IP address.
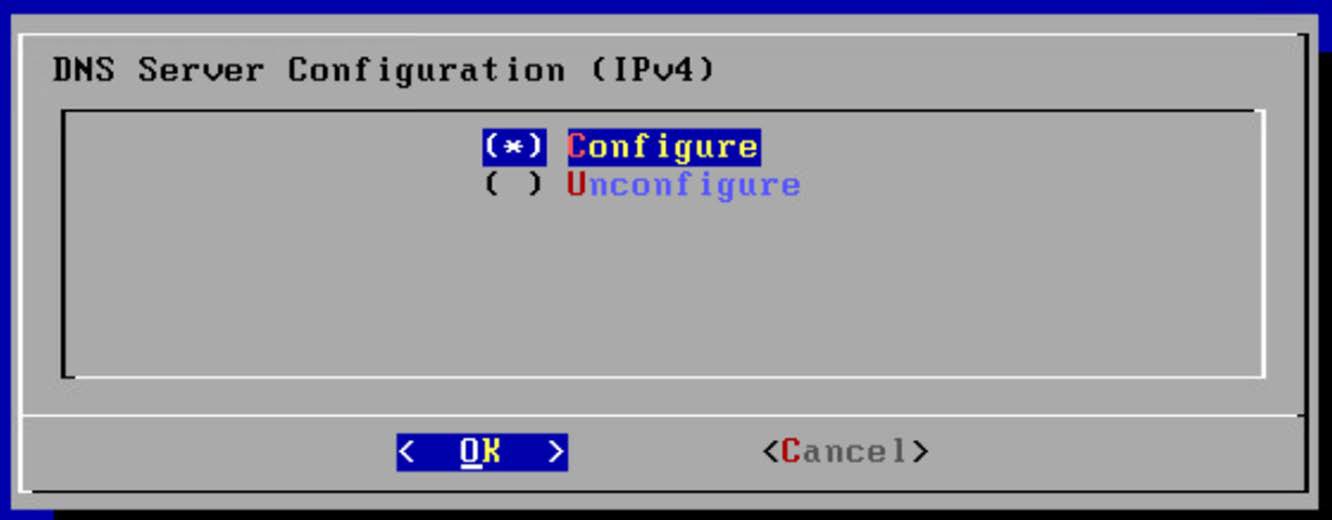
Select whether to configure DNS servers for IPv4 or IPv6.
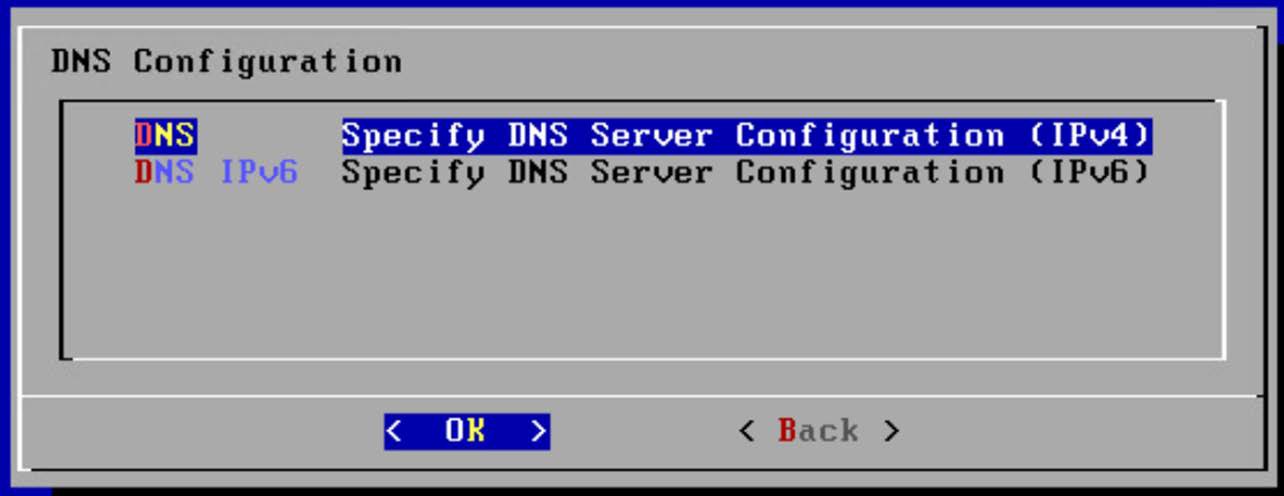
You can manually configure or deconfigure DNS for both IPv4 and IPv6.
Set DNS servers for the virtual appliance to resolve the Qualys URLs.
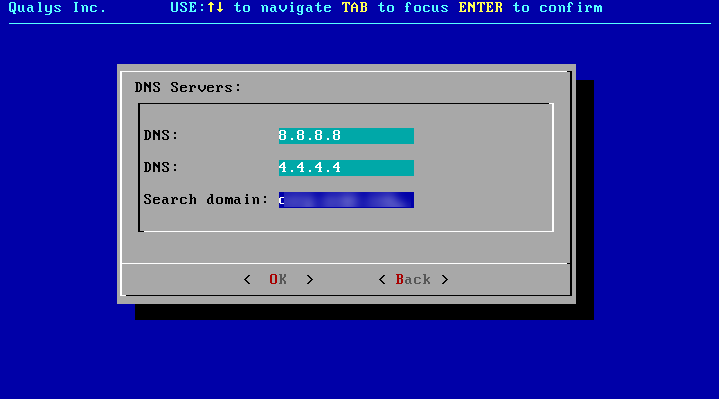
We have used Google internet DNS servers as example. Please point to your internal corporate DNS servers. If these are only accessible through a firewall, ports 53/tcp and 53/udp will need to be opened for successful DNS resolution.
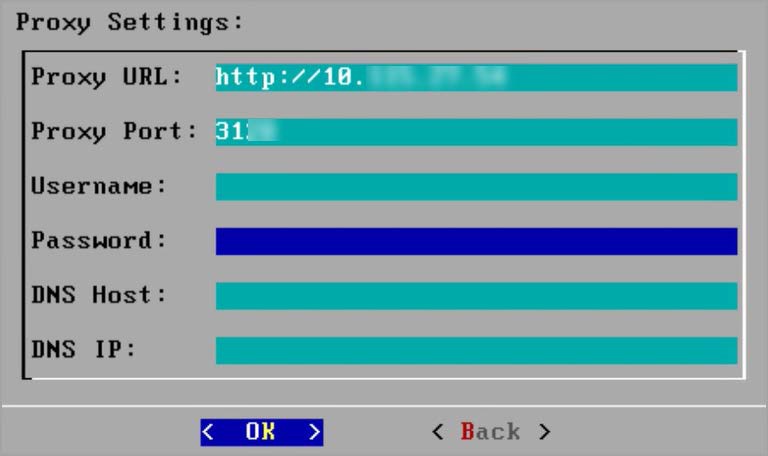
Select whether to configure Proxy servers for IPv4 or IPv6.
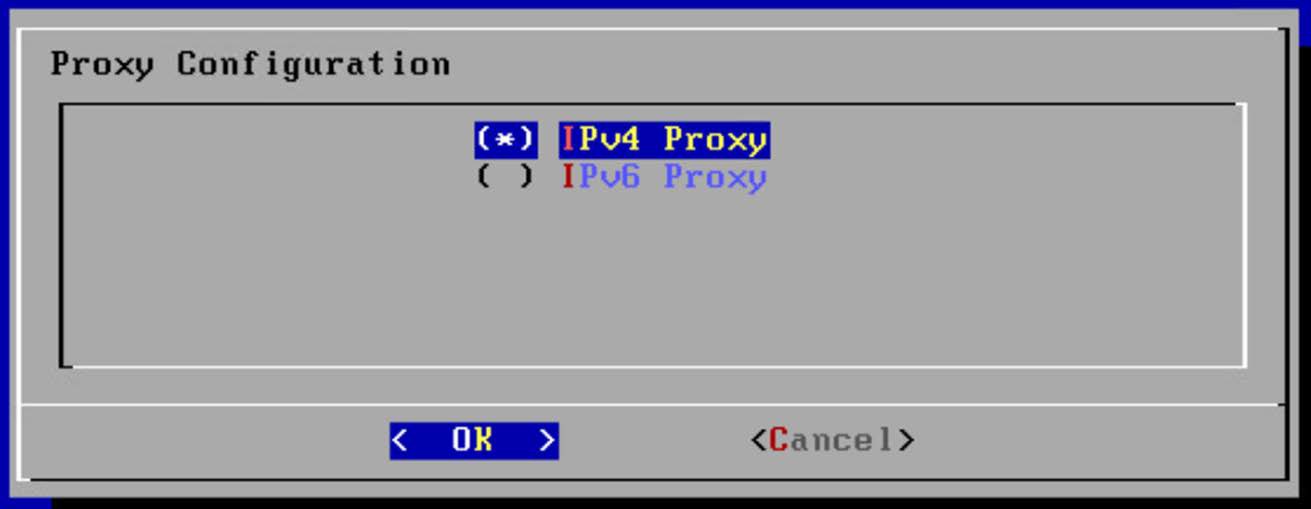
Configure upstream Proxy Server, if using proxy chaining.
The NTP service's behavior has changed as follows:
- If NTP servers are not specified, the QGS appliance will use default flatcar NTP servers to sync the time. The default flatcar NTP servers are listed as follows:
- 0.flatcar.pool.ntp.org
- 1.flatcar.pool.ntp.org
- 2.flatcar.pool.ntp.org
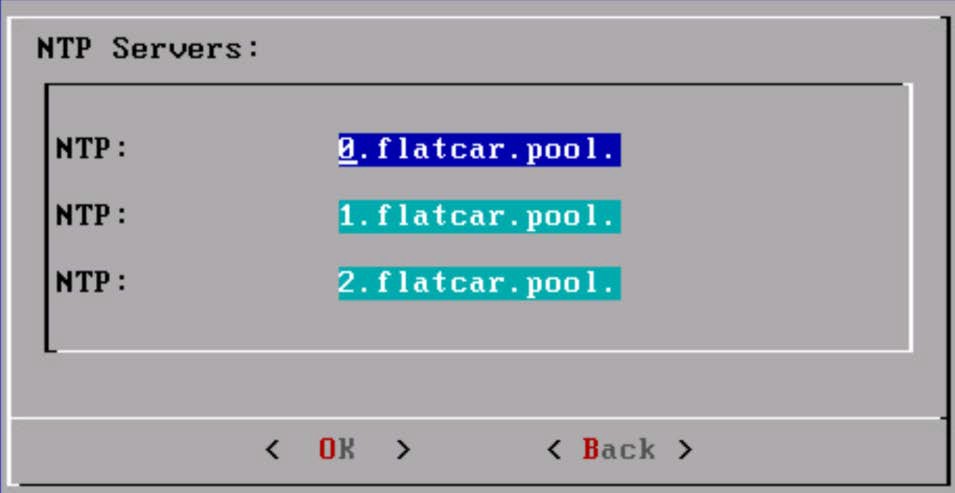 3.flatcar.pool.ntp.org
- If NTP servers are specified, the QGS appliance will contact the specified NTP servers only.
- If you remove the NTP server, the appliance will start communicating to flatcar default NTP servers again.
Info
QAG Status: Connected shows that QGS can connect to the Qualys POD.
If the status is not Connected, verify network connectivity and firewall settings.
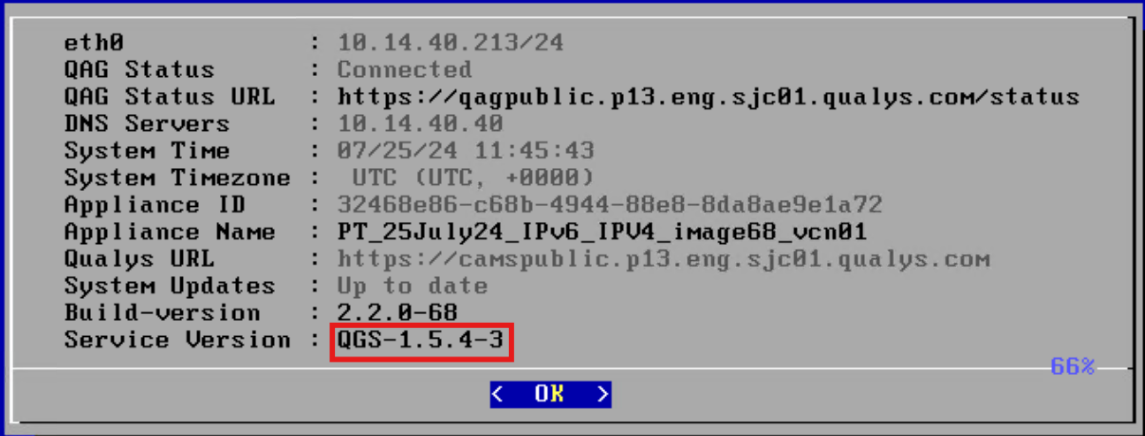 Note: As of QGS v2.1.0 release, the appliance TUI now display the service version on the Info tab, as shown in the following screenshot.
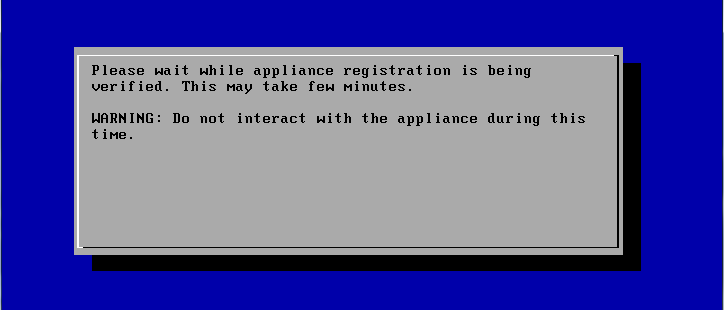
Registration
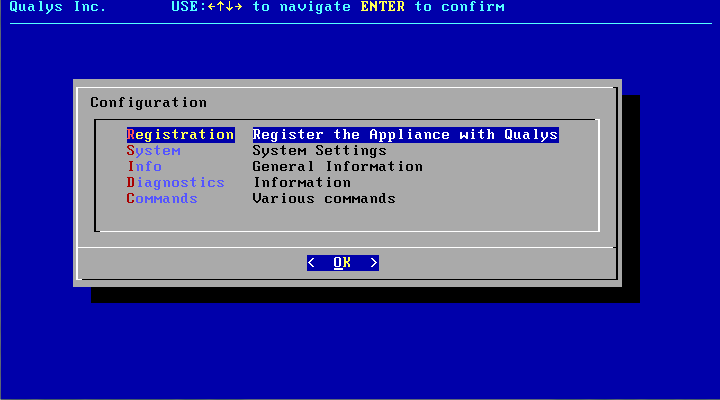
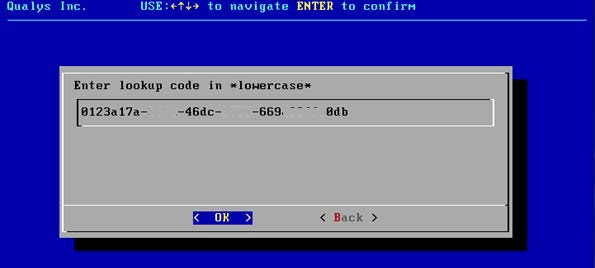
Enter the Personalization Code generated in the QGS User Interface module.
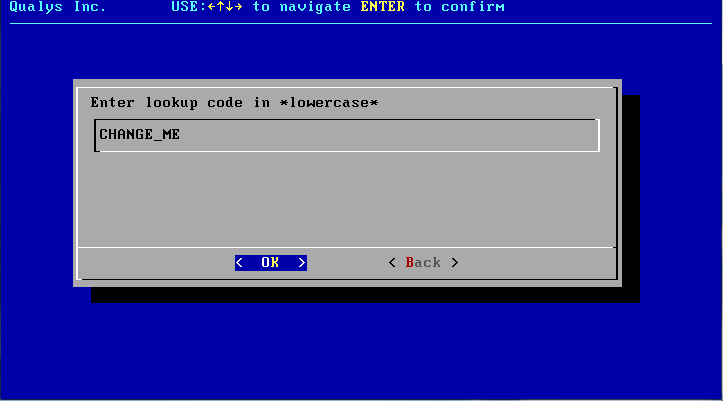
Here’s an example of a redacted Personalization Code.
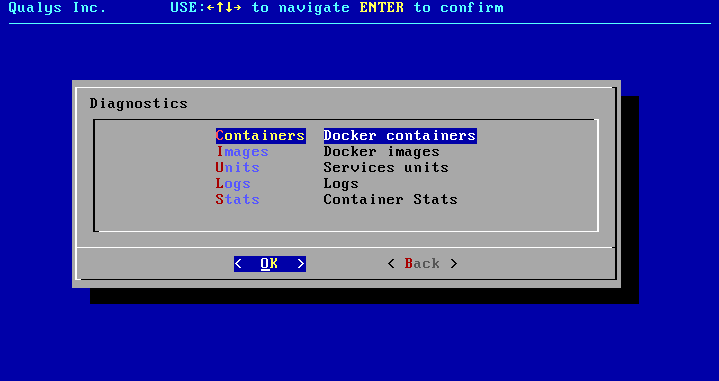
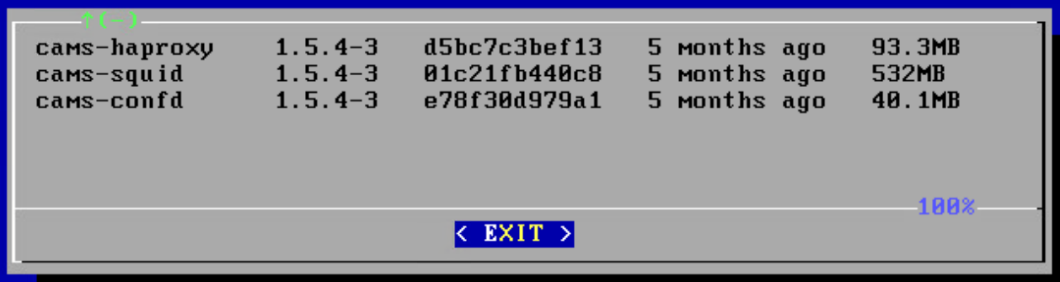
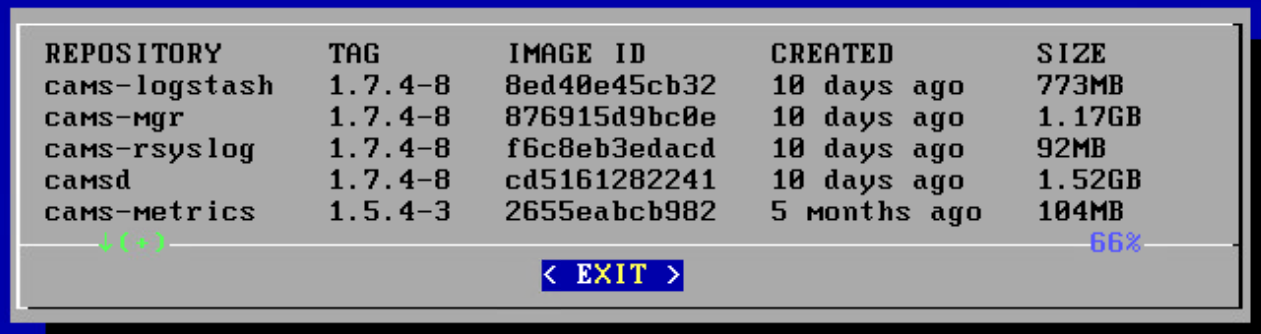
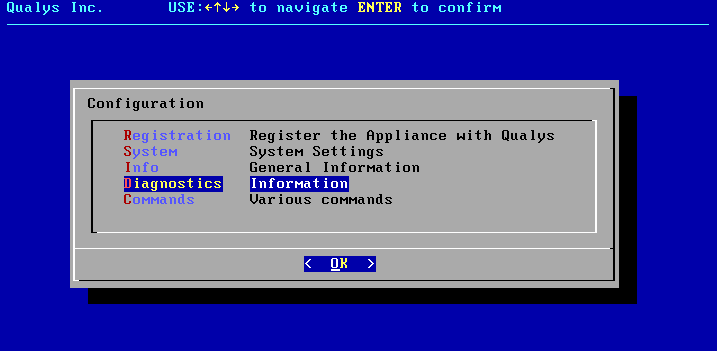
Diagnostics

The version can change according to the CAMS/QGS releases and will be conveyed to you with the help of release notes.
You need to wait at least Two hrs to enable the cache/patch on the QGSUI until all the latest containers/images are available on the appliance.
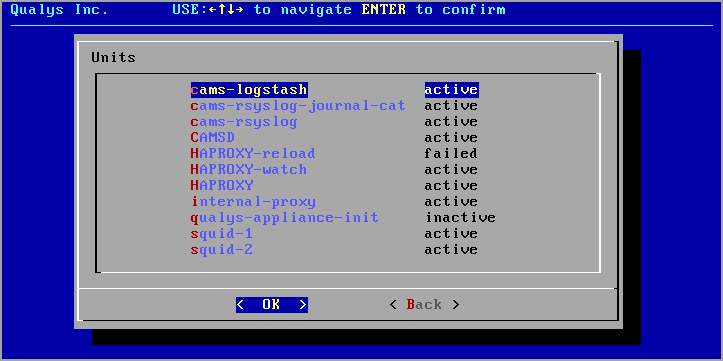
You can see Eight images and Eight containers under Diagnostics > Images and Diagnostics.
View log file of the virtual appliance. (Logs are also uploaded to the QGS UI Module.) Logs are sorted with most recent descending.
Navigation and search commands are defined in the UI.
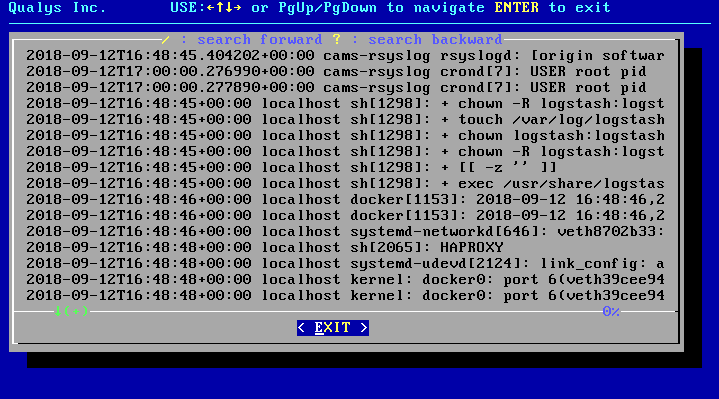
Don’t worry to delete or archive logs! The QGS appliance will automatically clean up its logs and disk space as it reaches capacity.
Executes a network connection test through a configured upstream proxy.
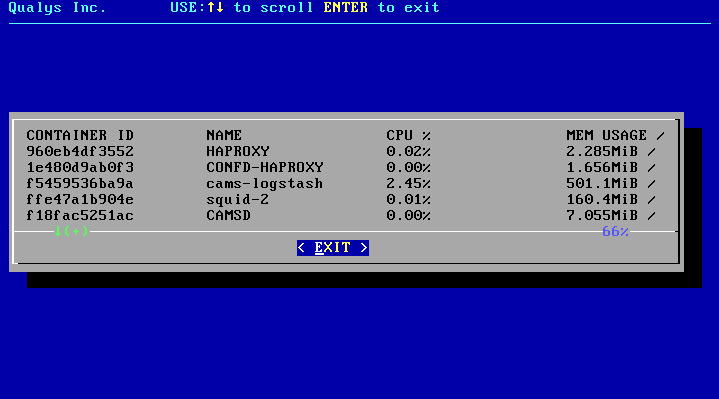
View utilization of the virtual appliance services.
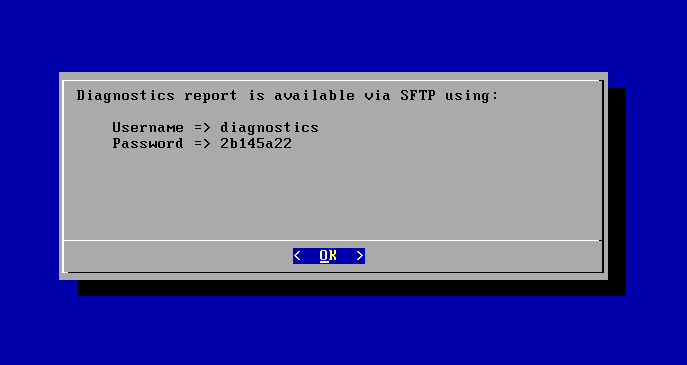
The QGS Appliance supports a Diagnostic mode to help accelerate Qualys Customer Support troubleshooting and problem resolution, primarily for initial network setup and registration issues. The Diagnostic mode is a user-initiated command that creates an encrypted report archive for the customer to collect and submit to Qualys Customer Support. The Diagnostics command creates a one-time generated password to download the encrypted report archive from the QGS appliance using SFTP.
- On the local console-based user interface, select the Diagnostics menu
- Executing the Diagnostics mode will trigger the appliance to create the encrypted report archive and generate a one-time random password to access the appliance to copy the diagnostics archive.
- Connect to the appliance using SFTP using the diagnostics username and one-time random password.
- Download the encrypted report archive from the appliance to a system of your choosing.
- Upload/attach the encrypted report archive to a Qualys customer support case.
Generate Upstream PCAP File
Follow these steps to create a packet capture file for the network communications between the QGS and the next hop, upstream.'
- Navigate to text UI and hit the Generate TCP dump. You need to wait for 5 minute.
- Generate the diagnostics logs as the dump file is captured in diagnostics reports.
- Any PCAP file previously generated will be overwritten in the process.
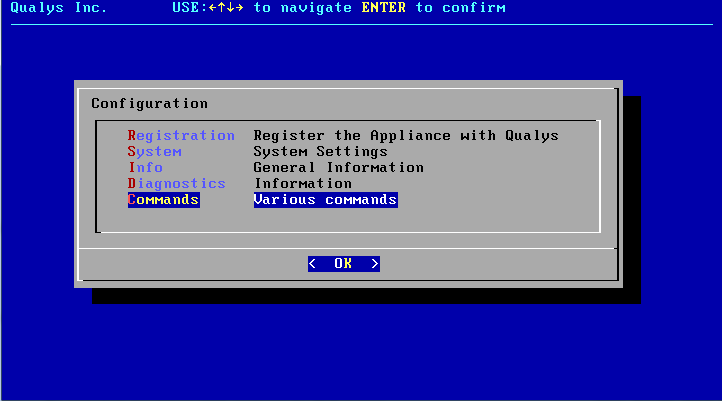
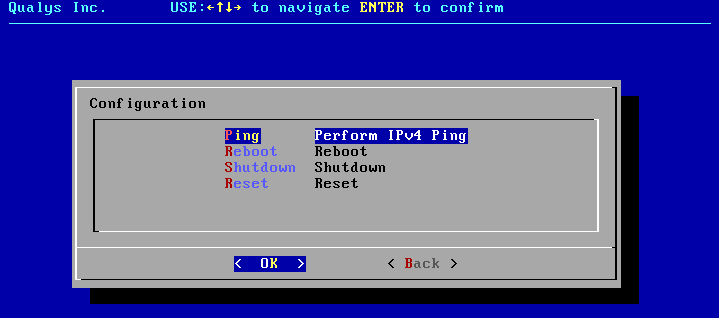
Commands
You can run commands to restart/reboot the appliance or fetch its ping.
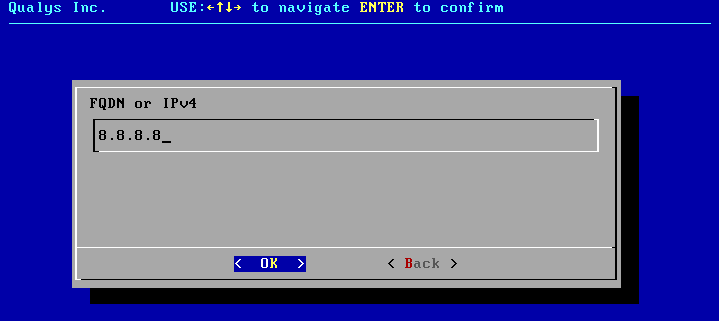
Ping is required to perform the connectivity checks. So, make sure that ping is enabled for IPs/URLs mentioned in Network Configuration section.
ICMP message types 0 and 8 are required to perform the connectivity checks using ping. When using ping, ensure ICMP 0,8 are enabled for IPs/URLs mentioned in the Network Configuration section.
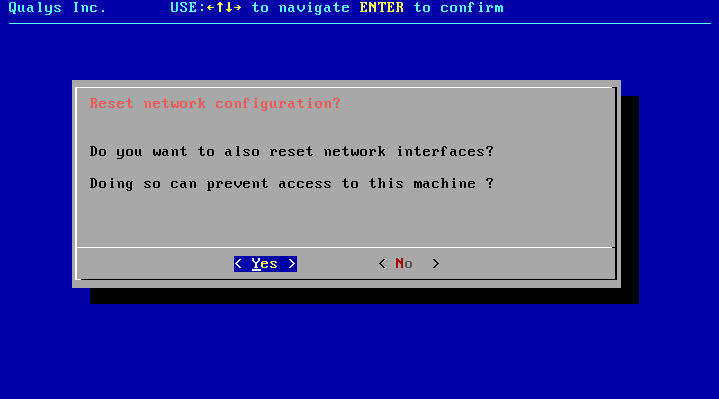
Reset appliance to its original unconfigured state.
Warning: All configurations and log files will be deleted.

Reset network interface of virtual appliance.
Note: This only resets the network configuration of the appliance.