Microsoft Office 365 Connector
SaaS Detection and Response (SaaSDR) enables you to understand the compliance posture of your SaaS applications. For Office 365, you can validate your environment against CIS controls using SaaSDR.
The Center for Internet Security (CIS) has published CIS benchmarks for O365 that can be validated using SaaSDR. Several controls can only be validated using PowerShell commands executed in your Azure environment. To accomplish this, you must install the PowerShell Module (PM) in your Azure environment, as mentioned in the following steps.
Prerequisites
To create the Office 365 Connector, the following prerequisites must be met:
- Azure Cloud Shell: The instructions involve running an automation script that uses the Azure CLI. Please make sure you have the Global administrator that has access to the Azure Cloud Shell.
- An active paid subscription to Microsoft Azure to create a serverless deployment containing the following resources.
- Azure Function App
- Azure Storage Account
- Azure Key Vault
All these resources would be created in a separate Azure resource group for easy management.
- You must have the following user permissions:
-
User with Global Administrator permissions and an active paid subscription to Microsoft Azure.
-
Installation
Follow these steps to create a Office 365 Connector:
Create Azure Resources
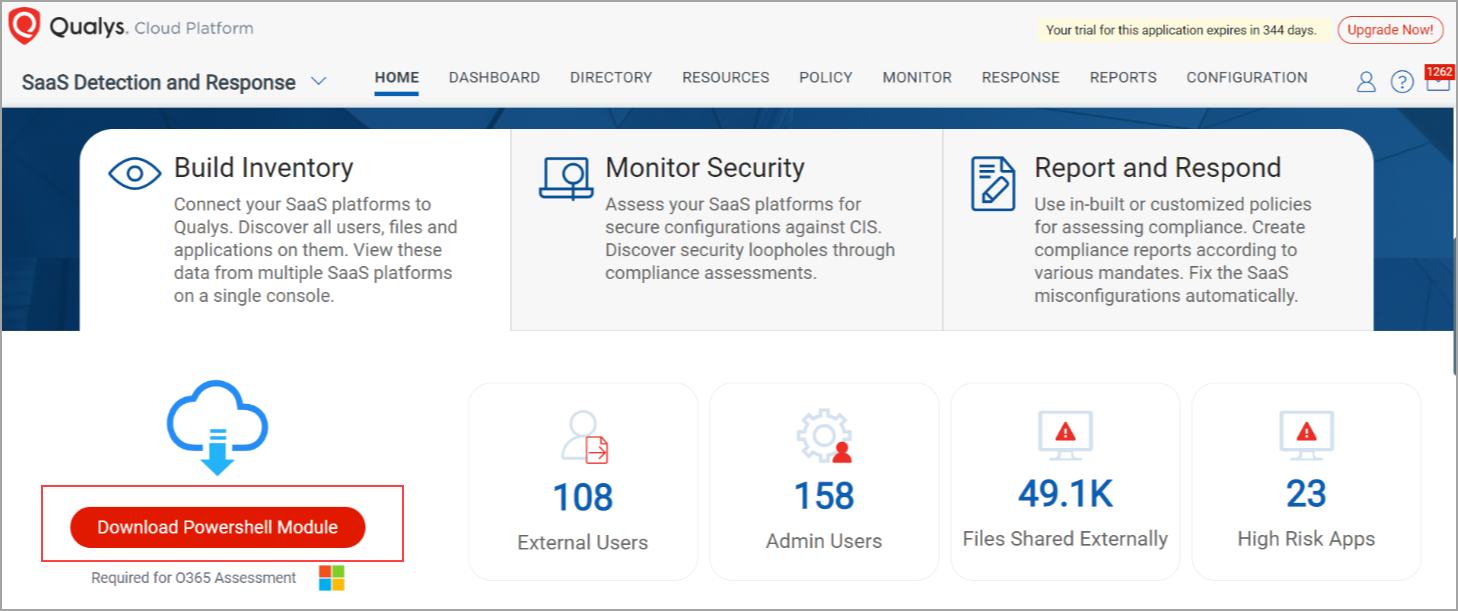
- Download the qualys_azure_setup.zip file from the home landing page. This file contains the required code for the Azure functions that validate individual controls as well as the script to be executed (qualys_azure_installation.sh).
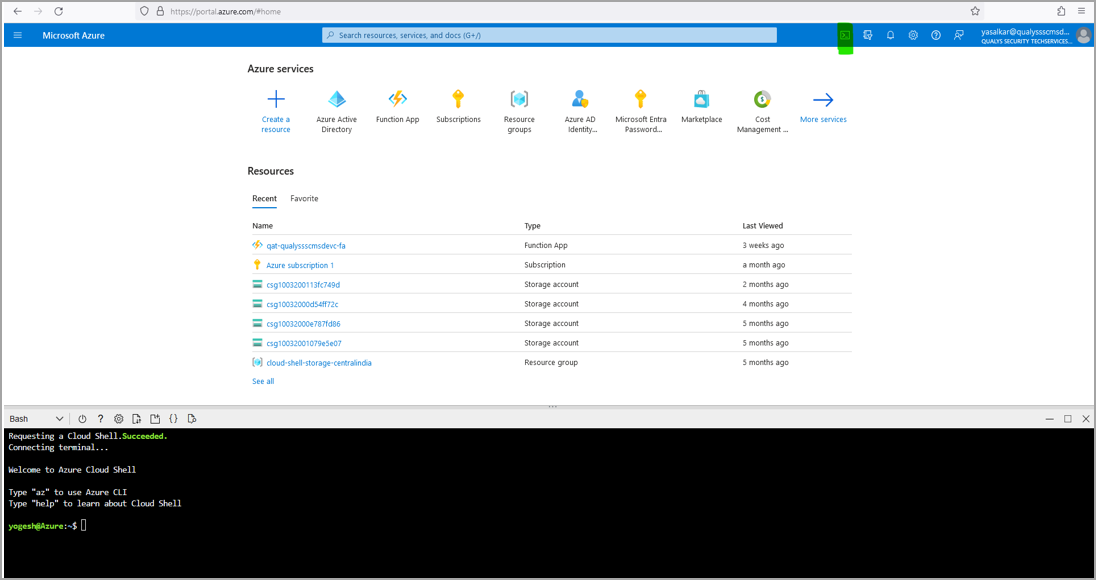
- Login to portal.azure.com with global administrator and open the Azure Cloud shell by clicking on the
 icon on top right side.
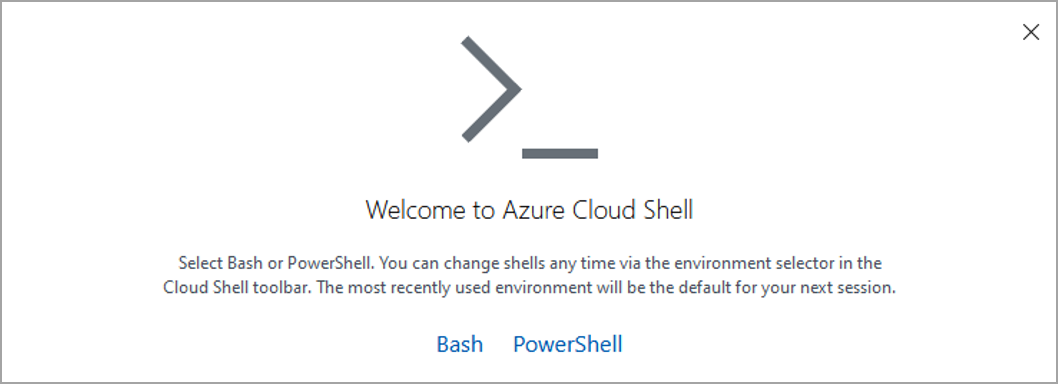
If this is the first time you open the cloud shell on the Azure portal, select Bash for the following prompt.
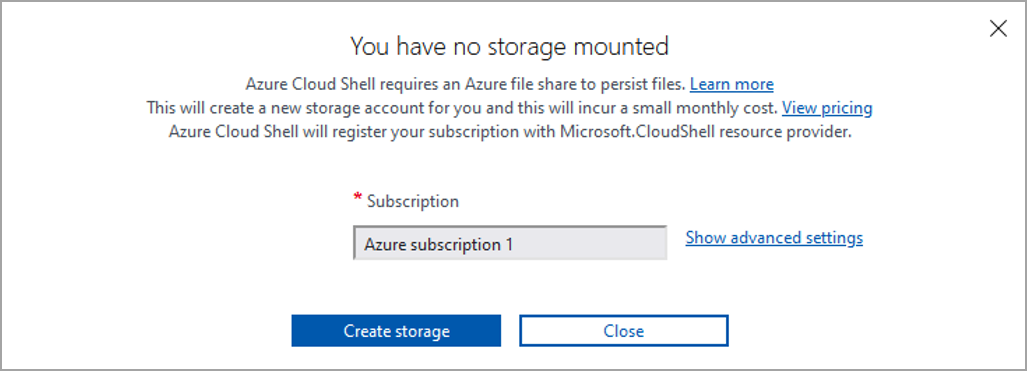
In the next step, select the appropriate subscription and click Create Storage.
-
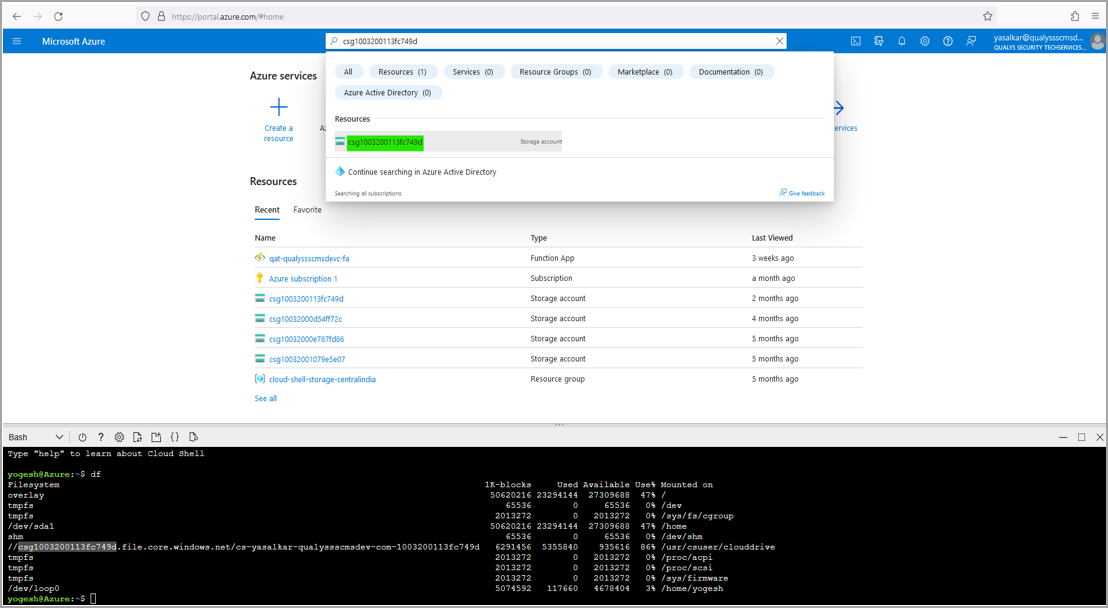
Once the bash terminal is open, type the df command and copy the storage account as shown below.

-
Paste the storage account copied from the above step in the Azure portal search box and click on the storage account found in the search.
-
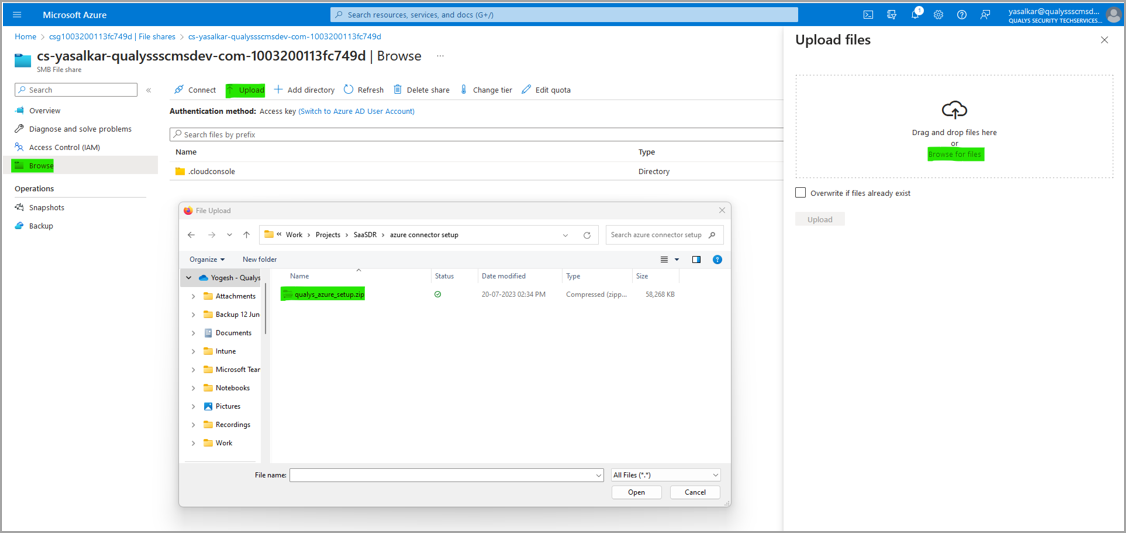
On the left panel, click on the File shares option and then click on the listed file share as shown below.

-
On the left panel, click the Browse option, then Upload. Now click Browse for files and select the qualys_azure_setup.zip file from the file explorer to upload the file to the cloud shell.
-
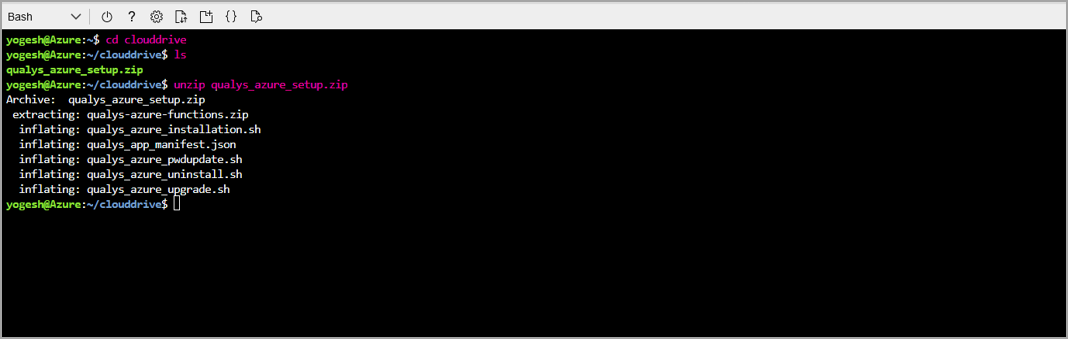
Now again, open the cloud shell, and unzip the qualys_azure_setup.zip file by using the following commands as shown in the screenshot.
~$ cd clouddrive
~$ unzip qualys_azure_setup.zip
-
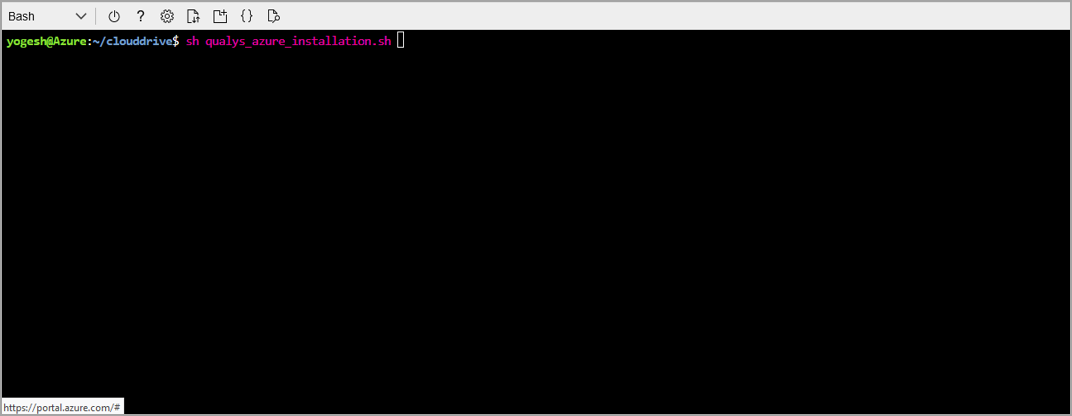
Now run the qualys_azure_installation.sh file is used to start the installation using the following command as shown in the screenshot.
$sh qualys_azure_installation.sh
-
Enter the following details in the script prompt.
-
O365 Domain name
-
Global Admin login email
-
Qualys platform you are using
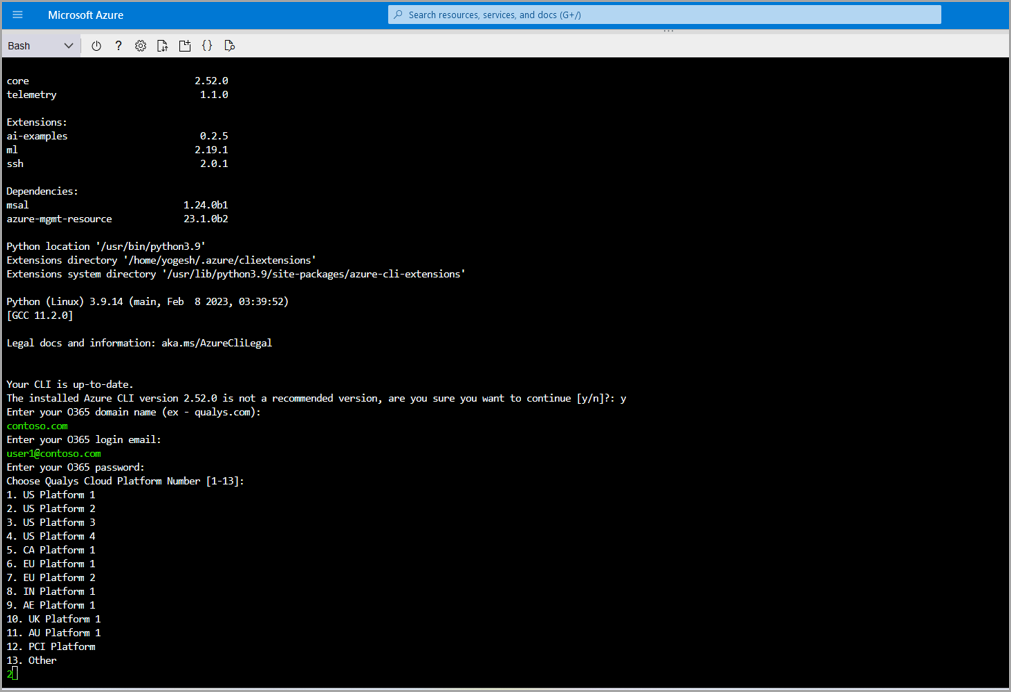
-
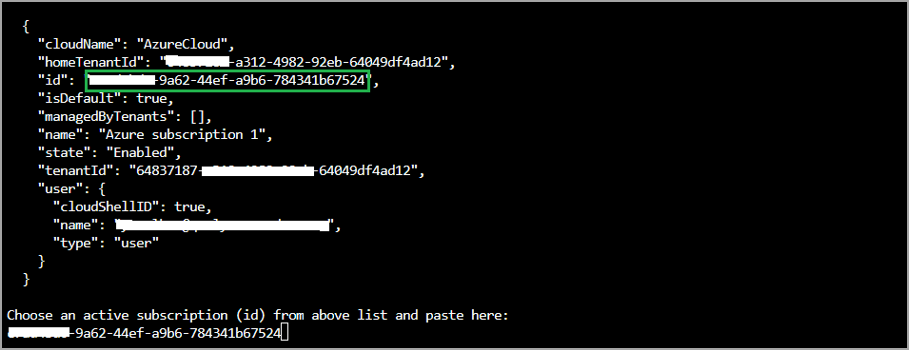
- In the next step, copy the subscription ID from the list for which you would like to create the connector.
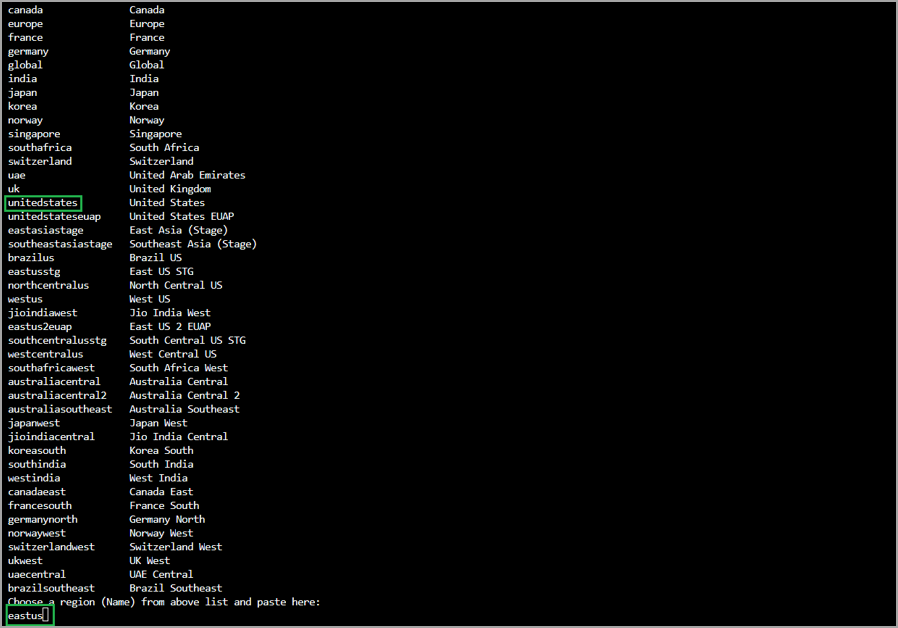
- From the list of regions, choose an appropriate region to deploy the Azure resources.
- After all the resources are created, the functions are uploaded. This step takes about 10-15 minutes. Do not stop this upload.

- Once the functions are uploaded, the Application ID, Application Key, Function Name, and Function Key are displayed on the console.
These items can be used to create the connector on the SaaSDR configuration page.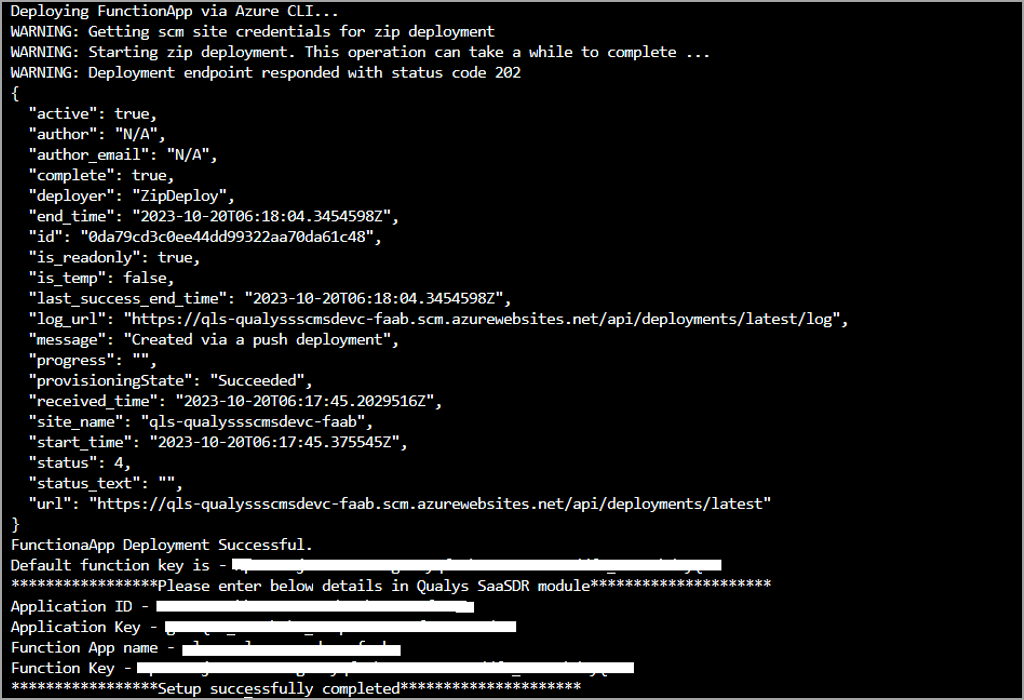
Create Connector in SaaSDR with Office 365 as application
- On the SaaSDR UI, go to Configuration > Connectors and click Create Connector.
- Select Office 365 from the SaaS drop-down menu on the Create Connector page.
- Provide the Application ID, Application Key, Function Name, and Function Key received in the previous steps.
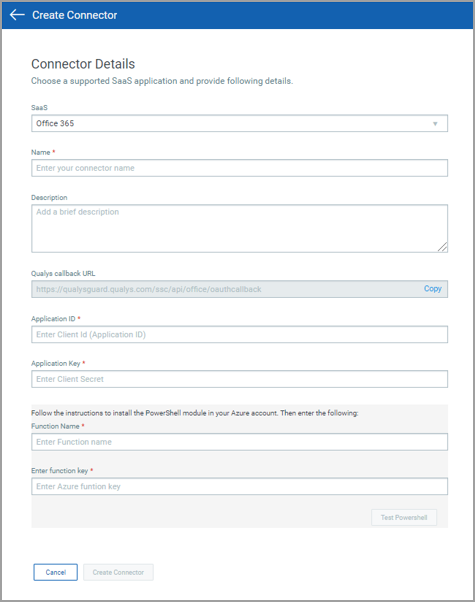
- Click Create Connector.
You are redirected to the application's login page, where you need to log in using your administrator credentials (this user must be a Global Administrator to be able to Grant Access to the newly created application). Once your connector is created, it is listed in the Configurations > Connectors list. Here, you can check the connector's status and other details.
That's it!
Once the application is connected, a scan is initiated to pull metadata from it. Depending on the number of resources to be cataloged in your application, this step may take some time to complete.