Slack Connector
Set up your Slack account to enable SaaSDR to scan it before you create the connector.
Follow these steps to create a Slack Connector:
- Create application and get Client ID, Client Secret Key
- Create Connector in SaaSDR with Slack as application
Create Application and Get Client ID, Client Secret Key
- Go to the https://api.slack.com/apps URL to create the app.
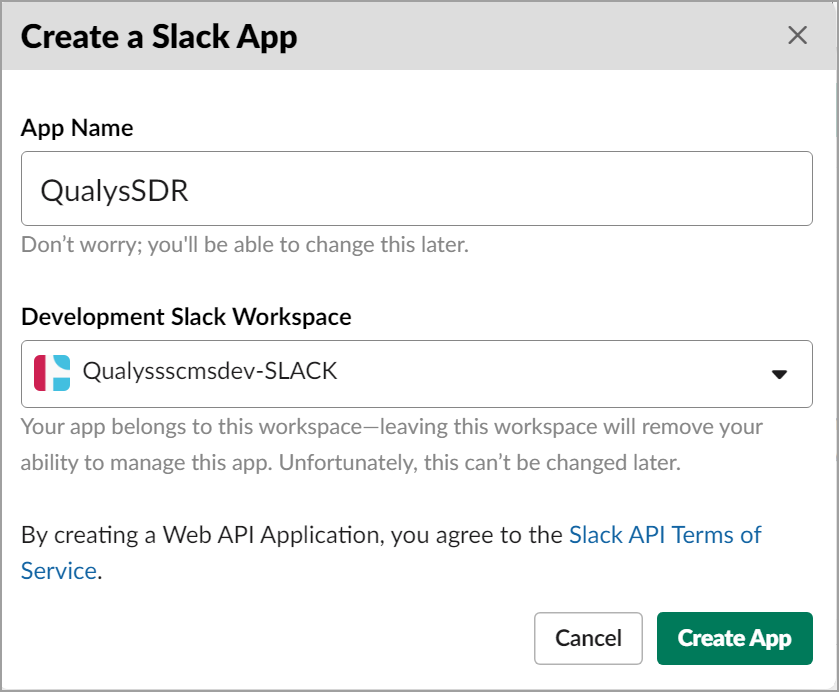
- Click Your Apps > Create New App.

- Enter App Name and select workspace.
Following details is displayed:
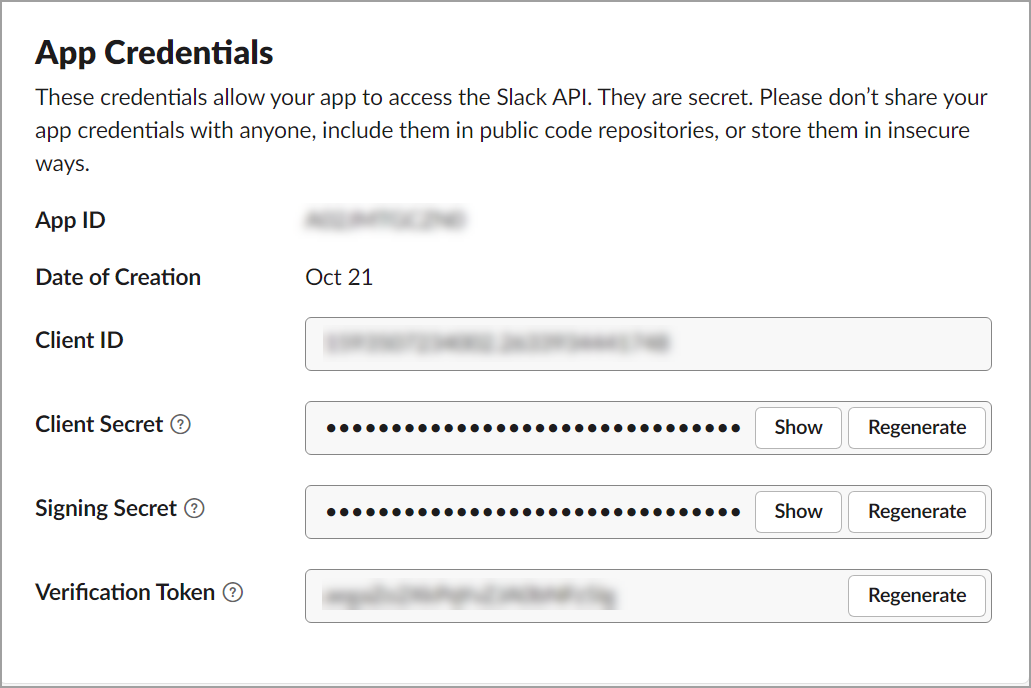
- Copy the Client ID and Client Secret from the above details; you need them in later steps while creating Slack Connector.
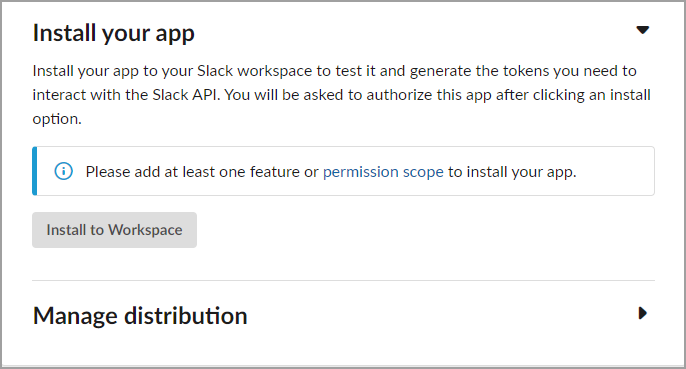
- Expand the Install your app section and click permission scope to add redirect URLs and scopes.
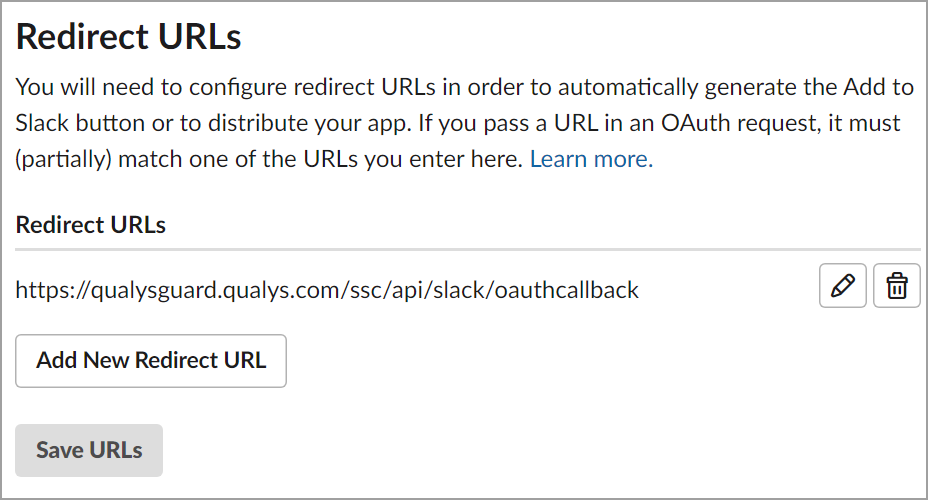
- Add redirect URL and scope (Example: https://qualysguard.qualys.com/ssc/api/slack/oauthcallback).
Redirect UrI as copied from Qualys SaaSDR application. (for example: https://qualysguard.qualys.com/ssc/api/slack/oauthcallback)
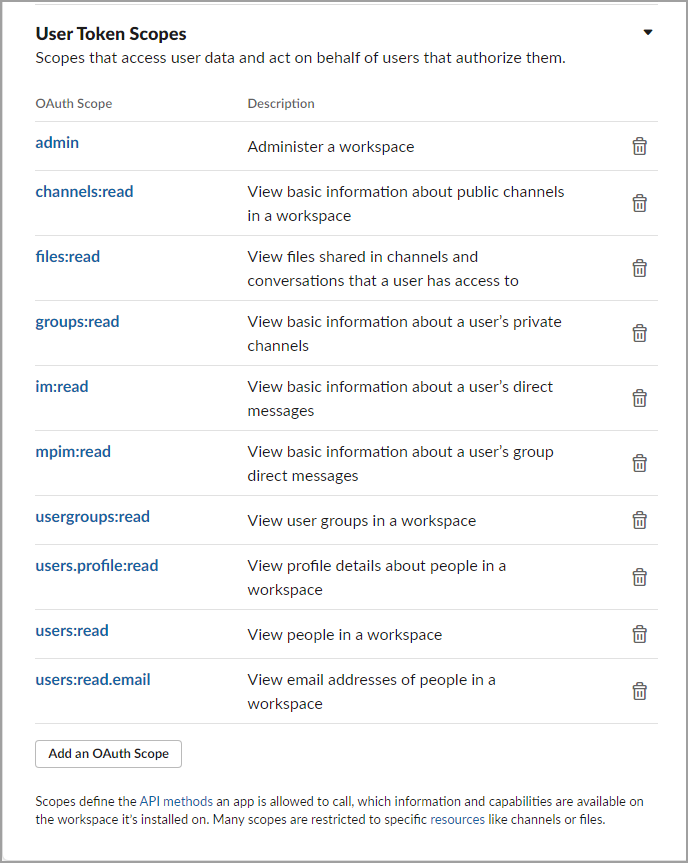
- Add the following scopes in User Token Scopes section and click Add an OAuth Scope.
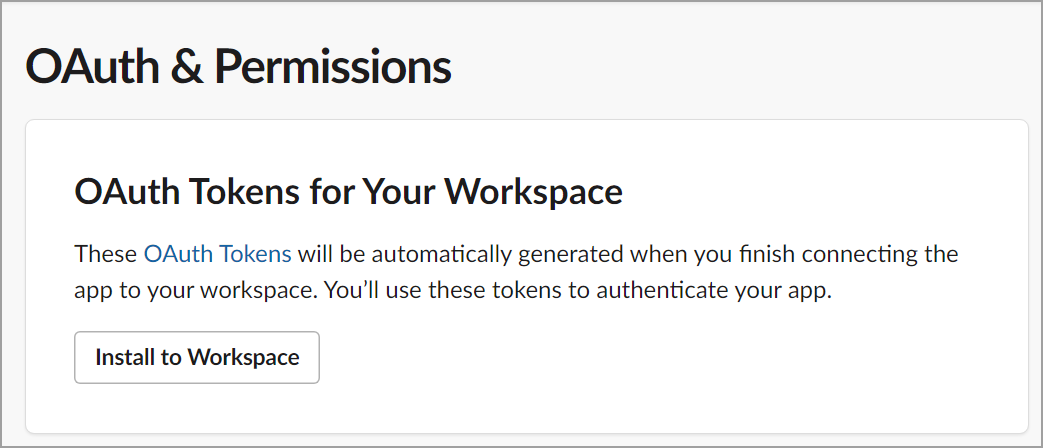
- On adding all the mentioned scopes click Install to Workspace.
- Click Allow and give permissions to your app.
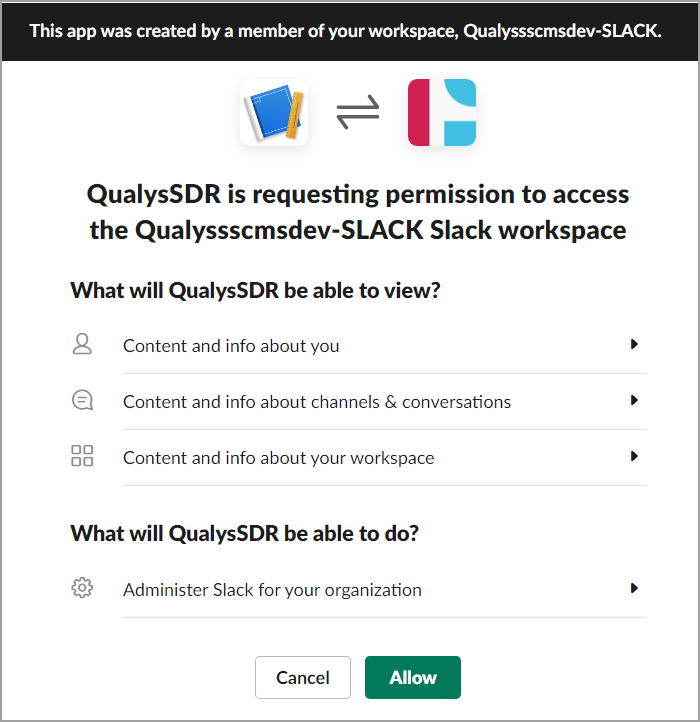
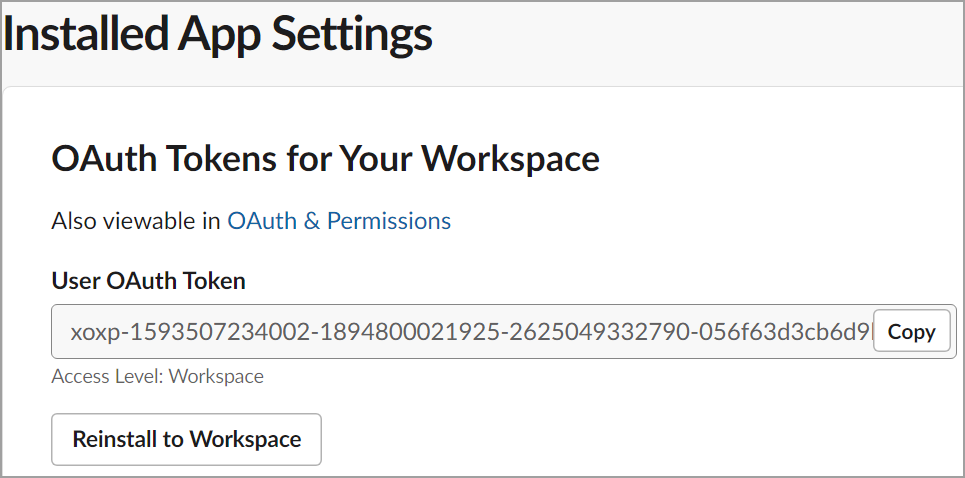
Once you click Allow, it creates your App, and the screen displaying the User Token is displayed.
Create Connector in SaaSDR with Slack as Application
- Now, on the SaaSDR UI, go to Configuration > Connectors and click Create Connector.
- Select Slack from the SaaS drop-down menu on the Create Connector page.
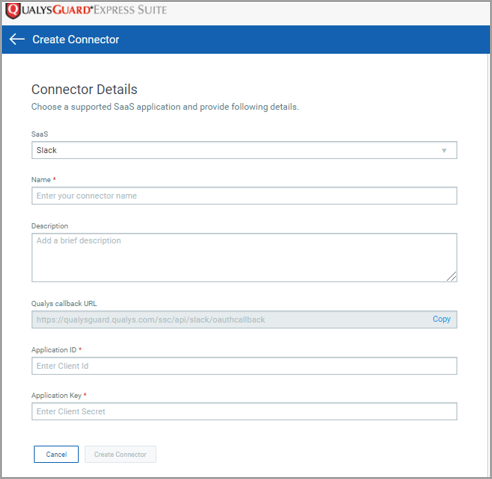
- Provide the Client ID and Client Secret as Application ID and Application Key in SaaSDR app.
- Click Create Connector.
You are redirected to the SaaS application's login page, where you need to log in. Once your connector is created, it is listed in the Configurations > Connectors list.
That's it!
Once the application is connected, a scan is initiated to pull metadata from it. Depending on the number of resources to be cataloged in your application, this step may take some time to complete.