Start Virtual Machine
After creating a virtual machine, you need to start it. Proceed with the following steps:
-
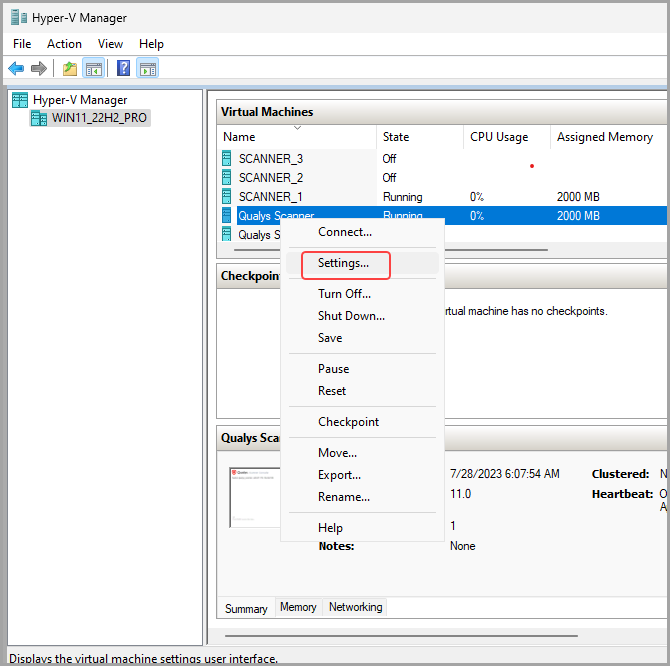
Open Hyper-V Manager Console.
-
To access the settings of your newly created virtual machine, right-click on it and select Settings.
-
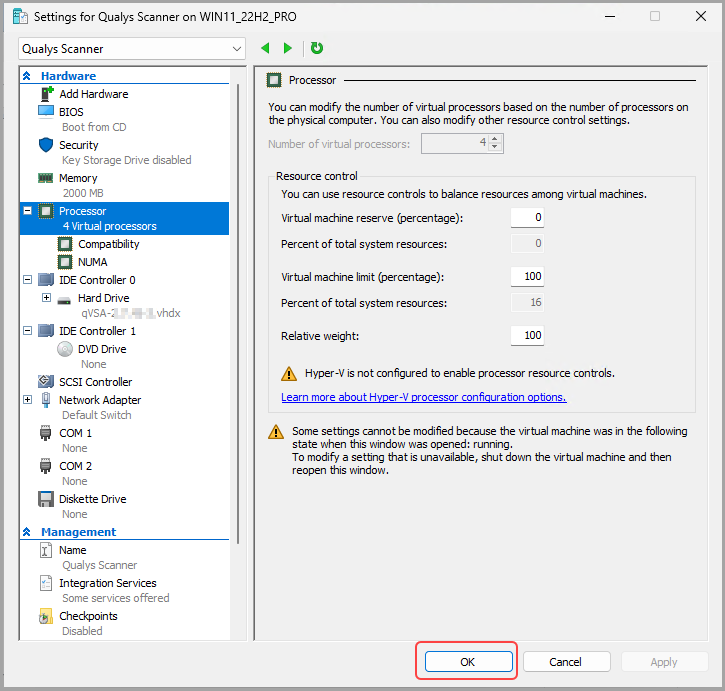
Ensure the virtual machine has at least two virtual processors and click OK.
The number of CPUs to allocated RAM ratio should always be 1:2. For example, 4 CPUS and 8 GB RAM. The maximum recommended size for a Virtual Scanner Appliance instance is 8 CPUs and 16 GB RAM.
Know more about Hyper-V CPU scheduler managementKnow more about Hyper-V CPU scheduler management
Hyper-V provides three CPU scheduler management options to optimize performance for specific scenarios. For the best results, we suggest adjusting the default settings on Qualys Scanner VM.
The CPU resource controls are:
- Virtual machine reserve – To ensure proper functionality, your scanner requires at least this minimum CPU.
- Virtual machine limit – This is the maximum amount of CPU that your scanner can use in a virtual machine.
- Relative weight – This is a number that you can assign to a virtual machine, ranging between 1 and 10000. This determines the CPU resource priority for virtual machines. In case of contention for CPU cycles, a virtual machine with a higher weight receives a larger portion of the limited resources. The Relative weight is set to 100 by default.
-
Uncheck Enable Checkpoints setting and click OK.

-
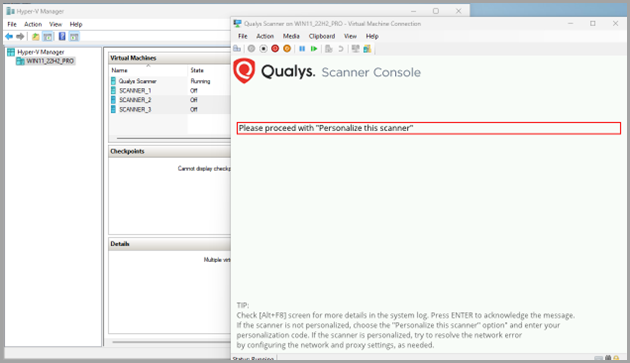
Right-click on the virtual machine and click Start.
Qualys Scanner console is displayed.
-
Click the message Please proceed with Personalize this scanner on the Qualys Scanner console.
If you need to change the network settings or configure a Proxy server before personalizing the scanner, you can do so via the Scanner Console main menu as shown in the following screenshot.

Know more about Proxy SettingsKnow more about Proxy Settings
Scanner supports proxy configuration for the following:
- IP-based and FQDN proxy host
- Proxy configuration with or without authentication
- Authentication modes: Basic and NTLM
For best results, use a proxy server with a static IP address and enable transparent SSL tunneling. Proxy-level termination, including SSL bridging, is not supported by the scanner. Additionally, SOCKS proxies are not supported in networking environments where the proxy server IP address is dynamically assigned.
- Using the Virtual Scanner Console, go to the main menu.
- Select Enable Proxy.
- Press the Right arrow and enter settings.
-
Enter a 14-digit personalization code in the Personalize this scanner field and wait for the scanner to get personalized.
-
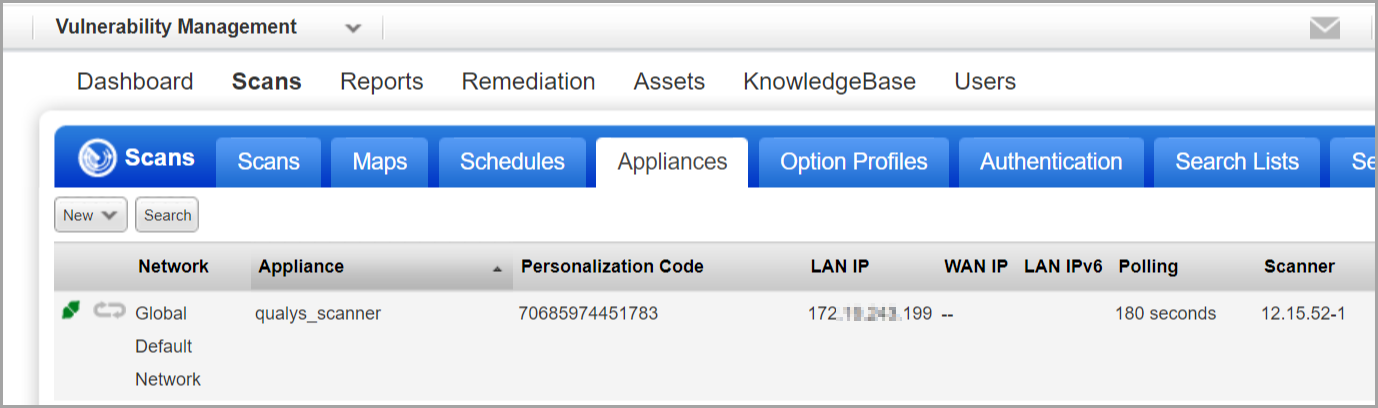
Check the scanner status in Qualys.
To confirm that the scanner is ready to use, check the virtual scanner status in the Qualys Scanner application.
-
Navigate to VM/VMDR, go to Scans > Appliances, and find your scanner in the list. Check that the scanner's status is Connected.
Check that the scanner's status is Connected.
It may take several minutes for the Qualys user interface to get updated after you add a new appliance. Refresh your browser periodically to see the most up-to-date details on the Qualys user interface.
Related Topics
Troubleshooting Steps for Resolving Qualys Scanner Startup Issues
Useful Commands: Hyper-V CPU, RAM and Storage information in Windows PowerShell