Enable WAN for Split Network Configuration
If the virtual scanner appliance is already deployed and you want to enable WAN for split-network scanning configuration, a second network interface must be configured for the virtual machine’s hardware settings and then for the Qualys scanner.
Perform the following steps to enable split-network scanning configuration within Hyper-V:
-
Turn off the virtual scanner appliance on Hyper-V Manager.
-
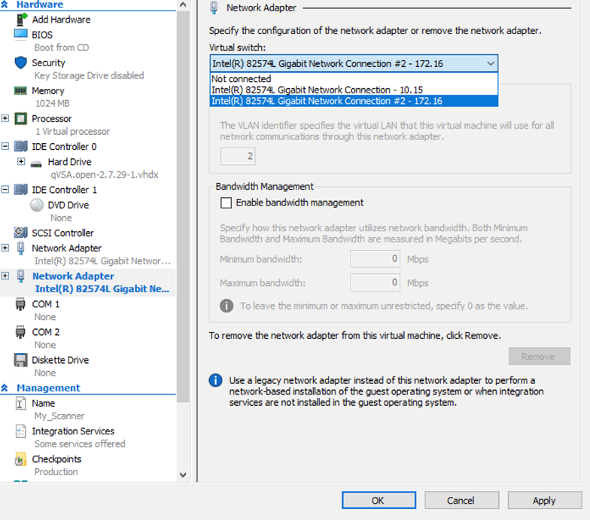
Edit the Virtual Scanner Appliance Hardware Settings.
Add a new Network Adapter. Network Adapter 1 must be set to the LAN destination network, and Network Adapter 2 must be set to the WAN destination network.
-
Power on the Virtual Scanner Appliance.
Start the Virtual scanner appliance on Hyper-V Manager. -
Enable WAN interface on the Virtual Scanner Appliance in Hyper-V
Perform the following steps to enable the WAN interface:
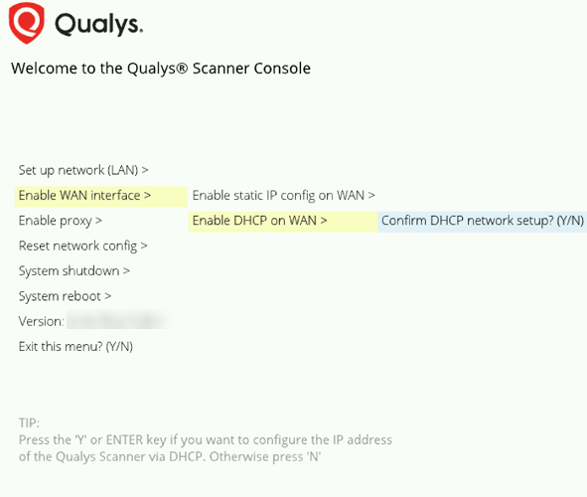
- Using the Virtual Scanner Console, go to the main menu.
- Select Enable WAN interface.
- Configure the WAN interface with either DHCP or Static IP configuration.
Configuring VLANs on Hyper-V
If you want to configure VLANs in Single or Split Network configuration, refer to Configure VLAN.