Deploy Scanner Instance using UI: Cockpit Web Console
This section explains how to deploy a Qualys Virtual Scanner instance using the KVM Cockpit Web Console and personalize it to connect to the Qualys Enterprise TruRisk™ Platform.
To deploy the Scanner instances, follow these steps:
- Go to the Cockpit web console and click Virtual Machines.
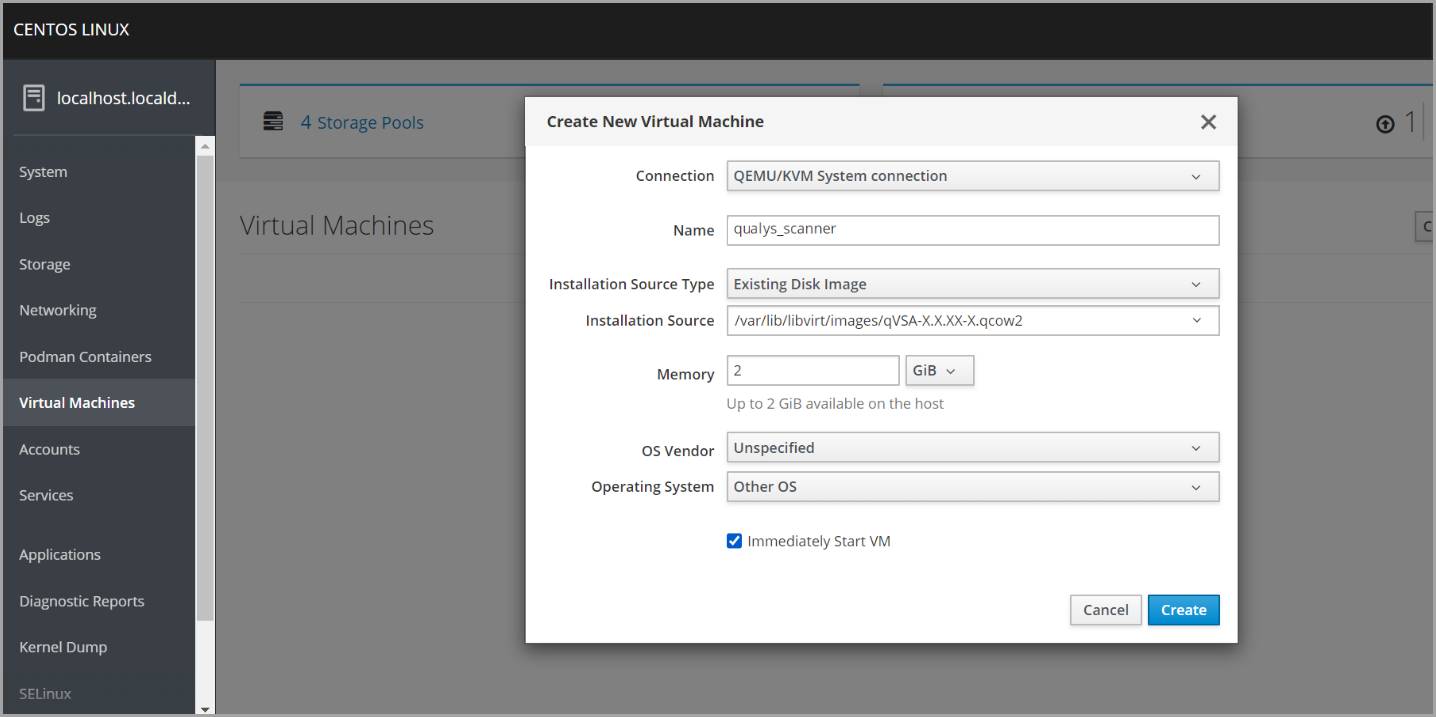
- Enter the details such as Connection, Name, Installation Source Type and so on.
For example,
Name - enter the name of the VM
Installation Source Type - select 'Existing Disk Image'
Installation Source - select the source where the imported image is available (make sure you change the owner&group of Image to qemu)chown qemu:qemu qVSA-X.X.XX-X.qcow2 - Click Create.
After the initial boot-up messages, the Scanner console is displayed where you need to enter the Personalization Code received in Step 1: Add your Virtual Scanner.
-
To activate the scanner, follow the steps mentioned in Step 4: Personalize the Scanner
Personalize the Scanner
Follow these steps to personalize the scanner:
- Power on your scanner instance Cockpit web console.
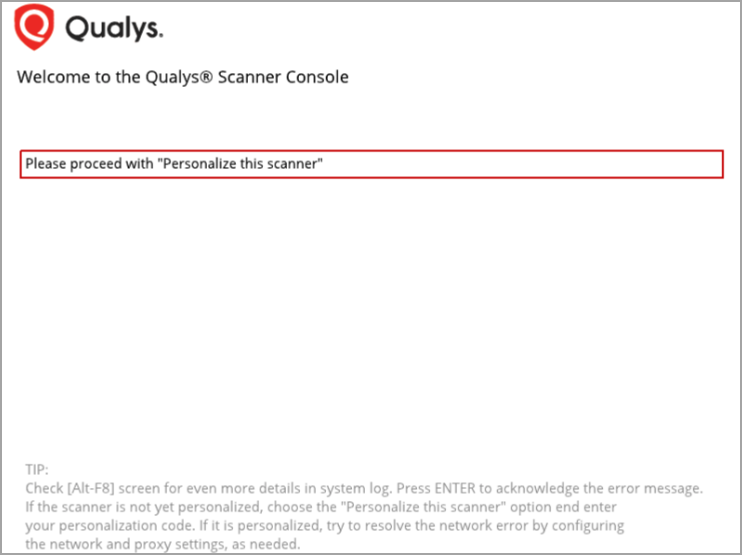
- In Cockpit web console interface, launch the scanner instance, click Please proceed with Personalize the scanner.
-
Click Enter personalization code and type the personalization code received in Step 1: Add your Virtual Scanner.
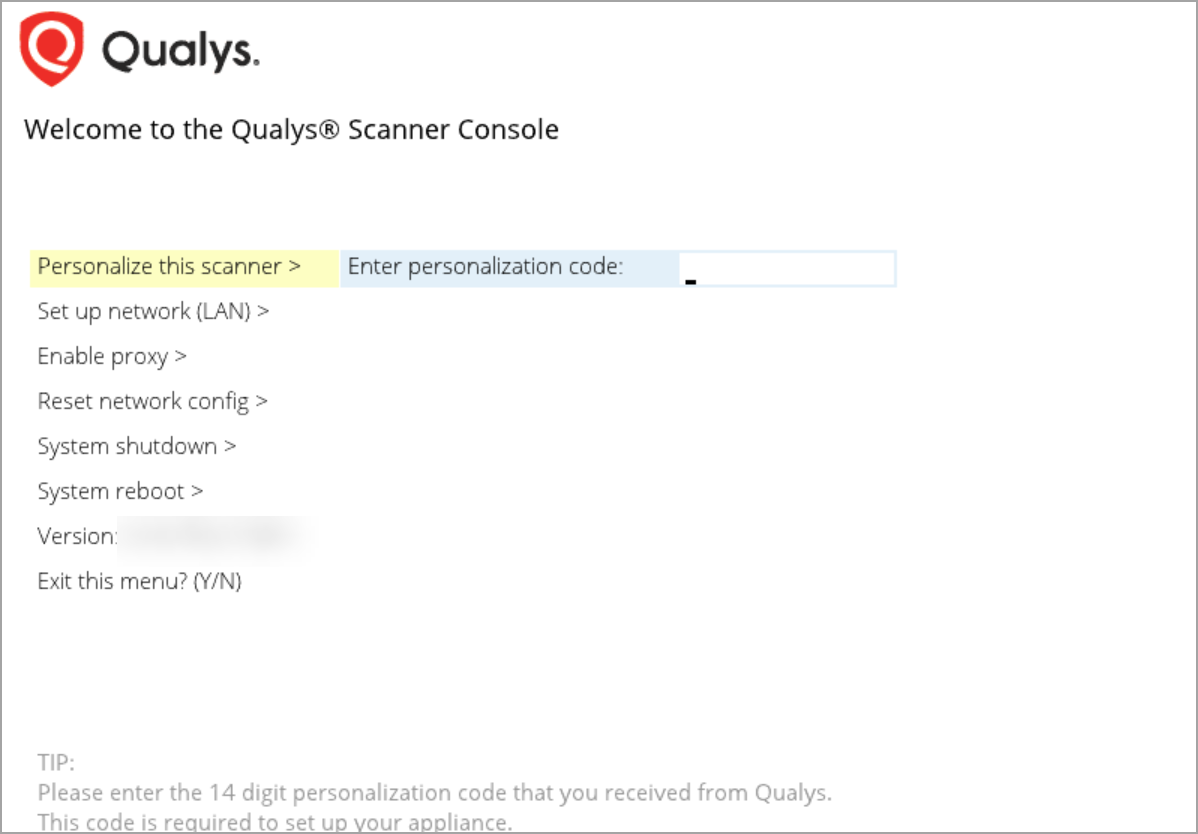
The scanner appliance connects with the Qualys Enterprise TruRisk™ Platform to complete the registration. The appliance also downloads the latest software and vulnerability signatures.
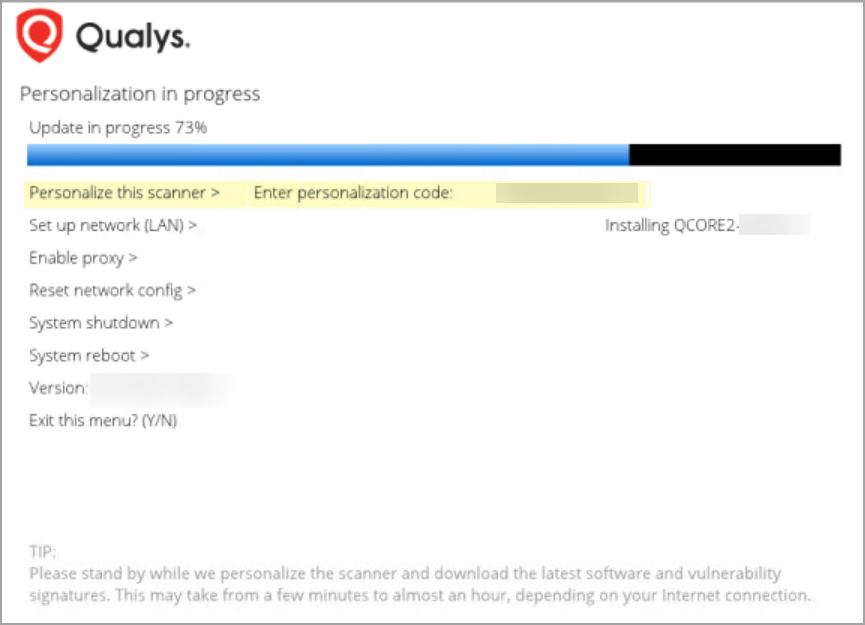
Once all the packages are downloaded, you see the message 'Welcome to the Qualys Scanner Console,' along with the appliance name and assigned IP address.
Alternative Method to Add Second Network Interface to Existing Scanner
This step is not needed if you used Method 1 to deploy the Split network scanner via the CLI and a user data file.
When deploying the scanner through the KVM Cockpit Web Console, you are limited to attaching a single network interface during the initial VM setup. The Cockpit UI does not provide an option to add a second network interface (the scanner’s WAN) at that stage.
You can add a second (WAN) interface to an existing scanner VM by manually editing its XML configuration.
To edit the XML, run this command:
virsh edit < INSTANCE NAME >
Example
virsh edit qVSA-X.X.XX-X
Add second interface configuration:
Ensure the source bridge network is present on the KVM Hypervisor host machine.
<interface type='bridge'>
     <mac address='<MAC address>'/>
      <source bridge='<name of the bridge network>'/>
     <model type='<model type>'/>
     <link state='up'/>
     <address type='pci' domain='0x0000' bus='0x01' slot='0x04' function='0x0'/>
</interface>
Example
<interface type='bridge'>
     <mac address='xx:xx:xx:xx:xx:xx'/>
     <source bridge='bridge1'/>
     <model type='e1000'/>
     <link state='up'/>
     <address type='pci' domain='0x0000' bus='0x01' slot='0x04' function='0x0'/>
</interface>