Configure Offline Scanner
To configure the Offline Scanner, perform the following steps:
- Launch the hypervisor (For example, Workstation, ESXi, or VirtualBox).
- Locate the offline scanner image file (starts with qVSA-O) on your local system.
- Import or deploy the OVA template using the hypervisor’s user interface.
The following table outlines the configuration details for deploying the offline scanner appliance across hypervisors.
Step
VMware Workstation
VMware ESXi
Oracle VirtualBox
Import Method
Go to File > Open and select the .ova image.
Use vSphere Client > Deploy OVA Template.
Go to File > Import Appliance wizard.
Deployment Location
Local machine
ESXi host or vCenter server
Local machine
Network Setup
Network Adapter 1:
NAT (default) with DHCP -This adapter is used to communicate with Qualys Enterprise TruRisk™ when the scanner is operating in CLOUD SYNC mode, which is the scanner’s default mode upon initial deployment. In this mode, Static IP configuration is not supported, and the adapter must be configured with DHCP.Network Adapter 2:
Host-Only (default) with DHCP - This adapter is designated for scanner management and configuration. This network interface must always be configured with DHCP.Network Adapter 1:
This adapter is used to communicate with Qualys Enterprise TruRisk™ when the scanner is operating in CLOUD SYNC mode, which is the scanner’s default mode upon initial deployment. In this mode, Static IP configuration is not supported, and the adapter must be configured with DHCP.Network Adapter 2:
This adapter is designated for scanner management and configuration. It enables access to the scanner's user interface through a web browser from another virtual machine on the same subnet as the scanner. This network interface must always be configured with DHCP.Network Adapter 1:
NAT (default) with DHCP -This adapter is used to communicate with Qualys Enterprise TruRisk™ when the scanner is operating in CLOUD SYNC mode, which is the scanner’s default mode upon initial deployment. In this mode, Static IP configuration is not supported, and the adapter must be configured with DHCP.Network Adapter 2:
Host-Only (default) with DHCP - This adapter is designated for scanner management and configuration. This network interface must always be configured with DHCP.Storage Format
Option to choose disk format (for example, thin or thick provisioning).
Storage and provisioning method selected during deployment.
Automatically handled by VirtualBox.
User Interface Access
Access the scanner user interface from a browser on the host machine.
Requires a VM with a browser on the same subnet as Network Adapter 2 to access the user interface.
Access the scanner user interface from a browser on the host machine.
- Customize the virtual machine settings (such as network configuration, storage options, or other settings) as needed.
- Power on the virtual machine.
By default, your Offline Scanner is configured with two network interfaces: Network Adapter 1 for scanning and Network Adapter 2 for Offline Scanner configuration and management purposes.
Additionally, the scanner is configured with 2 vCPUs and 4 GB of RAM by default. The maximum supported configuration for Qualys Offline Scanner is 8 vCPUs and 16 GB of RAM.
Add Proxy Server Details
If you have a proxy, you must give details about your proxy server.
Perform the following steps to add proxy server details:
- Copy and paste the Web UI URL into a new browser window.
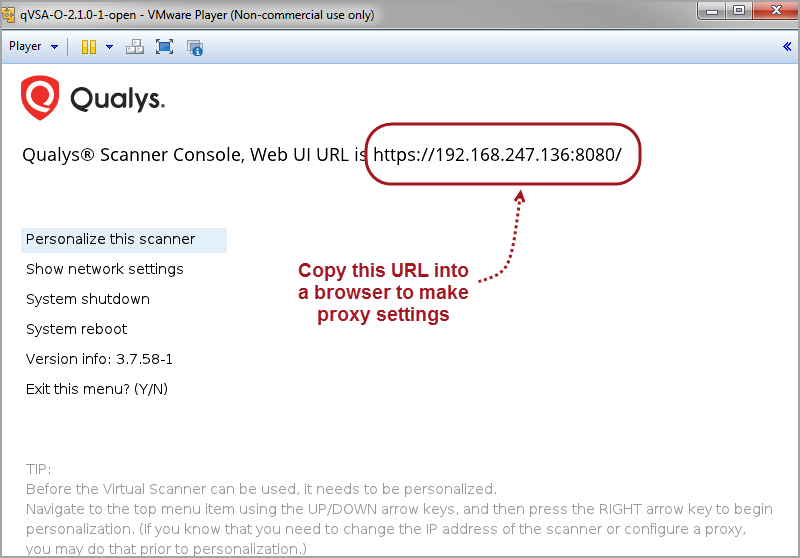
- Click the Click here link present on the screen to configure proxy settings.
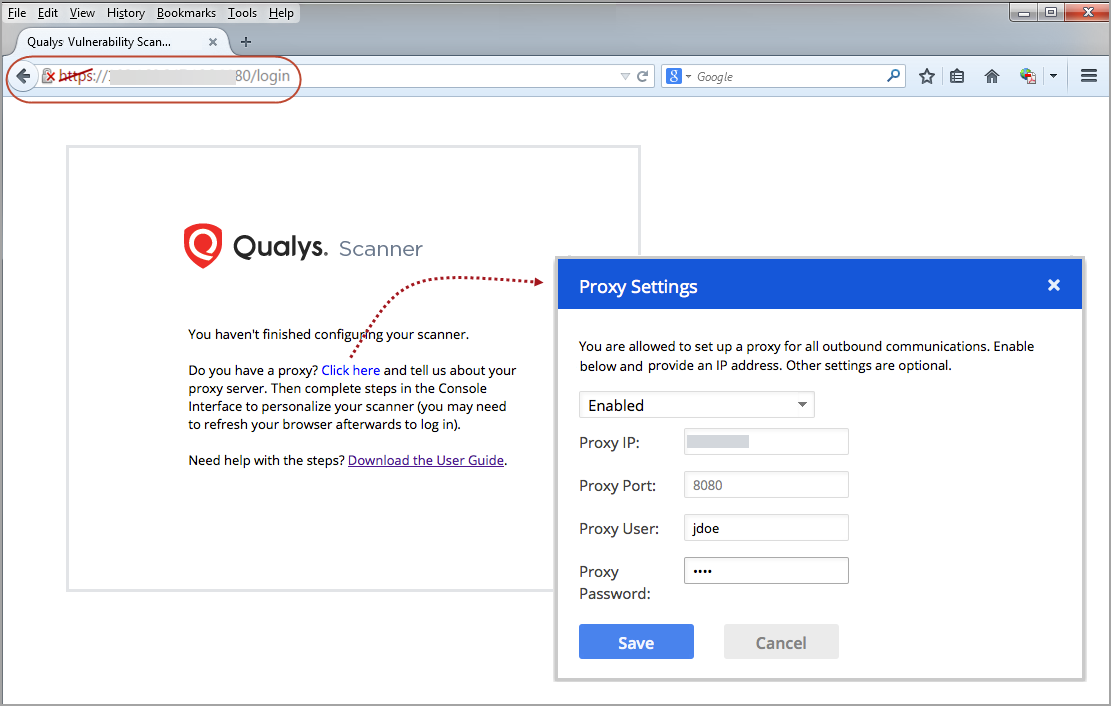
- Enter the IP address (required) and port number (8080 is implied but can be changed).
If the proxy server requires authentication, enter the proxy username and password.
After saving your settings, return to the Scanner Console to personalize your scanner.
Personalize the Scanner
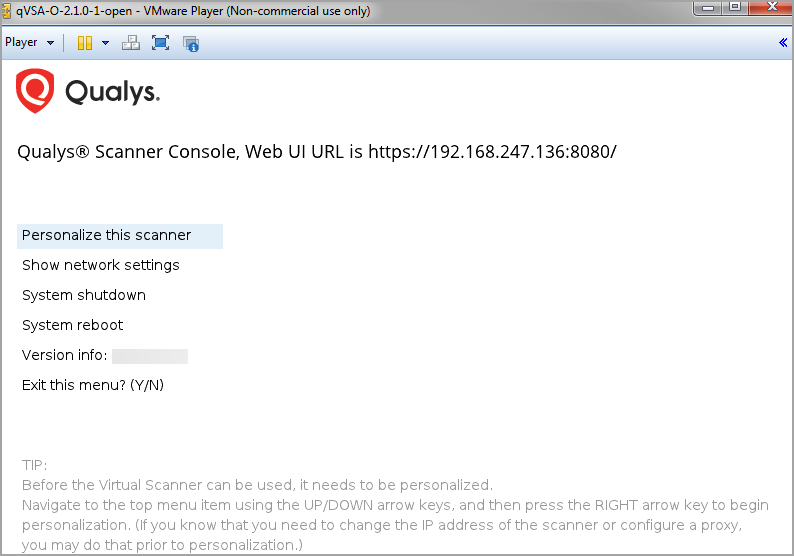
Perform the following steps in the Scanner Console to personalize the scanner:
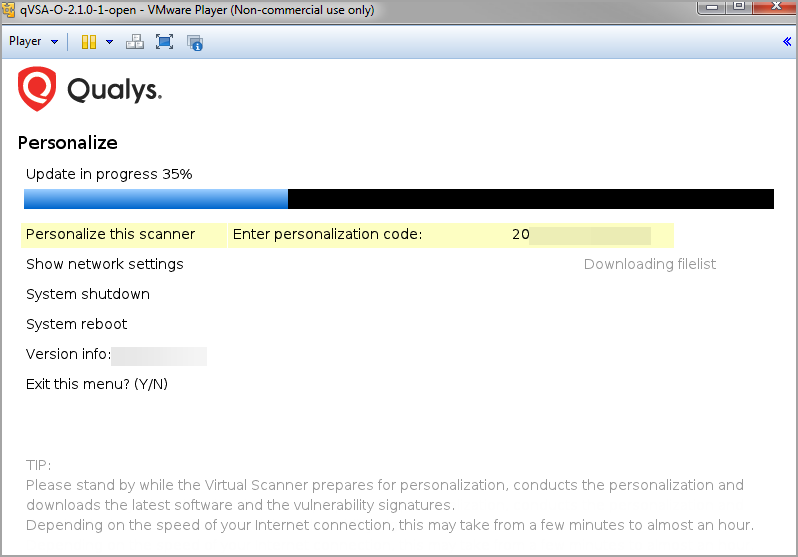
- Press the Right arrow to select Personalize this scanner.
-
Enter the personalization code.
If you do not have your personalization code, perform the following steps:
- Log in to Qualys Enterprise TruRisk™ Platform.
- Navigate to the VM/VMDR app.
- Then, go to Scans > Appliances. There is a separate column for personalization code.
Now, your scanner connects to the Qualys Enterprise TruRisk™ Platform to complete the activation and download the latest software.
Troubleshoot Activation Progress
If you face any issues in the activation progress, perform the following steps to troubleshoot it:
- Check your scanner network settings.
For more information about the Offline Scanner VM’s network configuration, refer to the Network Configuration section. - Check network access to scanners.
- Log in to Qualys Enterprise TruRisk™ Platform and go to Help > About to see a list of URLs (at the SOC) that your scanner must be able to contact on port 443.
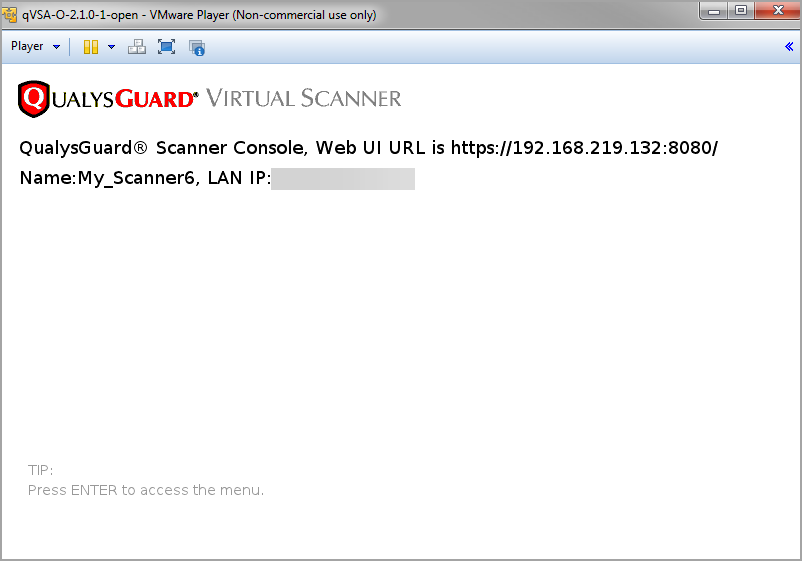
If successful, the scanner's name and IP address are displayed.
That’s it! You have added your offline scanner to your account.
Note the Web UI URL. You need this in a few minutes to log in to the Scanner’s Web UI.