Switch to OFFLINE SCANNING Mode in Oracle VirtualBox
Configure the OFFLINE SCANNING mode for a scanner deployed in Oracle VirtualBox, perform the following steps:
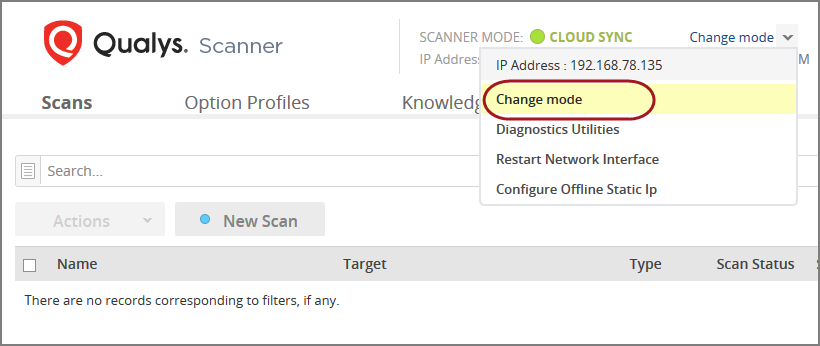
- Choose Change mode to get started.
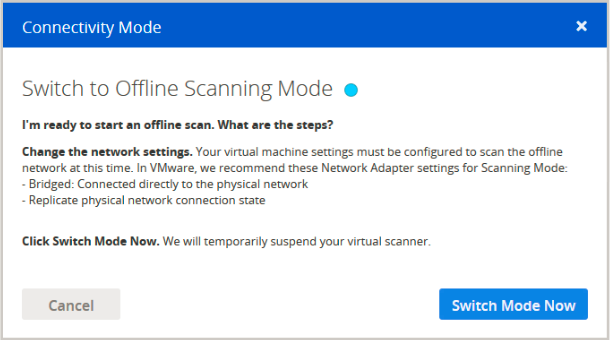
- Do not click Switch Mode Now. You need to do this later, after configuring the networking settings of your Scanner Virtual Machine.
-
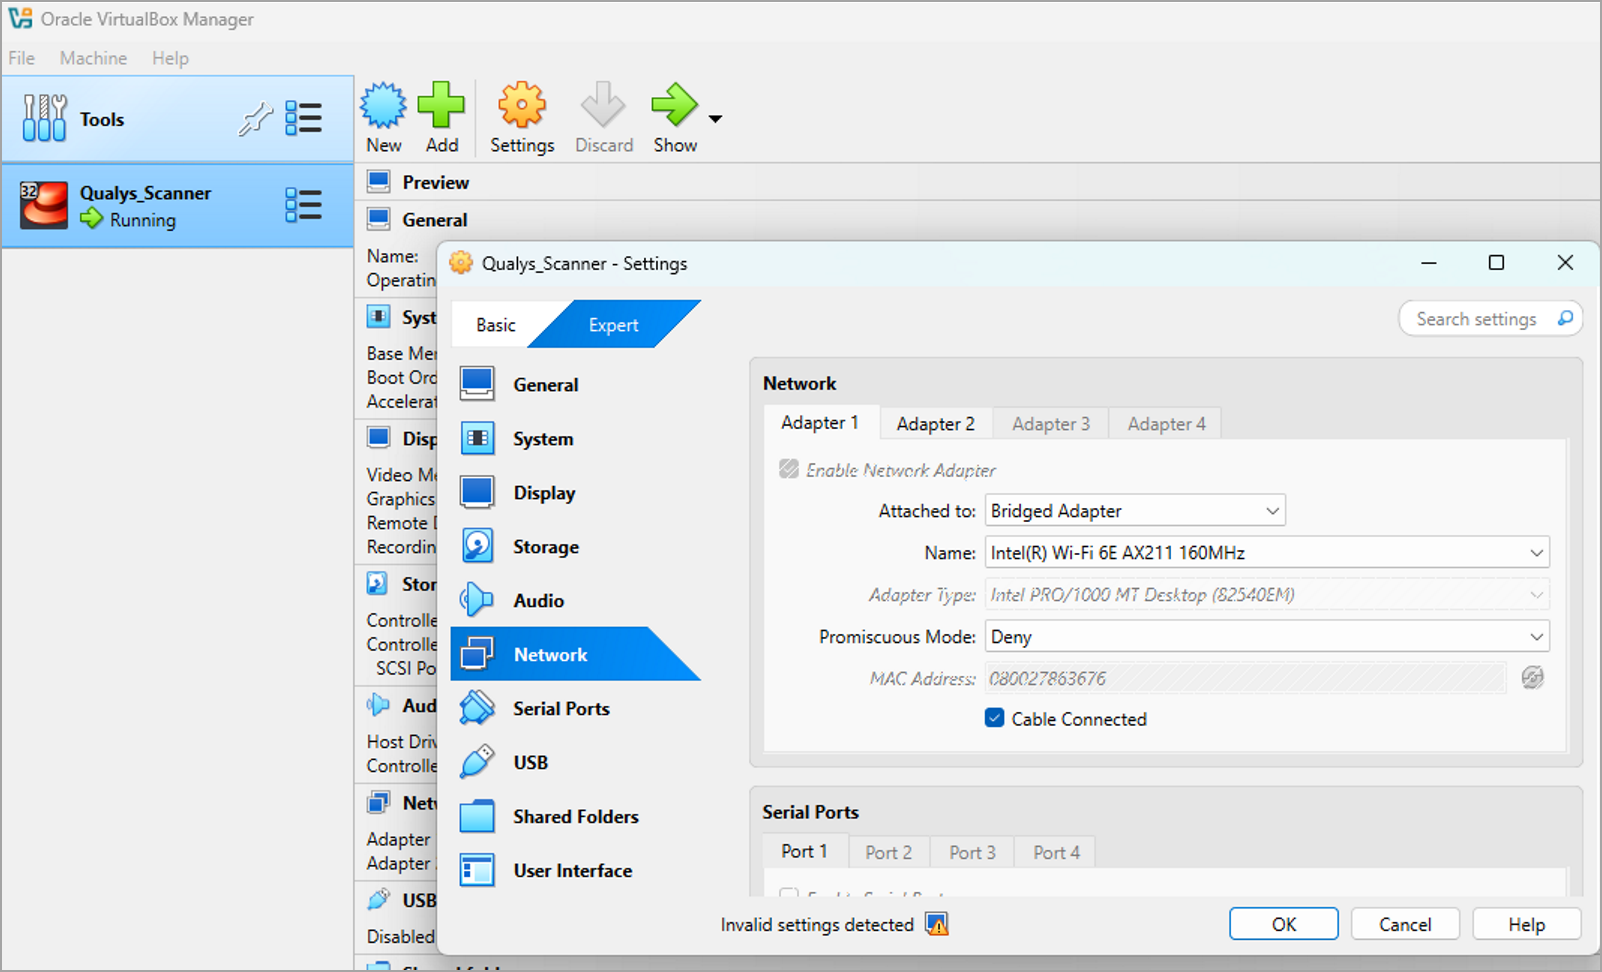
For scanning, we recommend that Network Adapter 1 be configured with Bridged network mode.
To configure bridging for Network Adapter 1, go to Settings > Network. From Offline scanner VM, choose Attached to Bridged Adapter.
Make sure Cable connected is selected. Then click OK to save your network preferences.
-
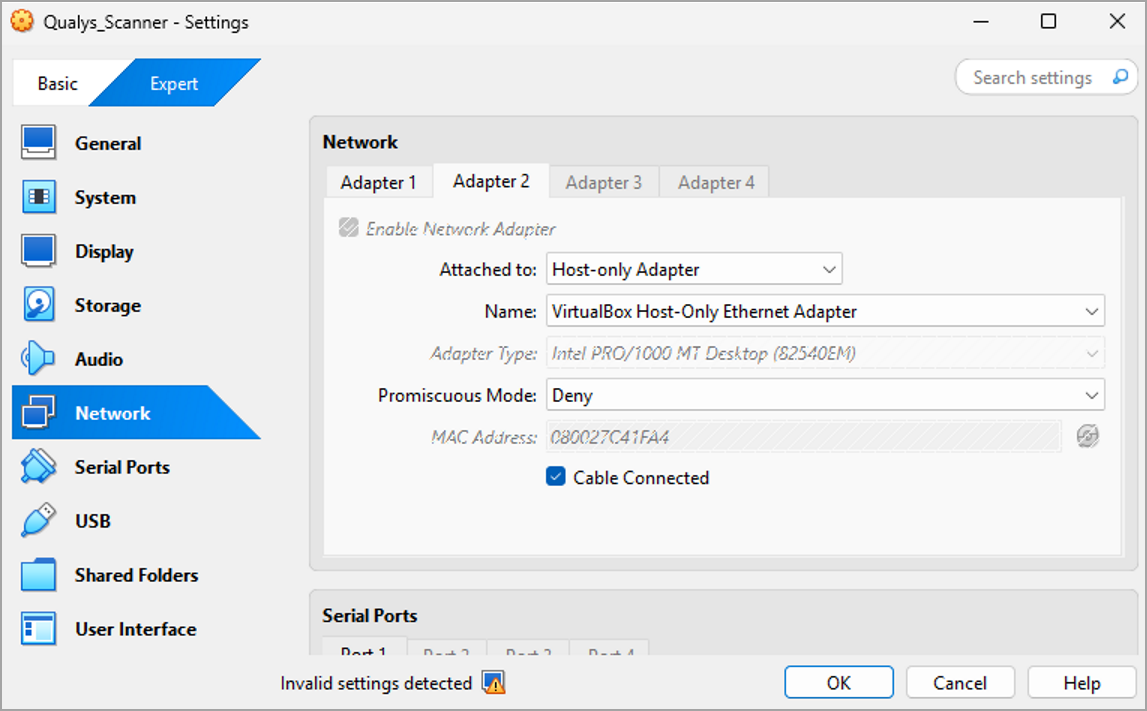
No changes in the network configuration for Network Adapter 2 are required. This network interface is used only for configuring and managing your Offline scanner. By default, Network Adapter 2 is configured as a host-only network adapter.
On Oracle VirtualBox, the Offline scanner should not be configured with Intel PRO/1000 MT Server and Paravirtualized network adapter types.
-
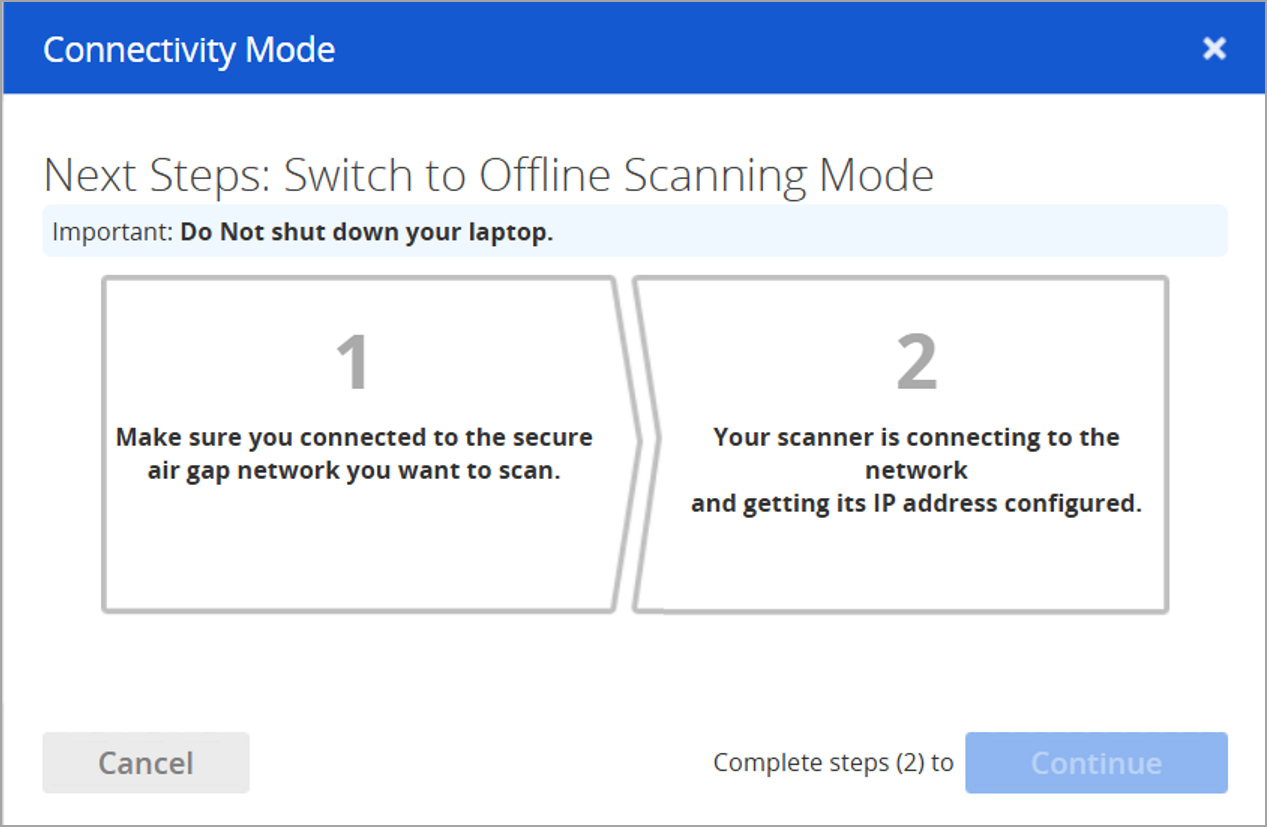
Now, your network is configured for OFFLINE SCANNING. Return to the Offline Scanner WEB UI and click Switch Mode Now.

Make sure the system remains powered on. Restarting or shutting down the Offline Scanner VM resets the scanner to CloudSync mode.
-
To complete the switch to OFFLINE SCANNING mode, click Continue.
The scanner is now switched to the OFFLINE SCANNING mode.