Deploying Scanner in OpenShift Console
Use the following steps to upload the QCOW2 image and deploy the scanner appliance within the OpenShift Console.
-
Upload your QVSA extracted QCOW2 image as a bootable volume.
- In the Administrator view, go to Virtualization, select Catalog, and then select Bootable volumes.
- Click Add Volume (top-right).
- Enter the following details:
- Source Type: Volume
- Upload PVC Image: select your extracted qVSA qcow2 for Upload
- Volume Name: for example, qvsa-4-1-82-1-base-volume
- Disk Size: 56 GB
- Volume Metadata - Preference: oraclelinux
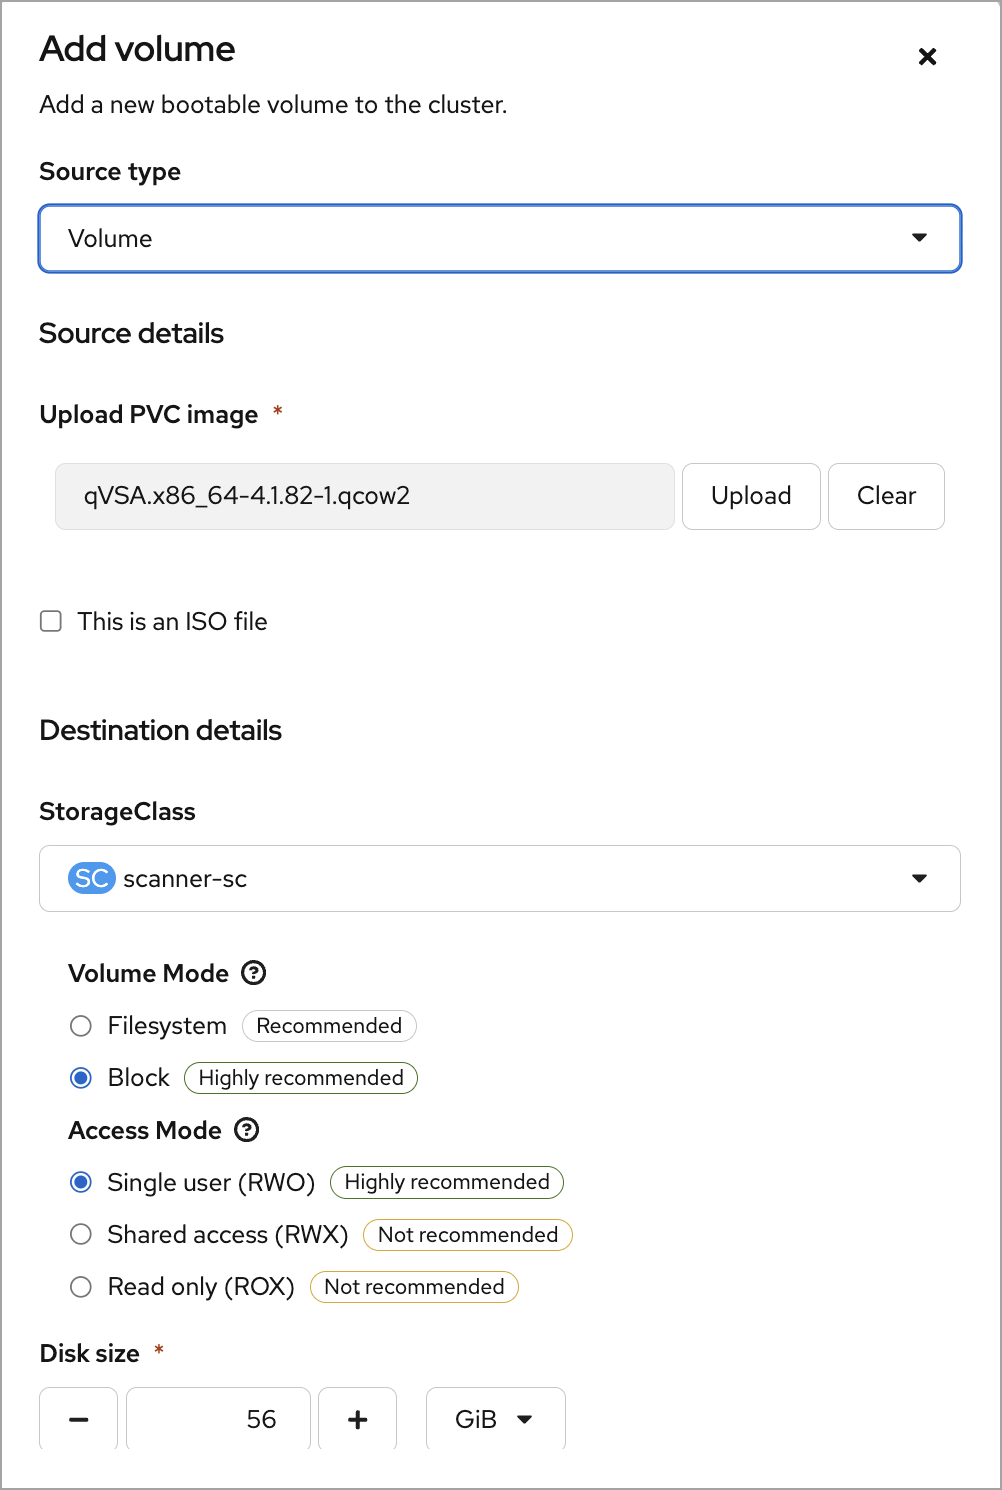
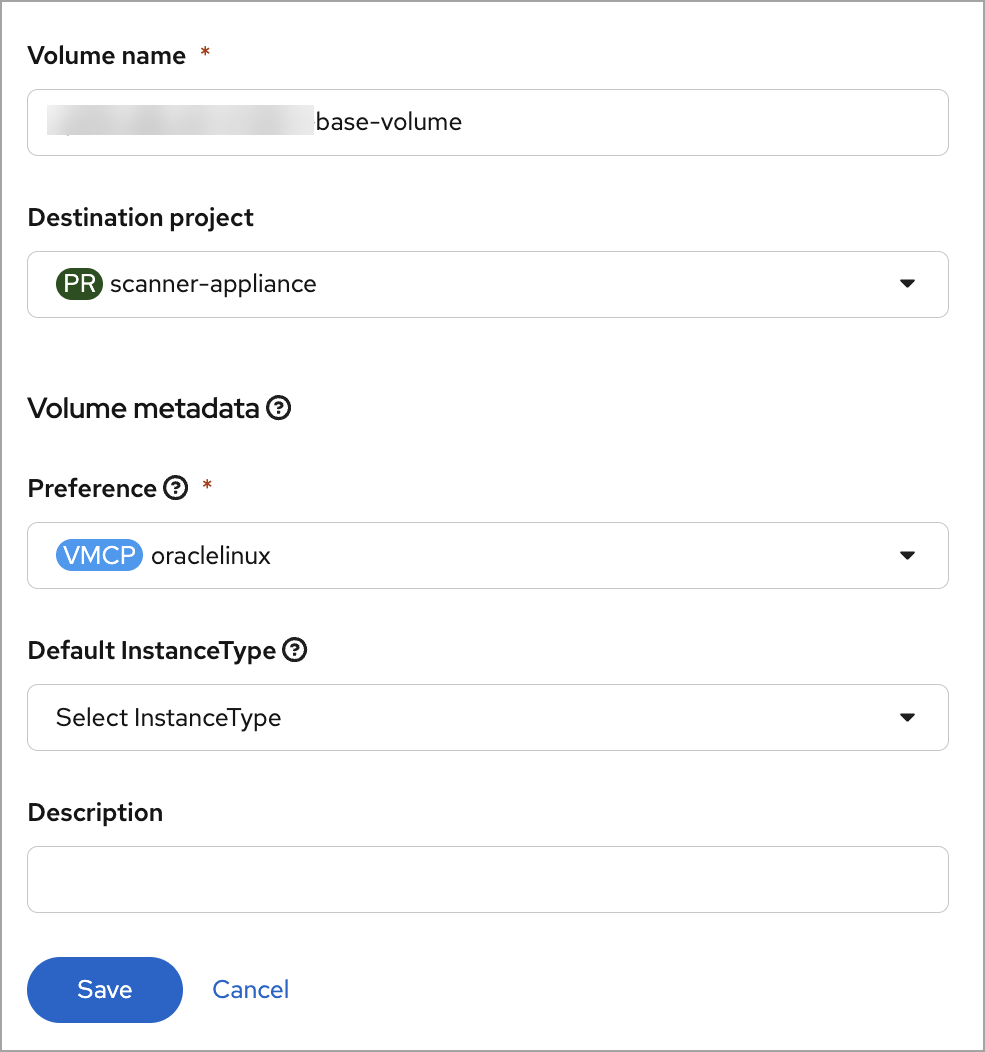
- Click Save to start the upload.
Wait for the bootable volume creation to complete.
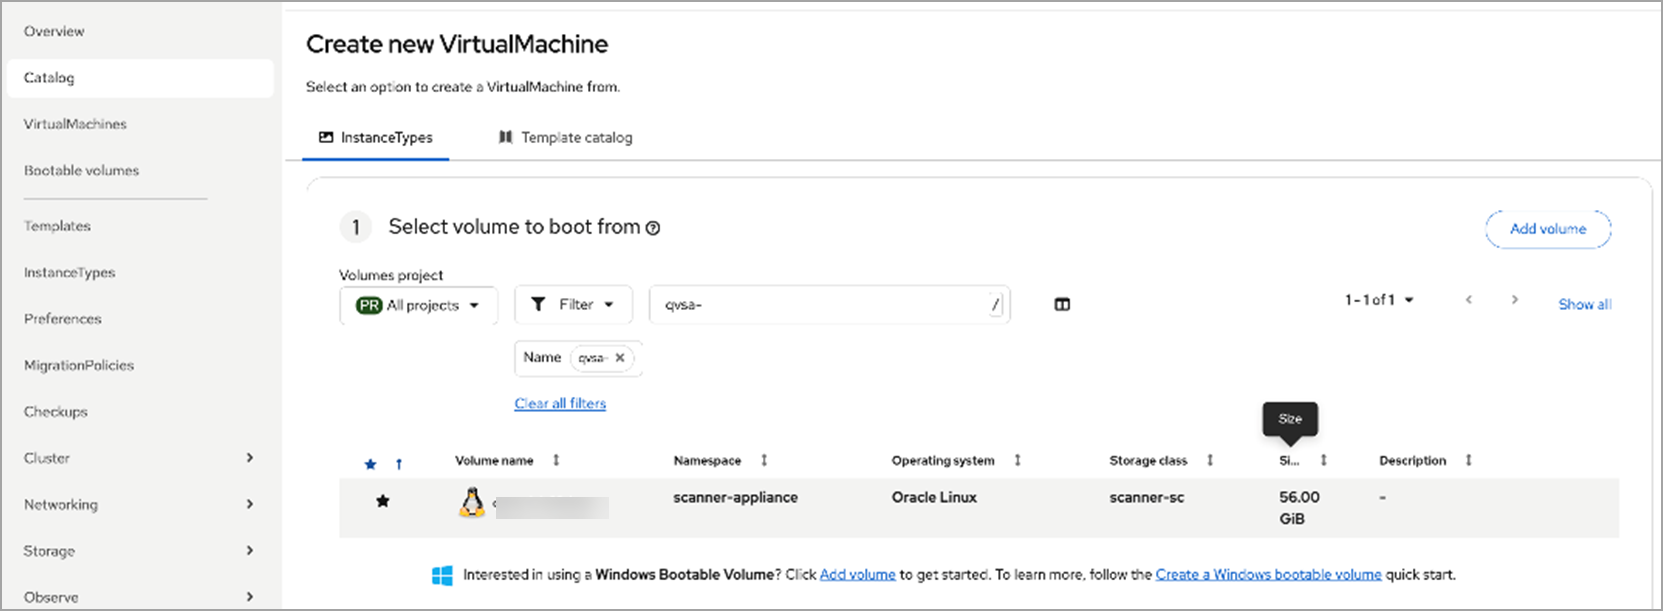
- Navigate to Virtualization > Catalog > Instance Type and locate the qVSA volume. Click Volume to create the VM:
- The qVSA image requires an instance size with a minimum of 2GB RAM.
- For optimal performance, the recommended CPU-to-RAM ratio is 1:2 or 1:3. For example, 4 CPU cores paired with 8GB of RAM.
- Boot Mode needs to be set to 'BIOS'.
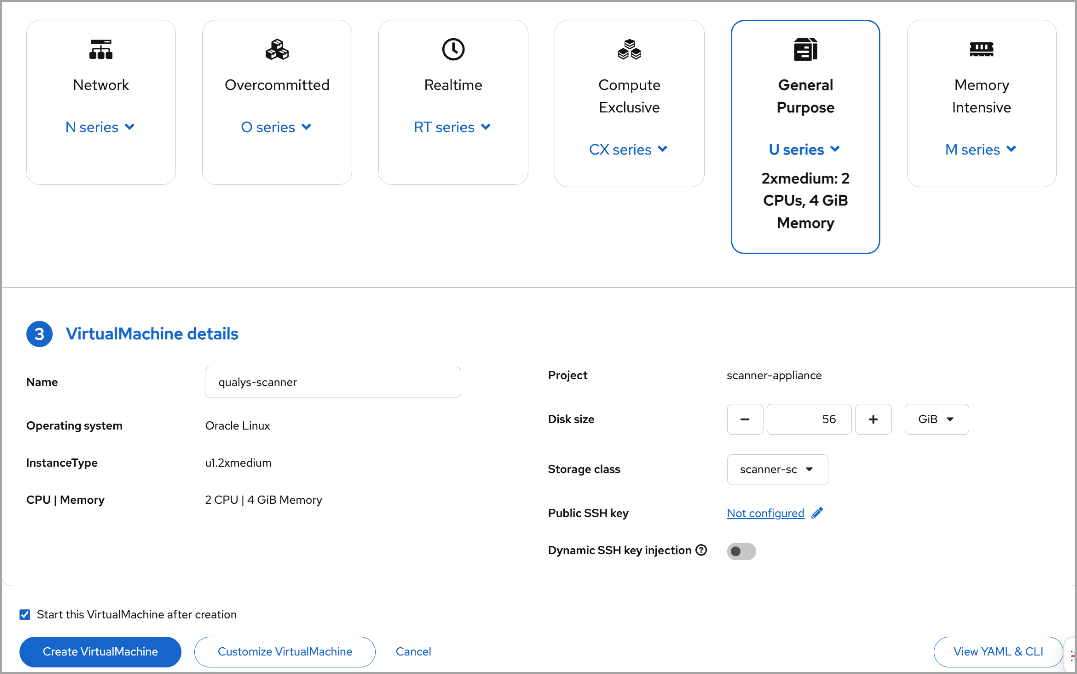
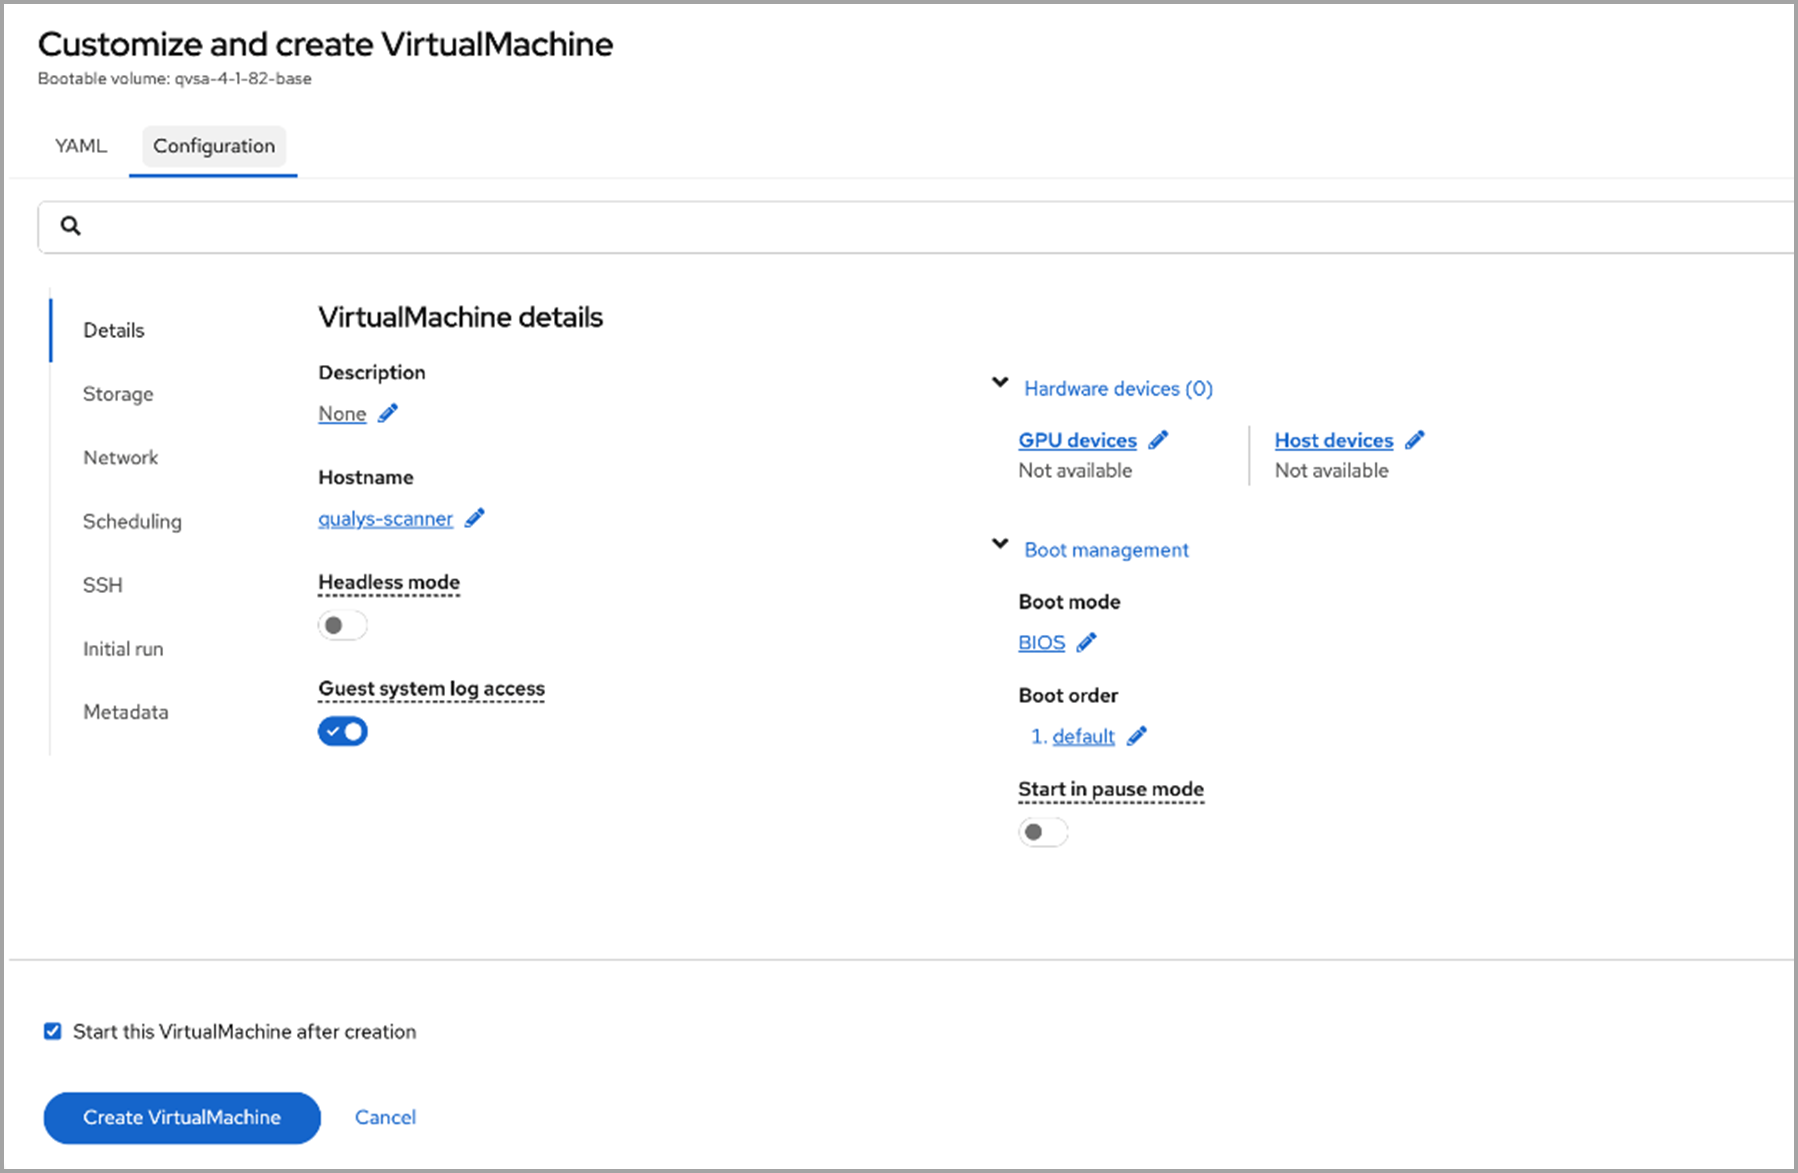
- View and manage the scanner VM full details in the OpenShift console.
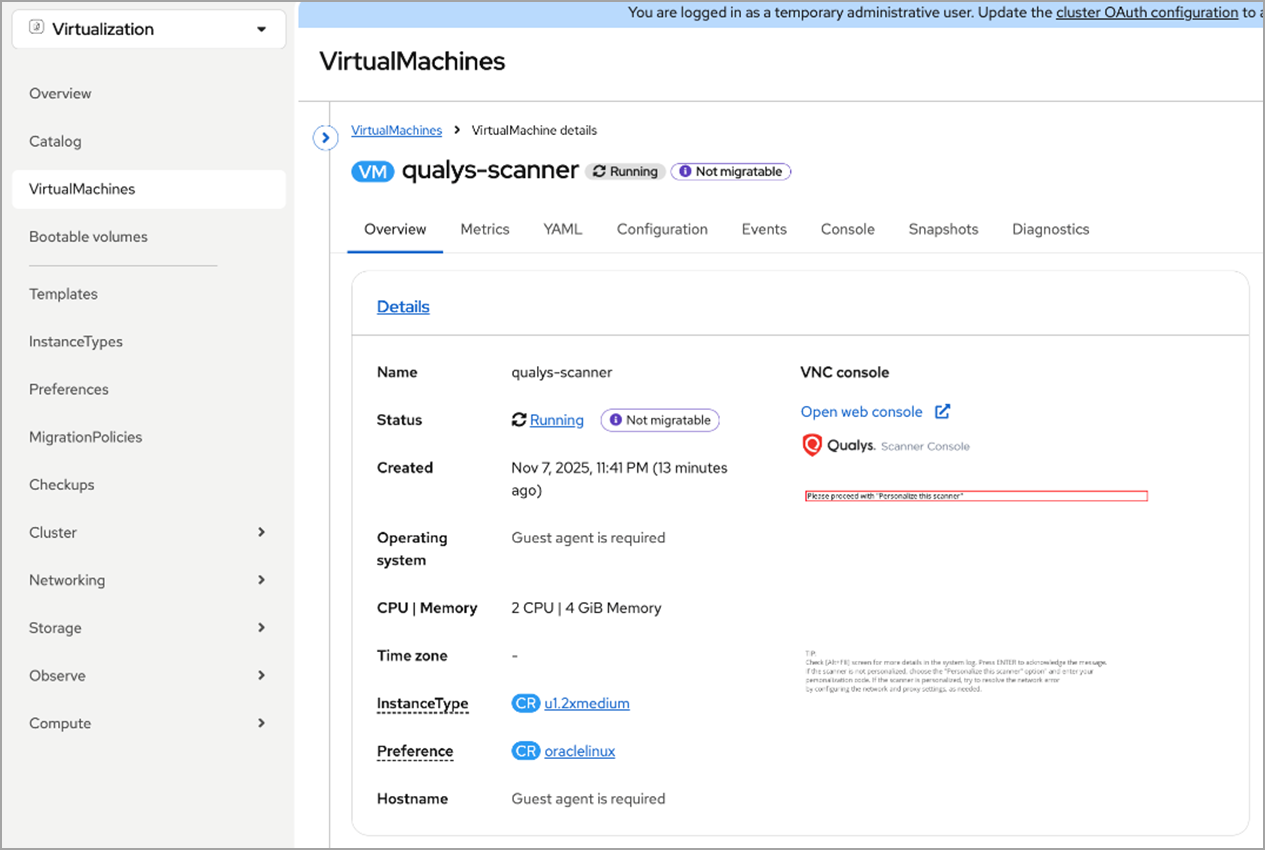
- Open the VM web console to access the Qualys Scanner Console. From the scanner console, you can configure network settings and activate the Qualys Scanner.
To enable split networking, the scanner VM needs to have two network interfaces on different subnets.
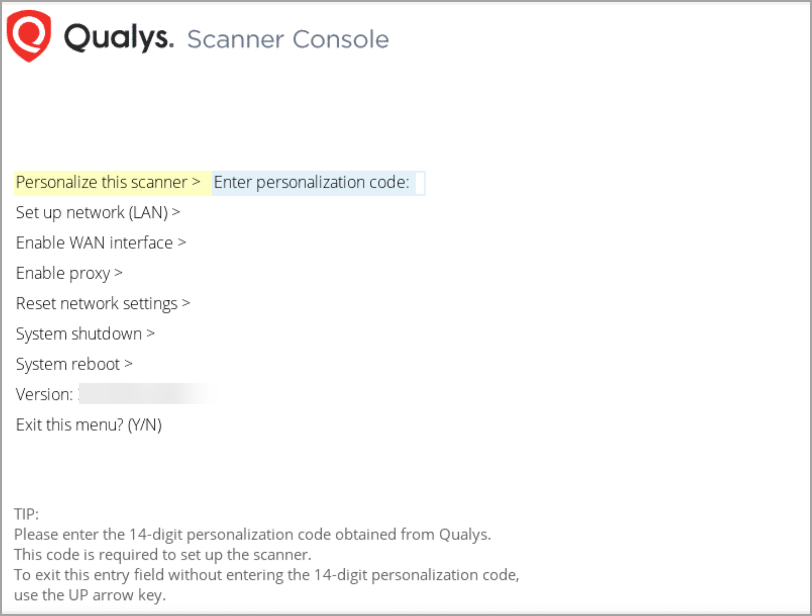
Press Enter and enter the 14-digit PERSCODE:
The scanner appliance connects with the Qualys Enterprise TruRisk™ Platform to complete the registration. The appliance also downloads the latest software and vulnerability signatures.
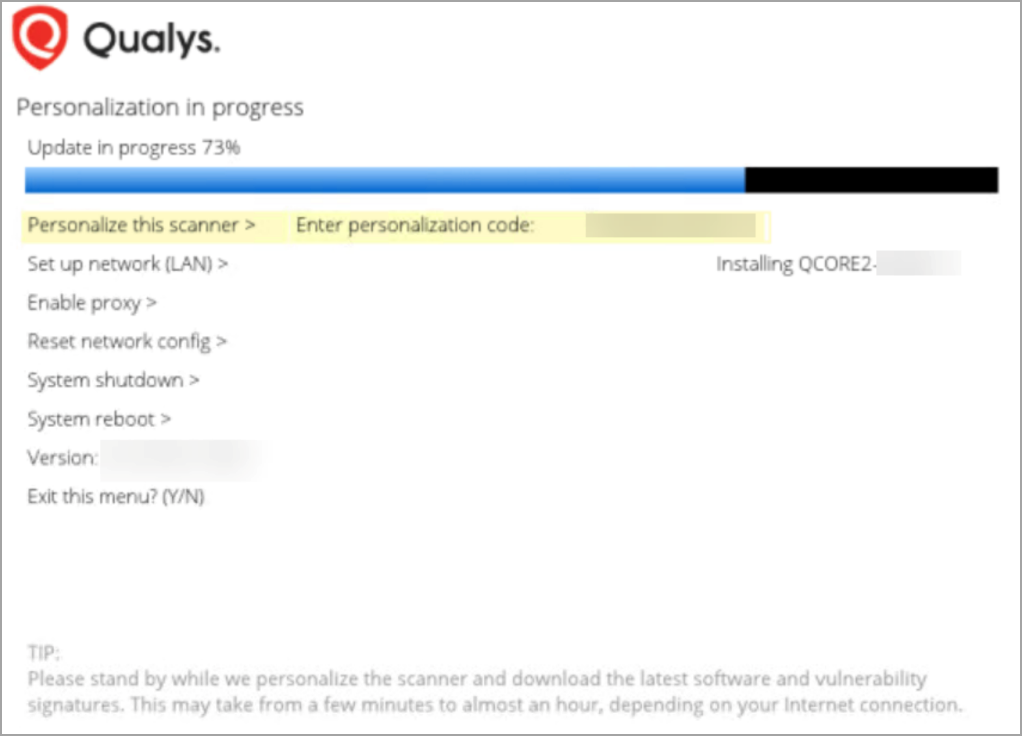
Once all the packages are downloaded, you see the message 'Welcome to the Qualys Scanner Console,' along with the appliance name and assigned IP address.