Upload Scanner Image
Scanner images can be uploaded using OpenStack dashboard or OpenStack command line.
Upload the Scanner Image Using Dashboard
- Go into Images from Compute and click the Create Image.

-
Enter the Image Name, select the Image Source Type, and add the image file.
It can either be a link or an image file from the local host. The format should be QCOW2.
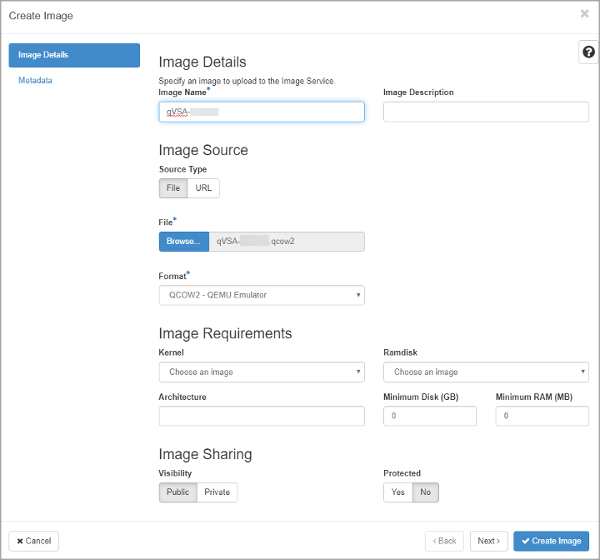
QVSA-4.2 and higher versions support UEFI boot mode.
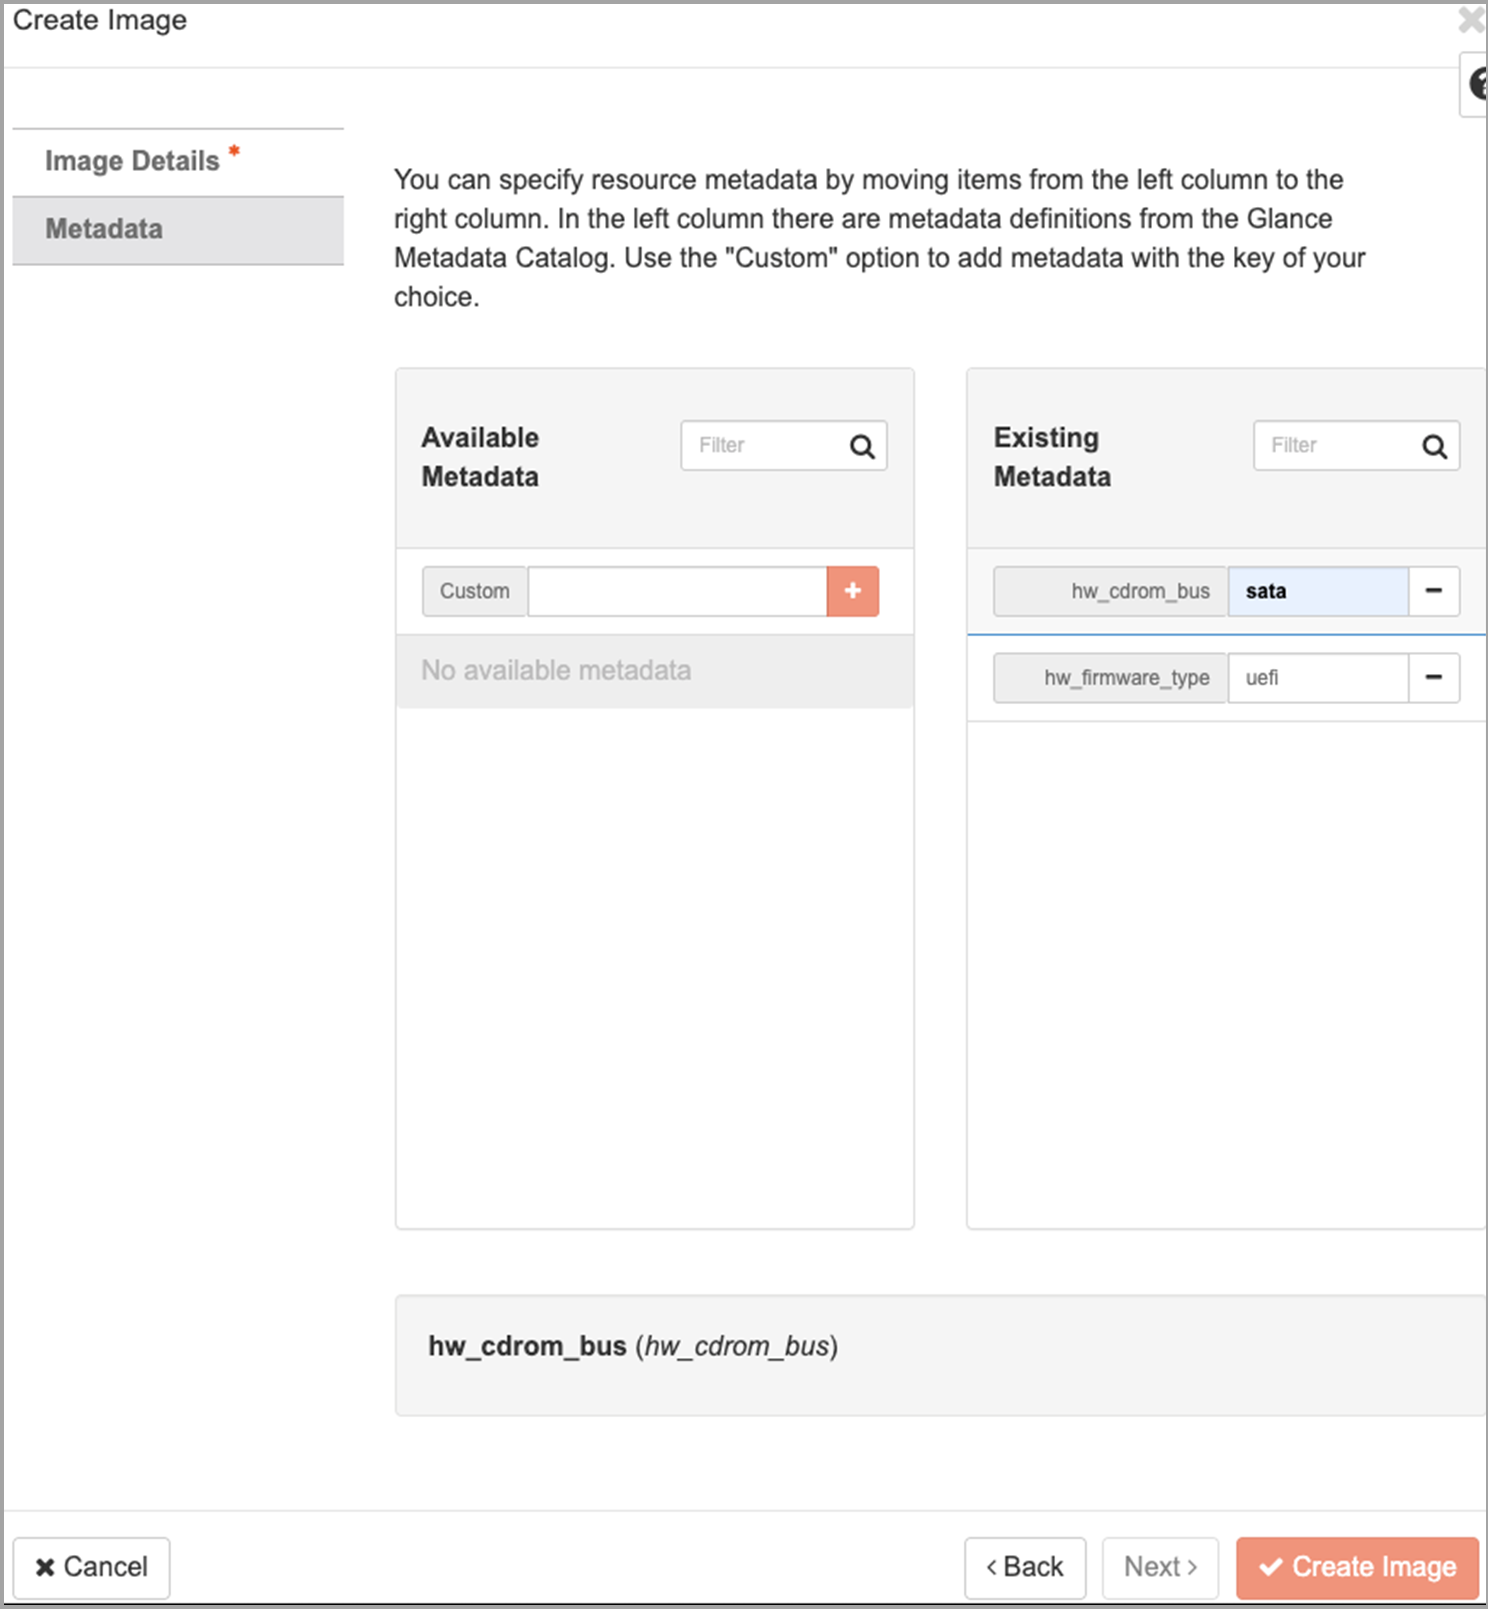
When creating an image using the OpenStack User Interface, you need to update the Metadata of the image with the following properties:- hw_firmware_type=uefi
- hw_cdrom_bus=sata
After entering image details, click Metadata.

In the Custom window, type the property key name: hw_firmware_type and add it by clicking on the '+'. Add another property key - hw_cdrom_bus.
-
Click Create Image.
The Image is saved, and you can view it on the Images dashboard.
Upload the Scanner Image Using Command Line
Run the following command on the Controller Node.
openstack image create < "IMAGE NAME" > --file < IMAGE_DISTRO_FILE > --disk-format < DISK_FORMAT > --container-format bare --public
Example:
openstack image create "qVSA-X.X.xx-x" --file qVSA-X.X.xx-x.qcow2 --disk-format qcow2 --public
QVSA-4.2 and higher versions with UEFI support, add hw_firmware_type=uefi and hw_cdrom_bus=sata as properties while creating the image -
openstack image create --file qVSA-X.X.xx-x.qcow2 --disk-format qcow2 --property hw_firmware_type=uefi --property hw_cdrom_bus=sata --public "qVSA-X.X.xx-x"
Next Step
Step 3: Get a Personalization Code