Configuration of Qualys Virtual Scanner in Proxmox
Qualys Virtual Scanners can be downloaded from the Qualys Enterprise TruRisk™ Platform using the following steps.
Use only the Virtual Scanner Appliance for Proxmox images available in the Qualys Enterprise TruRisk™ Platform.
Download Qualys Virtual Scanner Appliance Image
-
Log in to the Qualys Enterprise TruRisk™ Platform and download the Proxmox Scanner Image.
(Navigate to VMDR > Scans > Appliances and select New > Virtual Scanner Appliance. Choose the Download Image Only option, and select the distribution package you want to download.)
The image is downloaded in the tar.gz format.
-
Extract the QCOW2 file.
Extract QCOW2 from tar.gz
Linux
Use the following command to generate a file in QCOW2 format.
Command to Extract file in QCOW2
# tar –xvzf qVSA-X.X.xx-x.tar.gz
Upload this QCOW2 file using the dashboard or command line.
qVSA-X.X.xx-x.qcow2
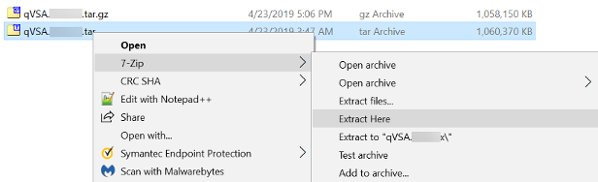
Windows
You can install 7-zip or any other extracting tool on the machine.
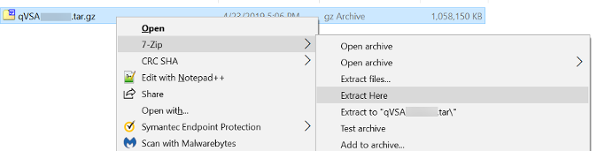
The extraction step generates a tar file.

Use 7-Zip tool again to extract the qcow2 image disk from the tar file:
Upload Qualys Virtual Scanner Appliance Image in Proxmox
Upload the QCOW2 disk image to the Proxmox storage. If using local storage, place it in the appropriate directory.
Example
scp qVSA.open.x86_64-4.1.82-1.tar.gz root@proxmox-server:/var/lib/vz/template/cache