Obtain Qualys Proxmox Virtual Scanner Image
Qualys Virtual Scanners can be downloaded from the Qualys Enterprise TruRisk™ Platform using the following steps.
Use only the Virtual Scanner Appliance for Proxmox images available in the Qualys Enterprise TruRisk™ Platform.
Download Qualys Virtual Scanner Appliance Image
To download the scanner appliance image, perform the following steps:
-
Log in to the Qualys Enterprise TruRisk™ Platform and download the Proxmox Scanner Image.
(Navigate to VMDR > Scans > Appliances and select New > Virtual Scanner Appliance. Choose the Download Image Only option, and select the distribution package you want to download.)
The image is downloaded in the tar.gz format.
-
Extract the QCOW2 file.
Extract QCOW2 from tar.gz
Linux
Use the following command to generate a file in QCOW2 format.
Command to Extract a file in QCOW2
# tar –xvzf qVSA-X.X.xx-x.tar.gz
Upload this QCOW2 file using the dashboard or command line.
qVSA-X.X.xx-x.qcow2
Windows
You can install 7-Zip or any other extraction tool on the virtual machine.
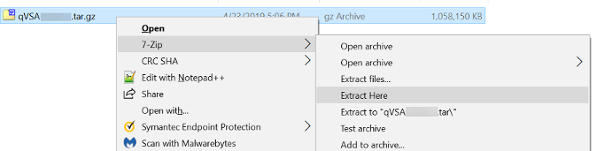
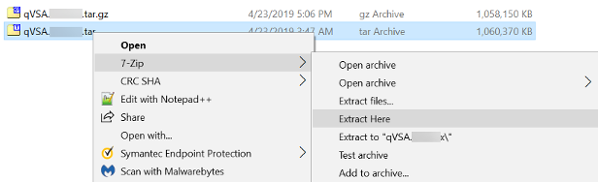
The extraction step generates a tar file.

Use the 7-Zip tool again to extract the qcow2 image disk from the tar file:
Add Import Directory in Proxmox VE
To add an import directory in Proxmox VE, perform the following steps:
- Log in to the Proxmox VE web interface.
- In the navigation panel, select:
Datacenter > Storage > Add > Directory.
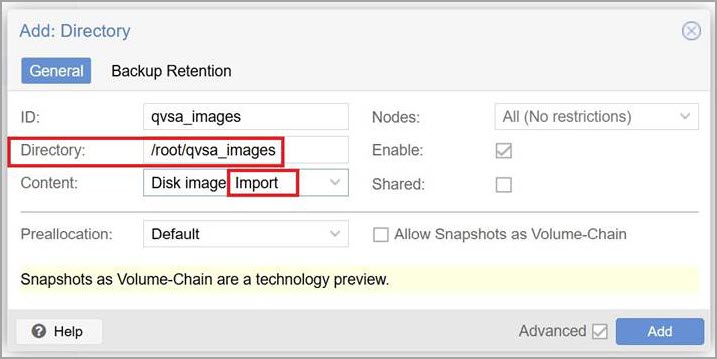
- On the Add: Directory page:
- Enter a unique ID for the directory.
- Specify the Directory Path.
- Under Content, from the drop-down menu, select Import.
- Click Add to create the directory storage.
Example: In the example below, the directory storage ID is qvsa-images.
Upload Images to Import Directory
To upload images to the import directory, perform the following steps:
- From the Proxmox VE web interface, navigate to:
Datacenter > [Proxmox Hypervisor] > qvsa-images > Import.
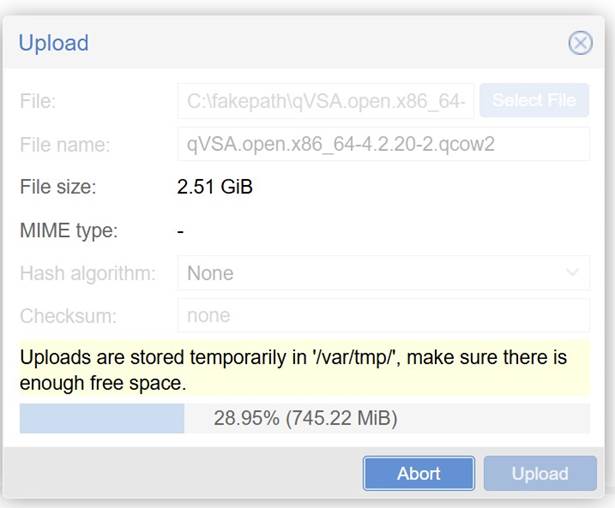
- Click Upload.
- Select the image file you want to upload and follow the prompts to complete the upload process.
Replace qvsa-images with the name of your import storage if you used a different storage ID
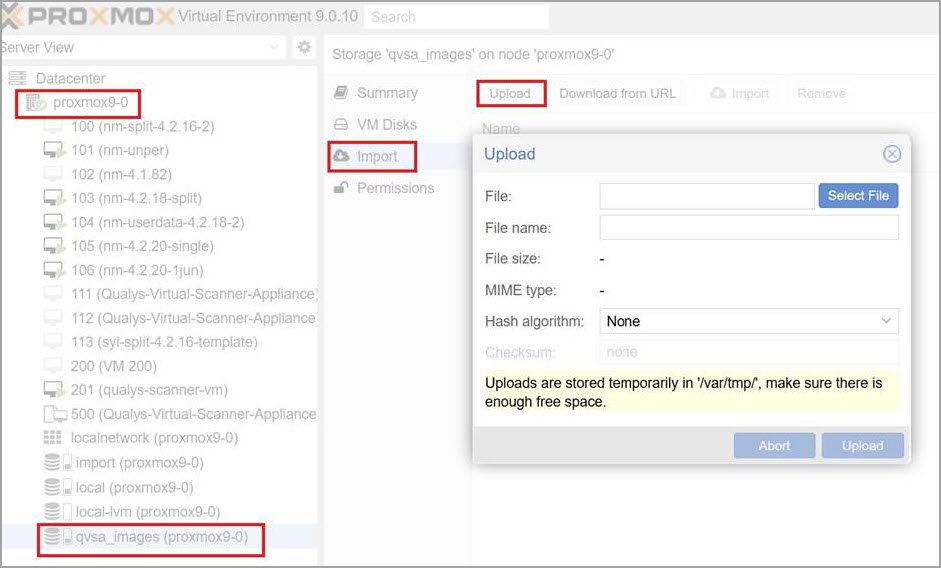
Uploads are temporarily stored in /var/tmp. Ensure there is sufficient free space before uploading the qVSA image file.
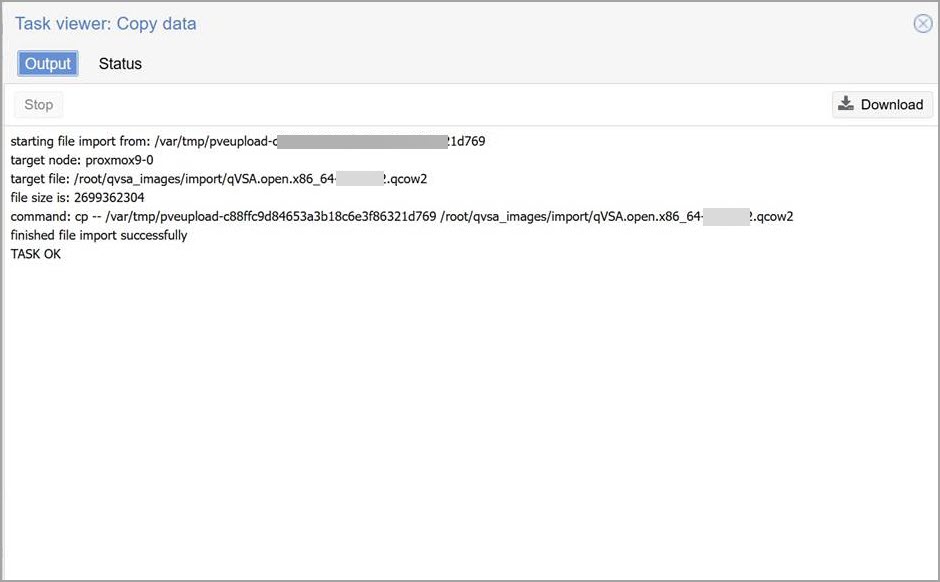
After the upload completes, you can see similar information in the Output.
Upload Qualys Virtual Scanner Appliance Image in Proxmox
Upload the QCOW2 disk image to the Proxmox storage. If using local storage, place it in the appropriate directory.
Example
scp qVSA.open.x86_64-4.1.82-1.tar.gz root@proxmox-server:/var/lib/vz/template/cache