Deploy Scanner Instance using Proxmox VE Web Interface
To deploy the Scanner instances, follow these steps:
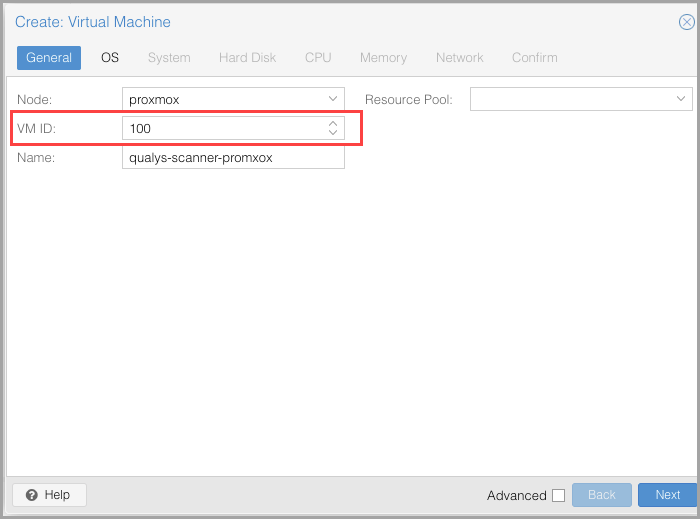
- Go to the Proxmox VE web interface and click Create VM.
- Note down the VM ID (for example, VM ID 106), as you need it later for copying the qVSA qcow2 disk into the corresponding VMID folder.
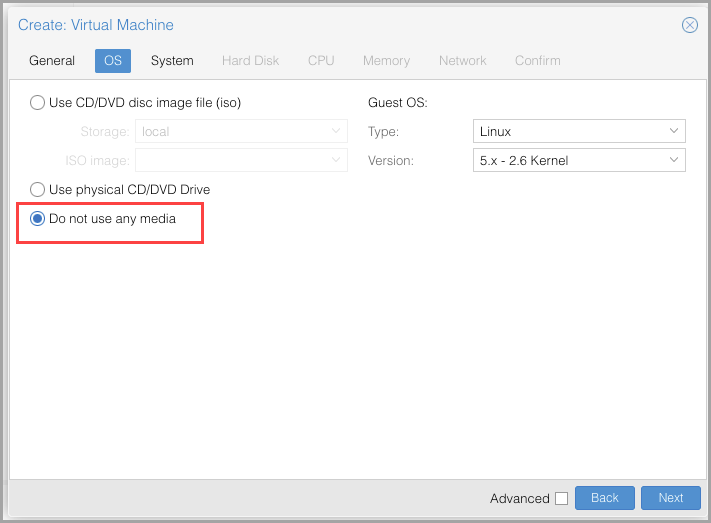
- On OS tab, select Do not use any media.
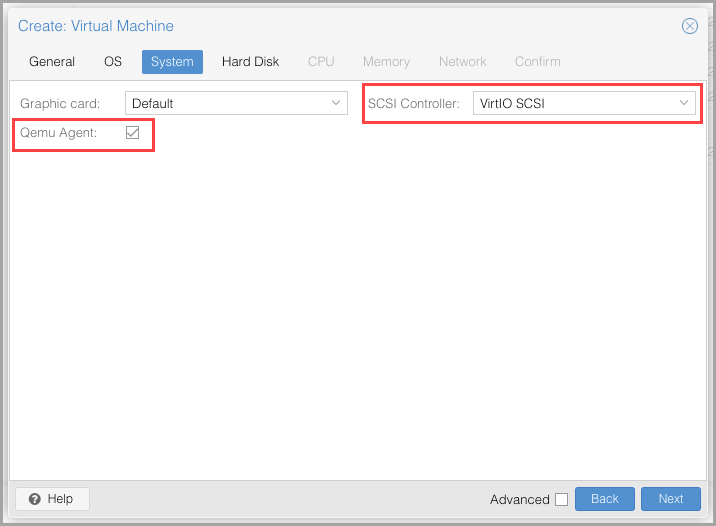
- On System tab, select checkbox Qemu Agent and select VirtIO SCSI.
-
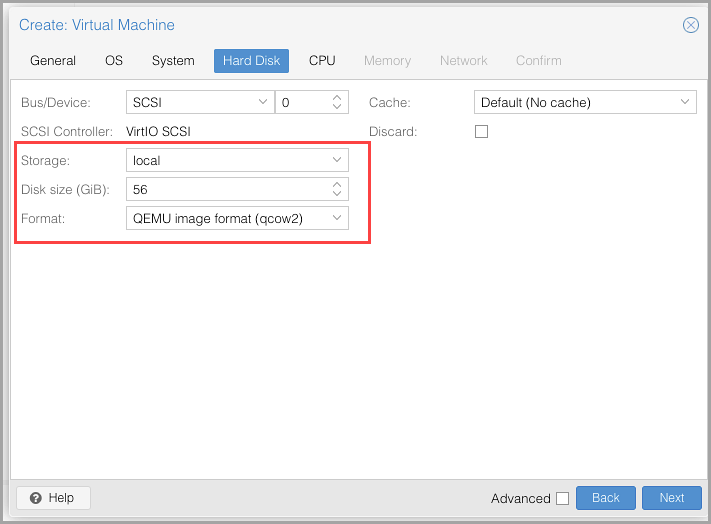
On Hard Disk tab perform the following actions.
- Select your Storage location.
- Set 56 GB for Disk size (GB).
- Select qcow2 for Format.
-
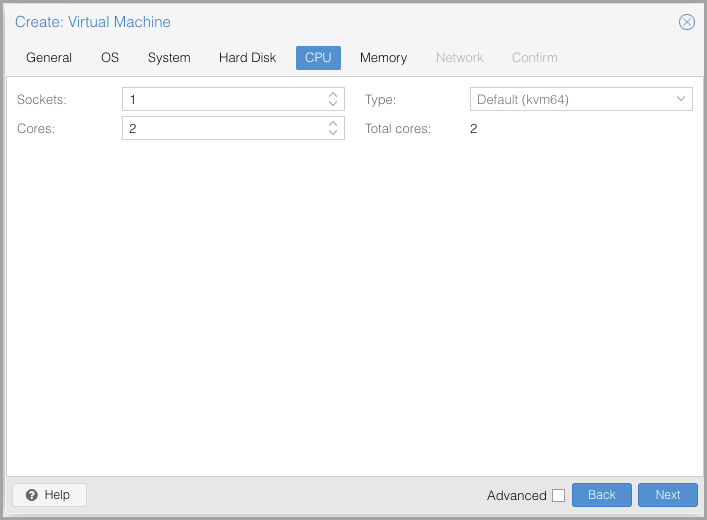
On CPU tab, set a ratio of 1:2 cores to memory. And select type as kvm64.
-
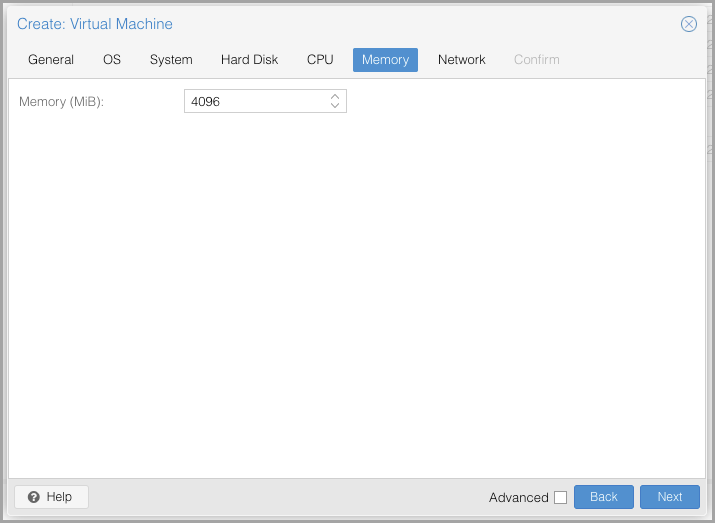
On the Memory tab, select 4096 of Memory (MB) of RAM.
-
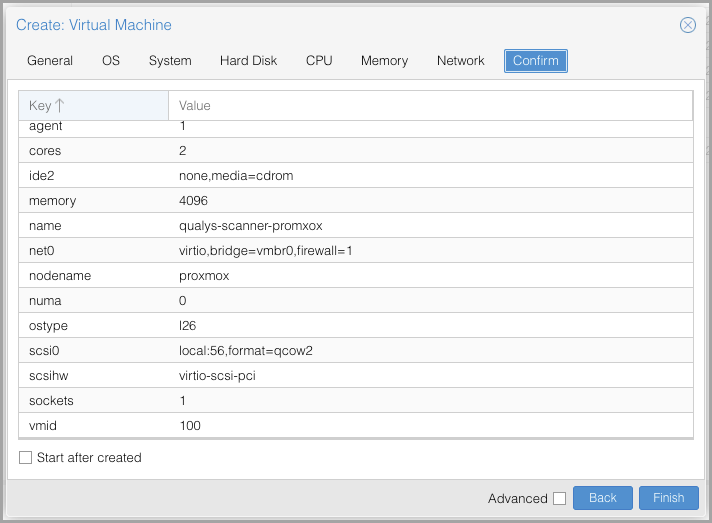
On the Network tab, select your network and click Finish from the Confirm tab.