Filter a Dashboard using Tags
The Integrate Tag Tree with the Tag filter on Dashboard filters dashboard widget count based on the tags associated with assets. Using the Tag selector ![]() , you can filter dashboard widgets based on the selected tags. You can choose one of two options:
, you can filter dashboard widgets based on the selected tags. You can choose one of two options:
- ANY (OR): Filters the widgets if any of the selected tags are associated with the asset.
For example, if you select the ANY option and select the Remote Endpoints and Cloud Environments tags, the widget count will be filtered using the following QQL:tags.name:["Remote Endpoints","Cloud Environments"] - ALL (AND): Filters the widgets when all the selected tags are associated with assets.
For example, if you select the ALL option and select tags the Remote Endpoints and Cloud Environments tags, the widget count will be filtered the following QQL:tags.name:`Remote Endpoints` and tags.name:`Cloud Environments`
You can persist the tag filters on the dashboard both at the subscription level and user level.
- At the Subscription level:
- Any selected tags with the Keep Selection Persistent toggle On, are pinned to the dashboard and are visible for all the users in the subscription.
- To update the selected tags on the dashboard, you need to have the Edit Dashboard permissions.
- At the User level: Note
If any selected tags with the Keep Selection Persistent toggle Off are applied to the dashboard, the tags are visible only for the particular user session. If the user logs out and logs in again, the selected tags are not visible on the dashboard for any user.
- Any selected tags with the Keep Selection Persistent toggle On, are pinned and visible on the dashboard only for that user. Although the user logs out and logs in again, the pinned tags are still visible on the dashboard for that user.
-
You can directly update the selected tags on the dashboard.
Note: To enable the user level pin tag feature, the Pin Dashboard Tag at User Level flag must be enabled from the Administration back office end. To enable this flag, you must contact your TAM.
To tag a dashboard, perform the following steps from the Dashboards tab:
- Click the Tag selector
 . The tag tree displays recent and favorite tags and all tags in your account.
 - Select the tags from Recent & Favorites or All Tags. Using the Search Tags field, you can type the tag name and select the tag. Parent and Child tags are selected individually.
- Selected tags are listed in the Selected Tags section.
Optionally, you can toggle Keep Selection Persistent to enable the tag selection persistently. - Click Apply. The applied tags are displayed on the Tag tree.
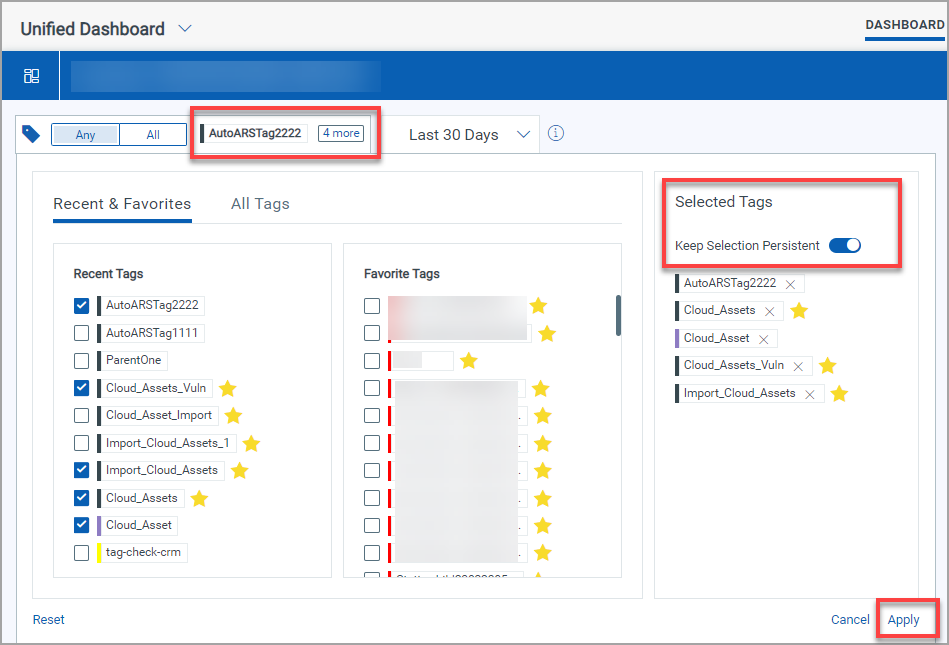
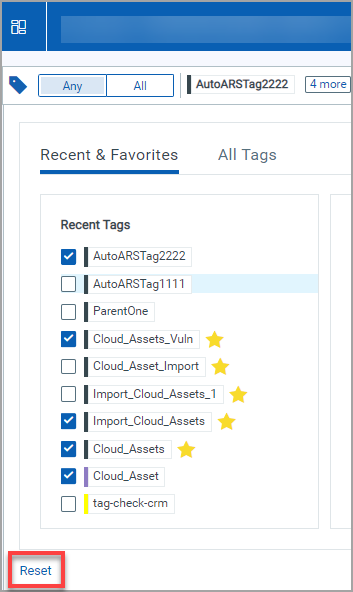
- To remove the selected tags click Reset and click Apply.
If you apply a tag to the dashboard that has trending enabled, the trending disappears from the widget, as historical data is not stored.
If you want to use tags along with the trending data in the widget, modify your query to add tags under Query Settings tab. While saving the query, you can select the option to purge old data. Refer to the following figure.
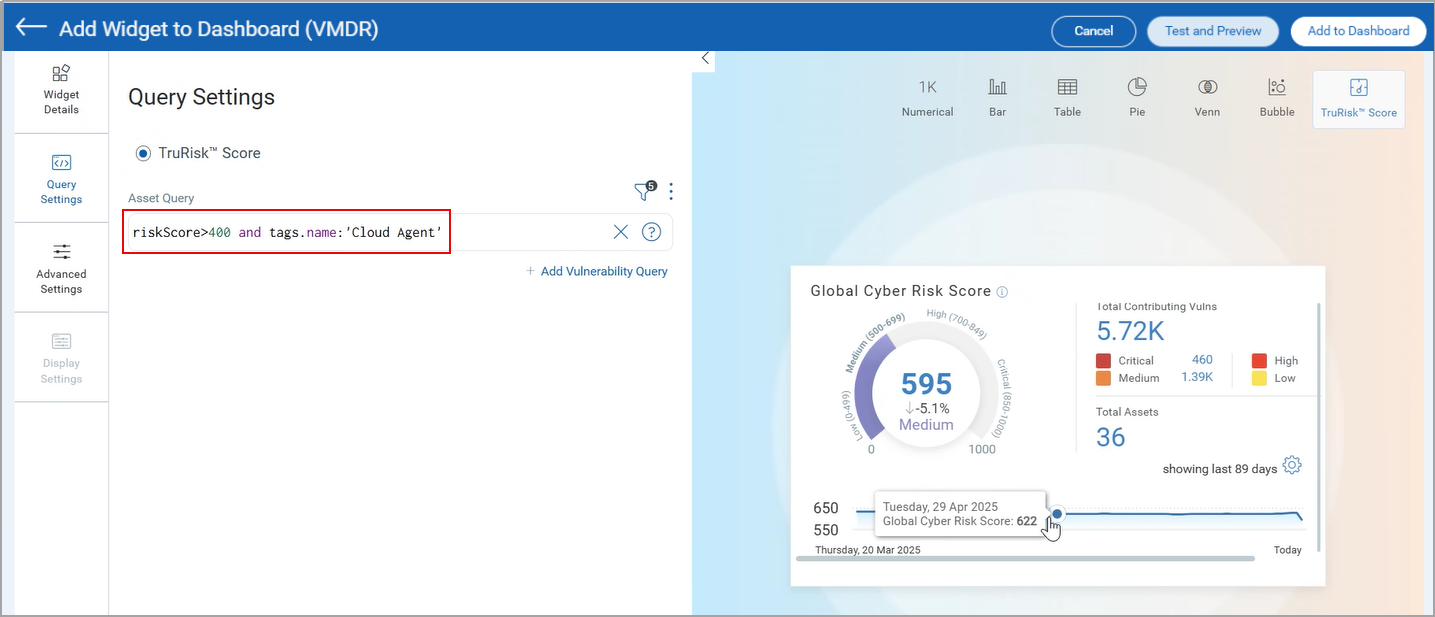
Once you save the widget settings, a pop-up window with the following two options is displayed:
- Purge old data: The old data is purged, and the old trending data is removed from the widget. The trending will display the latest data from the date the widget was saved.
- Keep old data: This option will retain your existing data, and after you save the query, it will display the new data.
You can save the widget settings, and the changes will reflect as per the selected options.