Create a Scan Account on Dell EMC SONiC
To create a dedicated scan account on Dell EMC SONiC:
- Log in as an admin user and enter the password.
When you log in as an admin user, you are placed in the Linux shell. - Use the following sonic-cli command to access the Dell Management Framework CLI:
admin@sonic:~$ sonic-cli. - Create a user:
- Enter a configuration mode and create a user:
sonic# configure terminal. - Configure a username with a password and role:
sonic(config)# username <name> password **** role <admin|operator>.
For example, to create an admin user:sonic(config)# username testuser password ***** role admin - Exit the config mode and save the configuration:
sonic(config)# end

		sonic# write memory
- Enter a configuration mode and create a user:
- Verify a user account.
- View all the logged-in users at present:

To launch a successful scan, PC needs a Linux shell.
- View all the logged-in users at present:
The SONiC CLI alone is insufficient to run a complete scan because some controls require you to:
- Verify file-based settings.
- Perform configuration checks.
Use the admin role to complete the scan because it is the only role that provides Linux shell access when you sign in.
Currently, we support only one target type method. This method requires a Bash shell with administrative privileges.
Set up an Authentication Record in VMDR
To create a new Unix record using the target type as Dell Networking OS:
- Navigate to VM > Scans > Authentication.
- Select New > Operating Systems > Unix.
- In the New Unix Record dialog box, in the left pane, click Login Credentials.
- Type username and password, and reenter the password for confirmation.
- In the Target Type list, click Dell Networking OS.
- Click Create.
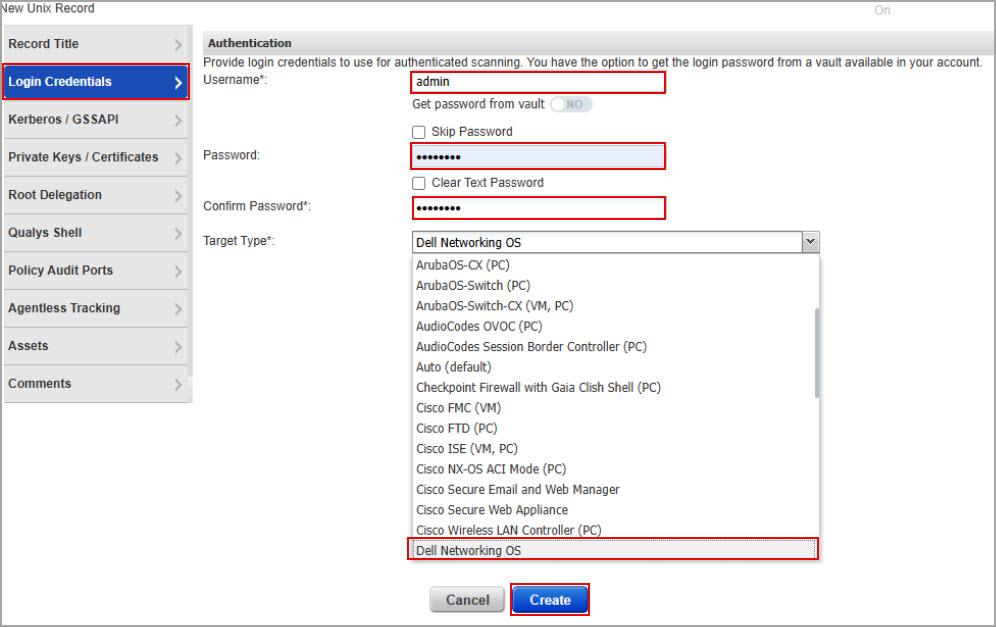
A new Unix authentication record for the target type Dell Networking OS is created.