Steps to Create Minimum Privilege User for ESXi Scan
To create a minimum privilege user for ESXi Scan, refer to the following steps:
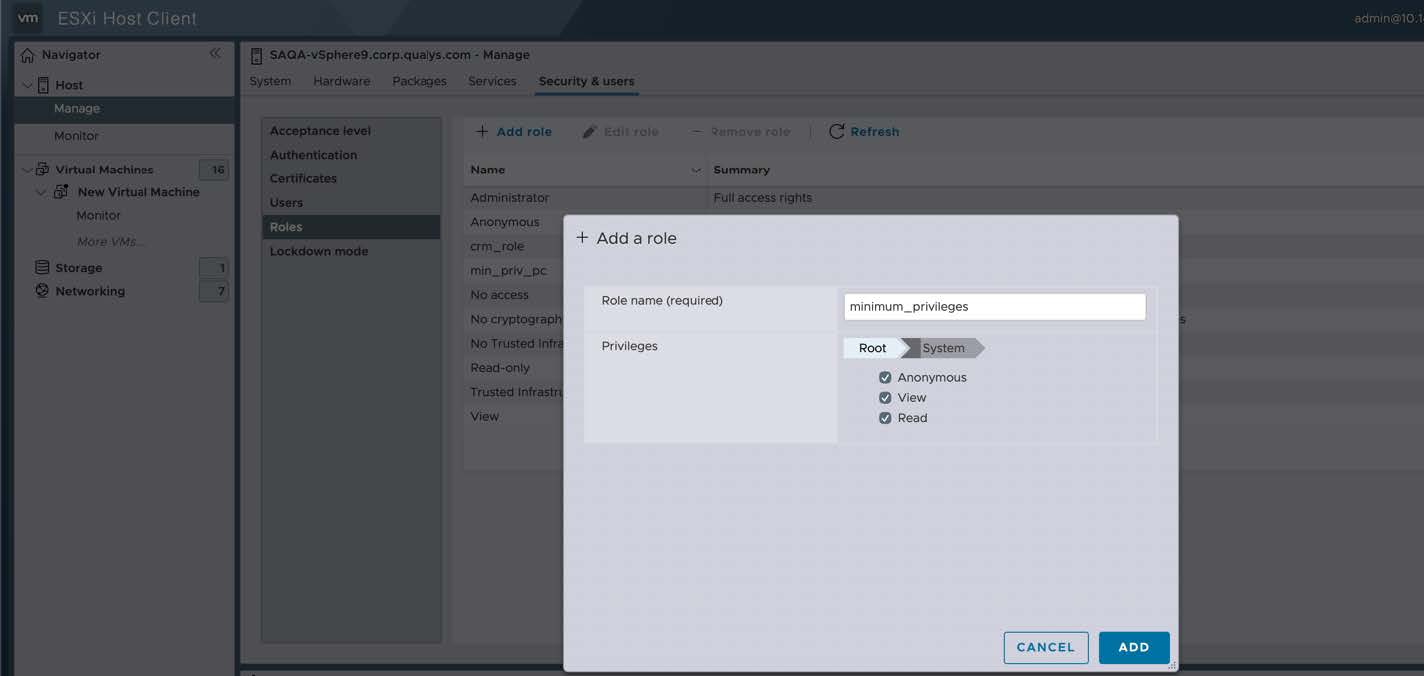
- Login to ESXi host client, select manage, go to Security & users tab -> Roles.

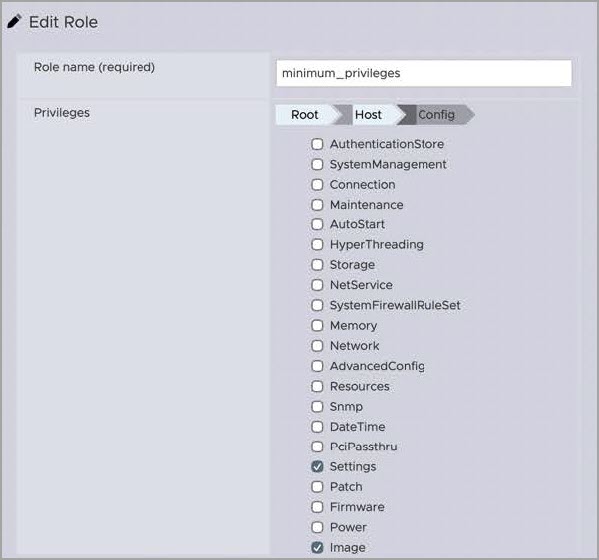
- Click Add role, provide a role name, select all System privileges.
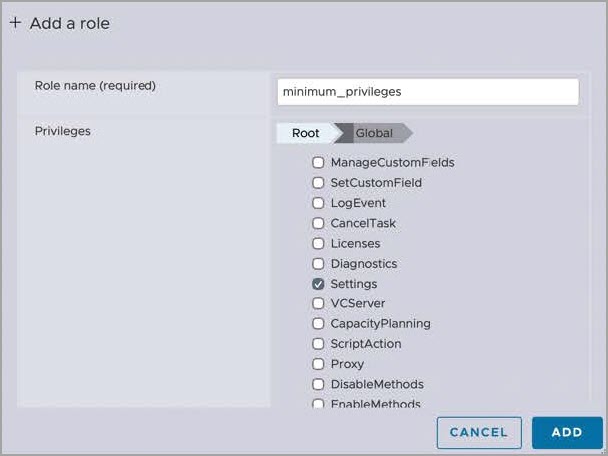
- Under the Global privileges, select Settings.
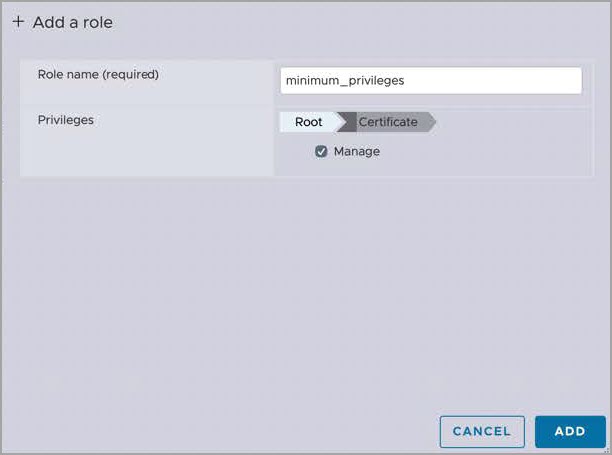
- Under the Certificate privileges, select Manage.
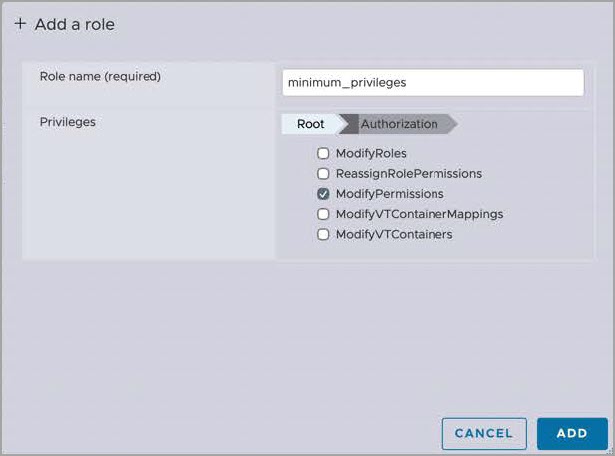
- Under Authorization privileges, select ModifyPermissions.
- Under Host privileges, select Host, next select Settings and Image.
- From the Security & users tab -> Users.
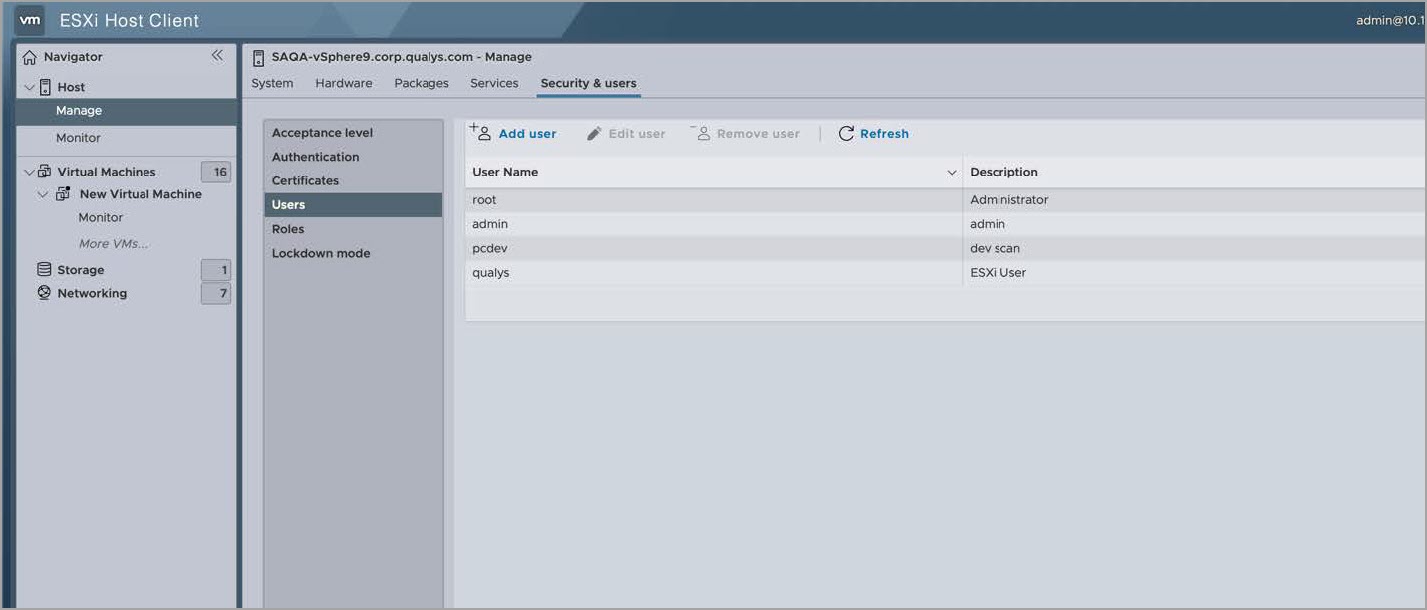
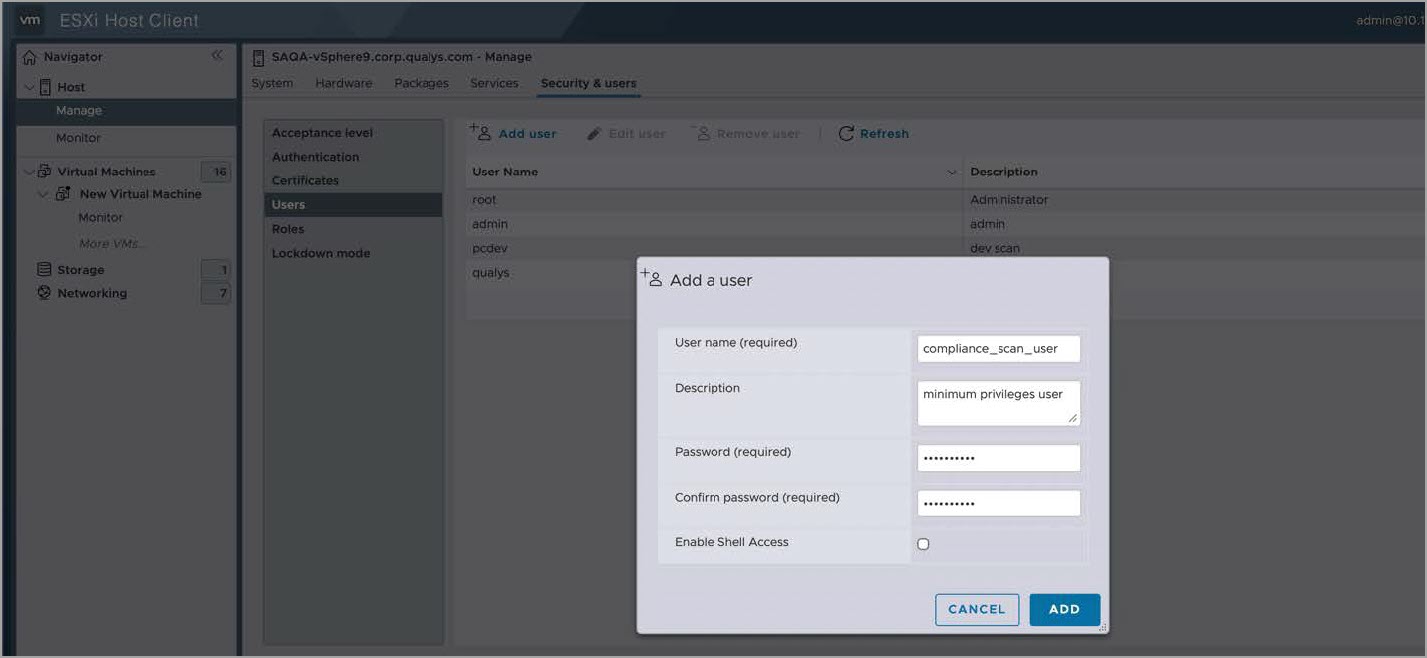
- Click Add user and provide all the necessary details.
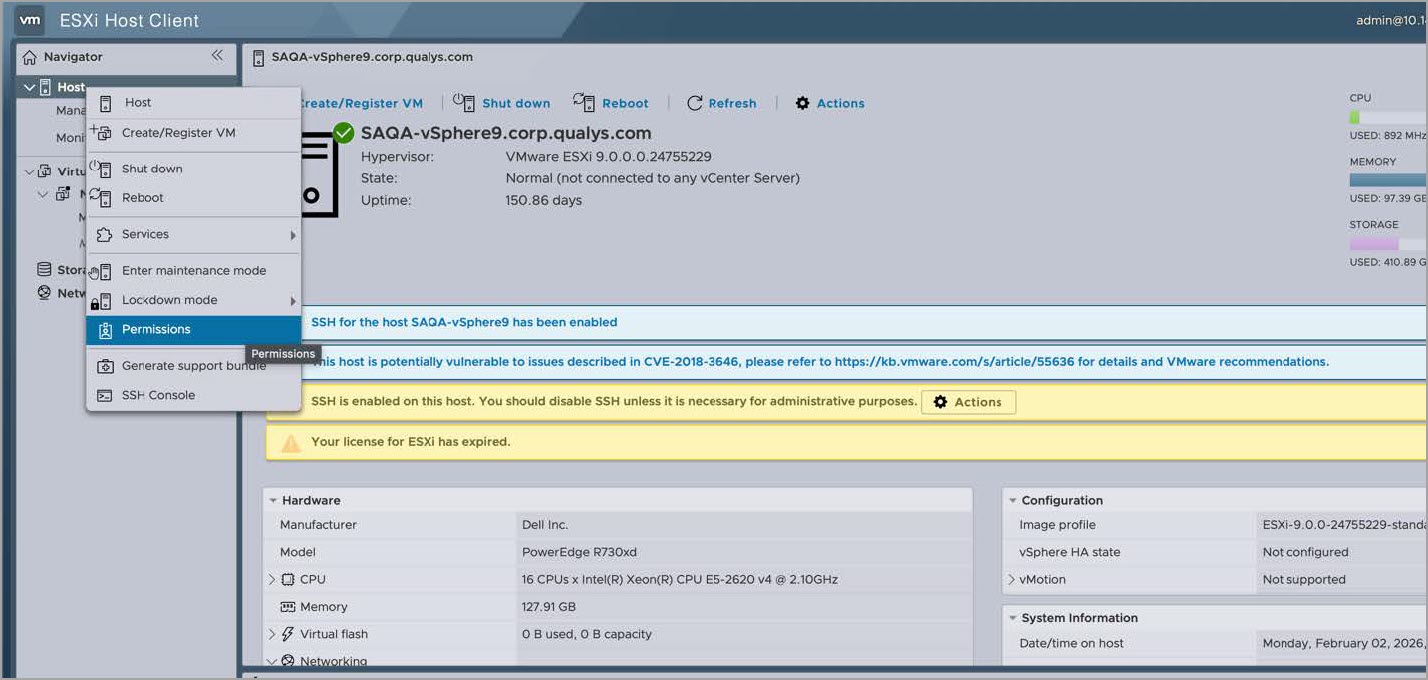
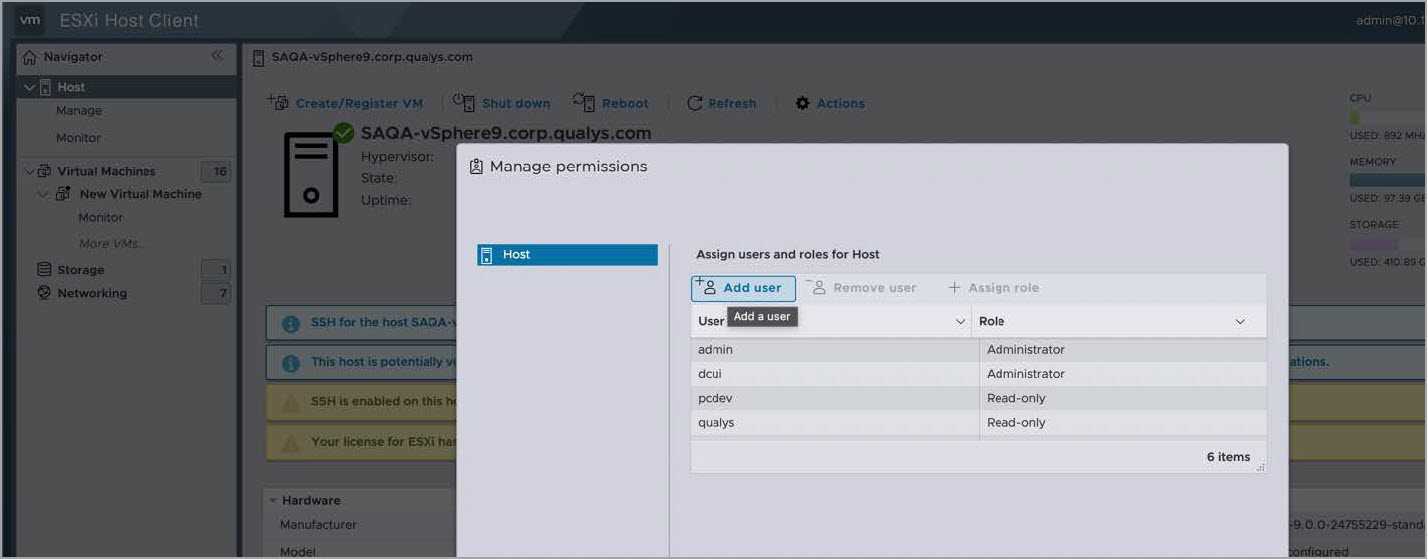
- Next to assign the newly created role to the newly created scan user, from the right click menu, select Permissions.
- In Manage permissions, click Add user.
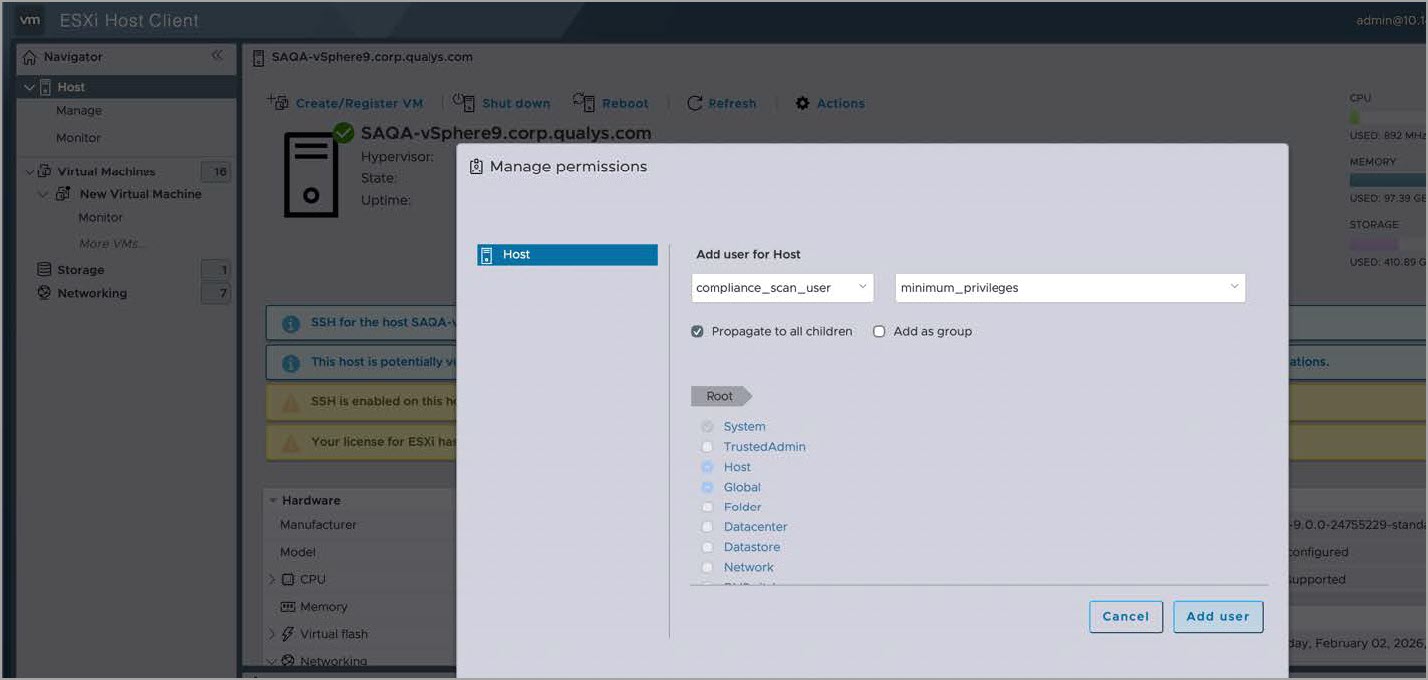
- Select scan user’s name in the first drop-down list and the new role name in the second drop-down list, then click Add user.
You can now use this User’s credentials for scanning the ESXi host.