Policy Audit Release 1.7
January 5, 2026
View QDS in Downloaded CSV Compliance Reports
With this release, we have added support to display the Qualys Detection Score (QDS) in the downloaded CSV reports.
Previously, the QDS could be viewed only in the Posture tab. However, this is now visible in the downloaded compliance reports in CSV format.
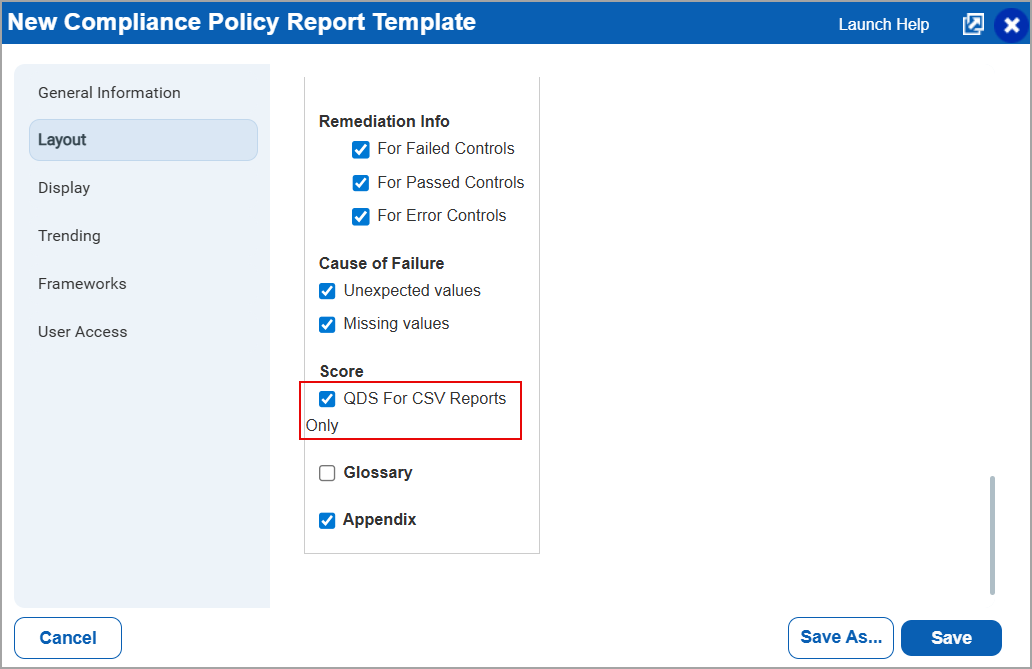
To enable the QDS column in the downloaded reports:
- Navigate to Reports > Templates > New > Policy Template > Layout.
- Under Score, enable QDS for CSV Reports Only.
This displays the QDS column in the downloaded report.
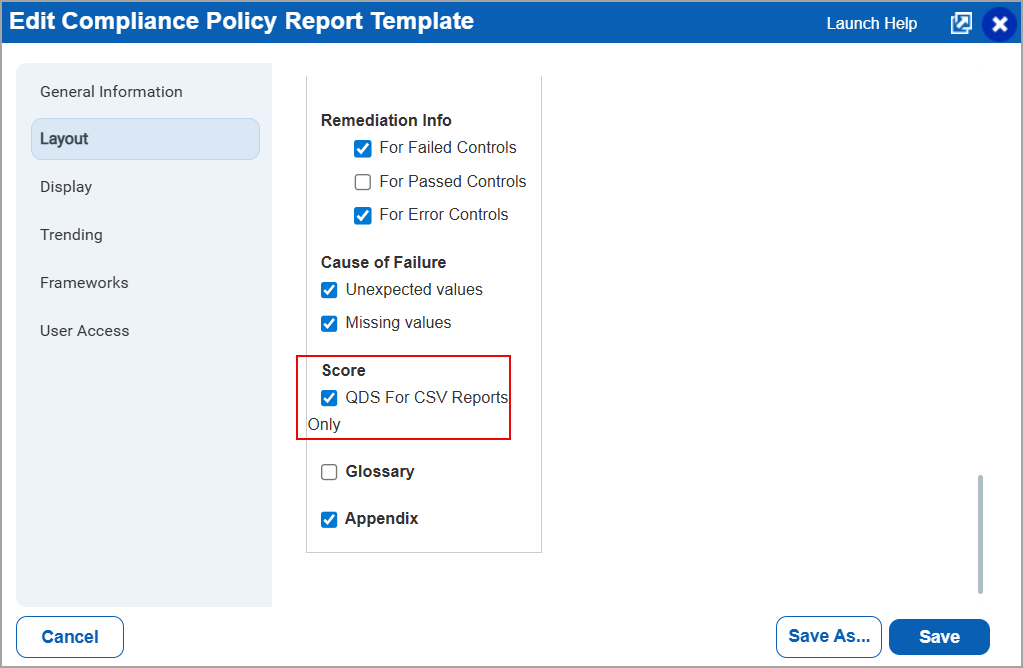
You can also edit existing Policy Report Templates to display the QDS column. To do so, navigate to Reports > Templates > select a report template > Quick Actions > Edit > Layout > under Score, enable QDS for CSV Reports Only.
By default, the QDS For CSV Reports Only option is unchecked.
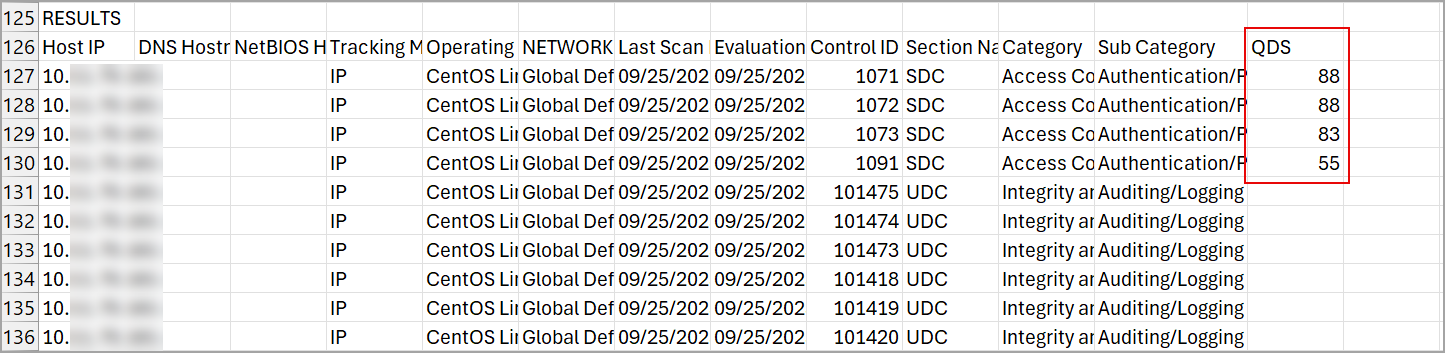
The QDS is visible in the Control Statistics section and the Results section of the CSV report. However, the QDS column available also depends on the selections you perform in the Policy Template > Layout.
QDS in the Control Statistics section

QDS in the Results section
- The QDS for CSV Report Only is displayed only for the Policy templates Group by Host, Group by Control, and Group by Control Reference.
- The option to view QDS in Reports is available to users with Policy Audit access. Users with only Policy Compliance access must upgrade to Policy Audit to view QDS in downloaded reports.
- To enable this feature for your account, contact your Technical Account Manager (TAM) or Qualys support.
HashiCorp Support Added to VMware ESXi and vCenter AD
With this release, we have added support for using HashiCorp Vault with Active Directories (AD) VMware ESXi and vCenter to create authentication technology.
When creating a new vCenter or VMware ESXi record, if you select the Vault as HashiCorp , previously you were required to enter a key. However, with the new enhancement, the Key field is excluded.
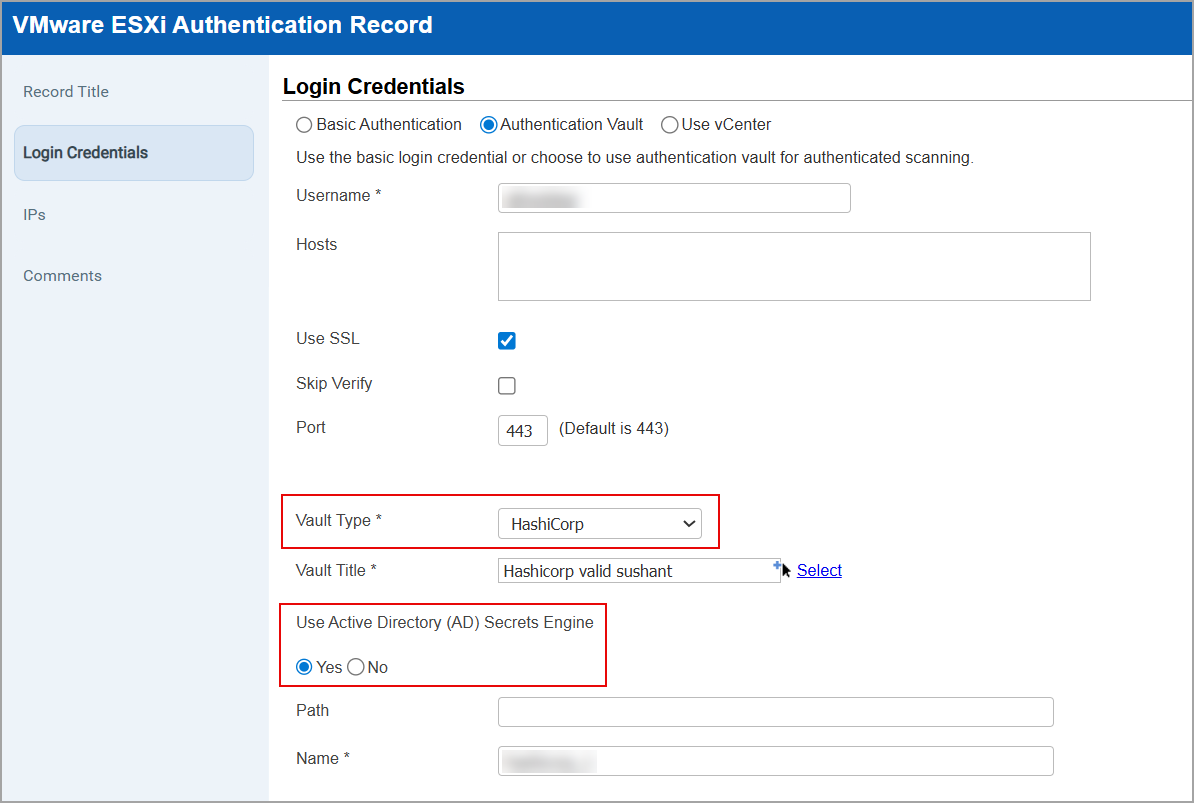
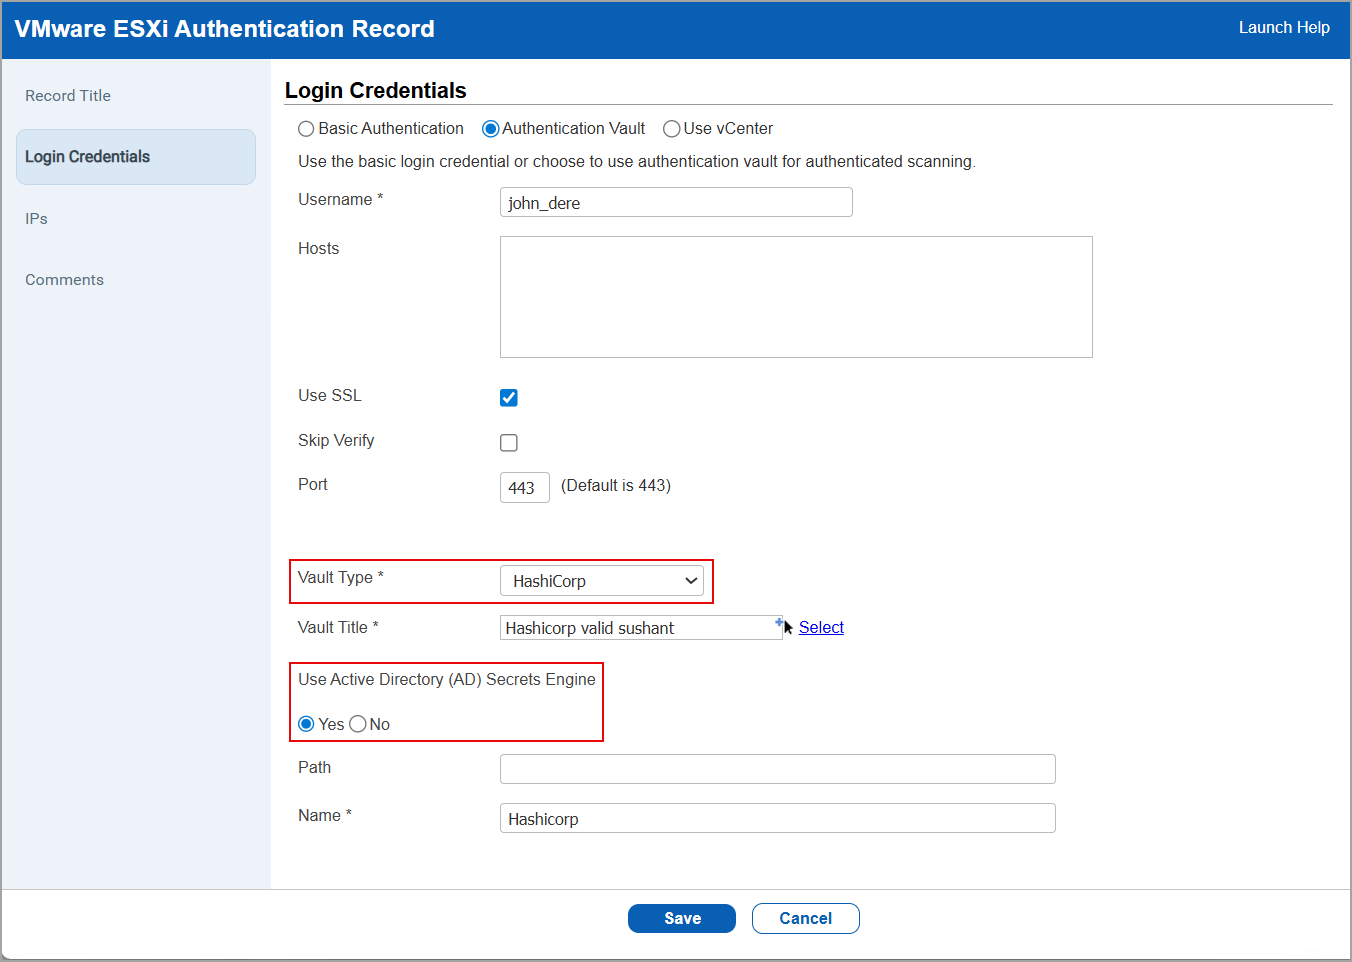
To create a new authentication technology with VMware ESXi with vault type as HashiCorp, navigate to, Scans > Authentication > New > VMware ESXi > Login Credentials > Select Vault Type as HashiCorp.
In Use Active Directory (AD) Secrets Engine, select Yes.
To edit the authentication technology with VMware ESXi with vault type as HashiCorp, navigate to Scans > Authentication > select the authentication record > Quick Actions > Edit > Login Credentials.
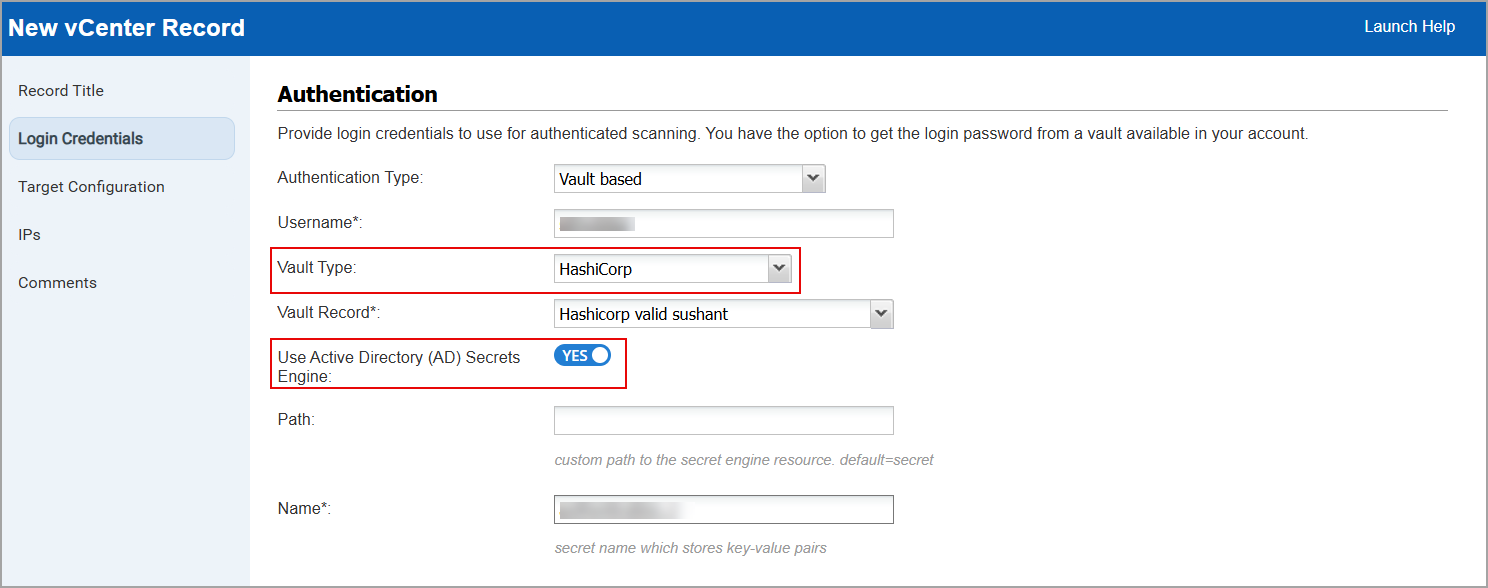
To create a new authentication technology with vCenter with vault type as HashiCorp, navigate to, Scans > Authentication > New > vCenter > Login Credentials > Select Vault Type as HashiCorp.
In Use Active Directory (AD) Secrets Engine, shift the toggle to Yes.
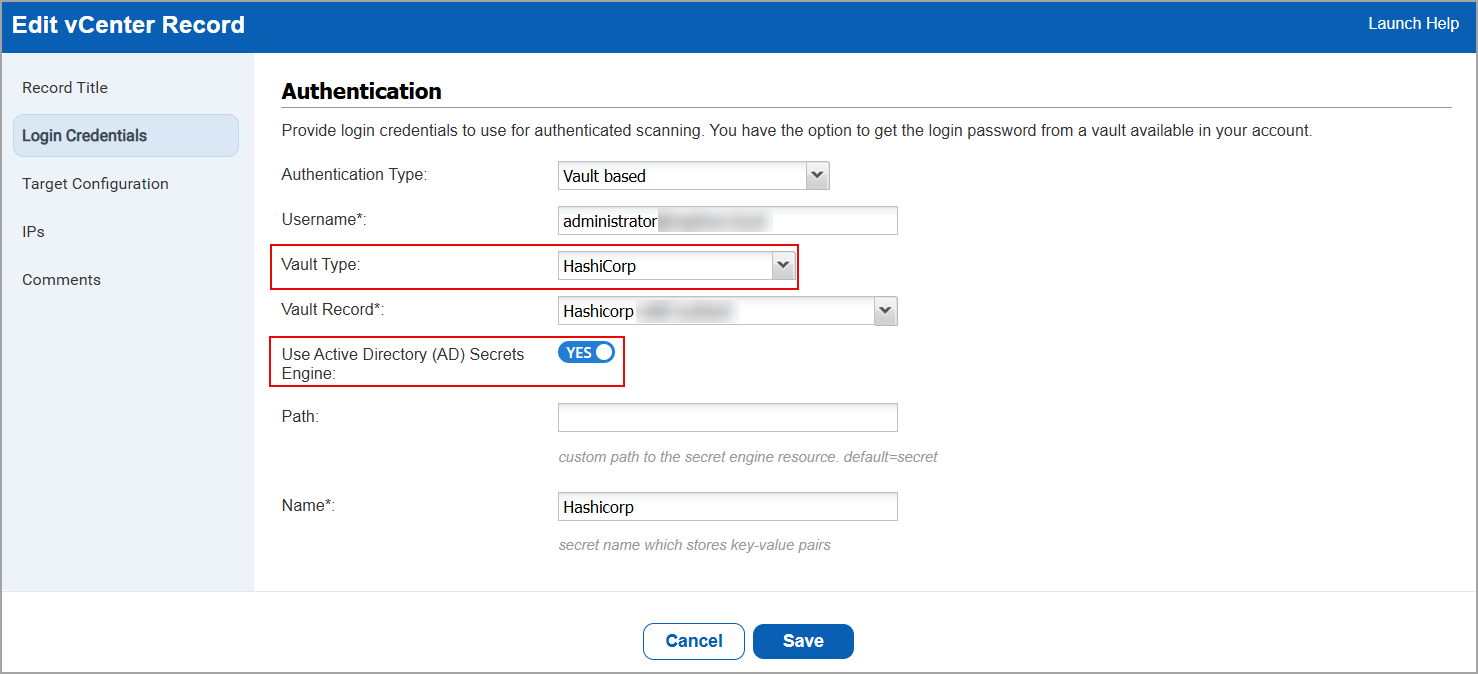
To edit the authentication technology with VMware ESXi with vault type as HashiCorp, navigate to Scans > Authentication > select the authentication record > Quick Actions > Edit > > Login Credentials.
Extended Tag Rule Support for Palo Alto Network Firewall
With this release, we have added support for IP Range in Tag Rule and Asset Tags in Palo Alto Network Firewall authentication record.
Previously, this support for IP Range in Tag Rule and Asset Tags was available for Unix authentication record. This release extends the same functionality to Palo Alto Network Firewall authentication records.
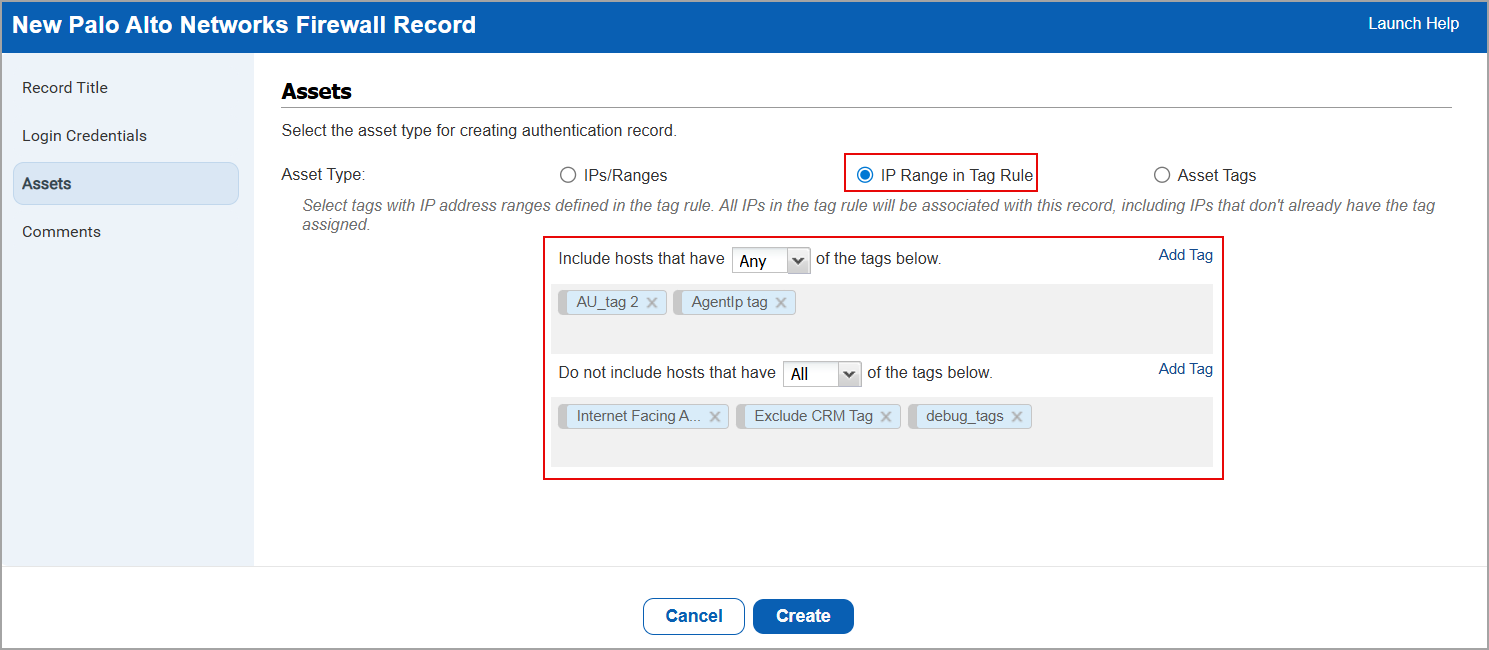
Using these new options, you can select tags that have IP address ranges defined in the tag rule. You can also include or exclude hosts based on whether they have Any or All of the selected tags. Similar enhancements have been implemented for Asset Tags.
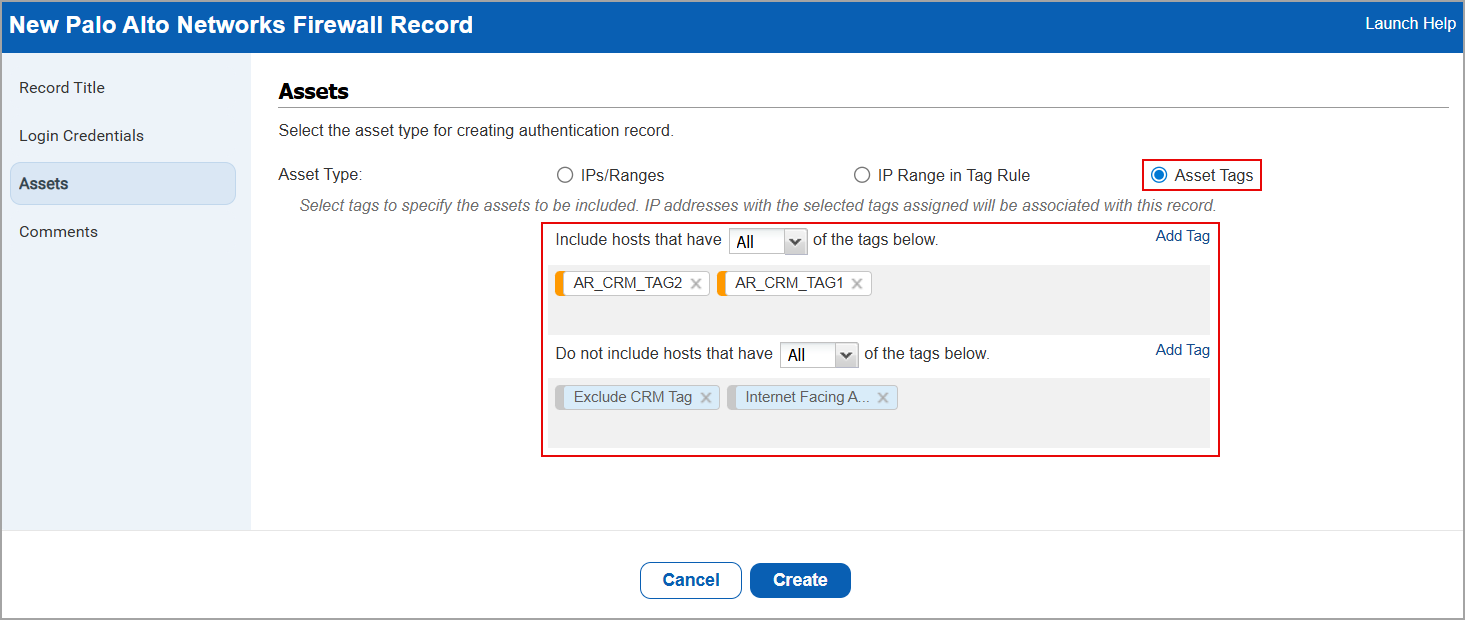
To create a new Palo Alto Networks Firewall Record with Assets types with IP Range in Tag Rule and Asset Tags, navigate to Scans > Authentication > New > Network and Security > Palo Alto Networks Firewall > Assets.
IP Range in tag Rule
Asset Tags
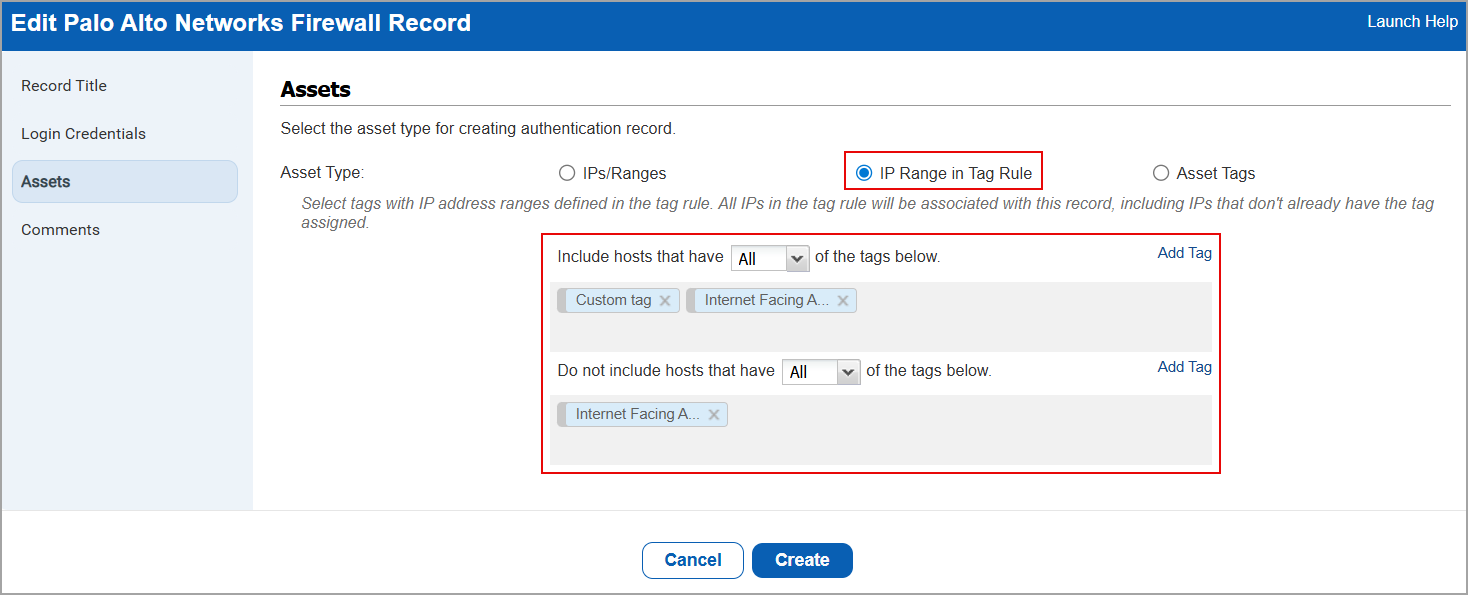
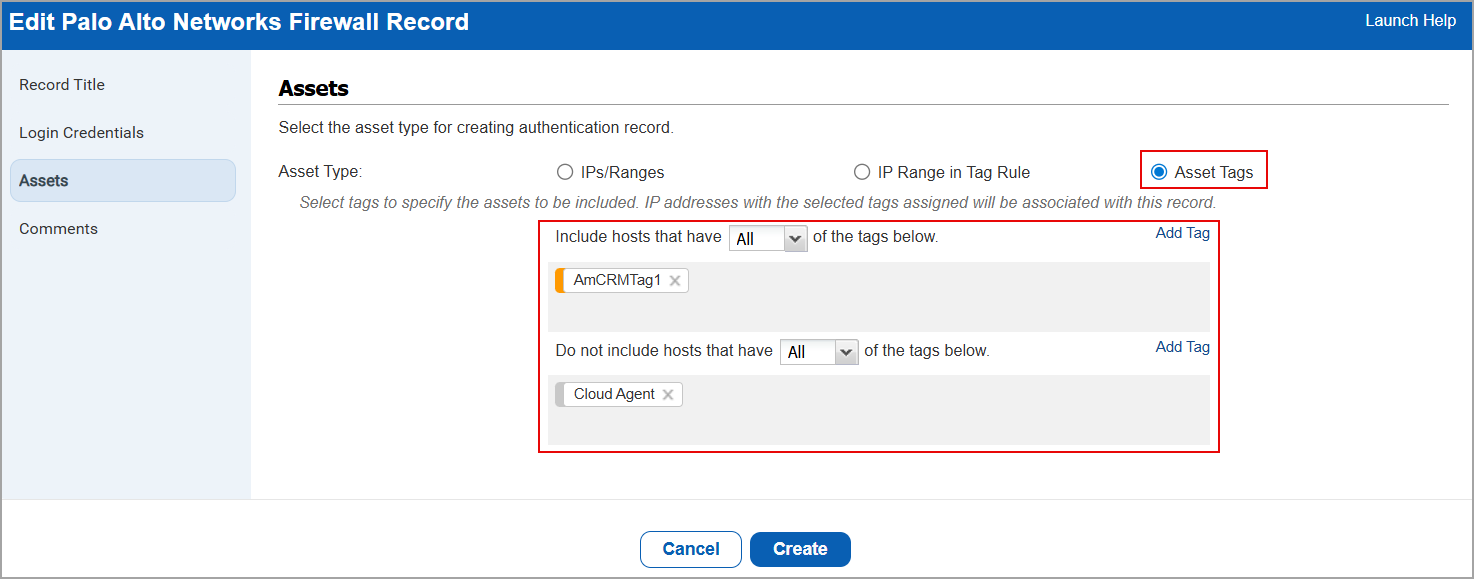
To edit a Palo Alto Networks Firewall Record with Assets types with IP Range in Tag Rule and Asset Tags, navigate to Scans > Authentication > select the authentication record > Quick Actions > Edit > Assets.
IP Range in tag Rule
Asset Tags
Export Policy with Original Control Sequence
With this release, we have introduced an option that allows you to preserve the original sequence of controls when exporting a policy.
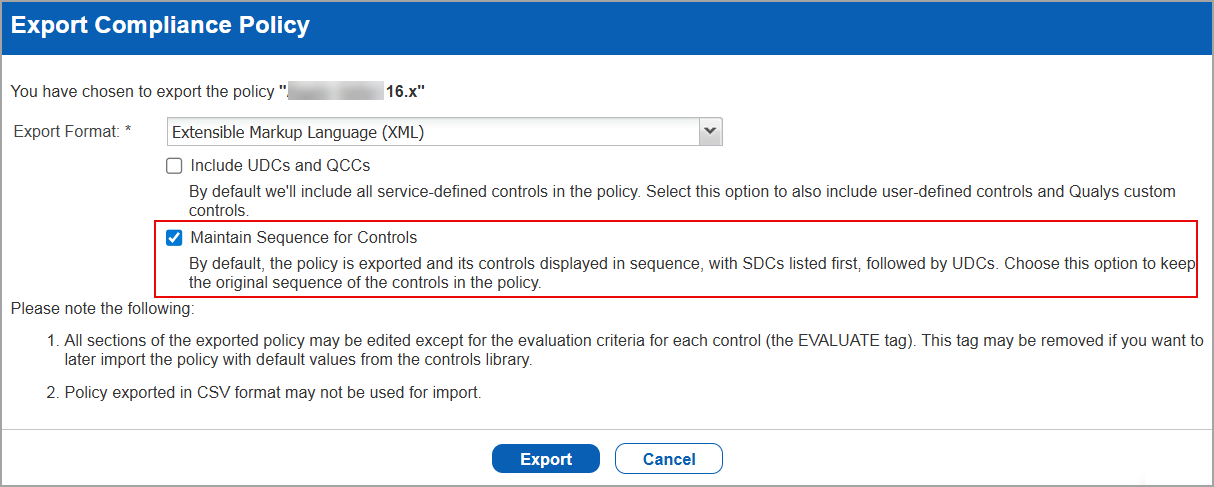
Previously, the policy was exported and its controls were displayed in sequence, with SDCs listed first, followed by UDCs. This altered the original control order. With the new checkbox, you can now export the policy without disrupting the control sequence, ensuring it remains consistent with the original policy definition.
To export the policy with the original control sequence, navigate to Policies > Select a policy to be exported > Quick Actions > Export. In the Export Compliance Policy window, select Maintain Sequence for Controls.
Activate or Deactivate Multiple Controls in a Policy
With this release, we have added the functionality to activate or deactivate multiple controls associated to a policy.
Previously, you could activate or deactivate only one control at a time. This was a time-consuming process. This enhancement enables you to activate or deactivate all controls or multiple controls in a single action, saving time and effort.
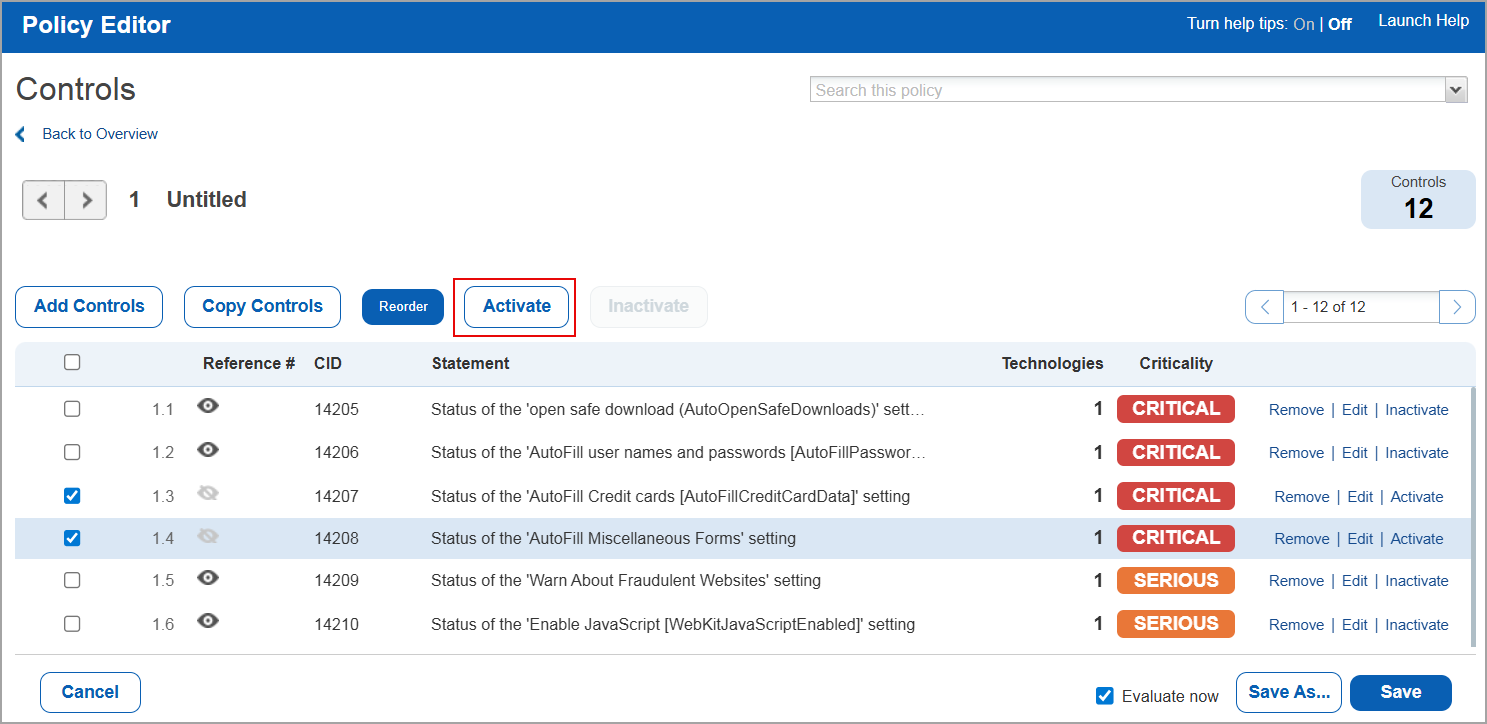
To activate or deactivate multiple controls in a policy, navigate to Policies > Select a Policy from the list > Quick Actions > Edit > For a section, select Edit. The Policy Editor window is displayed.
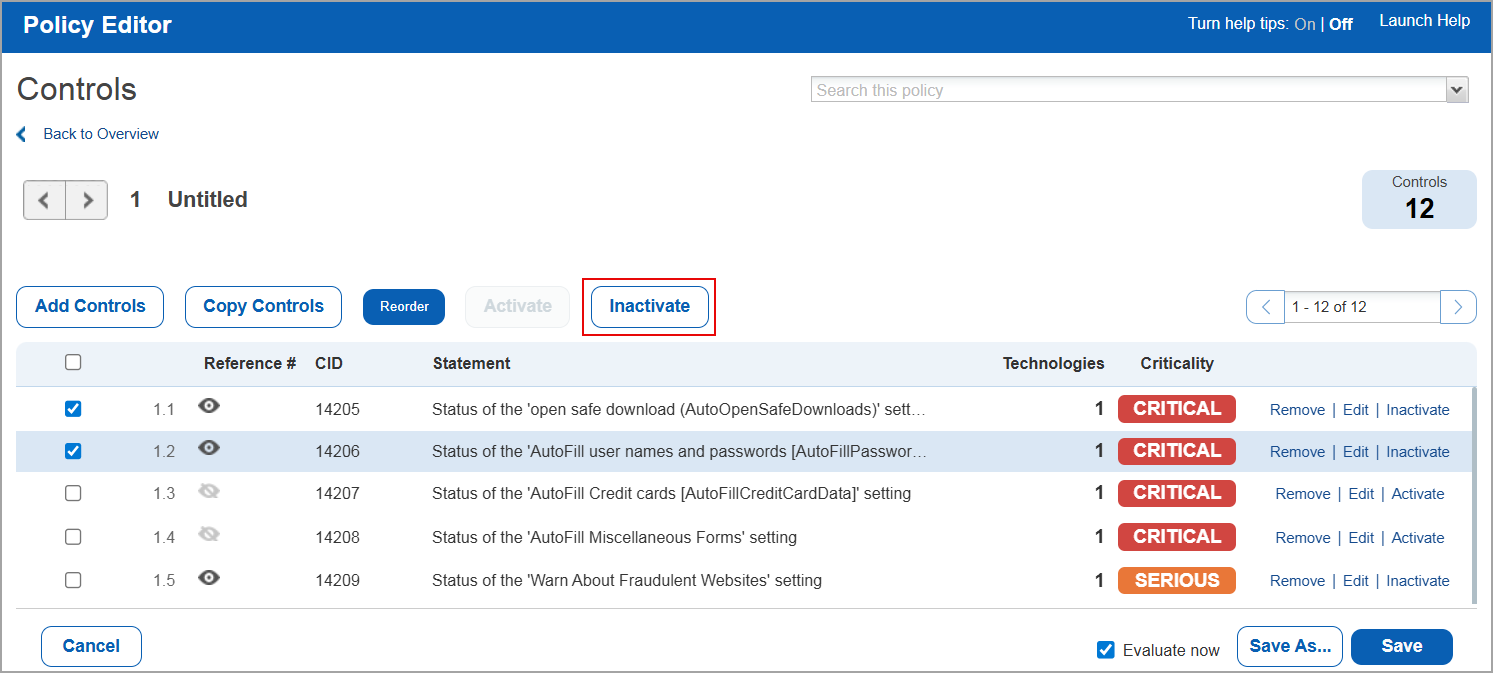
Select multiple or all controls and click Activate. Similarly, to deactivate the active controls, select multiple or all controls and click Inactivate.
You can activate multiple controls at once only if the selected ones are currently inactive. Similarly, you can deactivate multiple controls at once only if the selected ones are currently active.
Activate Controls
Deactivate Controls
Editable Instance for Authentication Record Azure MS SQL
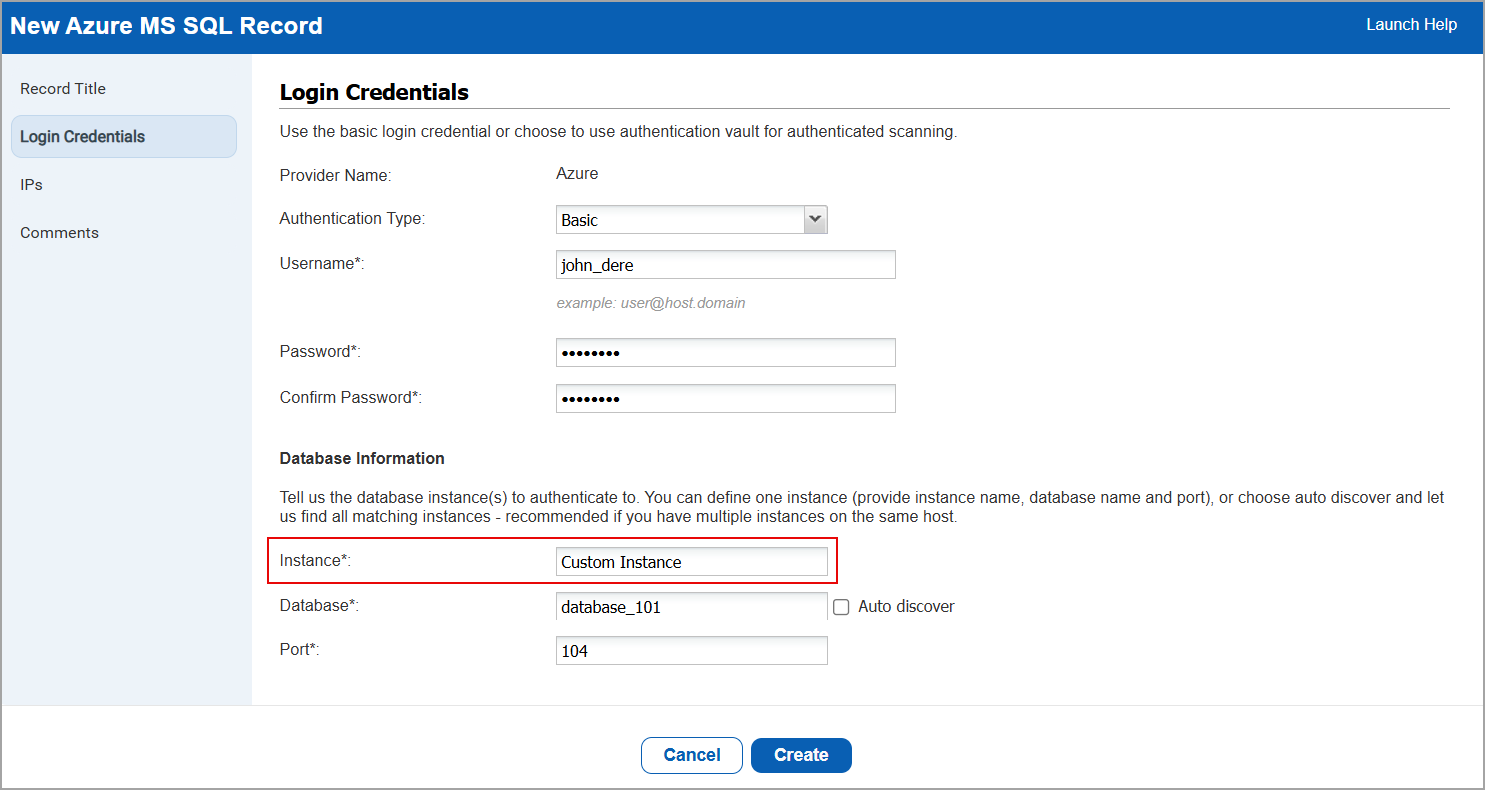
With this release, we have added support to edit the Instance field for the Azure MS SQL authentication record.
Previously, the Instance value was not editable and a default value (MSSQLSERVER) was automatically assigned to all Azure MS SQL authentication records. As a result, users could not customize the Instance per record.
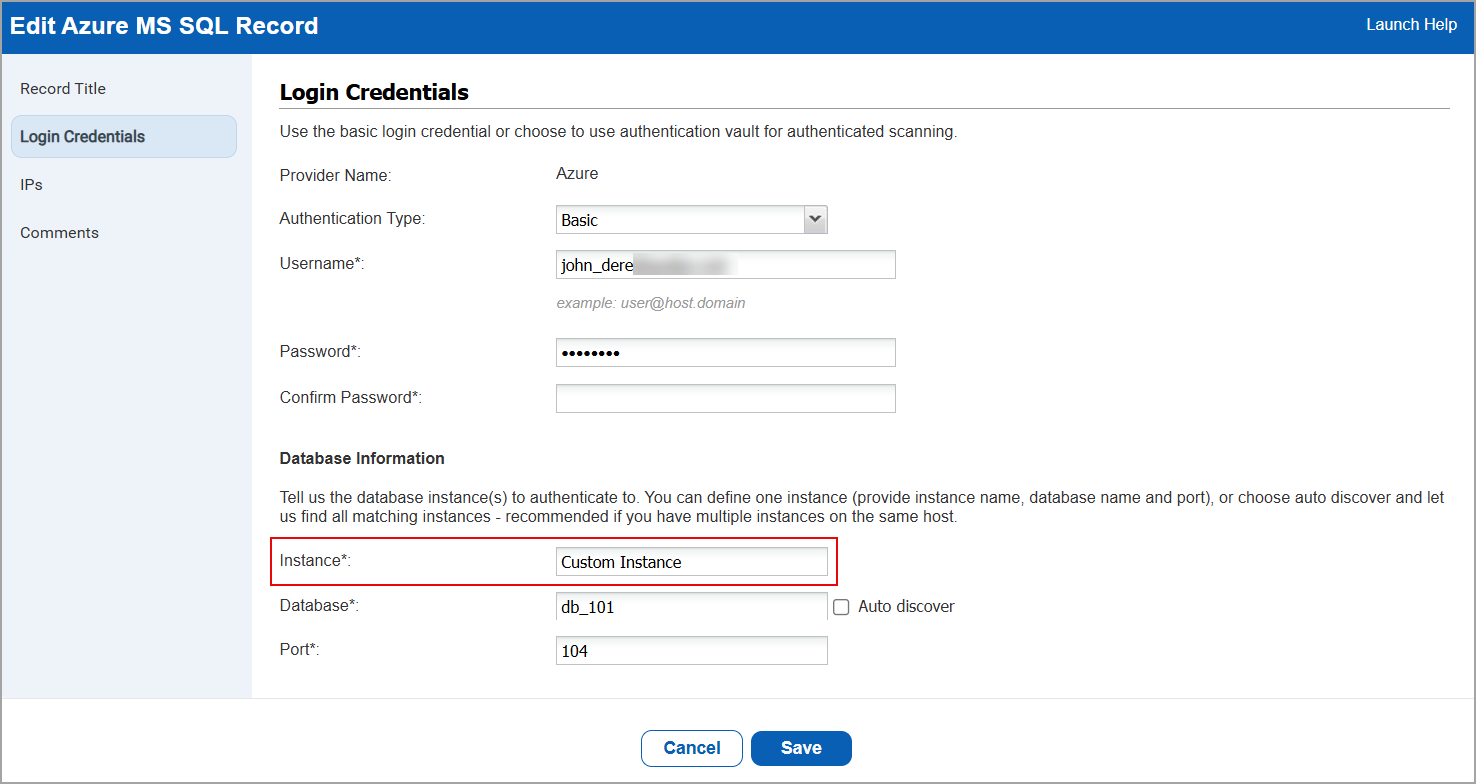
With this enhancement, you can now specify and assign a custom Instance for each Azure MS SQL authentication record you create.
To add an Instance field to the Azure MS SQL authentication record, navigate to Scans > Authentication > New > Databases > Azure MS SQL > Login Credentials > Instance.
To edit an Instance field to the Azure MS SQL authentication record, navigate to Scans > Authentication > select the authentication record > Quick Actions > Edit > Login Credentials > Instance.
Enhanced Posture Detection Source
With this release, we have made the following enhancements to the posture detection source in the Posture tab:
- In earlier release, we had introduced the Source column, under Controls, to indicate the most recent source (scanner or agent) of the Posture.
With this release, we have enhanced this feature to display all the sources using which the Posture was generated. For such Postures, both the scanner ( ) and agent (
 ) icons are displayed in the Source column, making it easy to identify the sources for the Posture.
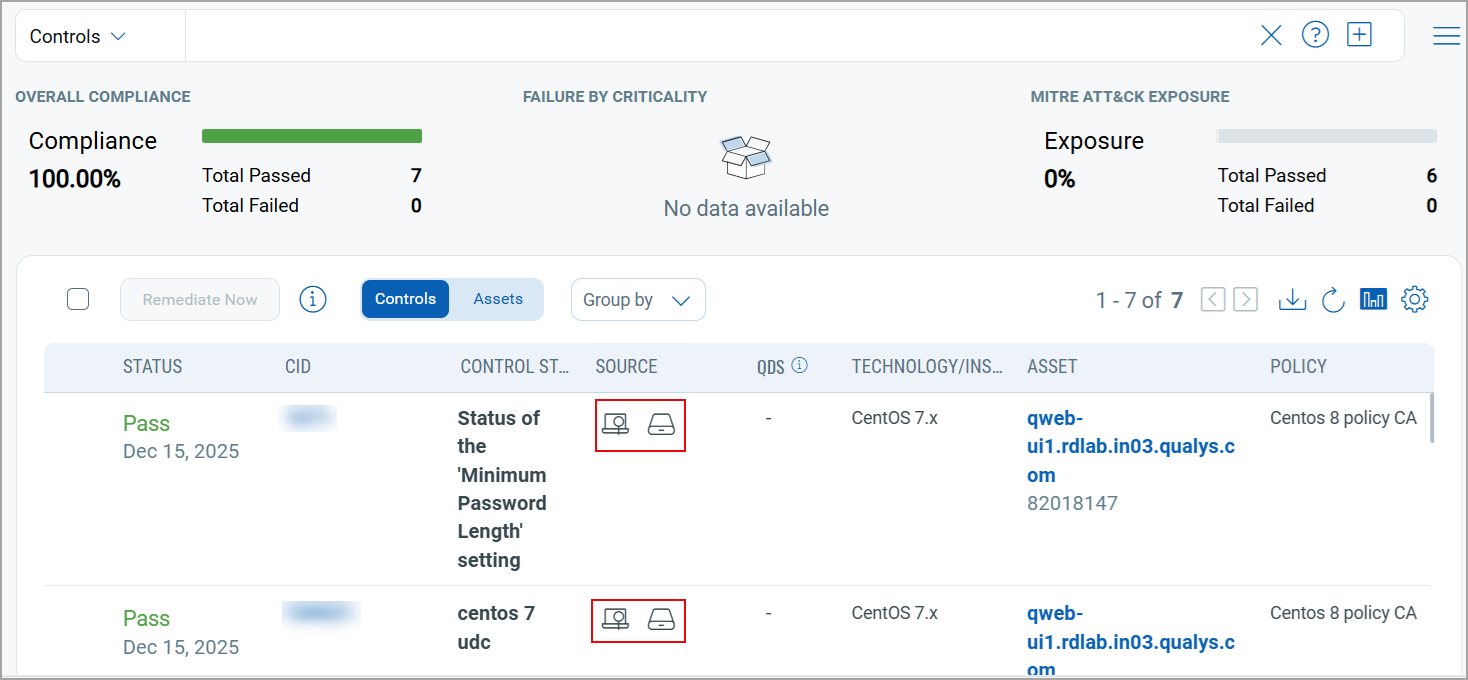
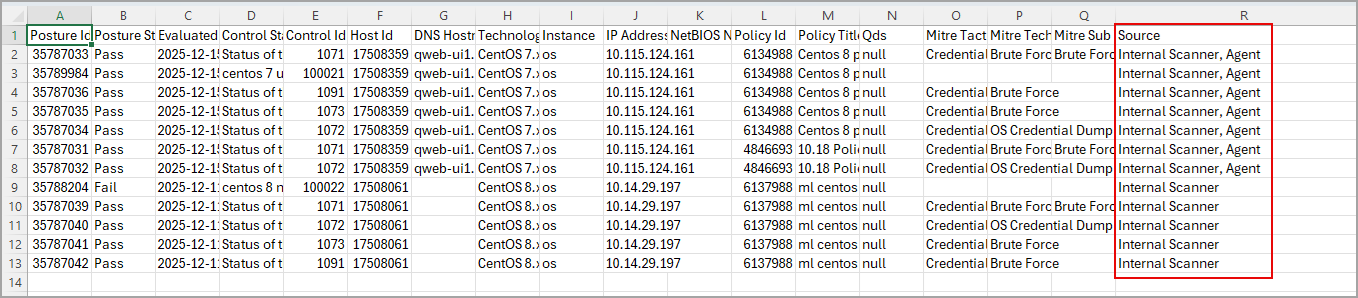
- When you download the results on the Posture tab, the Source column displays scanner and agent as the types.
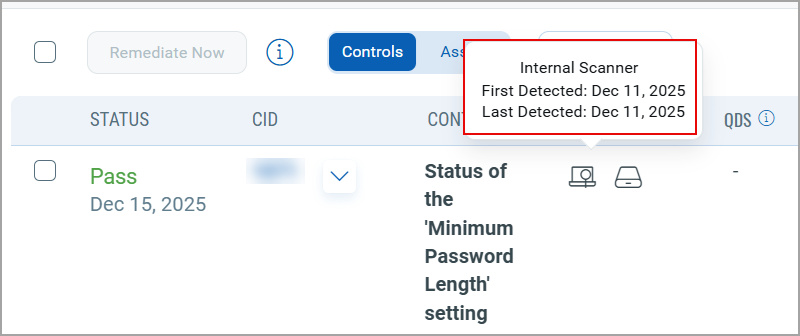
- If you hover over any of the icons, scanner or agent, you can see the name of the source (scanner or agent), the date on which the control was first detected in a scan, and the date on which it was last detected in a scan.
- In the Group by option, you can now group controls or assets by Posture Detection Source. This Group by option is available for Controls and Assets.

- We have also introduced new Qualys Query Language (QQL) tokens. These tokens are related to the posture detection source and can help you get more details on them:

posture.detectionSource -With this token, you can view results for a specific type of Source such as Agent, and Internal Scanner.
For example,posture.detectionSource:Agentposture.agentFirstDetectedDate- With this token, you can view all controls that were scanned by agent and were first detected on the entered date.
For example,posture.agentFirstDetectedDate: 2025-12-19posture.agentLastDetectedDate- With this token, you can view all controls that were scanned by agent and were last detected on the entered date.
For example,posture.agentLastDetectedDate: 2025-12-19posture.scannerFirstDetectedDate- With this token, you can view all controls that were scanned by scanner and were first detected on the entered date.
For example,posture.scannerFirstDetectedDate: 2025-12-19posture.scannerLastDetectedDate- With this token, you can view all controls that were scanned by scanner and were last detected on the entered date.
For example,posture.scannerLastDetectedDate: 2025-12-19
- The new QQL tokens can be used only when Controls is selected in the Search bar.
- The Source column currently displays details only for the internal scanner and agent.
Group By Policy Support Added for Table Widget
With this release, we have added support to create or edit a Table widget using the Group By Policy option. This enhancement allows you to view detailed policy information directly from the Dashboards tab.
Previously, to view policy specific details, you had to navigate to the Posture tab and use the Group By option to filter and identify the required policies.
Along with the columns displayed in the Posture tab, you can also add a few additional columns - Policy ID, Passed Postures, Failed Postures, and Error Postures.
To create a new widget that displays all policy details, navigate to, Dashboard > Add Widget > Build your Widget > Query Settings > Select Table > in Display results as: select Control > Under Table Type select Grouped > In Group By select Policy.
In Columns to Display, select the various columns to be added to the Policy table widget.

- The Group By Policy option is supported only for the Table widget type.
- Within the Table widget, the Group By Policy option is available only when the Display results as: is selected as Control and Table Type is selected as Grouped.
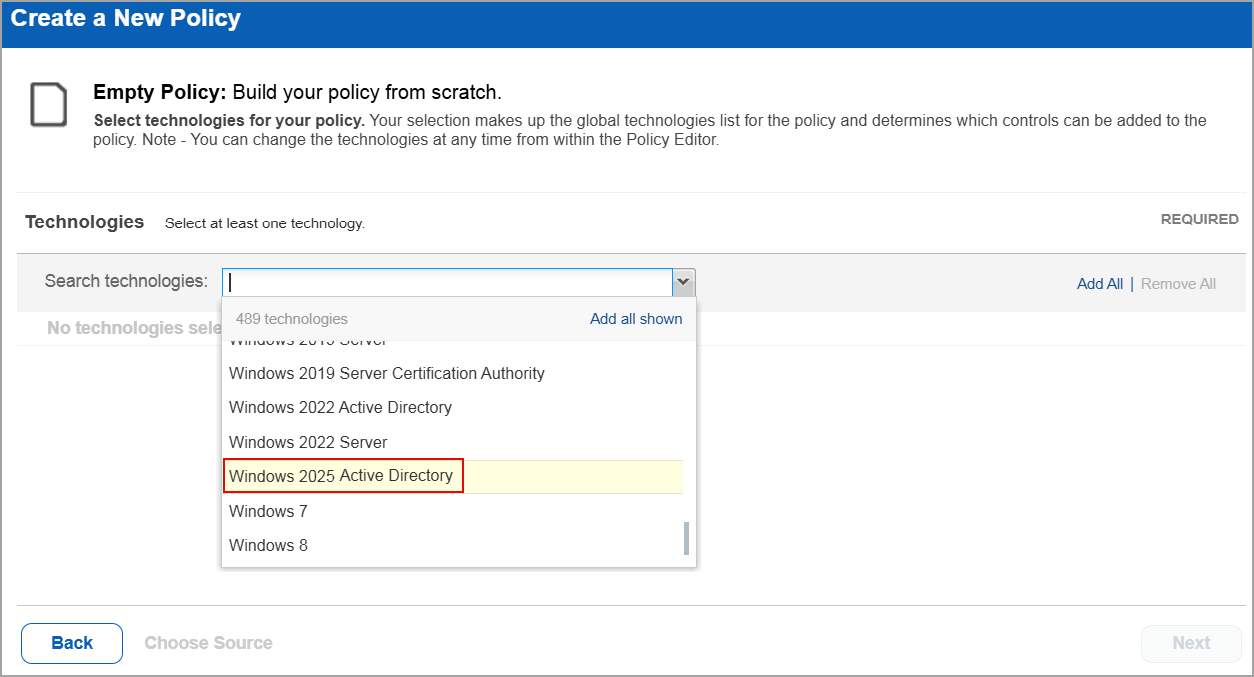
Support for New Authentication Technology - Windows 2025 Active Directory
With this release, Windows 2025 Active Directory technology is supported for Policy Audit authenticated scans using scanners and agents. This technology is now available for use at the following places, at both the scanner and the agent:
- Policy Editor
When you create or edit a policy compliance, Windows 2025 Active Directory is now available in the list of supported technologies.
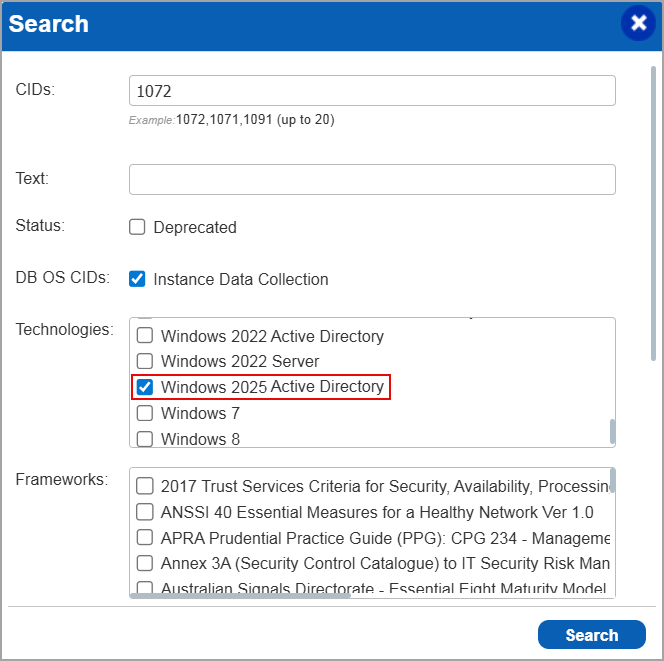
- Search Controls
When you search for controls, you see Windows 2025 Active Directory in the list of technologies. Go to Policies > Controls > Search and under Technologies, select Windows 2025 Active Directory in the list.
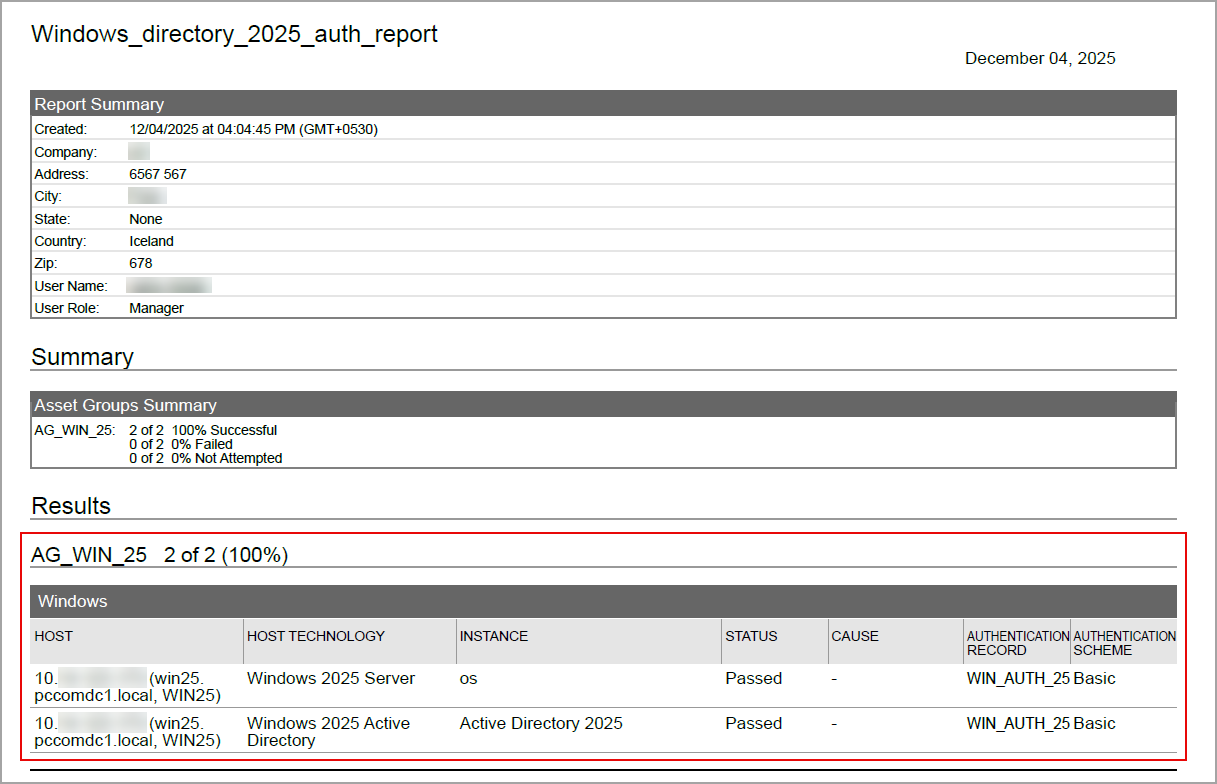
- Authentication Report
To display all OS authentication-based instance technologies per host, including Windows 2025 Active Directory, in your authentication report.
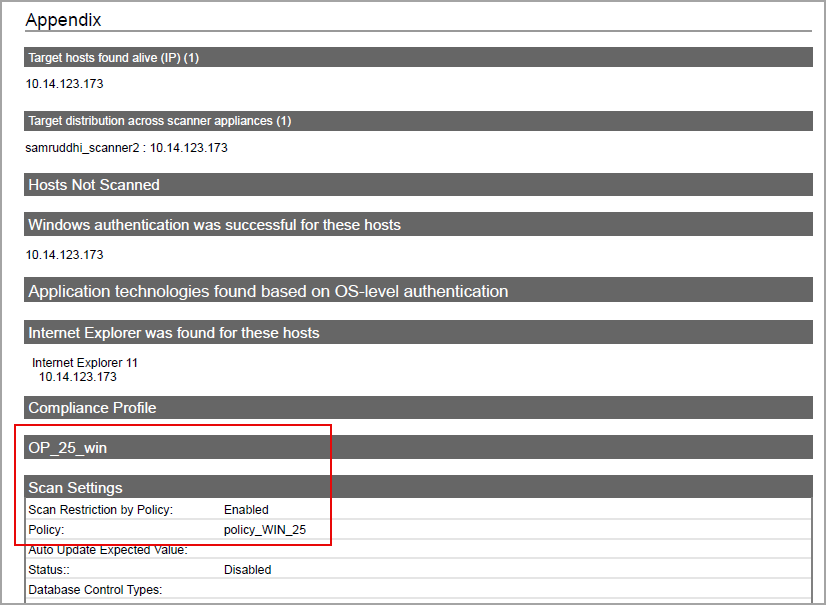
- Scan Results
Windows 2025 Active Directory is now listed under Application technologies found based on OS-level authentication in the Appendix section of a compliance scan result.
- Middleware Asset
If you are using Cloud Agent for Policy Audit (PA), the Cloud Agent auto-discovers Windows 2025 Active Directory. When an agent scan detects Windows 2025 Active Directory on a host, it is displayed in the Assets > Middleware Assets. -
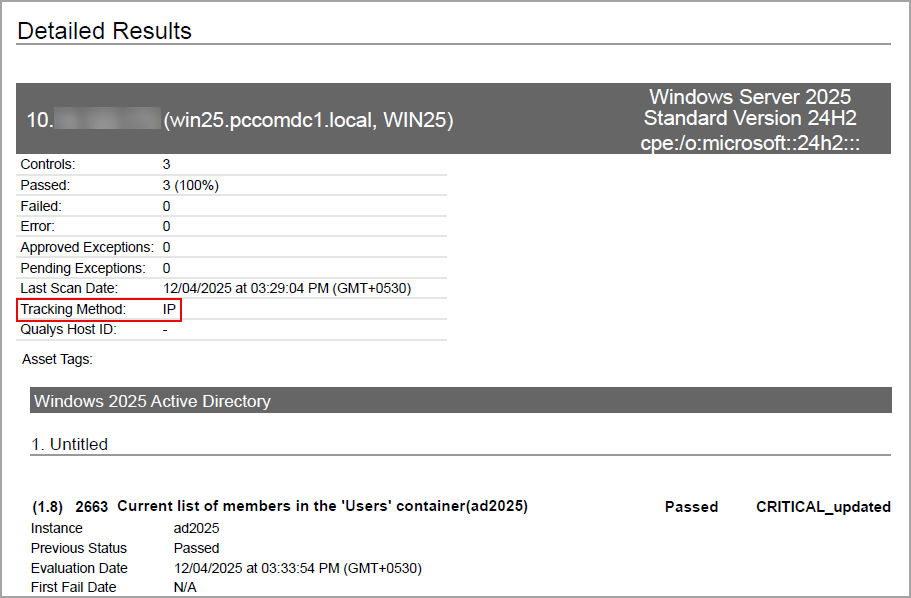
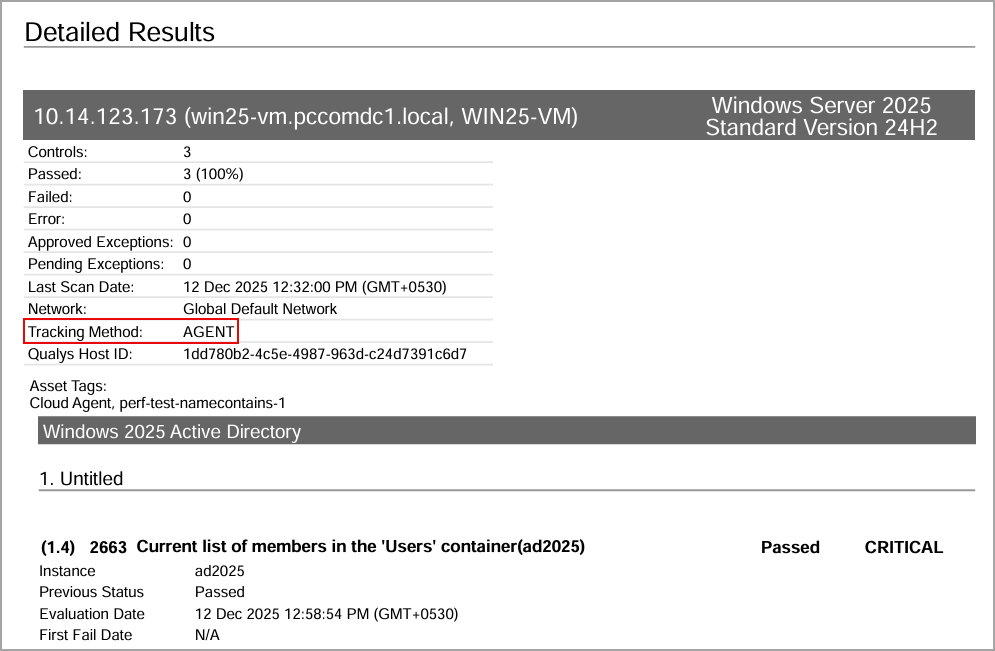
Sample Report
The sample report displays the tracking method and the instances for the scanner and the agent.
-
Scanner
In Compliance Reports, you can view the instances of Windows 2025 Active Directory for scanned hosts. The sample report displays the scanner's tracking method as IP with an instance of Windows 2025 Active Directory.
-
Agent
In Compliance Reports, you can view the instances of Windows 2025 Active Directory for scanned hosts. The sample report displays the tracking method for the agent as AGENT with an instance of Windows 2025 Active Directory.
-
Update - Automated Policy Creation using Compliance Framework
In the previous release, we introduced the ability to create policies using controls mapped to Compliance Frameworks. This enhancement enables quick alignment with industry standards such as CIS, DISA, and others, ensuring accurate compliance posture evaluation.
To enable this feature for your account, contact you Technical Account Manager (TAM) or Qualys Support.
For more details on the feature, refer to the Automated Policy Creation using Compliance Framework section in UI Release Notes for release 1.5.
Update - Agent Correlation Identifier
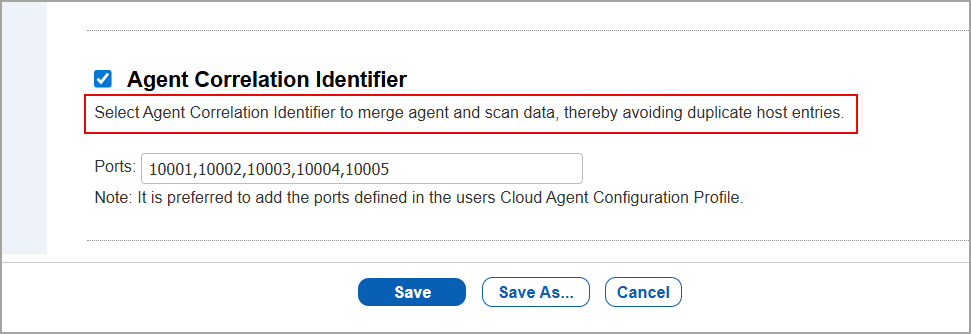
With this release, we have updated the text that was displayed below the Agent Correlation Identifier checkbox (Scans > Option Profiles > New > Compliance Profile > Additional).
Previously, the message did not clearly explain the result of selecting the checkbox. The revised text now states, 'Select Agent Correlation Identifier to merge agent and scan data, thereby avoiding duplicate host entries'.
This update provides clearer guidance and helps you understand the impact of selecting the checkbox.
For more details on the Agent Correlation Identifier, refer to the Improved Merging of Agent and Scan Data section in the UI Release Notes for Release 1.4.
Issues Addressed
The following reported and notable customer issues are fixed in this release:
| Component/Category | Application |
Description |
| PA / PC - Policy Summary | Policy Audit / Policy Compliance | When the user selected a policy in the Compliance tab for an Agent in the Cloud Agent application, the list of CIDs was displayed. On selecting any CID, it was observed that the Control Info page took longer than expected to load. Relevant code changes have been made to fix the issue. |
| PA / PC - Scan Processing | Policy Audit / Policy Compliance | When the user initiated a scan, it was observed that the scan could not be completed because multiple assets with the same IP addresses were being scanned for DNS-based assets. Relevant code changes have been made to fix the issue. |
| PA / PC - Policy Editor | Policy Audit / Policy Compliance | When the user entered an IP address manually in the IP address field for evaluating a control, the Scanned Host page did not display the entered IP address. Relevant code changes have been made to fix the issue. |
| PA / PC - Feature Request | Policy Audit / Policy Compliance | When the user generated a Control Chaining report for Member Server (MS) policy, they observed that the Domain Controller (DC) requirements were also included in the report. This is because the report displayed posture data for all controls associated to the CIS Benchmark, regardless of whether they are actually part of the selected policy. Relevant code changes have been made to improve the Control Chaining report. |