Vulnerability Scan - Scan Settings
On this page, select the settings for performing a scan.
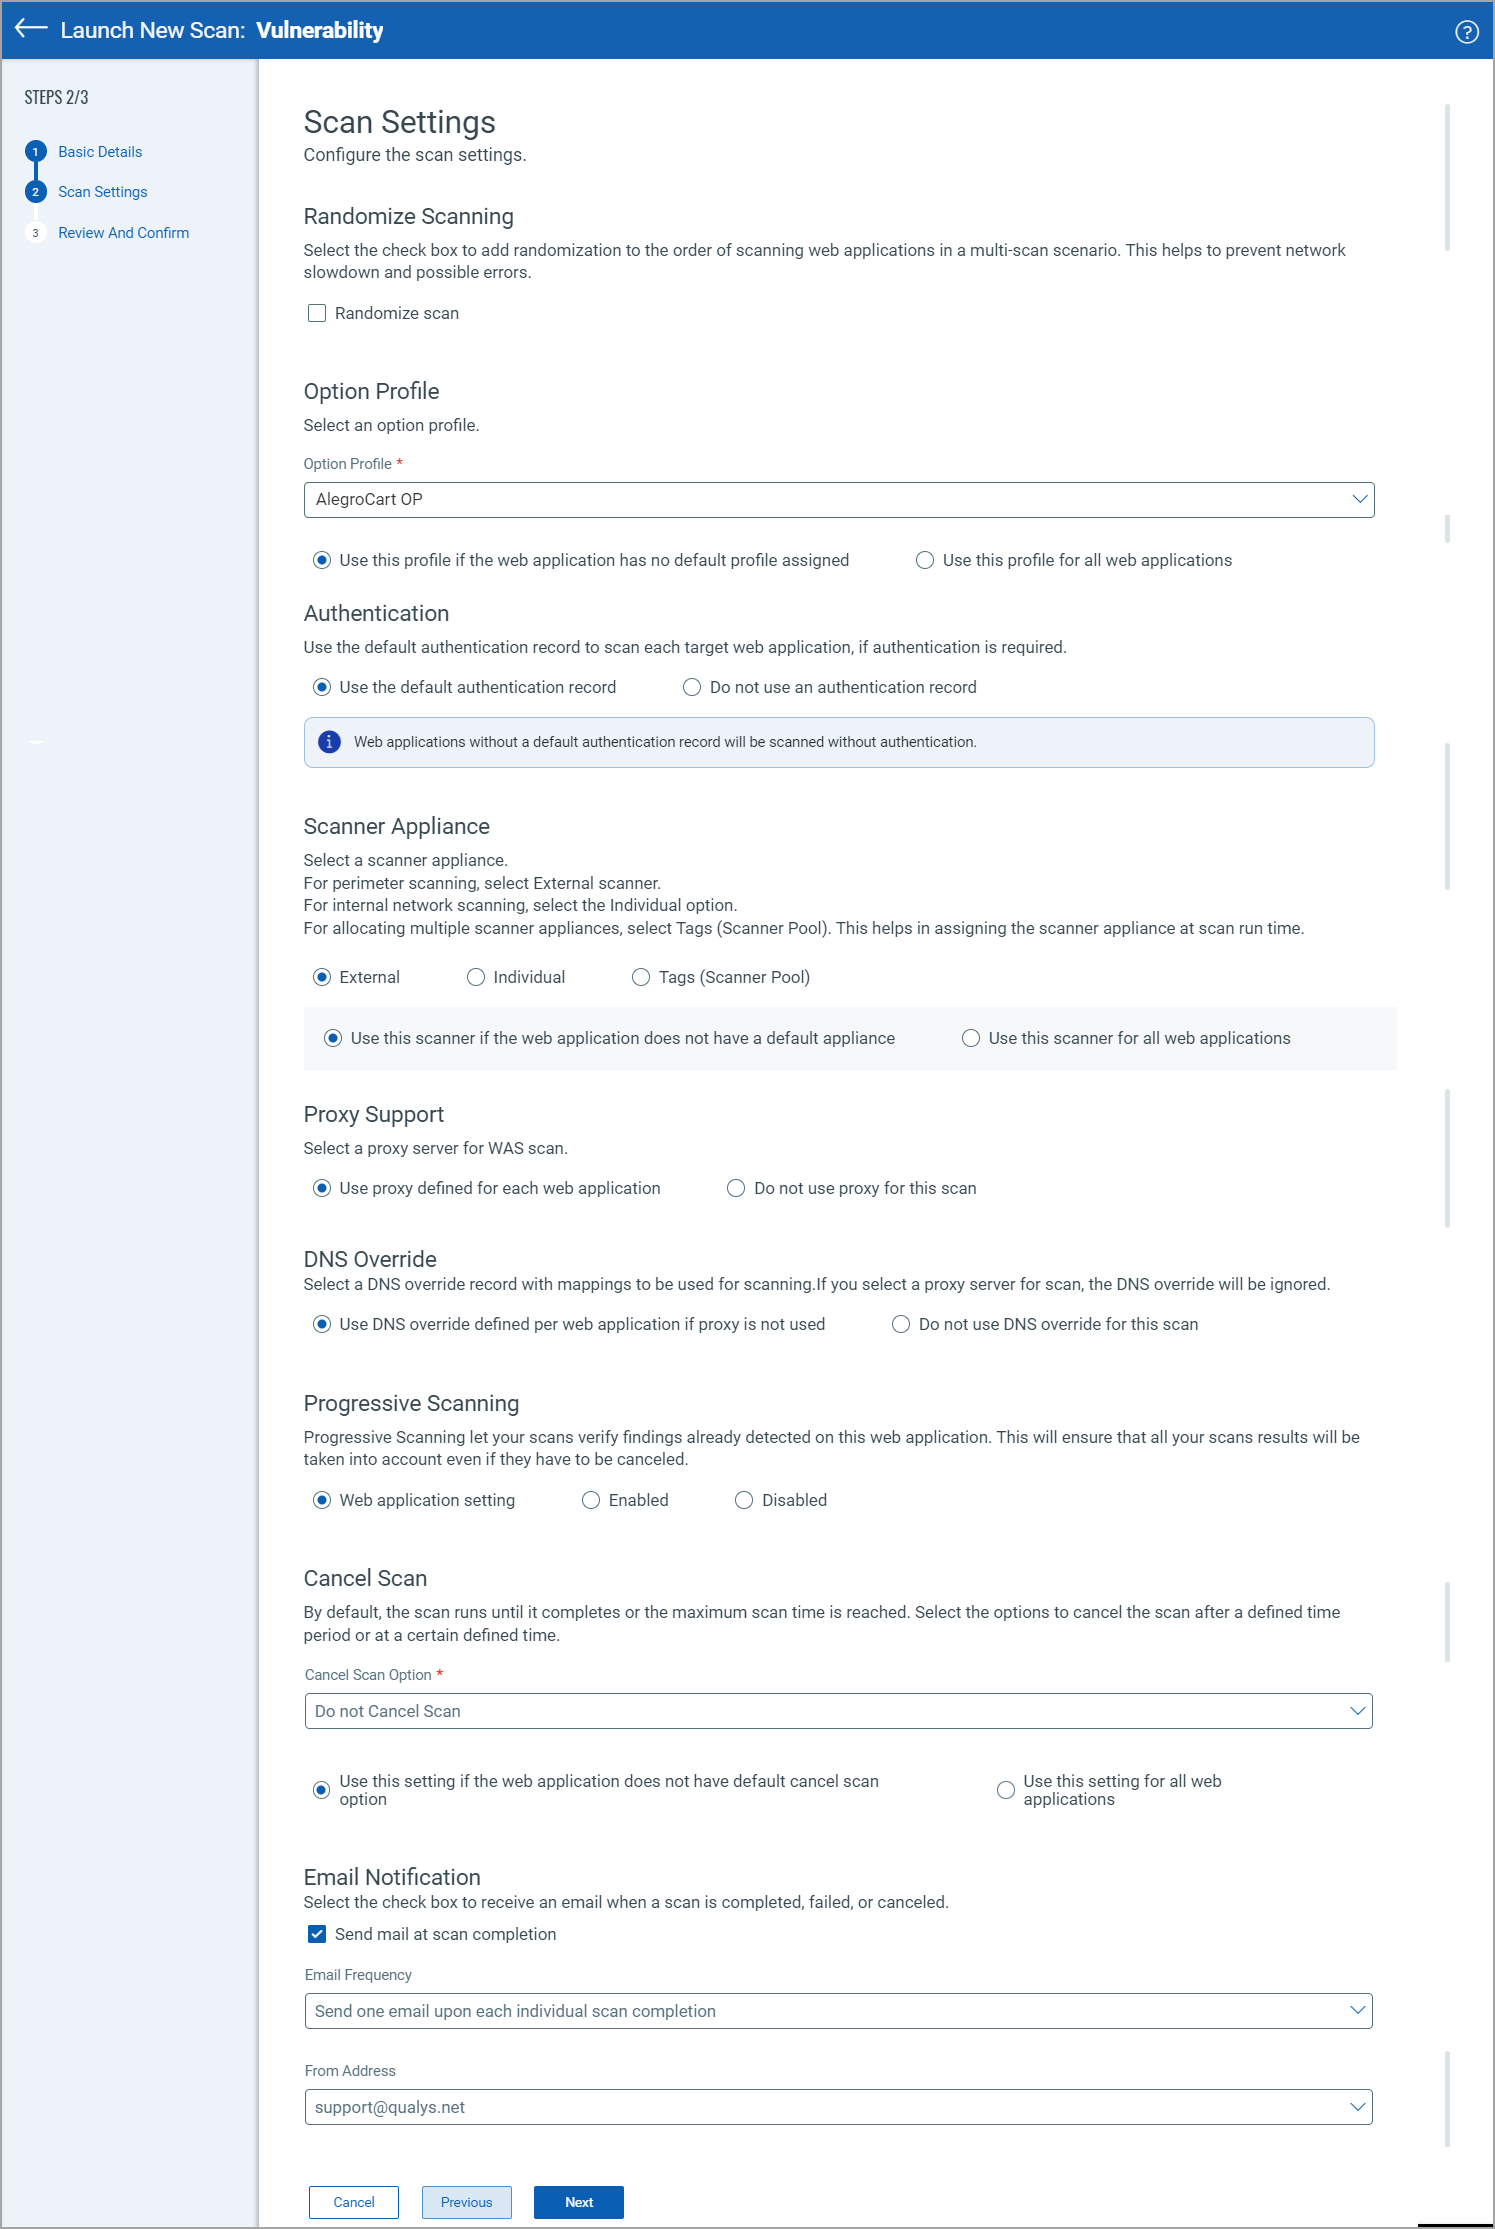
Option profile
Select an option profile from the list. The default option profile is automatically populated.
The option profile that is selected as a default while creating or updating the target web application is populated automatically. However, you can select the option profile from the list to override the default option profile.
For details on scan settings in option profiles, see Option Profile - Scan Parameters
Authentication
Select an authentication record from the list if authentication is required. Choose from records already defined for your target web application (in the web application settings).
This tells us the access methods and credentials (form and/or server-based) that is used to perform authenticated scanning.
Authentication may be required for our security scanners to access the functionality of your target web application. Tip - You can upload Selenium scripts to your authentication records and we'll use them for authenticating your applications at scan time.
Scanner Appliance
- If you have an external-facing web application, select External. Perimeter applications can be scanned by Qualys Cloud scanners.
- If you have a web application on your internal network, select Individual, and select scanner from the list of scanners.
- If you want to allocate multiple scanners. select Tags (Scanner Pool), and select tags from the list of tags. The scanner appliances with any of the selected tags are added to the scanner pool and can be assigned at the scan run time.
Proxy Support
Select a proxy configuration from the list of proxy configurations that are available for your account.
The proxy configuration that you have selected while creating a web application is automatically populated. However, you can override the default selection.
DNS Override
Select a DNS Override record to use the mappings in the selected record instead of the default value for the web application URL to crawl the web application and perform scanning.
This is useful in some scenarios. For example, if the web application does not have a DNS entry as it's in a non-production environment or the web application may have a different IP address in a non-production environment (that is, development or QA) than in production.
Progressive Scanning
Select the Progressive Scanning check box to add to the history of findings with this scan.
Progressive Scanning adds more scanning capabilities. Progressive Crawling expands the testing coverage for web applications over time. Each scan builds upon the information obtain in previous scans, prioritizing new content areas to expand coverage. Progressive Testing enhances the flexibility of scanning by automatically starting, stopping and resuming scans across your networks without manual intervention.
Cancel Scan
You can choose to cancel the scan automatically after a defined period of time or at a specified time.
By default, the scan runs until it completes or the maximum scan time is reached.
- To cancel the scan after a certain duration, select Cancel Scan After, and enter number of hours after which the scan should be canceled.
- To cancel the scan at a specified time, select Cancel Scan At, and select the time or enter the time.
You can set the cancel scan options while creating or updating the web application also. See Web Application - Default Scan Settings.
Note that canceled scans may return partial, incomplete results.
Email Notification
Select the Send mail at scan completion check box to send an email upon scan completion, failure, or cancelation, and select the email address from which the email should be sent in the From Address list. All users with permissions to view the target web application will get these emails.
For more information on sending an email notification, see Scan complete email notification.
Launch Vulnerability Scan for Multiple Web Applications
When you add multiple web applications for a scan, few additional settings are available for the fields for the application of field values to one or more web applications.
Randomize scanning
Select Randomize scan check box to add randomization to the ordering of scans in case of multiple scans.
Note: This field is available only if you add multiple web applications to the scan.
Option Profile
Select an option profile to be used for the scan.
You can use the selected profile for all web applications selected in the scan or use it only for the web applications, which do not have a default option profile assigned.
Authentication
You can select whether to use the default authentication assigned to the web application or not to use the authentication while scanning.
The web applications for which no default authentication record is assigned, are scanned without authentication.
Scanner Appliance
You can select to use the selected scanner for all web applications selected in the scan or use it only for the web application, which do not have a default scanner appliance assigned.
Proxy Support
You can select whether to use the default proxy configuration assigned to the web application or not to use the proxy configuration while scanning.
DNS Override
You can select whether to use the DNS override record defined to the web application or not to use the DNS override while scanning.
Progressive Scanning
You can select whether to use the progressive scanning setting defined for each web application or enable or disable it for all web applications added to this scan.
Cancel Scan
Select the Cancel Scan Option.
You can use the selected cancel scan option for all web applications selected in the scan or use it only for the web applications, which do not have a defined default cancel scan option.
Email Notification
You can select to send a notification when an individual scan is completed or multiple scans are completed.