Create Custom Remediation QID Scripts
The Custom Remediation QID script enables you to execute specific actions that fix an active vulnerability in VMDR. This script allows you to implement tailored remediation steps that may not be part of standard predefined solutions.
When you run the script successfully, the associated vulnerability is resolved or fully addressed.
You can only create and store Custom Remediation QID scripts in CAR. These scripts can only be executed through the Patch Management module.
You can create a Custom Remediation QID script using the following ways:
- Manually enter a script
- Upload script from local machine
- Import from GitHub
To create a Custom Remediation QID script, follow these steps:
- Navigate to Scripts > Scripts > Create > New Script.
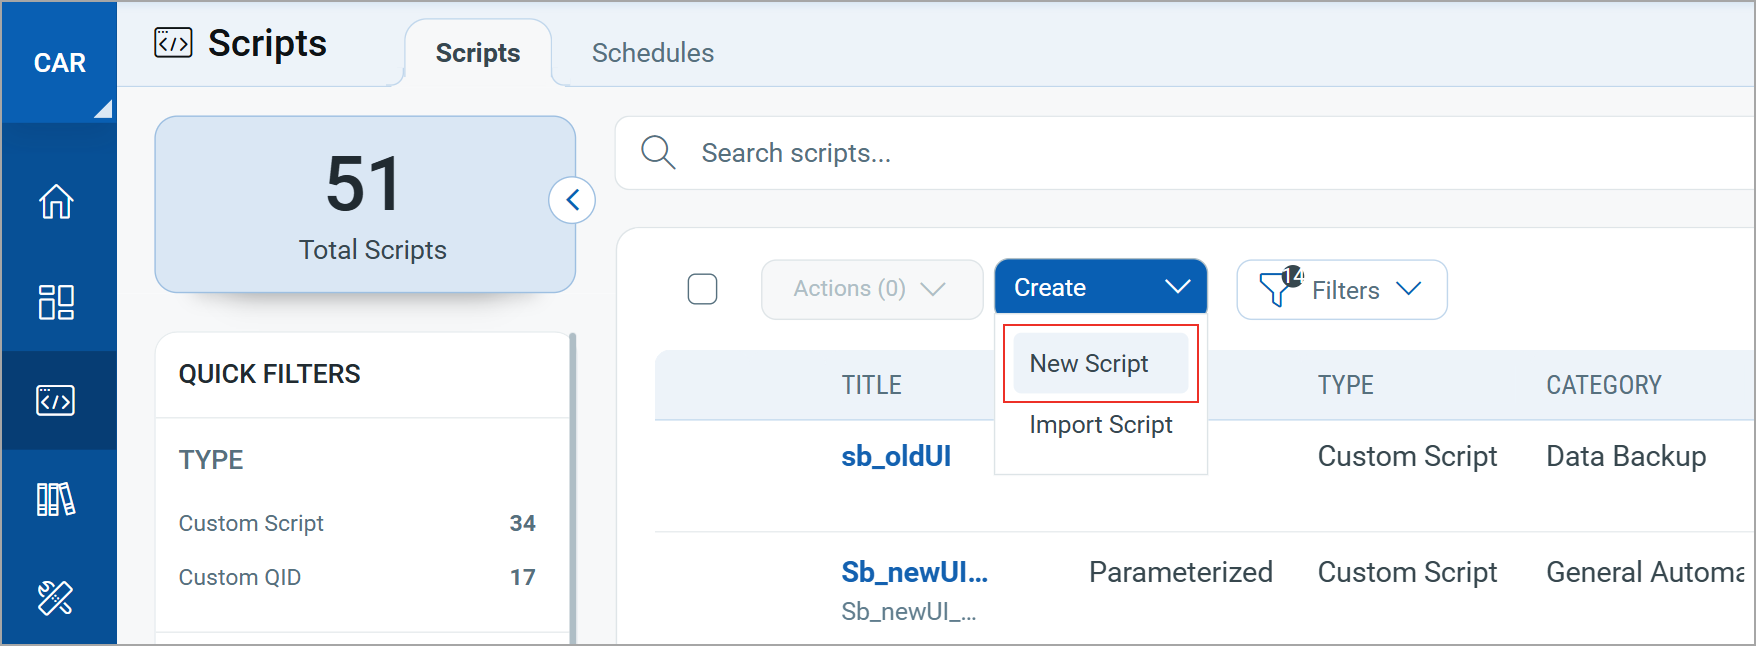
The Create New Script page is displayed.
- Enter a Name and Description for the script.
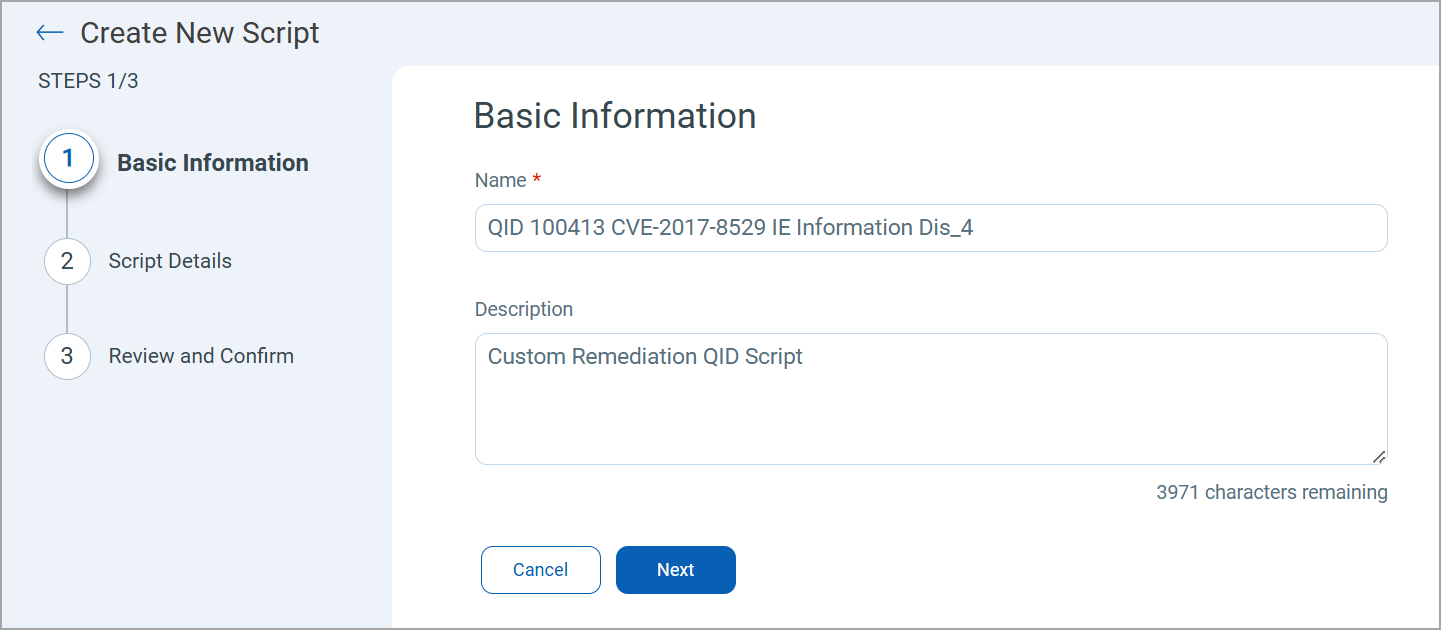
- Click Next to view the Script Details page.
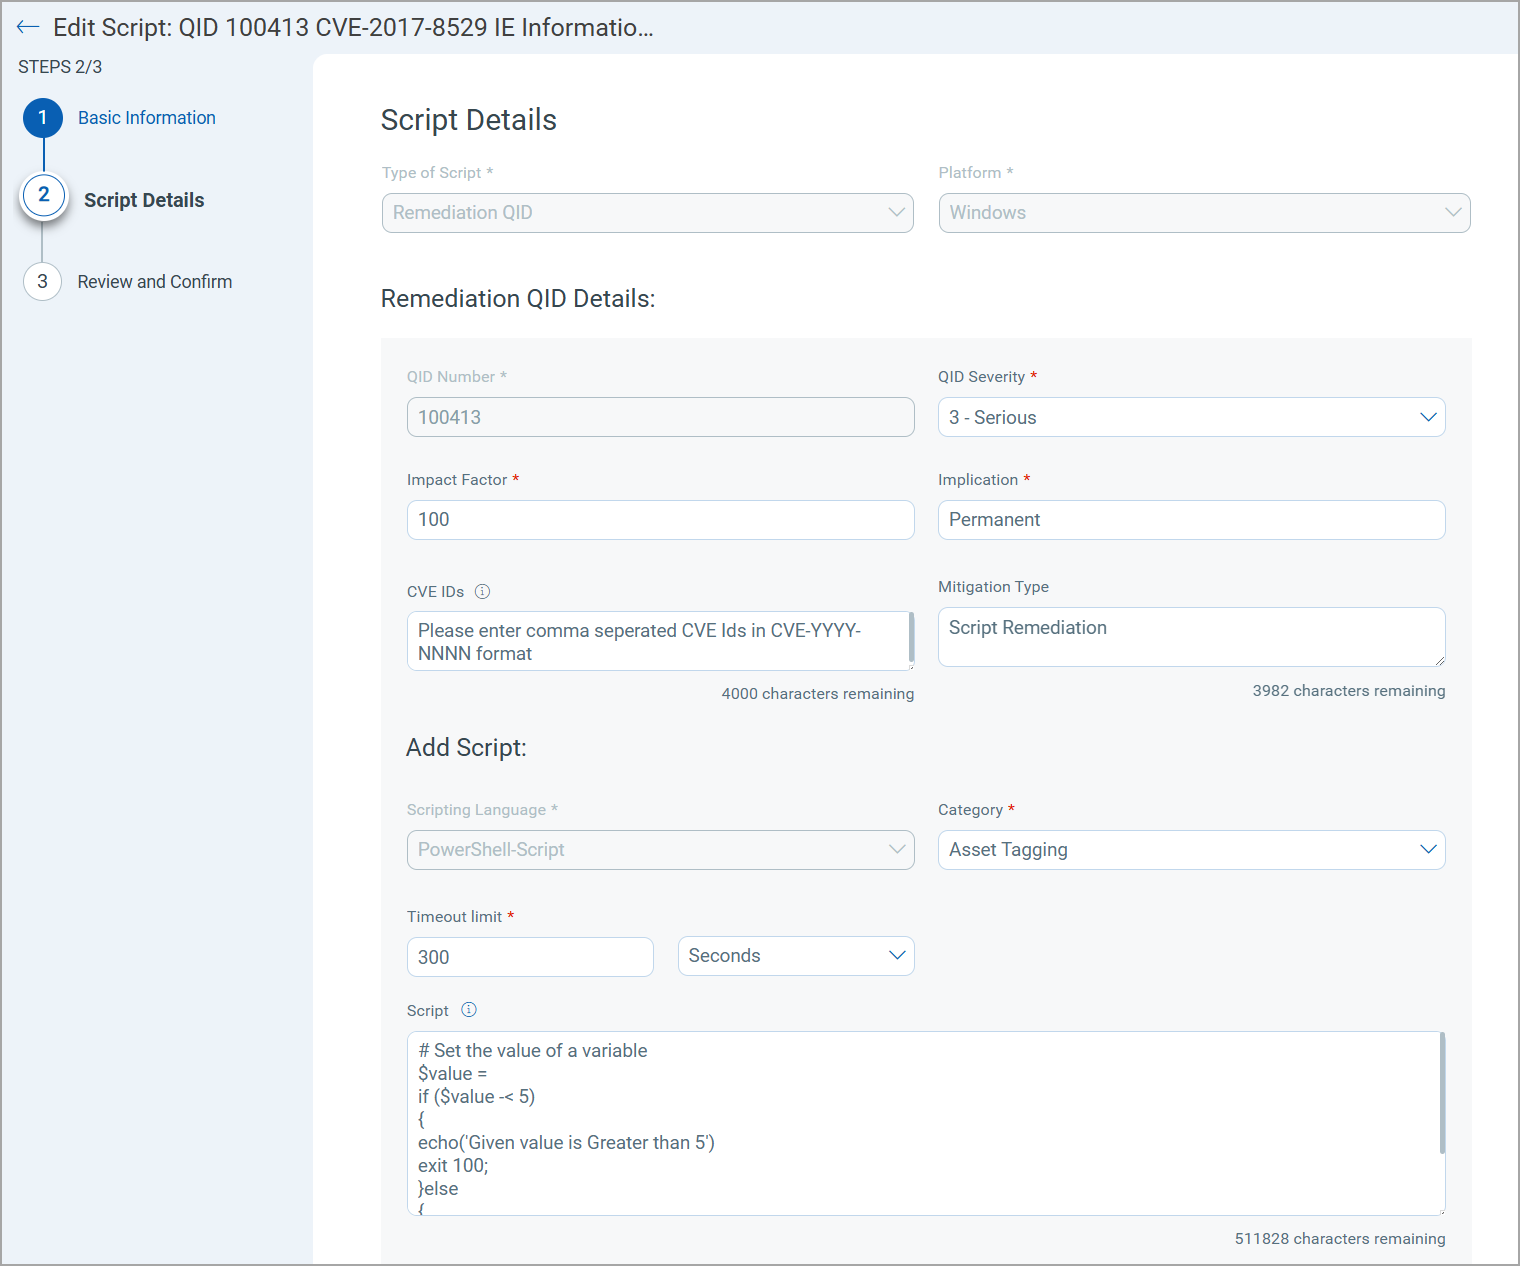
- Select the Type of Script as Remediation QID.
- Select Platform (Windows or Linux).
- Complete the following Remediation QID Details:
Fields Description QID Number Provide a QID number. QID Severity It is a QID Severity. You can select from values 1 (minimum) to 5 (urgent). CVE IDs Provide CVE IDs that are associated with a specific QID. 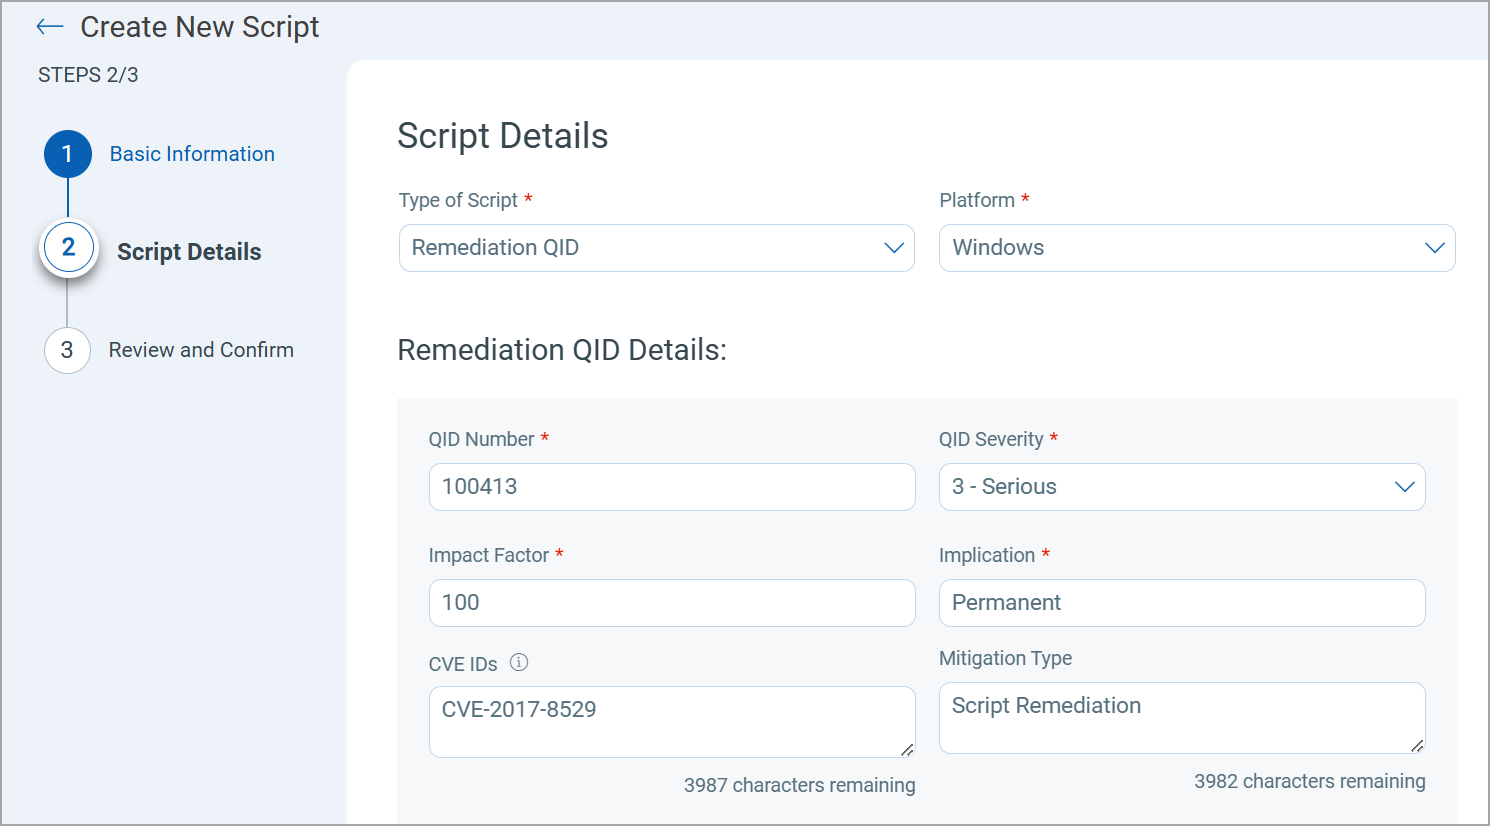
- Select the Scripting Language from the list in which you want to write the script.
The list of scripting languages for Windows and Linux is different.
Platform Supported Scripting Language Windows PowerShell-Command, PowerShell-Script, Python, and VBScript Linux Lua, Perl, Python, and Shell - Select a script Category from the list.
- Specify the Timeout Limit in seconds, minutes, or hours.
The Timeout Limit lets you define how long a script must be in execution.
The Timeout Limit for all Windows and Linux assets ranges from one second to 48 hours. The default value is 300 seconds.
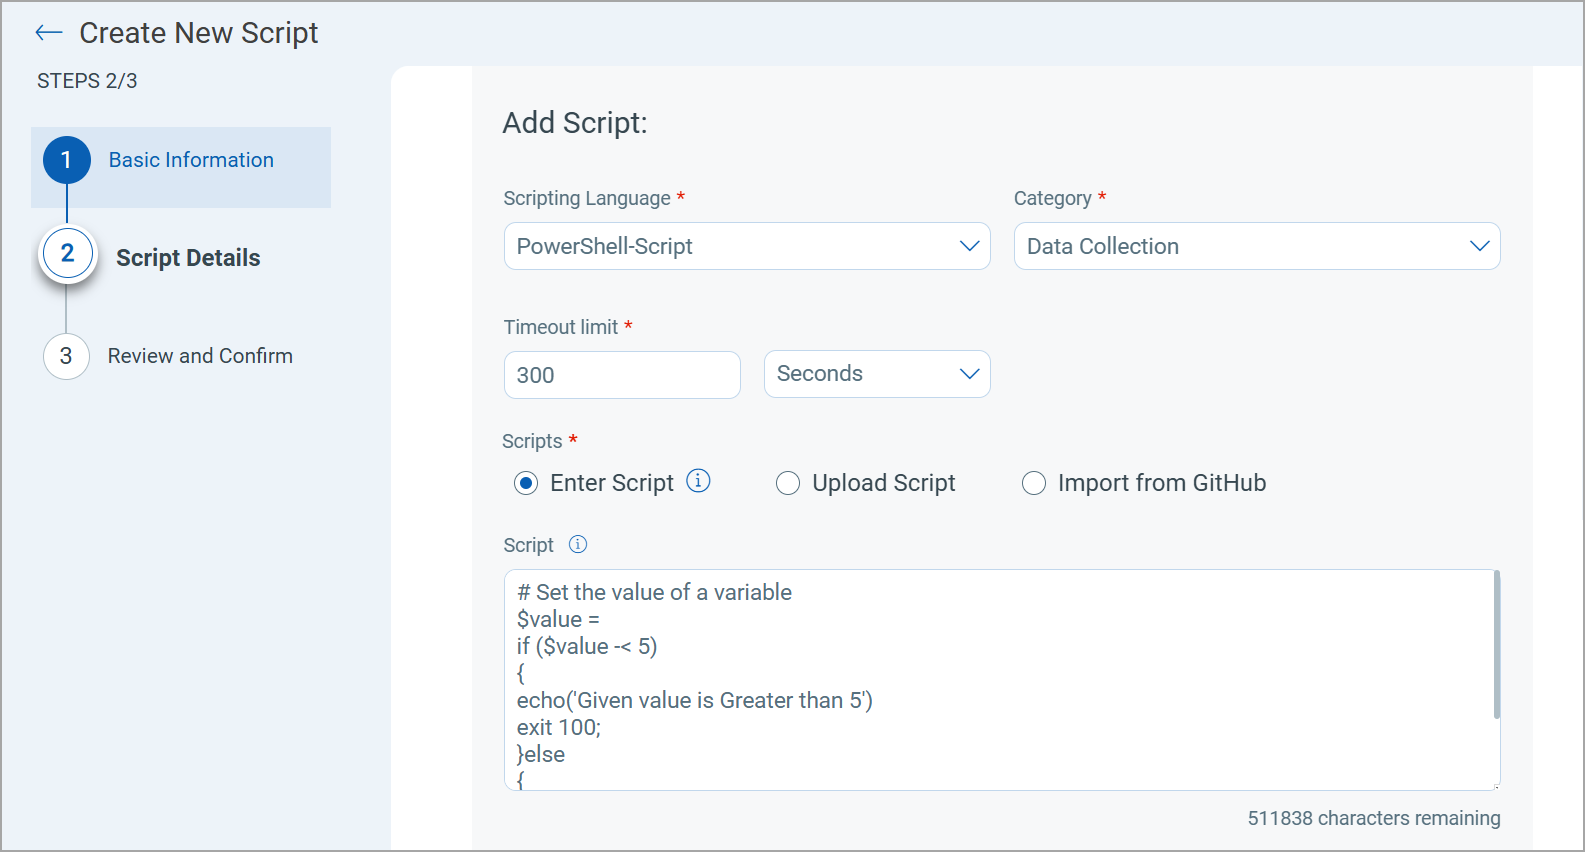
- In the Scripts section, select Enter Script and manually enter the script by typing or copy-pasting it from another source.
Example Remediation ScriptExample Remediation Script
# Initialize counters for the specified application installations
$Script:appCount = 0
# Set the application name and version regex to be searched
$targetAppName = "PowerShell"
$versionRegex = "^6\..*"
# Determine if the system is 64-bit or 32-bit and set the registry paths accordingly
if ([Environment]::Is64BitOperatingSystem) {
    $regPaths = @("HKLM:\SOFTWARE\Microsoft\Windows\CurrentVersion\Uninstall\*", "HKLM:\SOFTWARE\Wow6432Node\Microsoft\Windows\CurrentVersion\Uninstall\*")
} else {
    $regPaths = @("HKLM:\SOFTWARE\Microsoft\Windows\CurrentVersion\Uninstall\*")
}
# Function to check if the specified application version is still present
function Check-AppPresence {
    param (
        [string]$appName,
        [string]$versionRegex
    )

    # Retrieve all applications from the uninstall registry keys
    foreach ($regPath in $regPaths) {
        $apps = Get-ChildItem -Path $regPath | Get-ItemProperty
        foreach ($app in $apps) {
            if ($app.DisplayName -match $appName -and $app.DisplayVersion -match $versionRegex) {
                return $true
            }
        }
    }
    return $false
}
# Retrieve all applications from the uninstall registry keys
$appList = foreach ($regPath in $regPaths) {
    Get-ChildItem -Path $regPath | Get-ItemProperty
}
# Iterate over each application to find the specified installations
foreach ($app in $appList) {
    $appName = $app.DisplayName
    if ($appName -match $targetAppName) {
        $appVer = $app.DisplayVersion
        if ($appVer -match $versionRegex) {
            $Script:appVersion = $appVer
            $appUninstallString = $app.UninstallString
            # Increment application counter
            $Script:appCount++
            # Check if the uninstall command uses MsiExec.exe
            if ($appUninstallString -match "MsiExec.exe") {
                # Modify the uninstall command to run silently
                $uninstallCommand = $appUninstallString -replace "MsiExec.exe", "MsiExec.exe /quiet"
                # & cmd /c $uninstallCommand
            }
            # If no suitable uninstall method is found, notify the user
            else {
                Write-Host "Unable to uninstall $appName"
                exit 1
            }
        }
    }
}
# Notify the user if no specified applications were found
if ($Script:appCount -eq 0) {
    Write-Host "$targetAppName with version matching $versionRegex not found"
    exit 0
}
# Recheck if the application with the same version is still present after uninstallation
if (Check-AppPresence -appName $targetAppName -versionRegex $versionRegex) {
    Write-Host "Uninstallation of $targetAppName $Script:appVersion failed."
    exit 1
} else {
    Write-Host "$targetAppName $Script:appVersion successfully uninstalled."
}
You can also upload a script from your computer or import it from GitHub. For more details, refer to Script Input Options.
- Select the Create Script in the approved state checkbox to create the script in approved state.
This option is available only for the manager role.
The user with any other user role must get the script approved by an authorized user.
For more details, refer to Qualys CAR RBAC.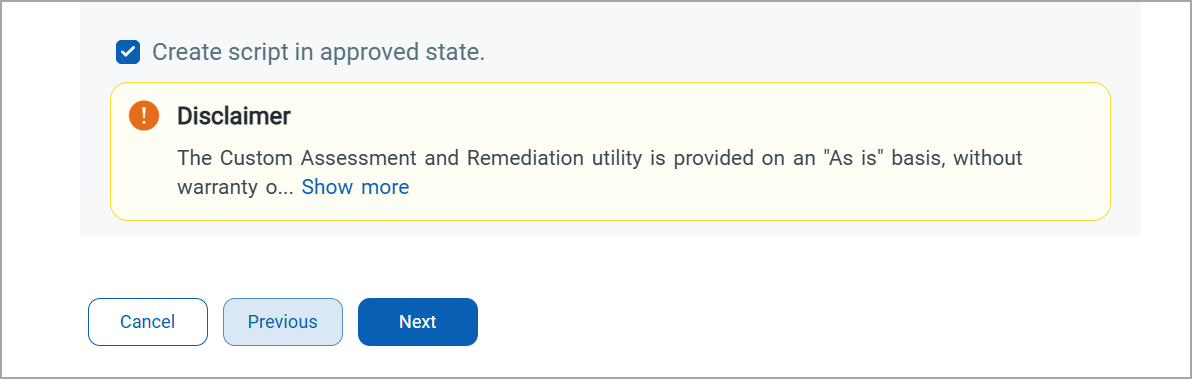
- Click Next to view the Review and Confirm page.
- Review the details and click Confirm & Save.
The Remediation QID script is created and displayed on the Scripts tab.
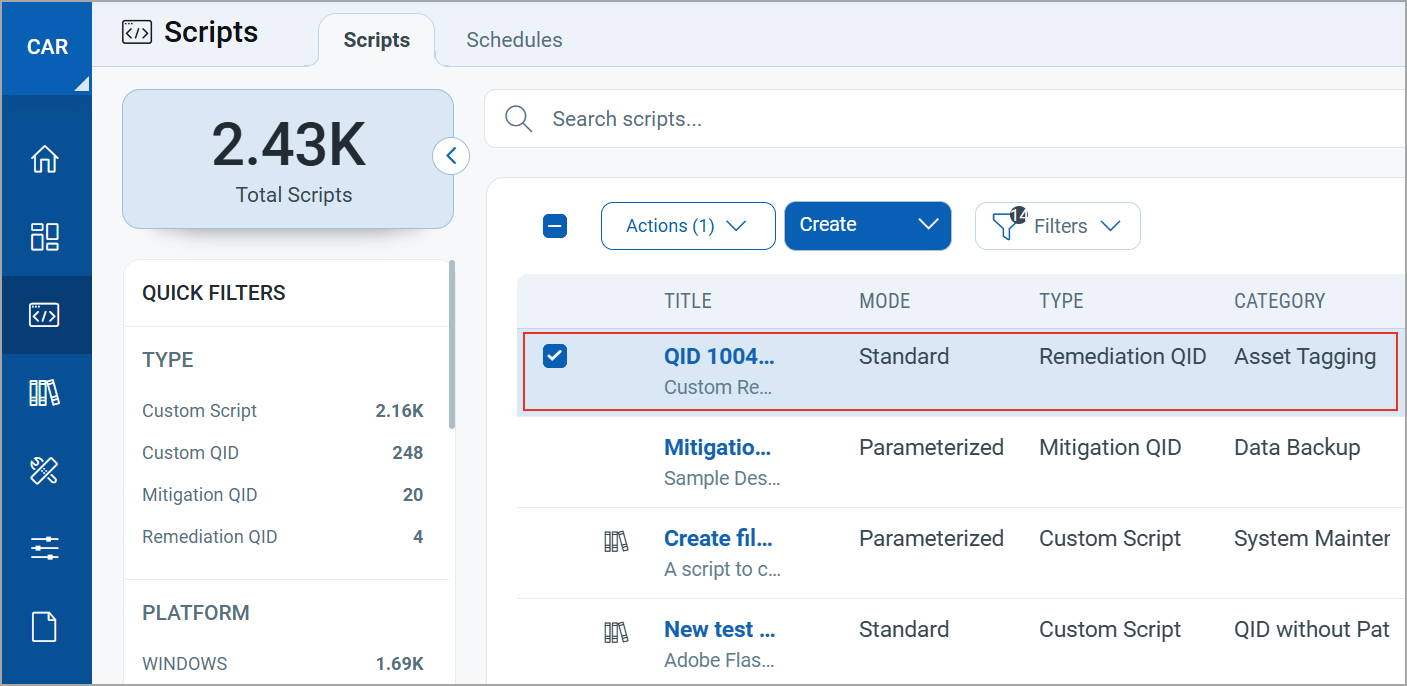
As CAR is used as a repository for storing the Remediation QID script, you can only View Details, Edit, Clone, Export Script, and Deprecate.
Script Input Options
While creating a script, the following options are available to provide the script content:
- Enter Script (see from step 10)
- Upload Script
- Import from GitHub
Upload Script
You can upload a script from your local drive. The script size limit for any asset on both Windows and Linux platforms is 500 KB.
To upload a script, follow these steps:
- Select the Upload Script option on the Script Details page.
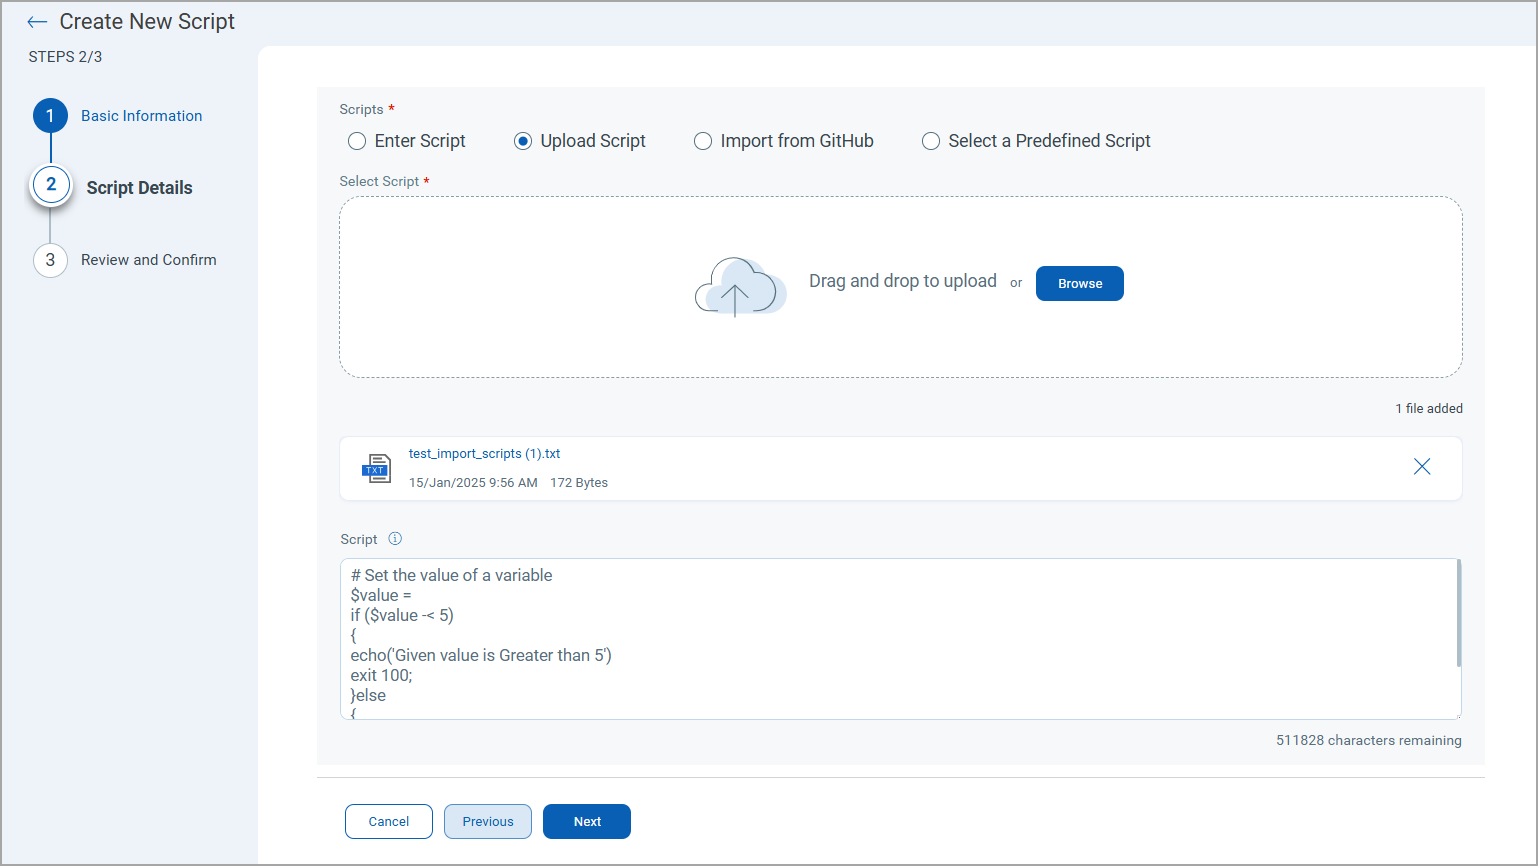
- Click Browse to navigate and upload the required script.
Once uploaded, the script content is displayed in the Script text box.
If you are using a signed script, always use the browse mechanism to select it. This ensures that the signed script remains intact and can be executed on assets if the execution policy is set to AllSigned.
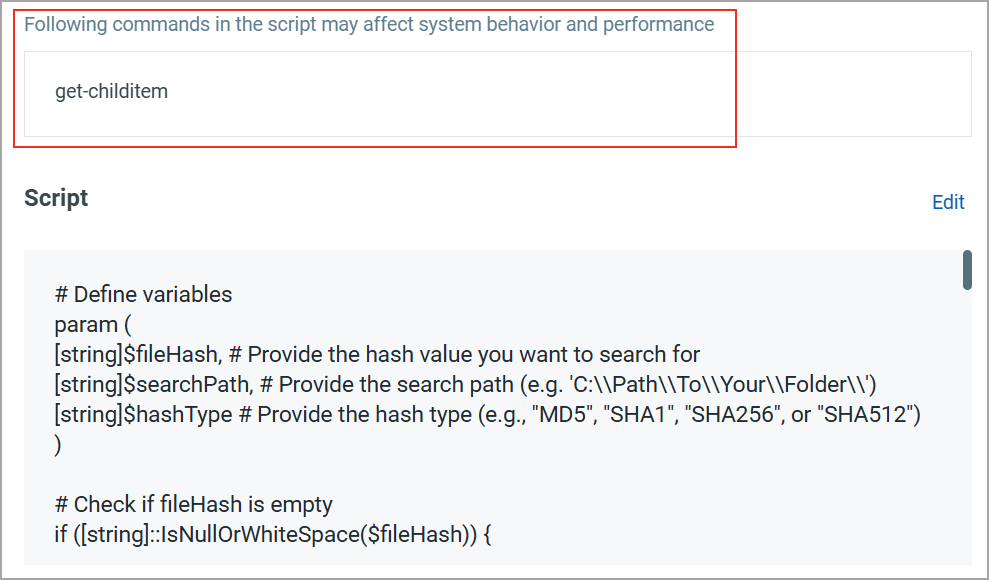
- Click Next.
The Review and Confirm page displays the selections you have made for the script. It also highlights if the script you have entered contains any commands that may potentially impact the system's behavior and performance.
Import from GitHub
To import a script from GitHub, follow these steps:
- Select the Import from GitHub option on the Scripts Details page.
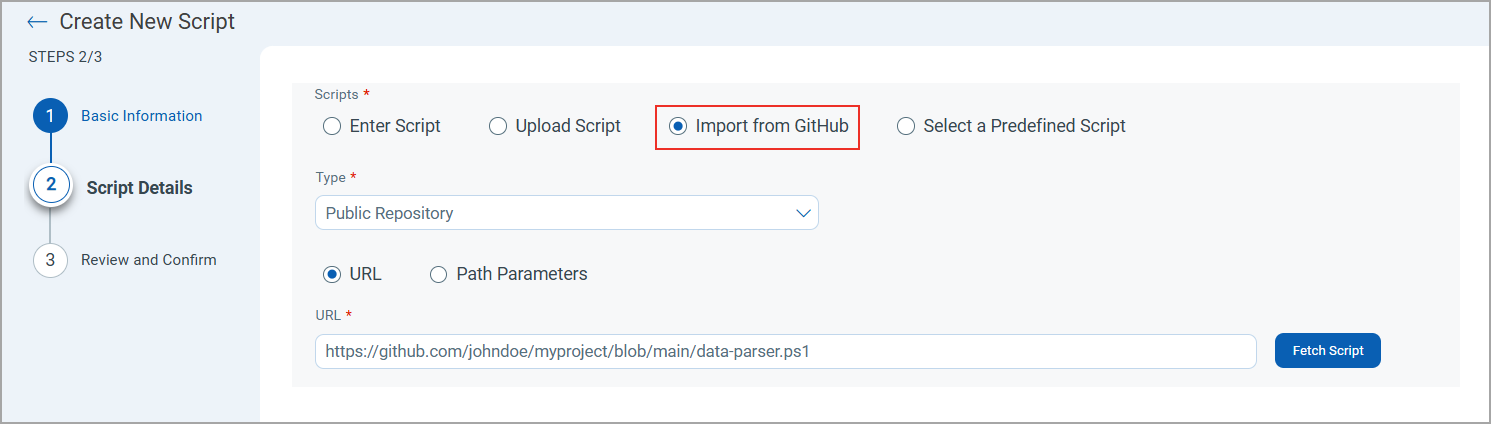
- Select a repository Type from the list to specify whether you want to import from a Private or Public Repository.
The following options are displayed if you select Private Repository:
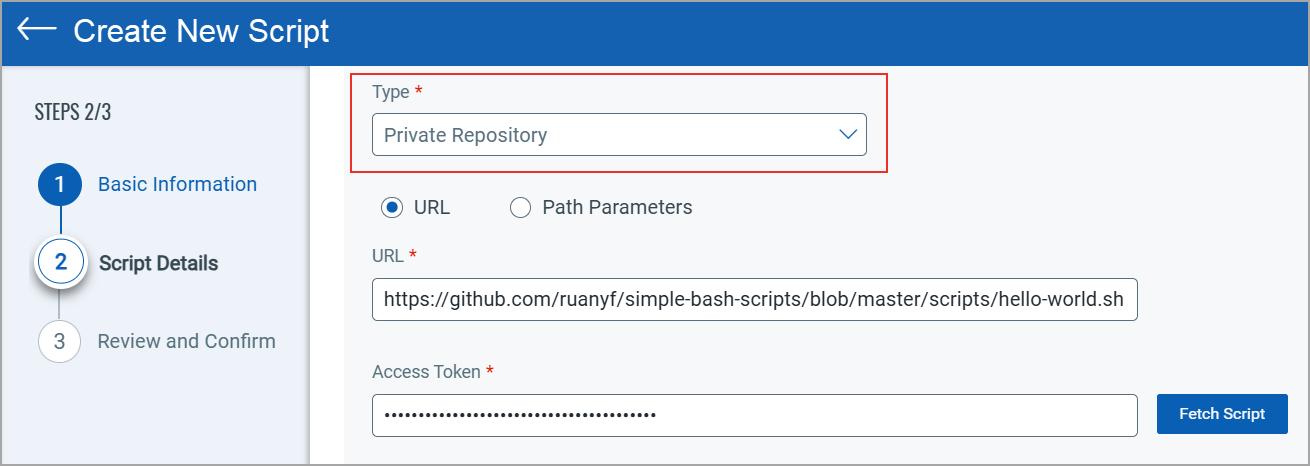
Option Usage URL
- In the URL text box, enter the URL of the file/folder for the GitHub private repository.
- In the Access Token text box, enter the token to access the private repository you have specified.
It is recommended that you provide an access token that has no expiration limit.
Path Parameters
- In the Owner text box, enter the username of the GitHub repository.
- In the Repository name text box, enter the name of the private repository that you want to access.
- In the Branch text box, provide the branch name of the repository from which the file is to be imported. This is an optional requirement.
- In the Access Token text box, enter the token to access the private repository you have specified.
It is recommended that you provide an access token that has no expiration limit.
The following options are displayed if you select Public Repository:
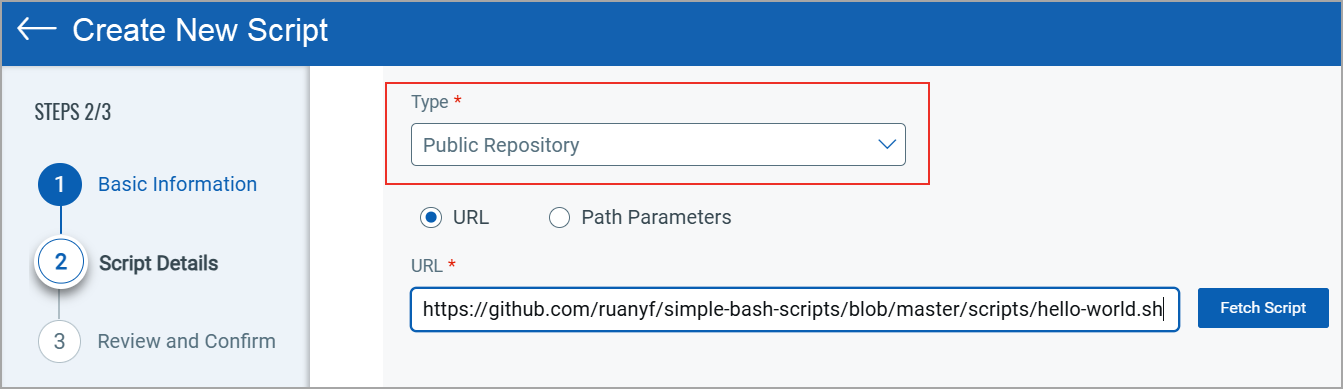
Option Usage URL
- In the URL text box, enter the URL of the file or folder for the GitHub public repository.
Path Parameters
- In the Owner text box, enter the username of the GitHub repository.
- In the Repository name text box, enter the name of the public repository that you want to access.
- In the Branch text box, provide the branch name of the repository. This is an optional requirement.
- Click Fetch Script.
- Turn on the Sync the script with GitHub toggle to sync the script with GitHub.
The following options become available:
- On Demand: Select if you want to manually sync the script with GitHub.
- Automated: Select if you want the script to sync automatically with the GitHub repository, which occurs every four hours.
Even if you select the Automated option, you can initiate an on-demand sync with GitHub at any point from the Scripts tab by selecting Quick Actions > Sync with GitHub now. Similarly, you can disable auto-sync by selecting Quick Actions > Disable auto sync.
- Select the Create script in approved state checkbox if you want the script to be ready for execution without approval.
This option is available only to the Manager user accounts.
-
Type "I have reviewed the script and accept the risk" in the Risk Acceptance text box and click Next.
If the script is not created in an approved state, it is listed as Pending Test on the Scripts tab.
Edit Remediation QID Scripts
To modify the script, follow these steps:
- Navigate to the Scripts tab.
- To edit a script, select a Remediation QID script and click Edit on the Quick Actions menu.
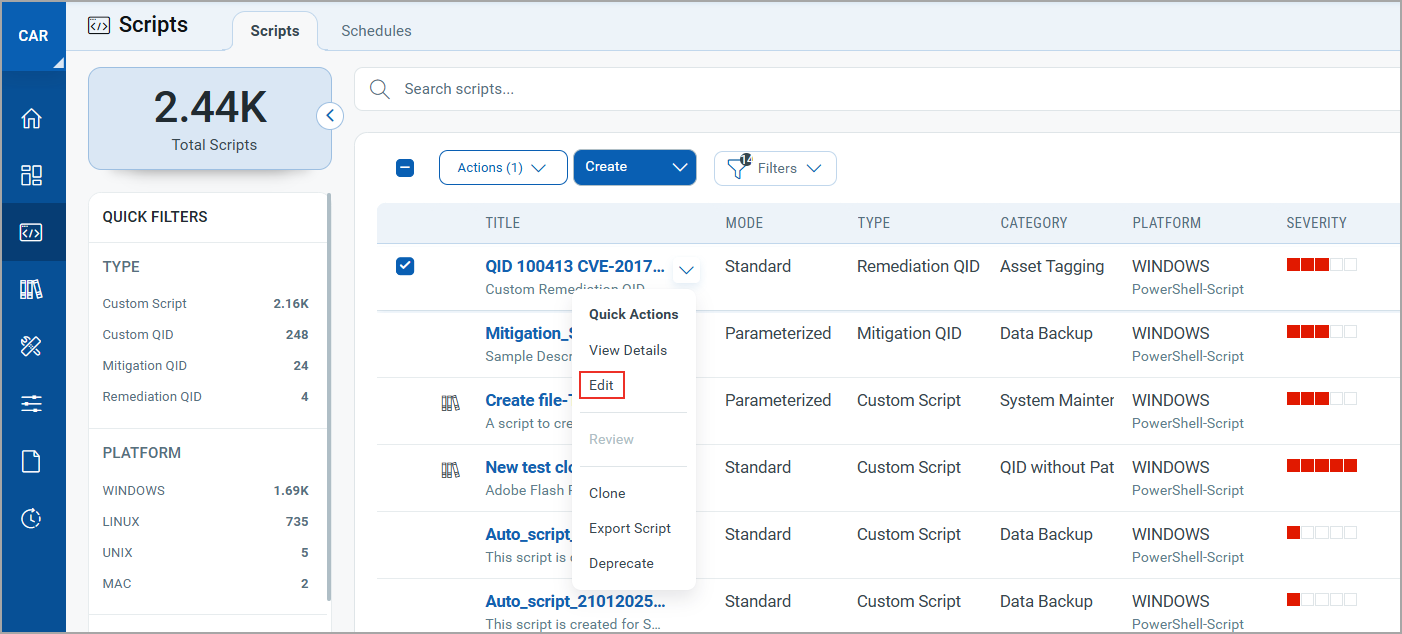
The Basic Information page is displayed.
-
Modify the details as required and click Next to view the Scripts Details page.
- Modify the editable content as required.
- Provide the Reason for Edit.
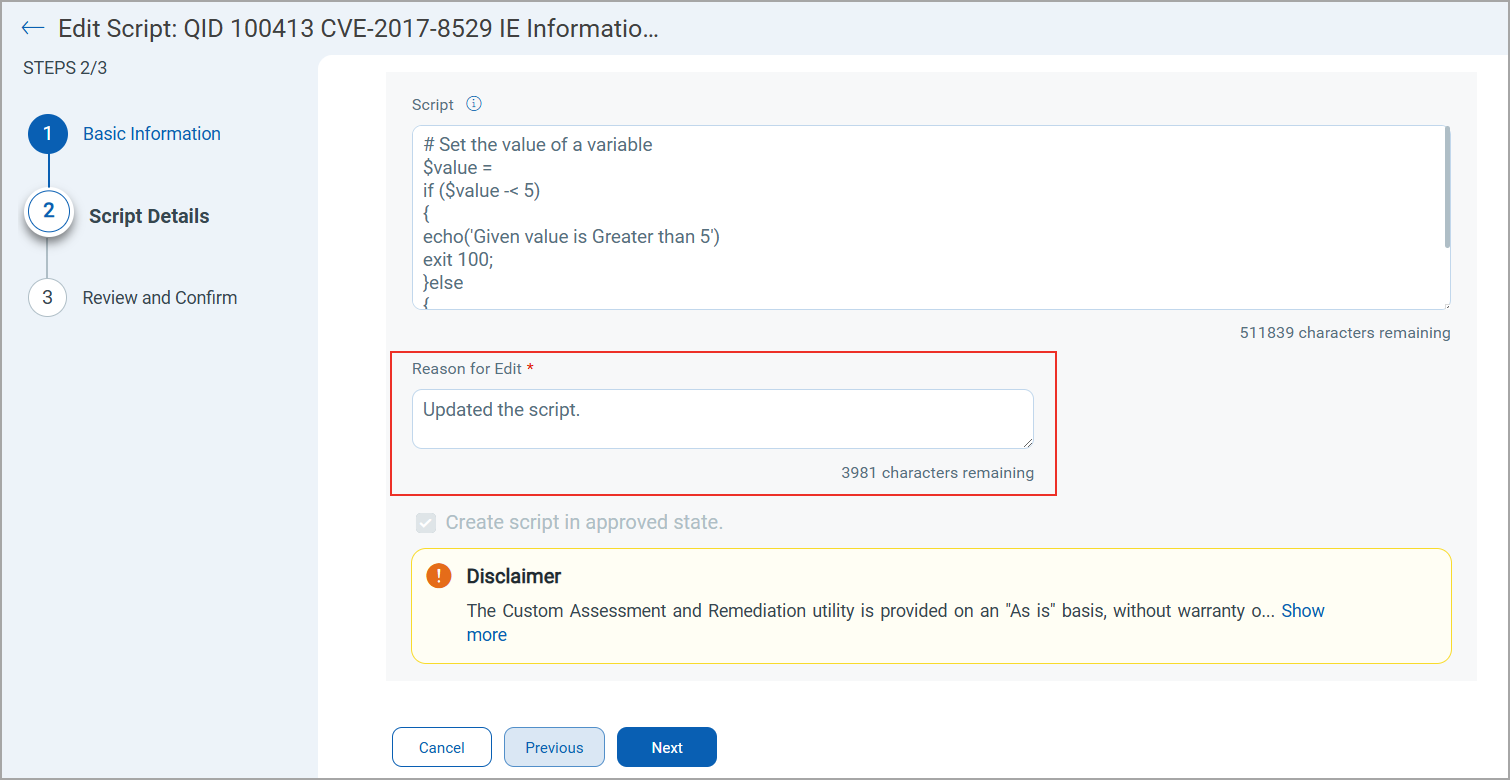
- Click Next to view the Review and Confirm page.
- Review the script and click Update to save the changes to the script.