Onboard CDR for Azure
This guide provides a step-by-step process for deploying the Cloud Detection and Response Appliance in the Microsoft Azure environment.
Pre-requisites:
Things you need to get started.
- A TotalCloud Azure Connector must be configured for your account. Refer to Configure Azure Connectors.
- Install Terraform to create and manage the Qualys environment on the Azure infrastructure.
Pre-requisites in Azure
- Ensure that VPC and private subnets exist in the Service Azure account. To know how to set up a VPC, refer to Create a VPC.
- The CDR appliance must be deployed in private subnets (Create a Subnet). Private subnets must have outbound internet access. Verify outbound internet access before deploying the CDR appliance.
- The open ports of the security group attached to the CDR Appliance and the firewall active for outgoing internet connection must allow the following connections.
Allow these URLs for outbound internet access
|
URLs |
Direction |
Port |
|---|---|---|
| nac-le-service.qg3.apps.qualys.com | Outbound | tcp/443 |
| qualysguard.qg3.apps.qualys.com | Outbound | tcp/443 |
| distribution.qg3.apps.qualys.com | Outbound | tcp/443 |
| gateway.qg3.apps.qualys.com | Outbound | tcp/443 |
The above URLs are as per Qualys platforms. For example, we have used US POD3. For the complete list of URLs for all Qualys Production PODs: URLs required for CDR, recommended to open for all URLs mentioned here.
Allow these IPs for inbound internal access
|
IPs |
Direction |
Port |
|---|---|---|
| any (Azure mirror traffic - VxLAN) |
BOTH |
UDP/4789 |
| LB Probe IP(any) | Inbound | TCP/8080 |
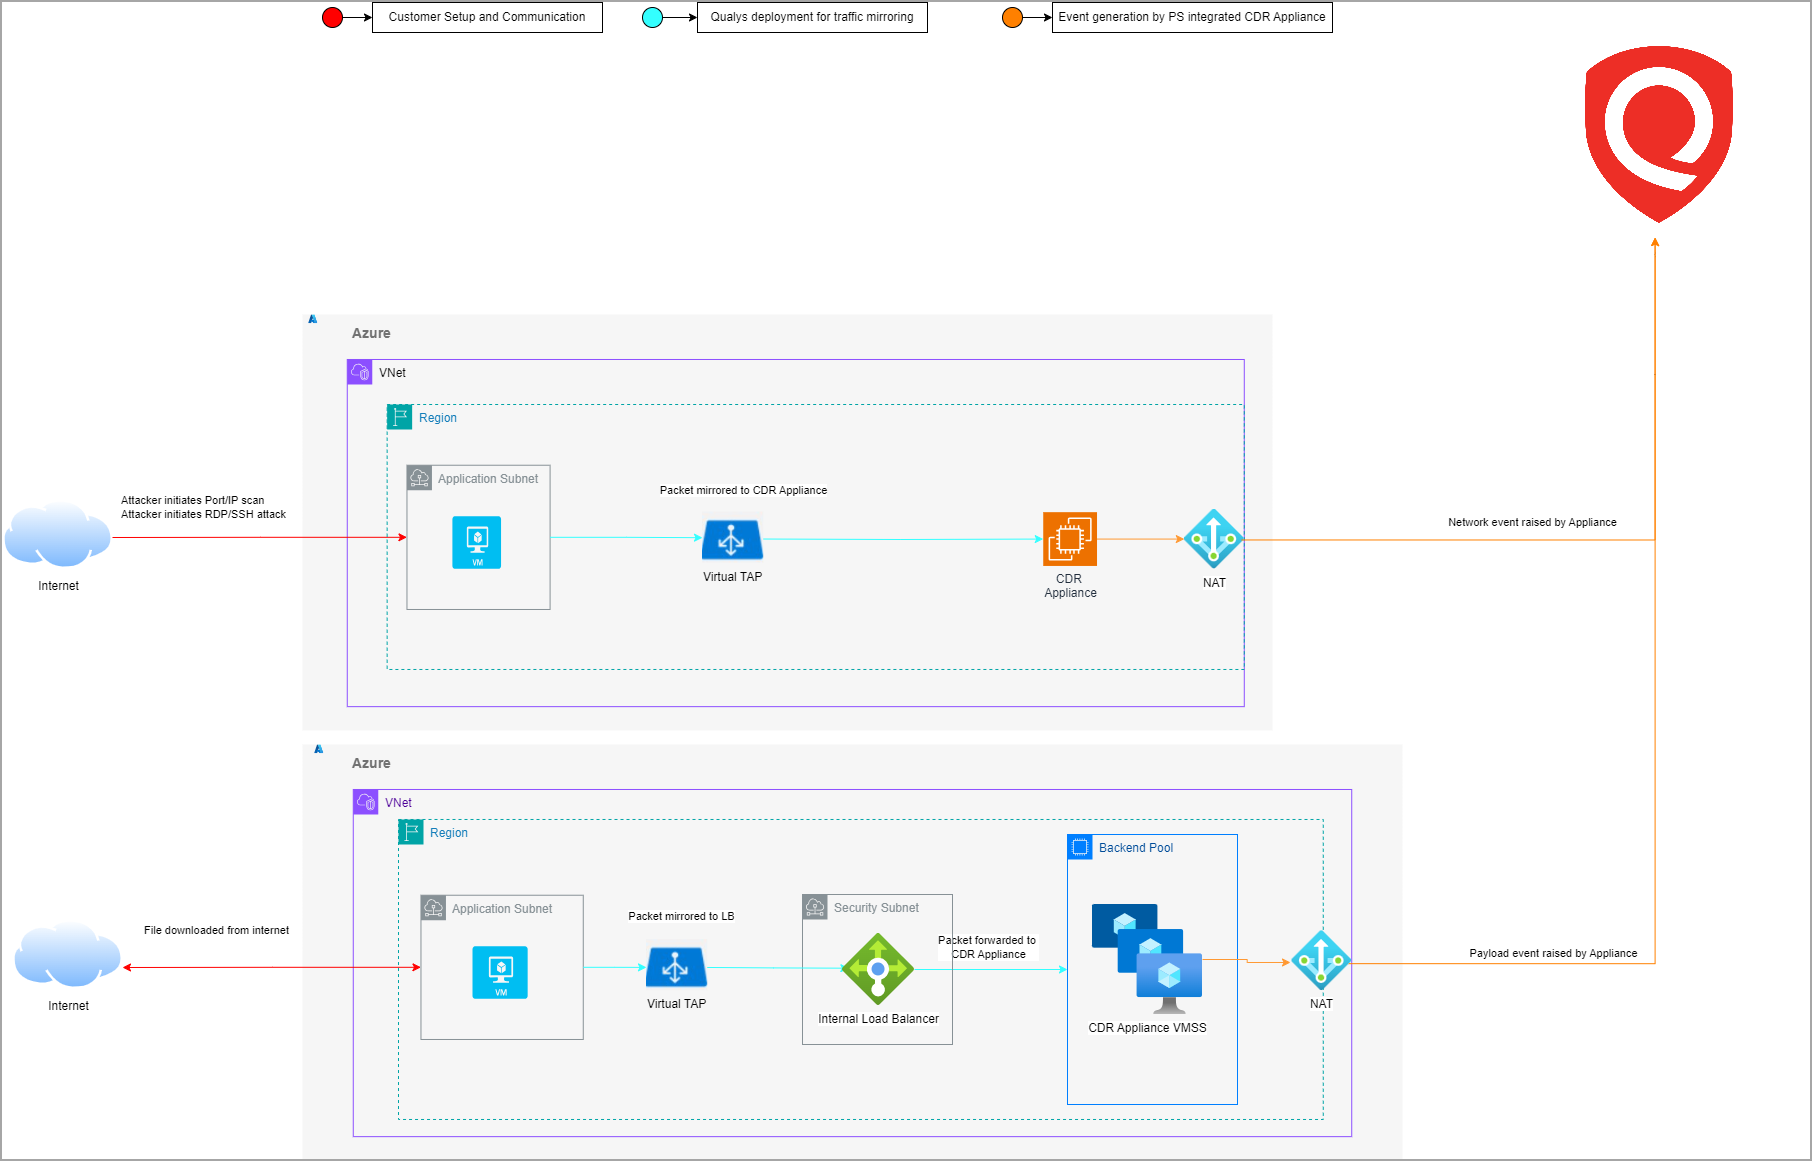
The following diagram depicts how the deployment works after deploying scripts.
Get Started with CDR on Azure
Connect Qualys to your Azure account(s) to by creating a TotalCloud Azure Connector.
After configuring a TotalCloud connector for Azure , your TotalCloud account is ready to onboard CDR to your network.
The CDR onboarding can be broken down to three primary steps.
Create Deployments on TotalCloud
1. Navigate to the Configure > Threat Scanners in TotalCloud, select the Azure tab under it.
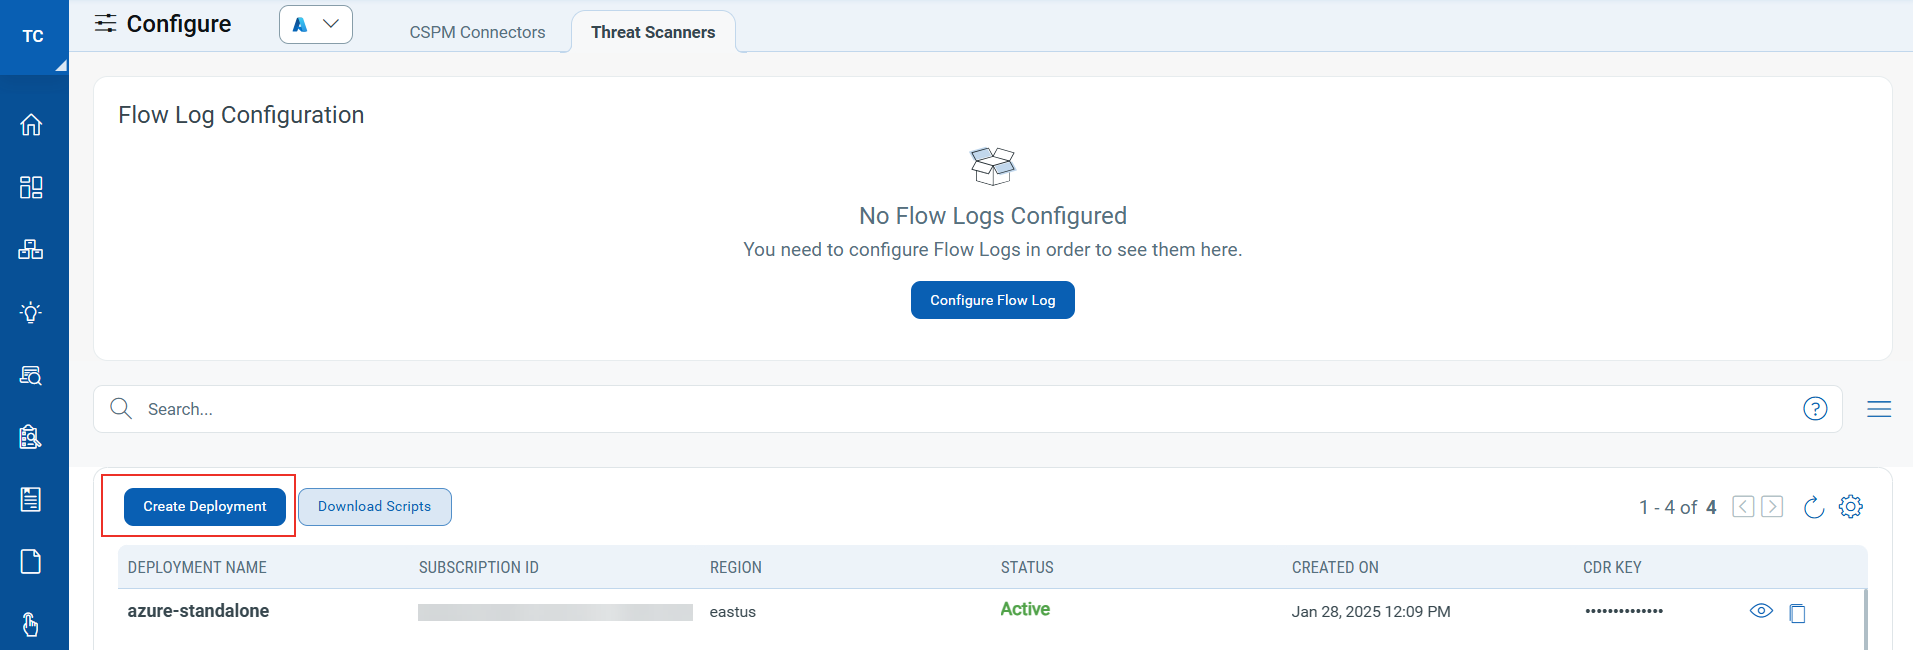
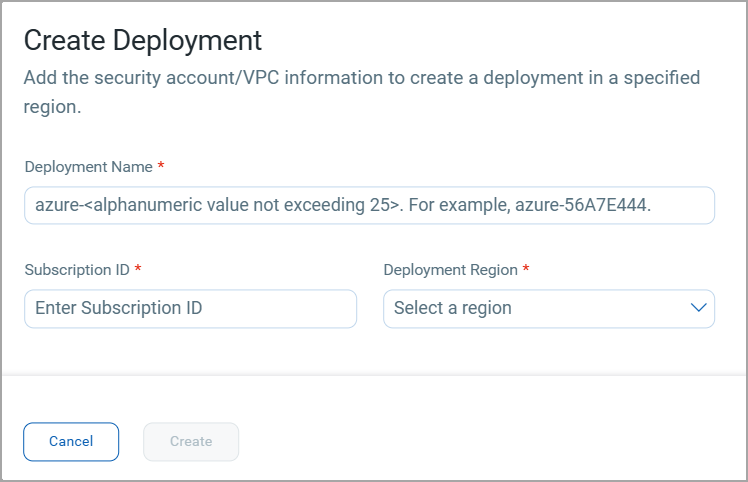
2. Click Create Deployment to begin your scanner deployment. You can find three input fields in the Create Deployment screen.
- Provide a unique Deployment Name. Ensure the name starts with 'azure-', followed by alphanumeric characters. The character limit is 25 (including 'azure-').
- Provide the Azure Subscription ID.
- Select the Deployment Region where the threat scanner must be deployed on.
Qualys supports Azure CDR deployment in following regions where VTAP Private Preview is available. Learn more.- North Central US
- West Central US
- East US
- West US
- East US 2
- Central US
- South UK
- West Europe
- Central India
After creating a deployment, the CDR key is visible from the list of deployments. Store it for later use.
You will also need the CDR Image name for the next steps.
The latest Image Name for Azure CDR is
/communityGalleries/cdrimage-9a3f529f-2d37-493b-9cbb-1c14c05b237d/images/qualys-cdr-az/versions/3.7.0
Once you have created your first deployment, the option to download scripts appears. This downloads the templates to set up CDR on your network.
Click Download Scripts. Once the scripts are downloaded, follow the steps below to proceed with the rest of the CDR configurations.
Deploy Qualys CDR in Azure
Deploy the scripts using Azure CloudShell and get started with CDR easily.
Qualys CDR for Azure supports two modes of deployment.
- Standalone
- High-availability auto-scaling mode with Azure Network Load Balancer
CDR monitors your Azure network via Virtual network TAP(VTAP) which is in Private Preview stage. Contact Azure support to obtain Private Preview access for your subscription.
Following Azure VM type is supported for CDR Appliance VM instance.
D8s_v3
Standalone CDR deployment
You can deploy Qualys CDR as a standalone Azure virtual machine.
1. Go to your Azure Console > Navigate to CloudShell.
2. Select the downloaded qualys_azure_cdr_terraform.zip bundle and upload it to CloudShell.

3. Extract qualys_azure_cdr_terraform.zip.
![]()
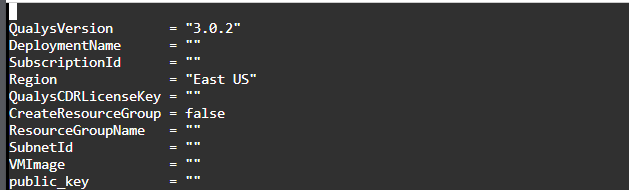
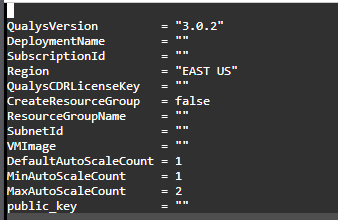
4. Go to cdr_deployment/standalone directory of extracted bundle. Modify the terraform.tfvars file here to manage deployment variables. Terraform variables are explained in detail in the README.md & terraform.example file.
Provide the unique deployment name and other parameters.
5. Terraform is ready to deploy CDR in your security account's VNet once terraform.tfvars file is configured.
6. Run the following commands to deploy the module to each Azure subscription as needed.
terraform init
terraform apply --auto-approve
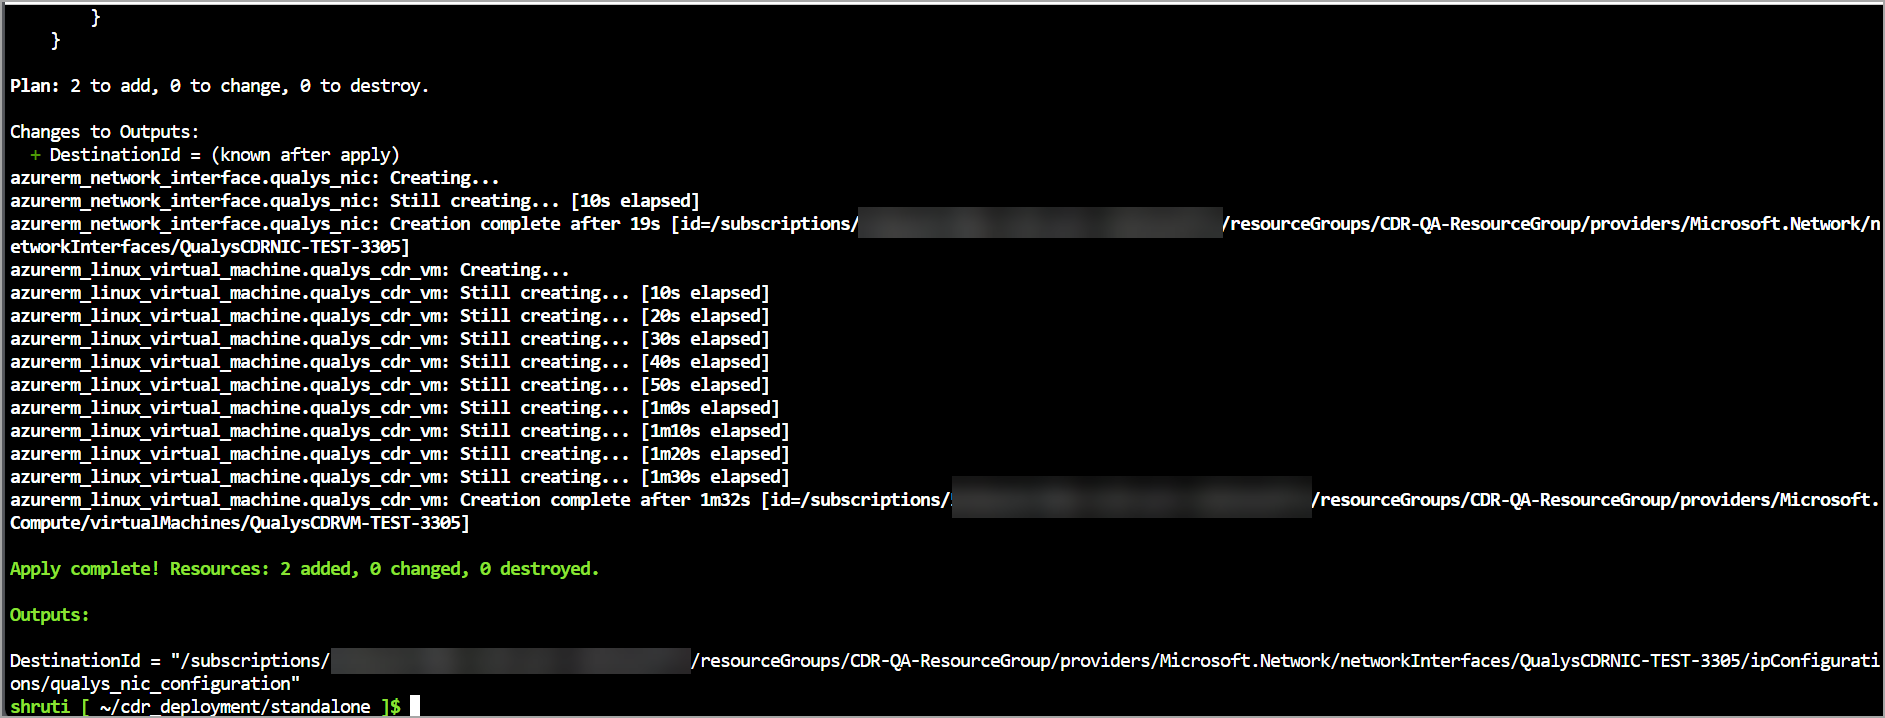
7. After terraform apply runs successfully, a CDR stack should be created including Appliance and dependent components in the Azure account.

8. Refer Deploy VTAP on Workloads section shown below to setup packet/traffic mirroring for this.
NLB Autoscaling - CDR deployment
Qualys supports High-Availability & auto-scalable deployment of CDR using Network Load Balancer. Follow the steps below to perform this deployment.
1. Go to your Azure Console > Navigate to CloudShell.
2. Select the downloaded qualys_azure_cdr_terraform.zip bundle and upload it to CloudShell.
3. Extract qualys_azure_cdr_terraform.zip.
![]()
4. Go to cdr_deployment/nlb directory of extracted bundle. Modify the terraform.tfvars file here to manage deployment variables. Terraform variables are explained in detail in the README.md & terraform.example file.
Provide the unique deployment name and other parameters.
5. Terraform is ready to deploy the CDR in your security account's VNet once terraform.tfvars file is set.
6. Run the following commands to deploy the module to each Azure subscription as needed.
terraform init
terraform apply --auto-approve
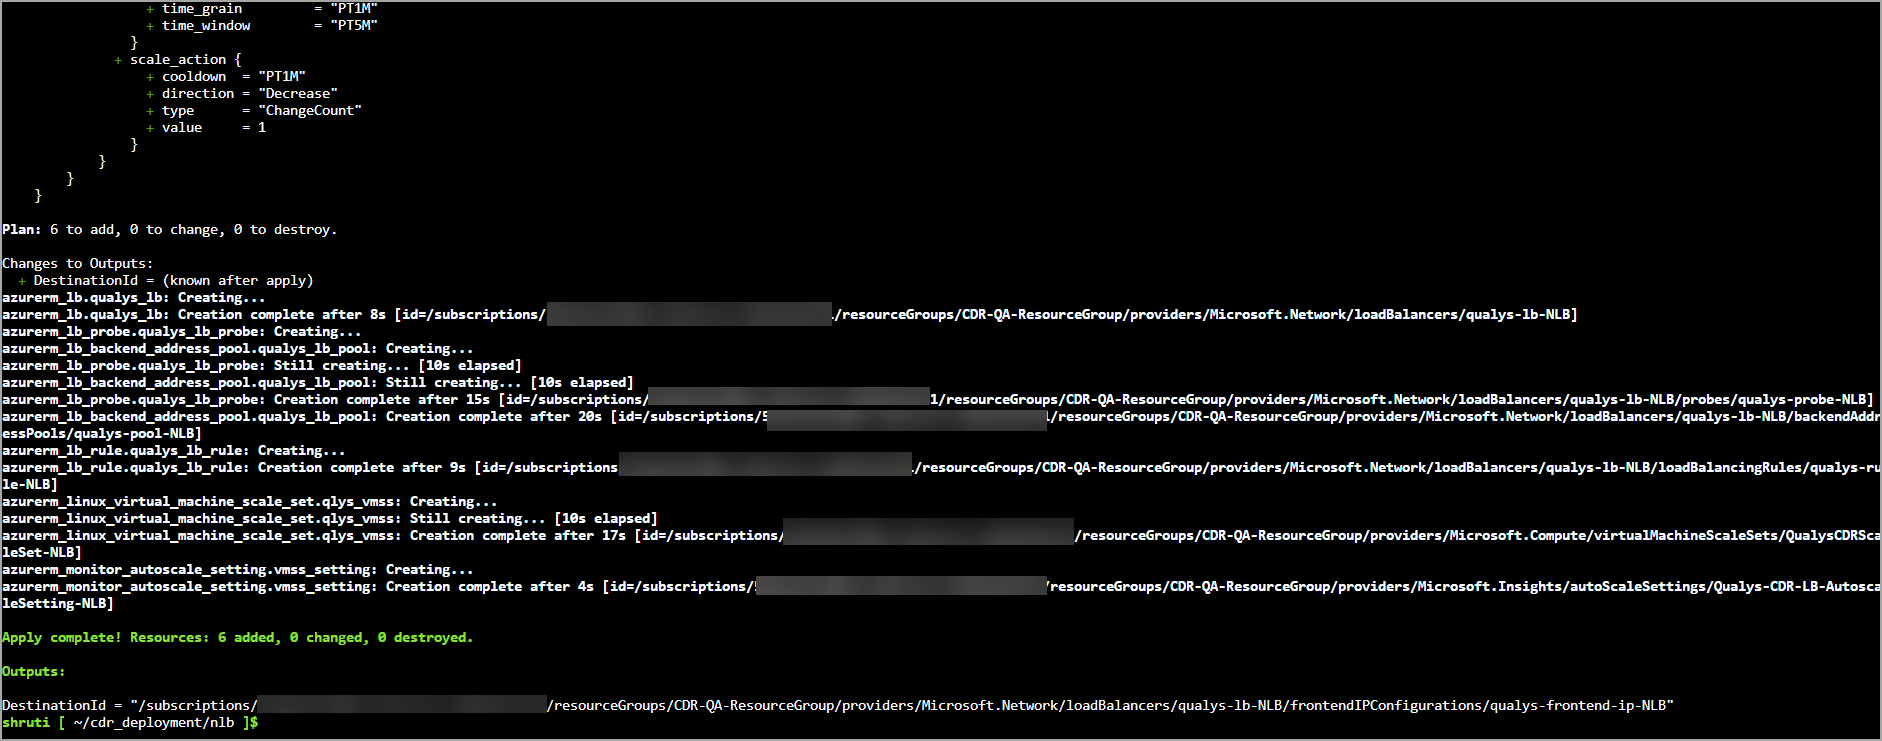
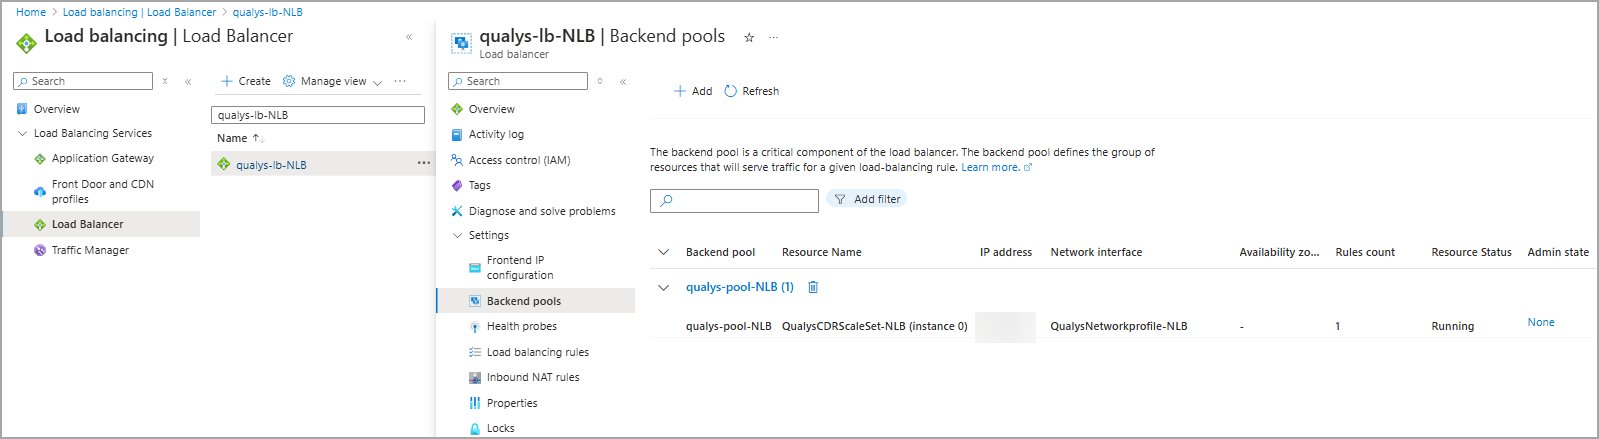
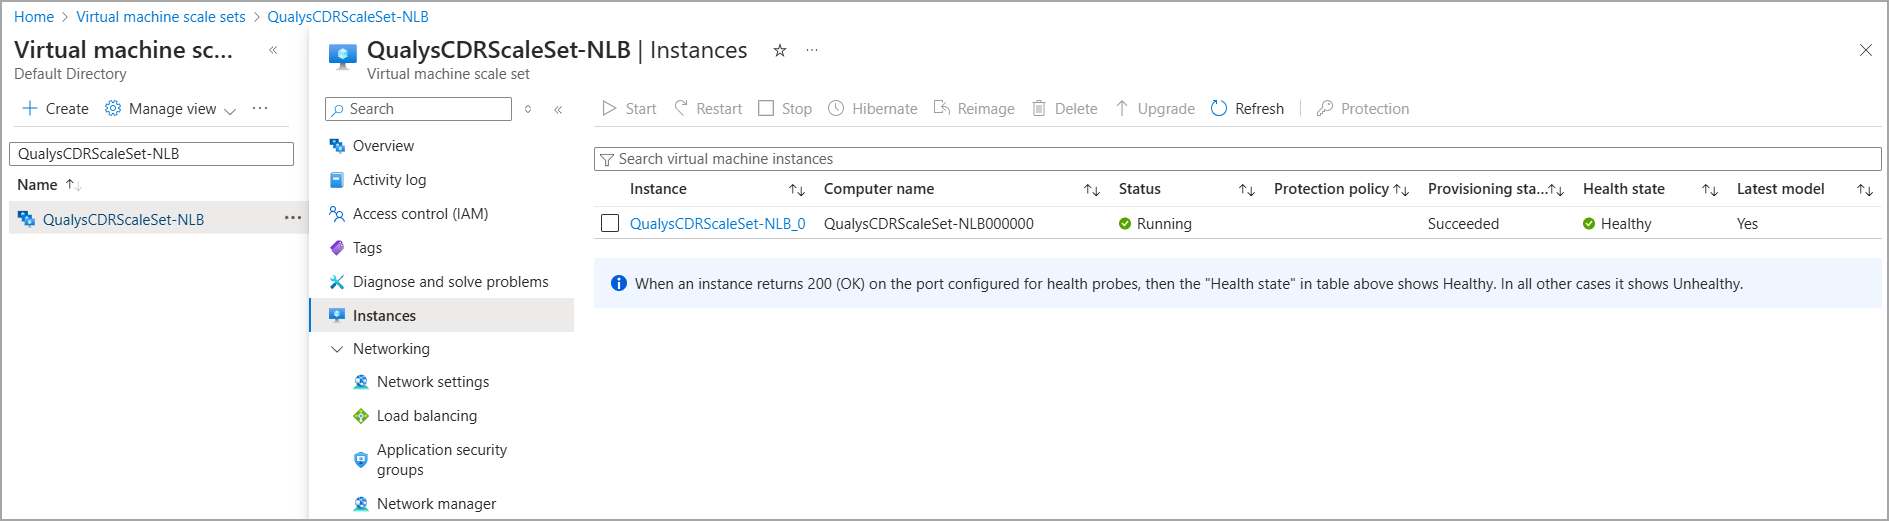
7. After terraform apply runs successfully, a CDR stack should be created including Appliance, NLB and dependent components in the Azure account. You should be able to see same in respective VMSS behind Load balancer deployed.
8. Refer Deploy VTAP on Workloads section shown below to setup packet/traffic mirroring for this.
Deploy VTAP on Azure Workloads
VTAP mirrors network traffic from your workloads to either a CDR Appliance or load balancer. When using a load balancer, traffic is distributed across CDR VMs automatically.
Deploy VTAP across all Azure subscriptions running application workloads for complete threat detection. VTAP works across VNets with proper peering configuration. Currently available in Private Preview for select regions including North Central US, West US, East US, UK West, and Central India.
Prerequisites
- Get Private Preview access through Azure support.
- Review VTAP limitations for application workloads:
- Set the fastpathenabled tag on VM and NIC to TRUE.
- Enable Accelerated Networking during deployment.
- Enable Accelerated Connections on NIC
- Deploy the Qualys CDR appliance as Standalone or AutoScalable(NLB) before executing VTAP.
Configure the VTAP
After the above steps are completed, create VTAP and VTAP Config.
Create VTAP for a given destination where mirrored traffic will be delivered. Run the following command on your Azure CloudShell.
sh create_vtap.sh ResourceGroup TapName DestinationId LocationVTAP Creation Parameters
The parameter and descriptions for the above command.
| Parameter | Description | Example |
|---|---|---|
| ResourceGroup | Resource group where VTAP will be created |
qlys_resource_group |
| TapName | Your unique name for the VTAP |
TestTap |
| DestinationId | IP config ID of CDR Appliance NIC or load balancer frontend |
/subscriptions/...frontend -ip-test |
| Location | Azure region for deployment |
westus |
Example command
sh create_vtap.sh qlys_resource_group TestTap "/subscriptions/
xxxxxx-xxxx-xxxx-xxxx-xxxxxxxx/resourceGroups/CDR-ResourceGroup/
providers/Microsoft.Network/loadBalancers/qualys-lb-test/frontendIPConfigurations/qualys-frontend-ip-test"
westus
Configure the VTAP Config
Next, add a VTAP Config for the NIC of each application workload to be mirrored to the VTAP created above.
sh create_vtap_config.sh ResourceGroup NetworkInterface TapId Tapconfig SubscriptionId
VTAP Config Parameters
The parameter and descriptions for the above command.
| Parameter | Description | Example |
|---|---|---|
| ResourceGroup | Resource group for VTAP config |
qlys_resource_group |
| NetworkInterface | NIC name of application workload VM |
vtap-test-2606 |
| TapId | VTAP ID from create_vtap.sh output |
/subscriptions/...TestTap |
| Tapconfig | Your unique name for this config |
TestTapConfig |
| SubscriptionId | Azure subscription ID | xxxxxx-xxxx-xxxx |
Example command
sh create_vtap_config.sh qlys_resource_group vtap-test-2606 "/subscriptions/
xxxxxx-xxxx-xxxx-xxxx-xxxxxxxxx/resourceGroups/CDR-ResourceGroup/
providers/Microsoft.Network/virtualNetworkTaps/TestTap" TestTapConfig xxxxxxx-xxxx-xxxx-xxxx-xxxxxxxxx
The VTAP and VTAP Config appears as below.

Known Issue
In Azure CDR deployments, SSH brute force detection and file metadata extraction for malware analysis may work inconsistently due to Azure's traffic mirroring implementation. While your traffic logs might show suspicious activity, the system might not always generate the corresponding security events. We're addressing this limitation in our future releases.