Configuring Remediation for Microsoft Azure
Configure Microsoft Azure connectors for gathering resource information from your Microsoft Azure account. It just takes a couple of minutes.
Pre-requisites
Before you create an Azure connector, ensure that you meet the following requirements:
- Enable Remediation for Azure Connector to register an application with your Azure Active Directory.
- Check Azure Subscription permissions to assign the application to a role in your Azure subscription.
Enable Remediation for New Azure Connectors
On the Configuration tab, select Microsoft Azure and then click Manage Connectors.
The Connectors Application appears.
On the Connectors Application, click Create Connector.
Provide a name and description (optional) for your connector. Configure the required settings for the Azure connector. For detailed information on connector creations steps, refer to Configure Azure Connectors.
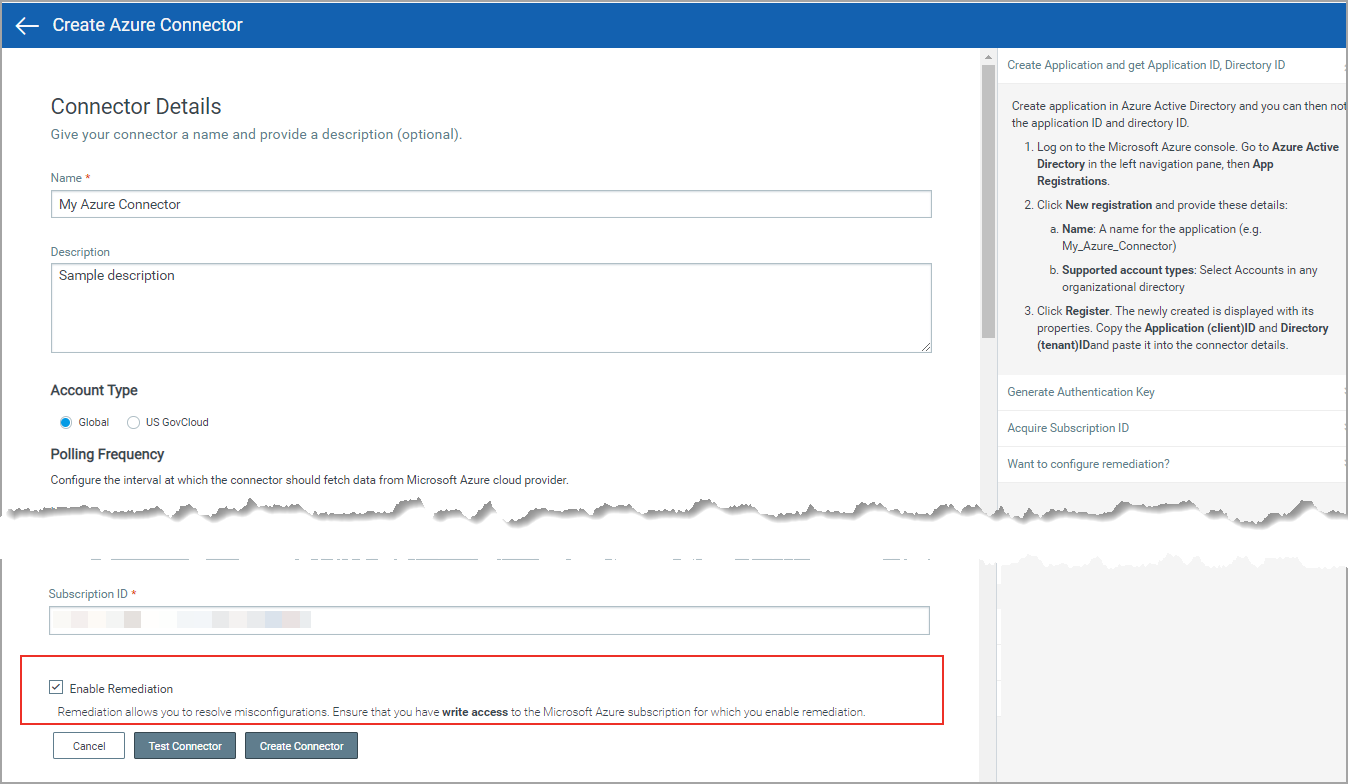
Select Enable Remediation check box to enable remediation for the connector.
Click Create Connector.
That’s it! The connector will establish a connection with Microsoft Azure to start discovering resources from each region and evaluate them against policies.
Configuration on Microsoft Azure Console
You can configure the roles and permissions needed for remediation on the Microsoft Azure portal.
Manual Configuration
The manual configuration for remediation includes two parts: creating custom role and adding the custom role to the application.
Creating Custom RoleCreating Custom Role
1. Go to IAM console on the Microsoft Azure Portal.
2. In the search bar, search for Subscriptions and click Subscriptions, under the Services category.
3. In the Subscriptions page, choose your subscription.
4. Click Access control (IAM) navigation pane.
5. Scroll to Create a custom role card and click Add.
6. Provide a name for the Custom role, select Start from scratch option for Baseline permissions and click Next.
7. On the Permissions tab, click Add permissions and add the permissions listed below:
- Microsoft.Sql/servers/firewallRules/delete
- Microsoft.Storage/storageAccounts/write
- Microsoft.Storage/storageAccounts/blobServices/containers/write
- Microsoft.Network/networkSecurityGroups/write
- Microsoft.Web/sites/config/write
- Microsoft.Web/sites/write
8. Click Review + create.
9. Click Create.
Adding Custom Role to the applicationAdding Custom Role to the application
1. Go to the Microsoft Azure Portal.
2. In the search bar, search for Subscriptions and click Subscriptions under the Services category.
3. On the Subscriptions page, choose your subscription.
4. Click Access control (IAM) navigation pane.
5. Find Add a role assignment card and click Add.
6. In the Role field, choose the custom role you created (If the custom role does not appear in the drop-down, refresh the page).
7. Select drop-down choose the App provide during the connector creation.
8. Click Save.
Enabling Remediation for Existing Azure Connectors
Go to Configuration > Microsoft Azure and select the connector for which you would want to edit the details. From the quick actions menu, select View and go to Connector Information tab and click Edit.

You can now edit the required details. Select the Enable Remediation check box and click Save. Once you edit the connector settings, ensure that you also configure the roles and permissions needed for remediation on the Azure console.
For more information on configuration of roles and permissions on Microsoft Azure console, refer to Configuration on Microsoft Azure console.
To fetch the updated resources, you need to select Run from the quick actions menu for the Azure connector.