Qualys Dataflow for CSAM Connector
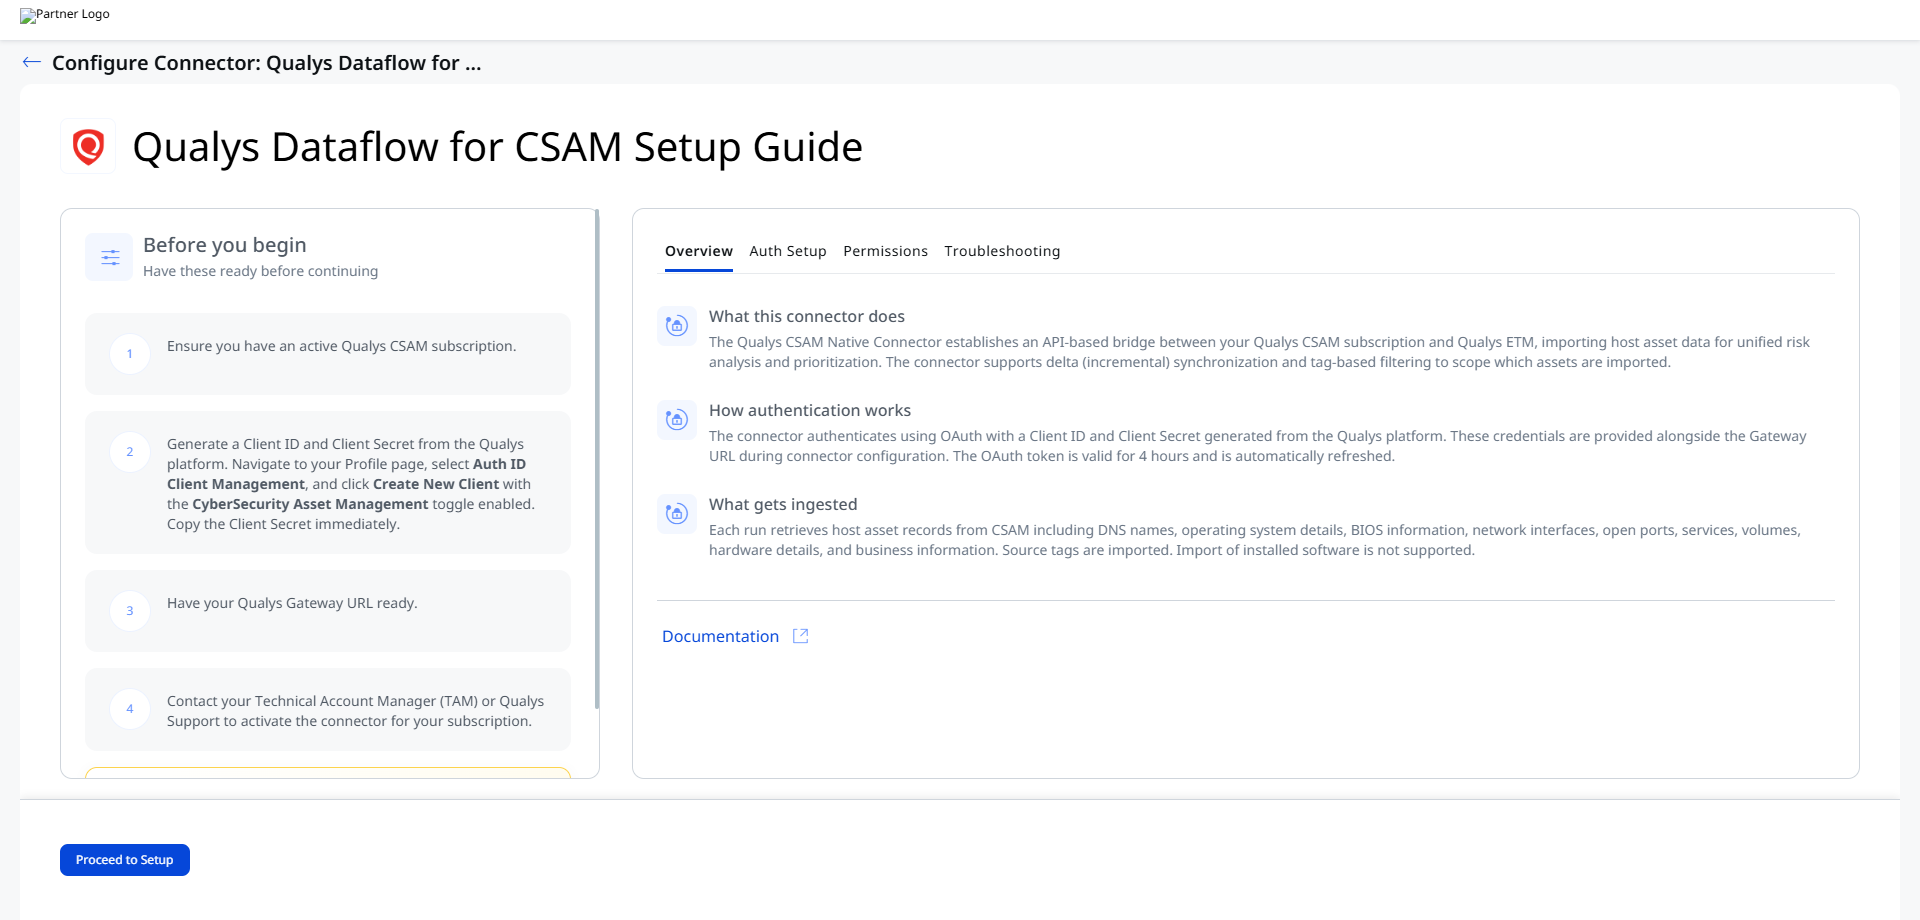
The Qualys CSAM Native Connector establishes an API-based bridge between your Qualys Cloud Platform and Enterprise TruRisk Management, automatically synchronizing host asset metadata for centralized inventory analysis. By retrieving asset data through scheduled API calls, the connector enables security teams to eliminate manual data gathering and gain a unified view of their attack surface across multiple sources.
The platform then deduplicates redundant entries, normalizes data formats, enriches findings with additional context, and calculates risk scores to accelerate data-driven remediation decisions. This integration matters because it converts fragmented asset intelligence into actionable risk insights without requiring manual integration work or custom scripting.
Connector Details
| Vendor | Qualys |
| Product Name | Qualys CSAM |
| Category | Asset & Attack Surface Management |
| Findings Support | Not Supported |
| Supported Assets | Host Assets |
| Version | 1.0.0 |
| Integration Type | API Integration (REST) |
| Direction | Unidirectional |
| Delta Support | Supported |
| Supported Version & Type | SaaS (Latest) |
| Import of Installed Software | Not Supported |
| Import of Source Tags | Yes |
| Filters/Filter Query | Yes |
Configure the Connector
Before You Begin - AuthenticationBefore You Begin - Authentication
Ensure the following prerequisites are completed before configuring the connector:
- Ensure you have an active Qualys CSAM subscription.
- Generate credentials from the Qualys platform.
- Have your Qualys Gateway URL ready.
- Contact your Technical Account Manager (TAM) or Qualys Support to activate the connector for your subscription.
The connector is available on demand and requires activation for your subscription.
Generating Client ID and Client Secret
- Navigate to your Profile page in the Qualys platform.
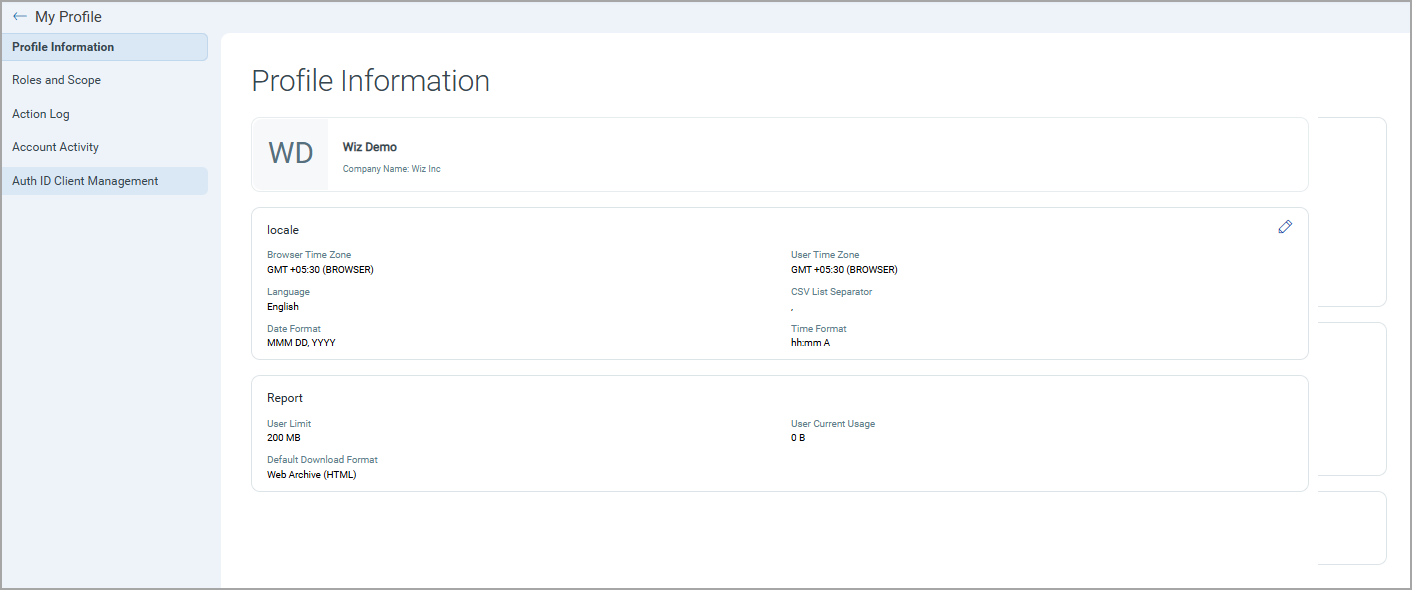
- Select
Auth ID Client Managementfrom the left navigation menu.
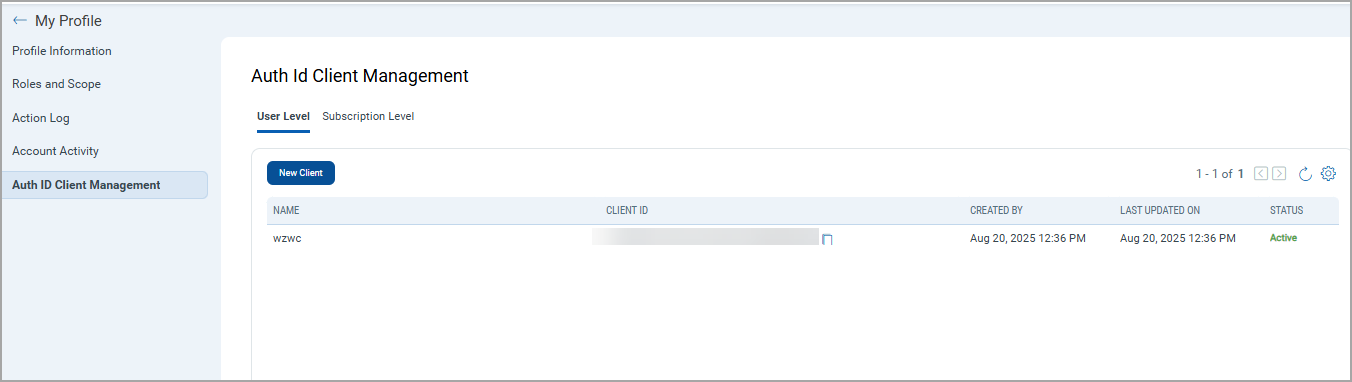
- Click
Create New Client. - Provide a client name.
- Enable the
CyberSecurity Asset Managementtoggle.
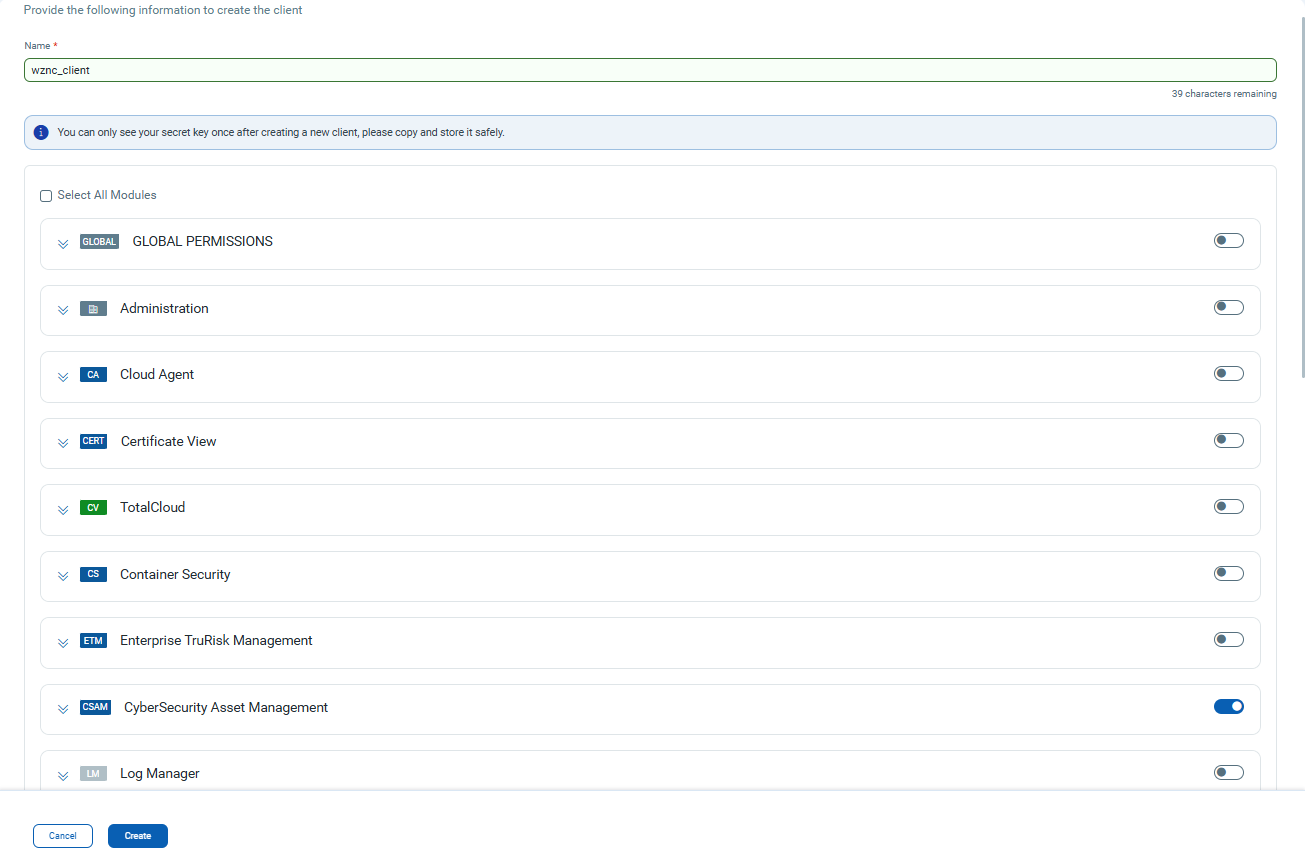
- Click
Create. - Copy the generated Client Secret immediately.
- Copy the Client ID from the listing page.
The Client Secret is displayed only once during creation. Store it securely before leaving the page.
Permissions Required
An active CSAM subscription is required. The Client ID must be created with the CyberSecurity Asset Management toggle activated.
Scope and Data Access
The connector queries the following CSAM API endpoint:
/rest/2.0/search/am/asset
The connector supports tag-based filtering by providing a comma-separated list of active Qualys tags.
Example:
eval-214027-test, exec-220563
Key Rotation
Generate new credentials from the Auth ID Client Management page and update them in ETM using the Edit Connector workflow.
Create a Profile & ConnectionCreate a Profile & Connection
Provide the connector profile details and authentication configuration.
Connector Details
| Field | Type | Description |
| Name | String | Connector profile name. |
| Description | String | Connector profile description. |
Authentication Details
| Field | Type | Description |
| IS IP RESTRICTED | String | Optional IP restriction setting. |
| Base URL | String | Qualys Gateway URL. Example: https://qualysapi.qualys.com |
| Authentication Mechanism | String | Authentication type. Example: BASIC/OAuth |
| Username | String | Qualys username. |
| Password | Encrypted String | Password associated with the configured username. |
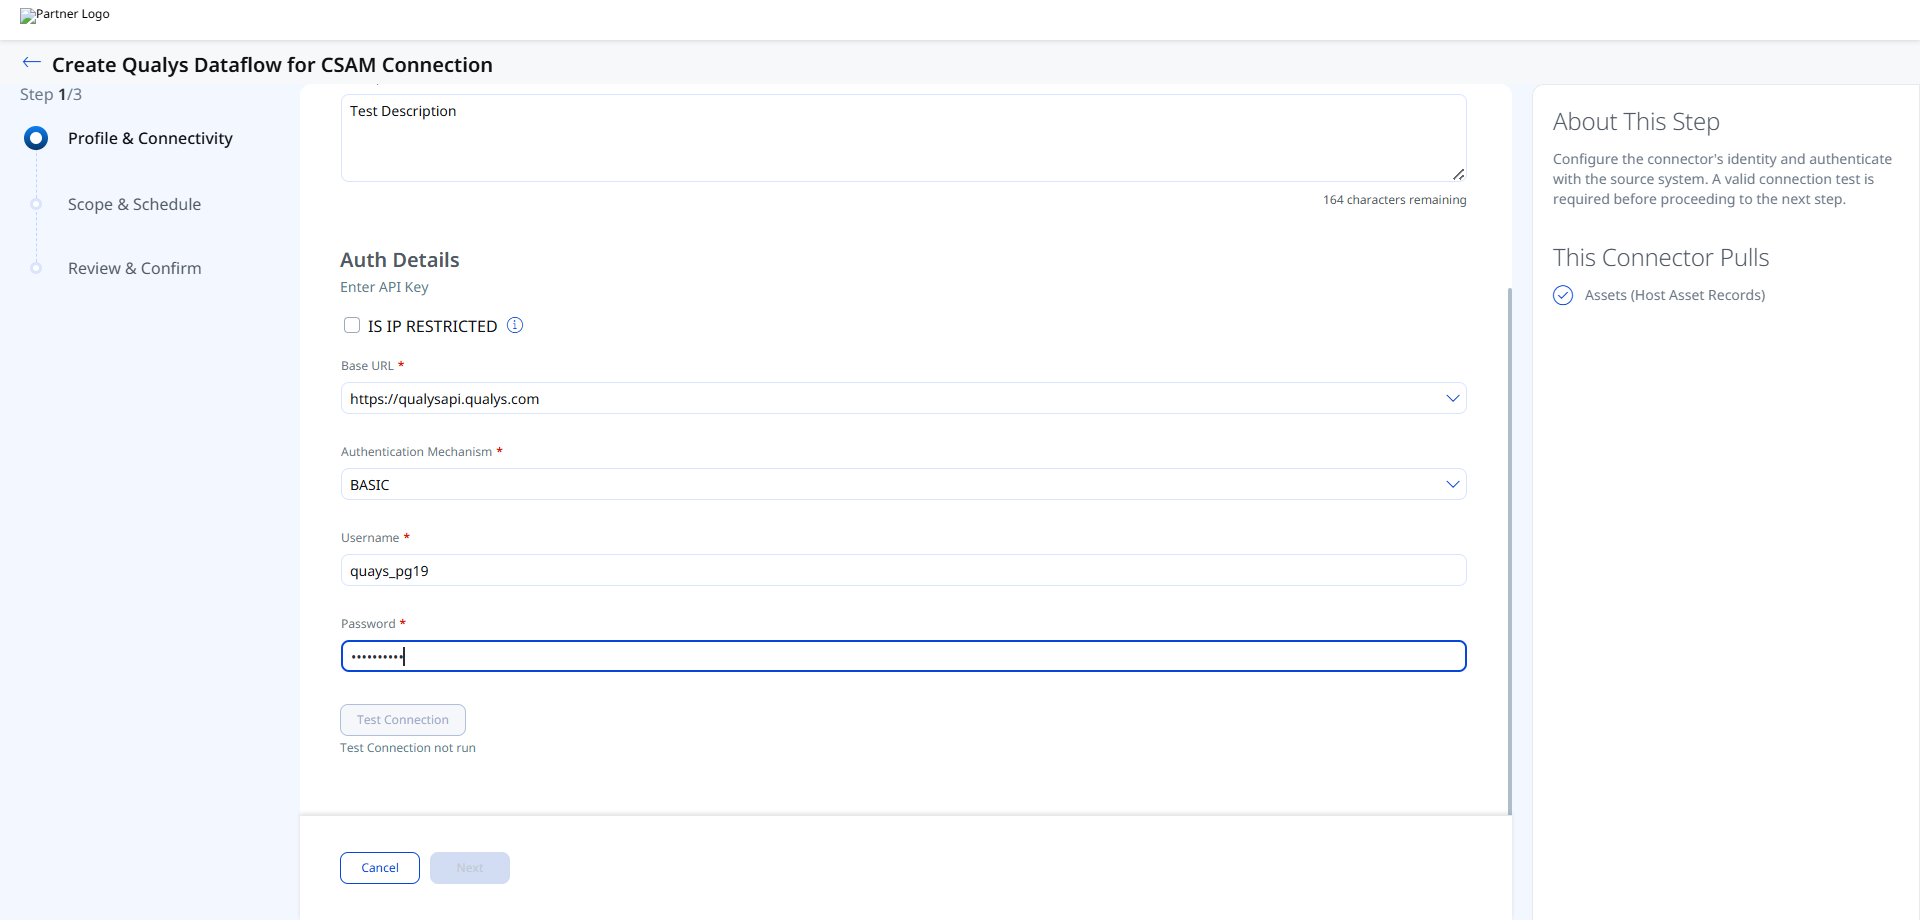
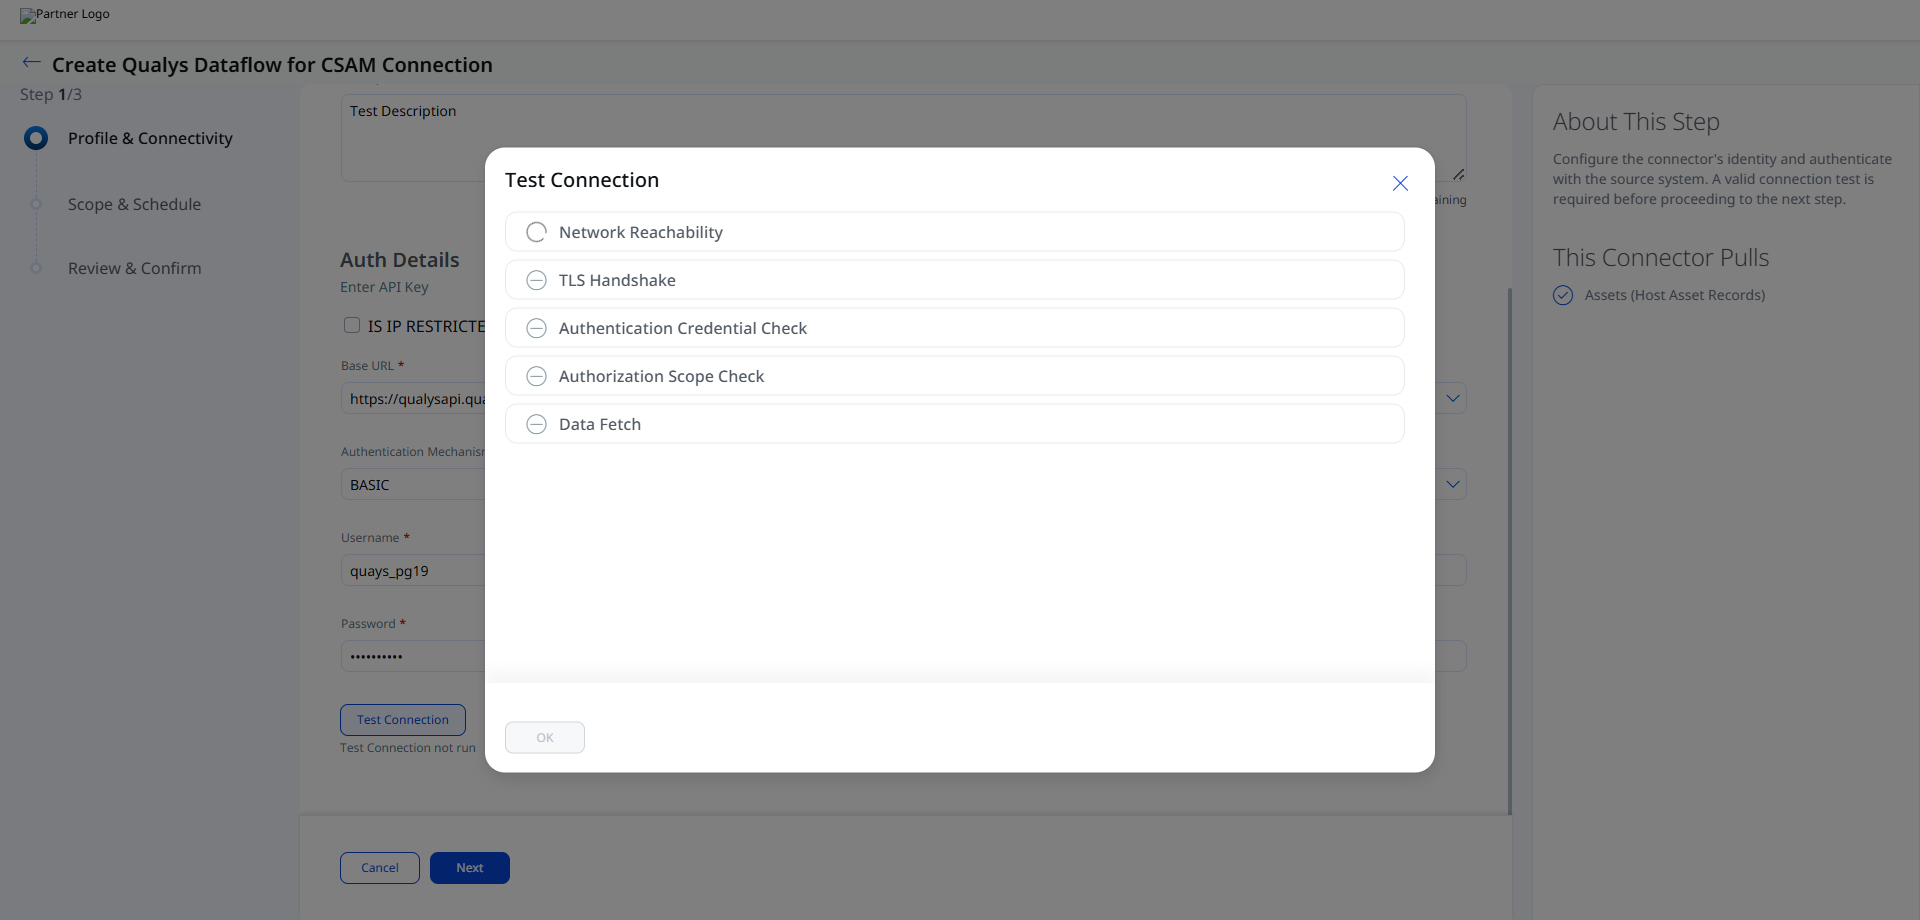
Click Test Connection to validate the connector configuration.
- Network Reachability — Verifies that the connector endpoint is reachable over HTTPS (port 443).
- TLS Handshake — Confirms that a secure TLS connection can be established with the remote endpoint.
- Authentication Credential Check — Validates the configured credentials against the source system's authentication endpoint.
- Authorization Scope Check — Confirms that the provided credentials have the required permissions to access the configured data scope.
- Data Fetch — Verifies that data can be successfully retrieved from the source system using the configured connection.
Set the Scope & ScheduleSet the Scope & Schedule
Select the data type to synchronize and configure the connector schedule.
- Supported Data to Sync:
Assets - Schedule Type:
Daily
The connector supports Advanced Settings for filters and transform map configuration.
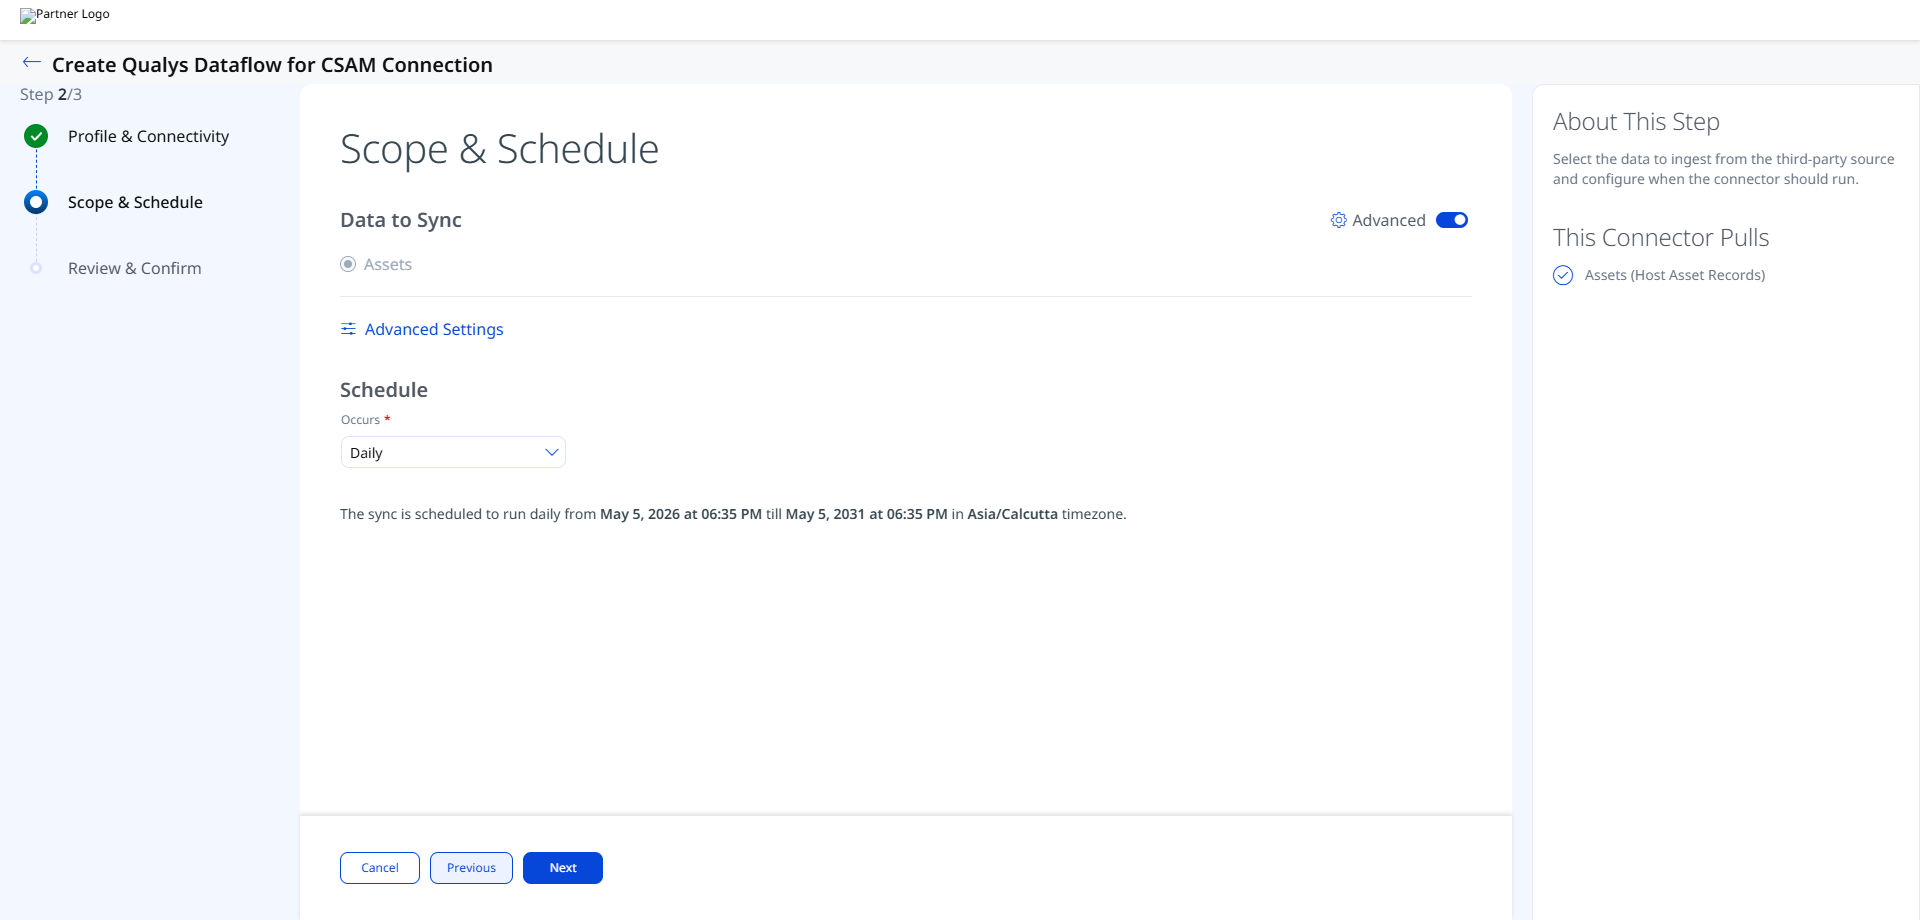
The configured schedule timezone and recurrence duration are displayed during connector creation.
Advanced Settings
Filters Tab
The connector supports tag-based filtering using a free-text Tag Filter field.
Provide a comma-separated list of active Qualys tags.
Example:
eval-214027-test, exec-220563
You can also filter based on the required TruRisk Score or a specific date when the asset was modified.
![]()
How the Connection Works
The connector retrieves host asset records from CSAM including DNS names, operating system details, BIOS information, network interfaces, open ports, services, volumes, hardware details, and business information. Source tags are imported into ETM.
The connector supports scheduled synchronization and imports data into Enterprise TruRisk Management (ETM) for centralized asset visibility and risk analysis.
Connector States
A configured connector progresses through the following states:
- Registered – The connector is successfully created.
- Scheduled – The connector is queued for execution.
- Processing – The connector is actively retrieving data.
- Processed – Asset synchronization completed successfully.
- Errored – The connector encountered an execution or authentication issue.
The first synchronization cycle may take up to 2 hours to complete depending on the size of the imported asset inventory.
Viewing Assets and Findings in ETM
Navigate to ETM > Assets > Host to view imported CSAM assets.
Use the following QQL filter to view imported CSAM assets:
inventory:(source:"qualys")
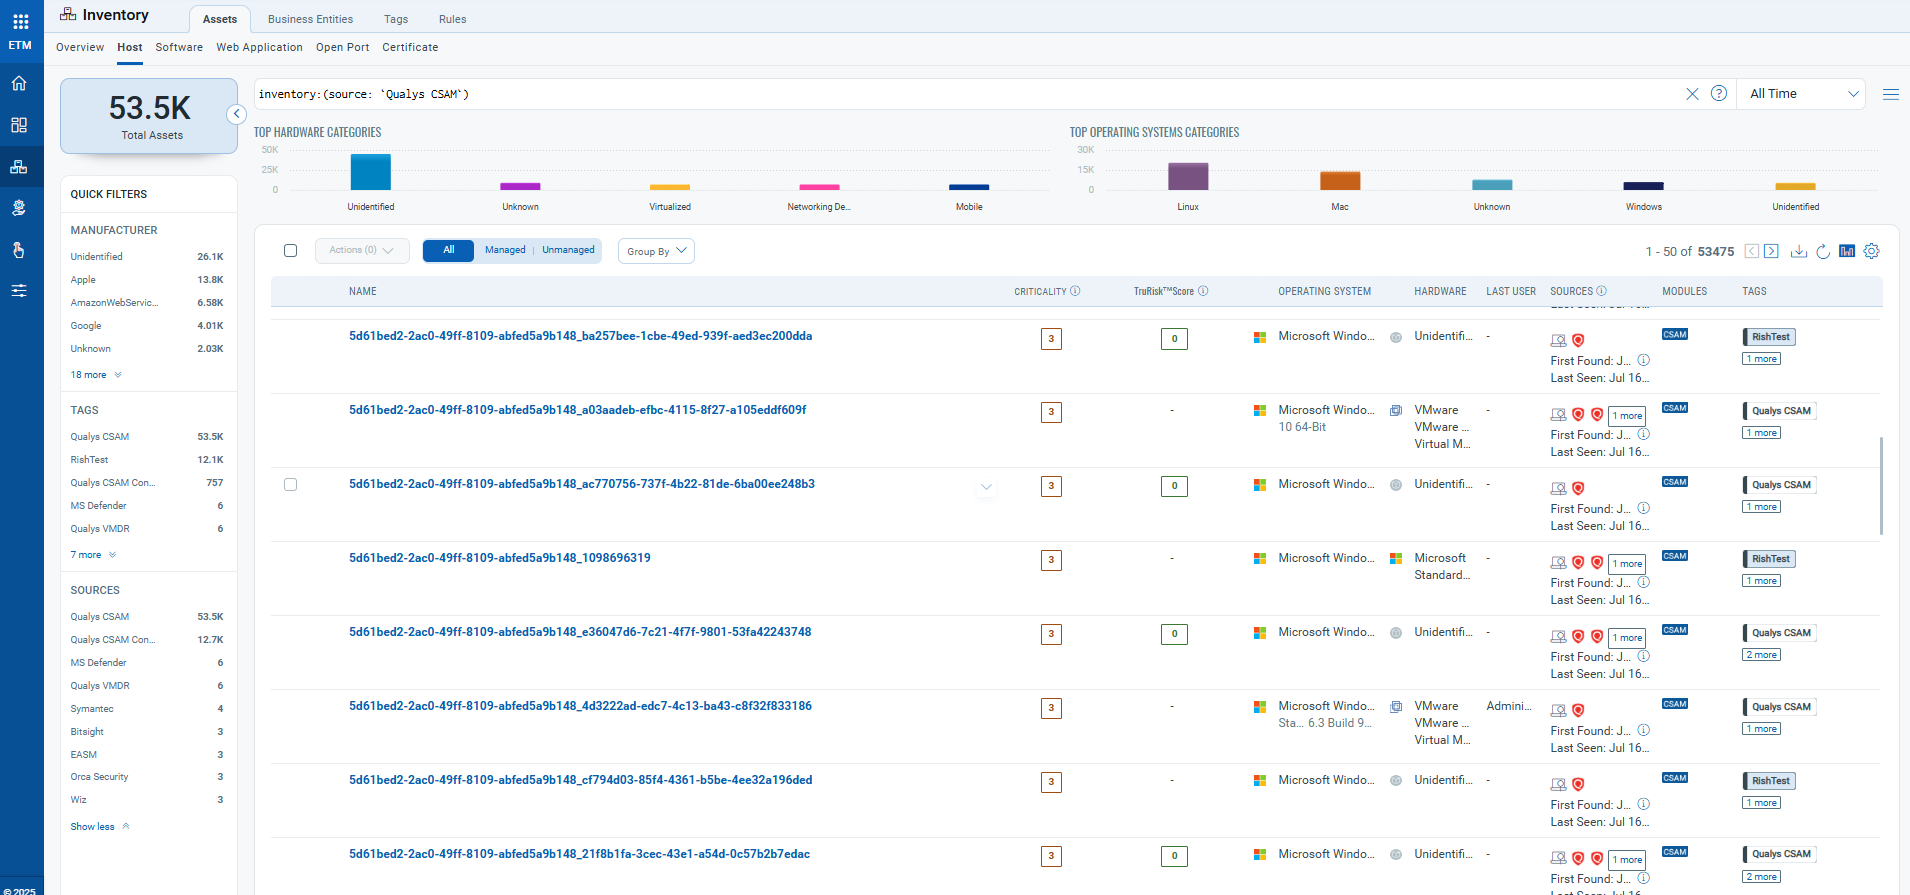
The connector currently imports asset records only.
Troubleshooting
| Issue | Resolution |
|---|---|
| Authentication failure on connector run | Verify the Gateway URL, Client ID, and Client Secret are correct. Confirm the Client ID was created with the CyberSecurity Asset Management toggle enabled. |
| No assets imported after first run | The process may take up to 2 hours for completion. Verify the CSAM subscription is active and contains asset data. If tag filters are configured, confirm matching assets exist. |
| Connector not available in the integrations list | The connector is available on demand. Contact your TAM or Qualys Support to activate it. |
Additional Information
API Reference
| Operation | Endpoint | Notes |
|---|---|---|
| Authentication API | https://<gateway_url>.qualys.com |
Authenticates connector requests. |
| Fetch Asset List | https://<gateway_url>.qualys.com/rest/2.0/search/am/asset |
Default batch size: 300 |
Transform Map Tab
The connector includes a default transform map for CSAM asset ingestion.
CSAM Asset Transformation MappingCSAM Asset Transformation Mapping
| Source Attribute | Target Attribute |
|---|---|
| DNS Name | DNS Name |
| Host Id | Host Id |
| Asset UUID | Asset UUID |
| BIOS Serial Number | BIOS Serial Number (Required) |
| Operating System Name | Operating System Name |
| Operating System Version | Operating System Version |
| Open Port Number | Open Port Number |
| Network Interface IPv4 Address | Network Interface IPv4 Address |
| Hardware Manufacturer | Hardware Manufacturer |
| Hardware Model | Hardware Model |