Qualys Dataflow for VMDR Connector
The Qualys Dataflow for VMDR Connector aggregates vulnerability and asset data from multiple Qualys subscriptions into a unified view within Enterprise TruRisk Management. Security teams can import VMDR findings and host asset data from another Qualys subscription to gain consolidated risk visibility across their hybrid-IT environments without manually consolidating disparate data sources.
The connector automatically deduplicates entries, normalizes formats, and enriches findings with context and risk scores, enabling teams to prioritize remediation efforts more effectively. This unified approach helps organizations identify and address critical vulnerabilities faster across their entire infrastructure footprint.
Connector Details
The following table describes the supported capabilities for the Qualys Dataflow for VMDR Connector.
| Vendor | Qualys |
| Product Name | Qualys VMDR |
| Category | Vulnerability Management |
| Works With | Enterprise TruRisk Management (ETM) |
| Connector Type | API Connector |
| Supported Assets | Host Assets (Compute) |
| Findings Support | Vulnerability Findings (CVEs) |
| Version | 1.0.0 |
| Supported Version & Type | SaaS (Latest) |
| Integration Type | REST API |
| Authentication Type | Basic Authentication |
| Direction | Unidirectional (Qualys > Qualys) |
| Incremental Sync (Delta) | Supported |
| Import of Installed Software | Not Supported |
| Import of Source Tags | Not Supported |
| Filters / Filter Query | Supported |
Configure the Connector
Before You Begin - AuthenticationBefore You Begin - Authentication
You need an active VMDR subscription to create this connector.
You will require the Qualys Gateway URL, a Client ID and Secret to authenticate yourself.
The Base URL for your platform is available at Qualys Platform Identification
You must activate the API from the Administrator module. You can select your profile > Edit User > User Role, then select the API checkbox.
Steps to generate User level Client ID and Client Secret:
- Navigate to My Profile page from your account.
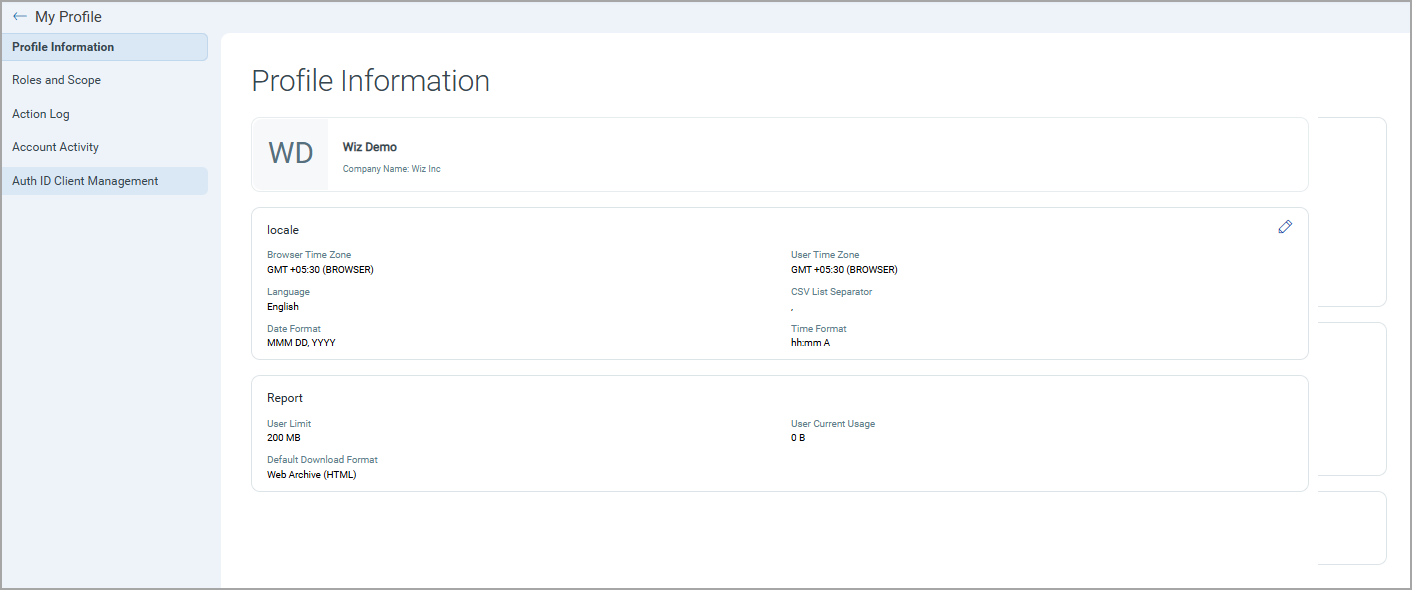
- Select Auth ID Client Management from the left-hand menu options.
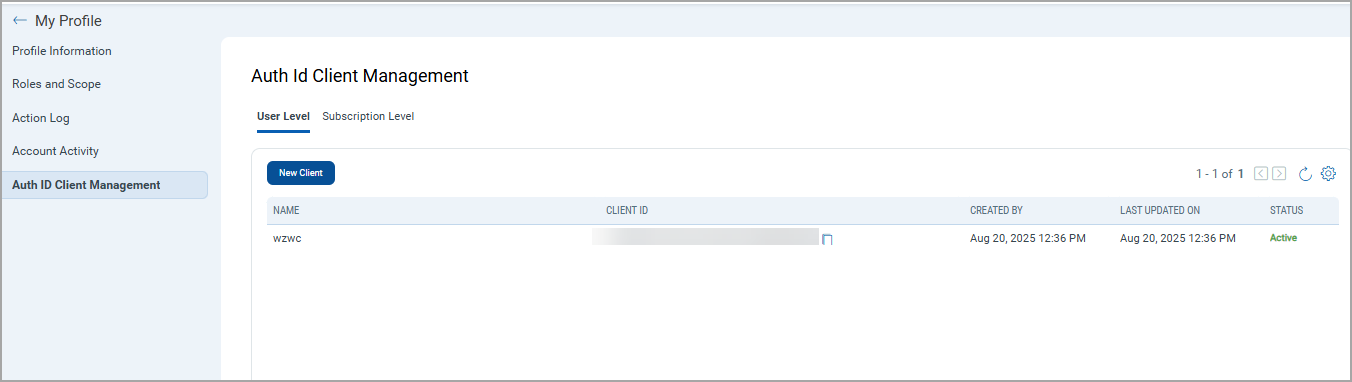
- Click New Client on the Auth ID Client Management page.
- Give any friendly name for the client.
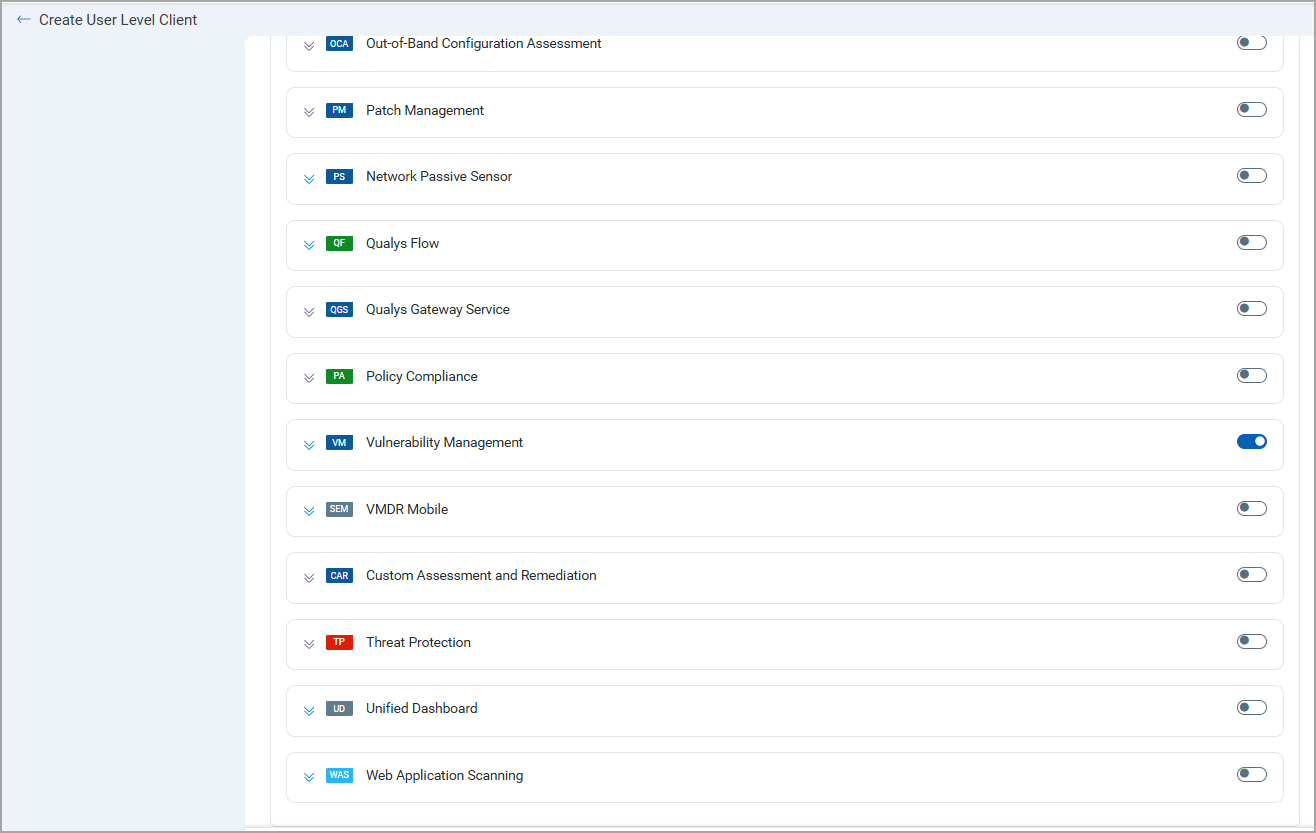
- Select Vulnerability Management by clicking on the toggle button.
- Click Create.
- Client Secret will be generated and displayed in encrypted format. Copy and store this secret, as it appears once.
- Click Close.
- The Client ID and its details will be listed in the list of Client ID.
- Client ID can be copied from the Client ID column.
Permissions Required
The Qualys user account must have an active VMDR subscription and API access enabled through the Administrator module.
Scope and Data Access
The connector queries the VMDR host asset and host detection list APIs to retrieve asset and vulnerability data.
Optional filters are available to scope imported data by vulnerability type, severity thresholds, and tag-based filtering.
Tags can be specified by ID or by name. Example tags:
"TI: Active Attack""TI: Active RCE"
The selected tags must be associated with vulnerabilities present in VMDR for the configured account.
Key Rotation
When rotating credentials, update the stored Username or Password from the connector configuration using the Edit Connector option.
Create a Profile & ConnectionCreate a Profile & Connection
Create the connector profile and configure authentication settings.
Connector Details
| Field | Type | Description |
|---|---|---|
| Name | String | Name of the connector profile. |
| Description | String | Description for the connector configuration. |
Authentication Details
| Field | Type | Description |
|---|---|---|
| Is IP Restricted | Boolean | Enable if the environment requires IP-based access control. |
| Base URL | String | Qualys platform API URL. Example: https://qualysapi.qualys.com. |
| Authentication Mechanism | String | Authentication type used by the connector, BASIC or OAuth. |
| Username | String | Qualys VMDR username. |
| Password | Encrypted String | Password associated with the Qualys VMDR account. |
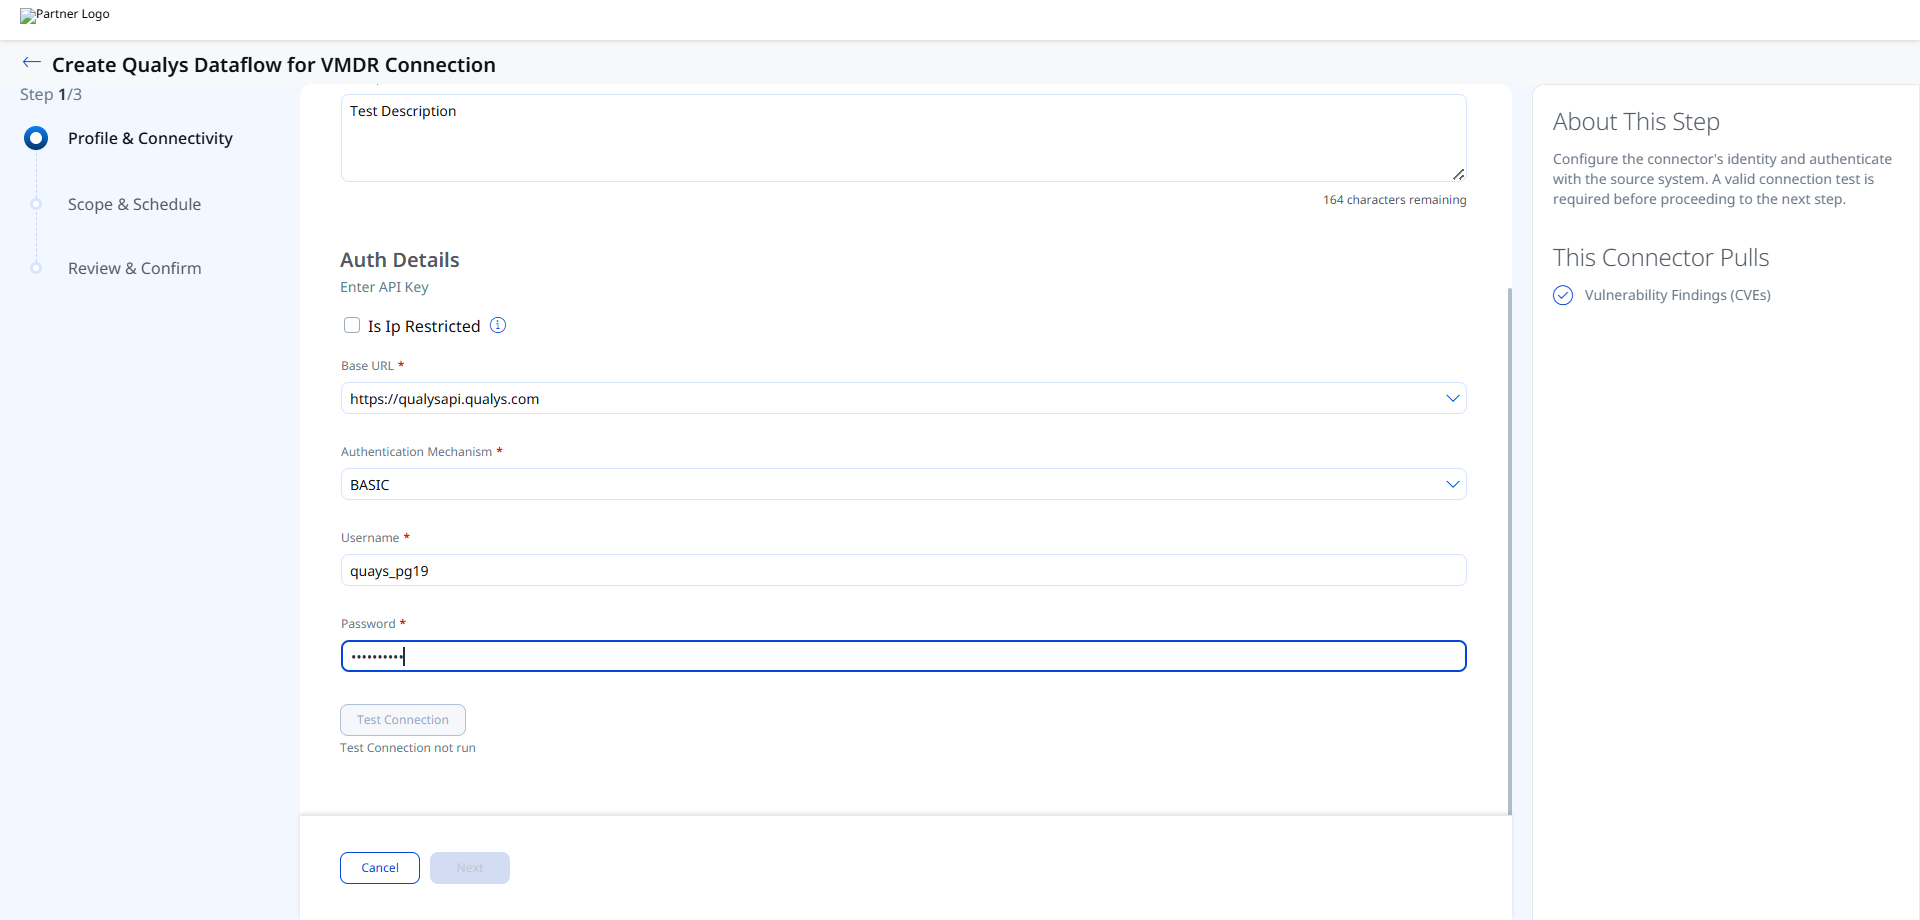
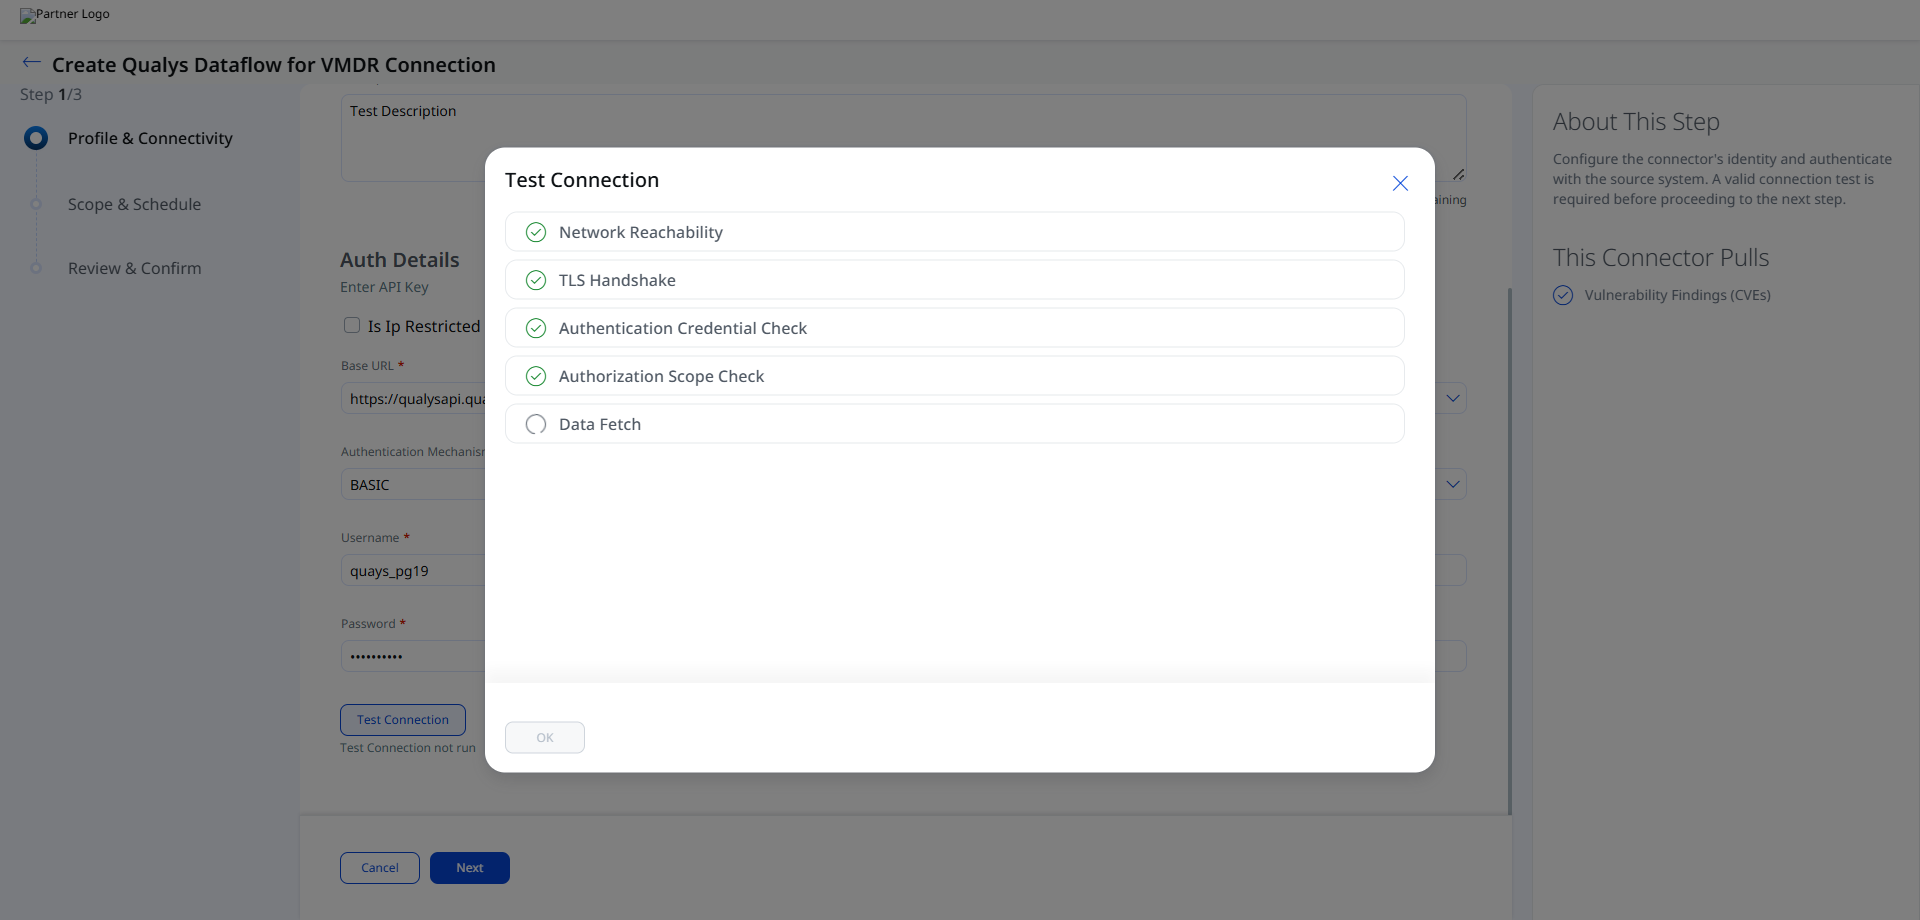
After entering the credentials, click Test Connection.
The connector validates the following checks:
- Network Reachability — Verifies the Checkmarx One regional endpoint is reachable over HTTPS (port 443).
- TLS Handshake — Confirms a secure connection can be established.
- Authentication Credential Check — Validates the API key, region code, and Tenant Name against the Checkmarx OAuth endpoint.
- Authorization Scope Check — Confirms the API key has
read:vulnerabilitiespermission on the VulnerabilityFindings entity. - Data Fetch — Verifies that DAST environment and scan data can be retrieved from the Checkmarx One API.
Set the Scope & ScheduleSet the Scope & Schedule
Select the data types to synchronize and configure the execution schedule.
- Assets & Findings – Imports both host assets and vulnerability findings.
- Assets – Imports only host asset records.
Supported schedule frequency:
DailyWeeklyMonthly
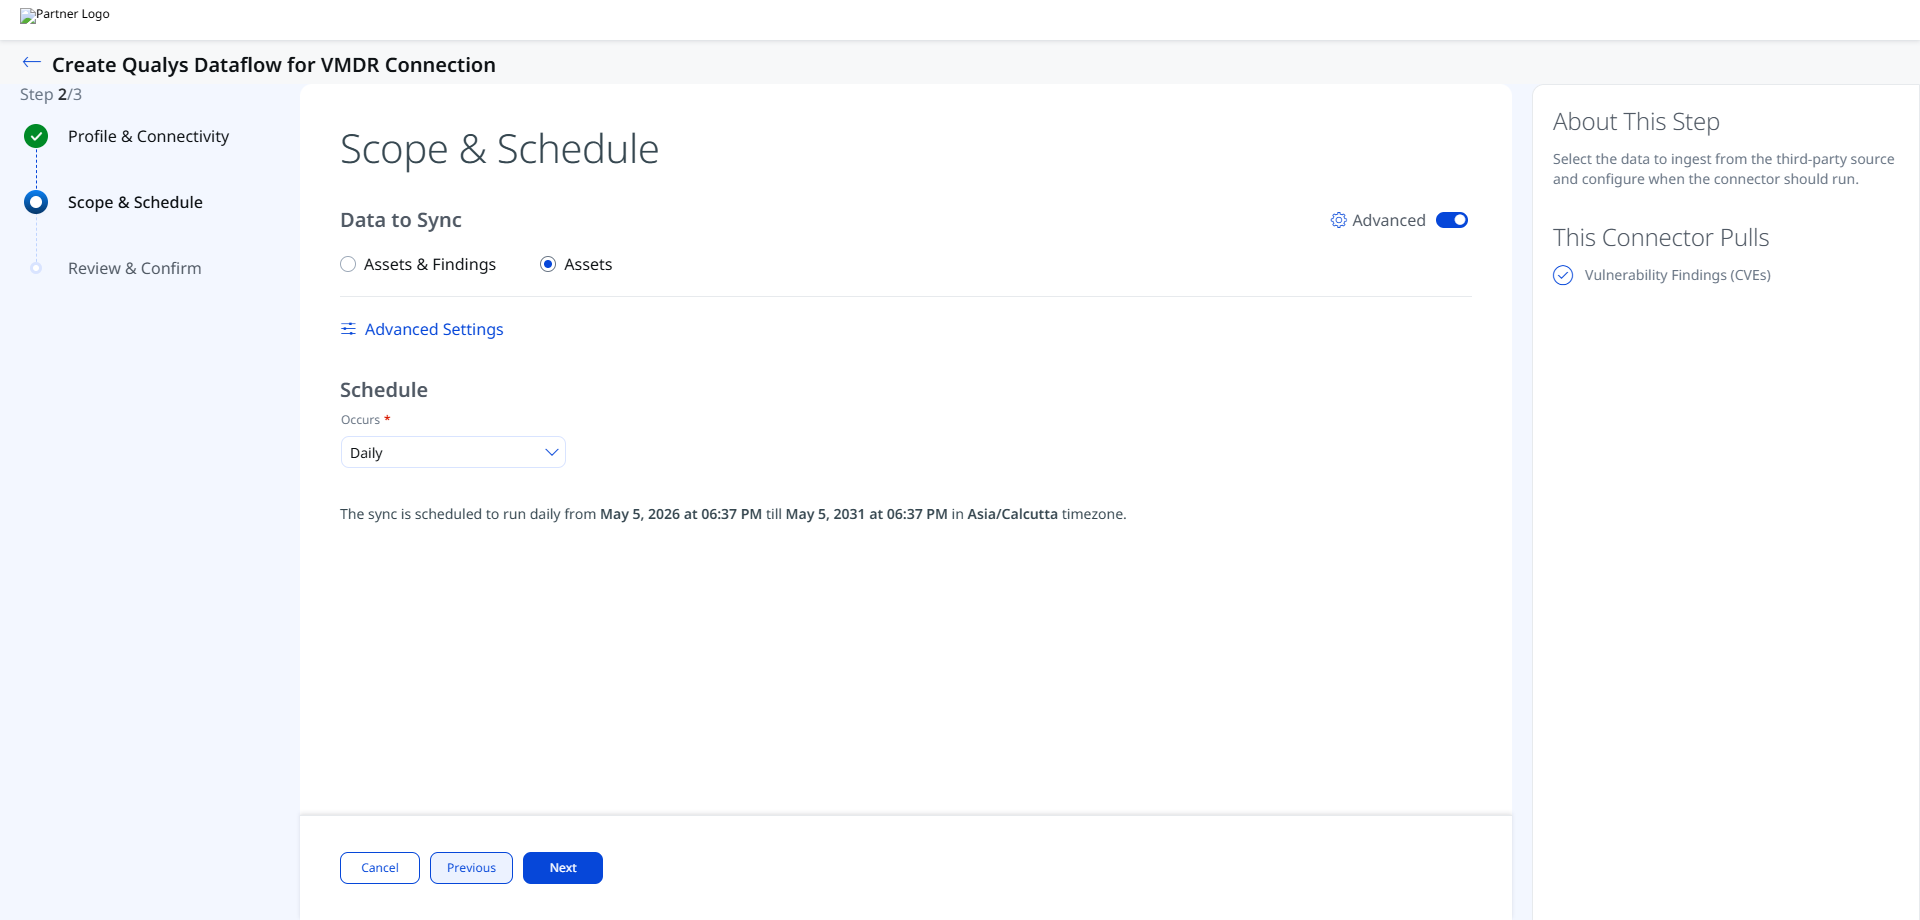
The schedule configuration includes timezone-aware execution windows and recurring schedules with a 5-year duration range.
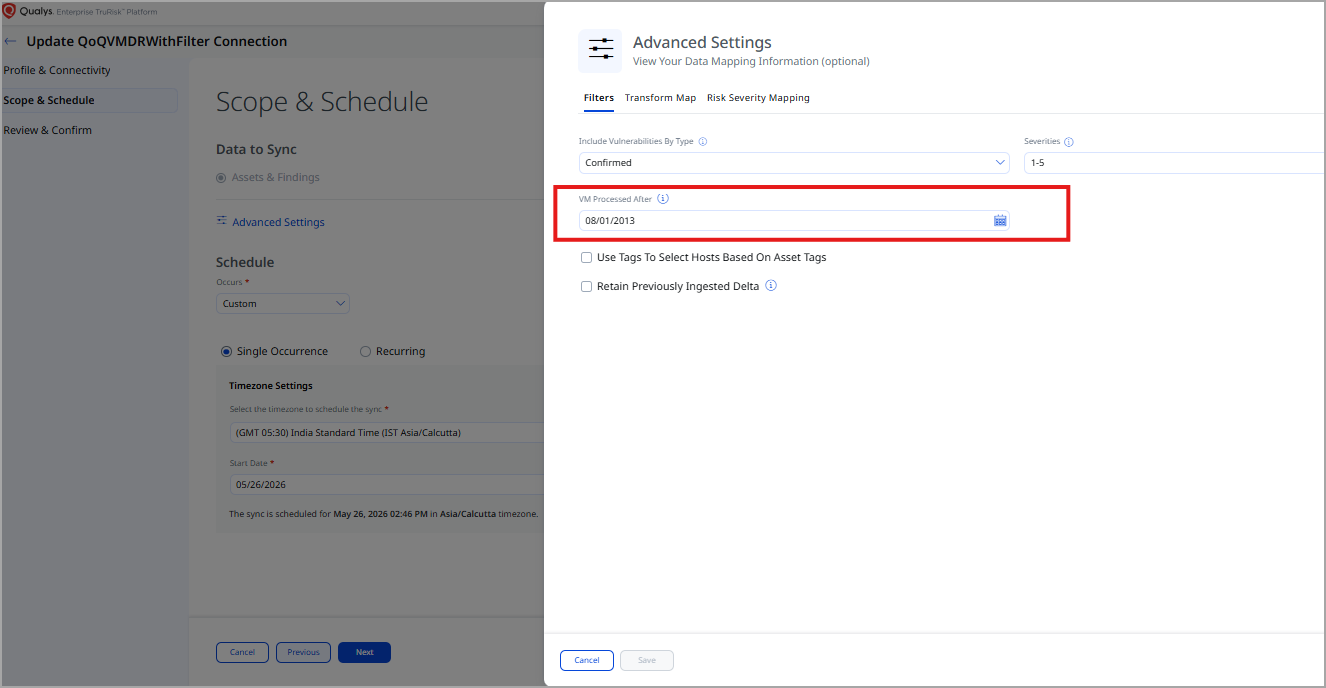
Advanced Settings
Filters Tab
The Filters tab allows you to filter imported vulnerability data.
Supported filters include:
- Include vulnerabilities by type
- Severity-based filtering
- Tag-based filtering
Severity filtering retrieves detection records that match the selected severity values.
Tag filtering is enabled using the Use tags to filter result option.
Ensure the selected filters have matching data available in the VMDR environment. Filters referencing tags with no associated vulnerabilities return no results.
You can also filter based on the required TruRisk Score or a specific date when the asset was modified.
Transform Map Tab
The Transform Map tab displays the active transformation maps applied during connector execution. Default transform maps are provided for each asset type and applied automatically. See Transformation Maps for full field-level mapping details.
Risk Severity Mapping Tab
The Risk Severity Mapping tab allows you to configure how VMDR severity values are mapped during ingestion.
The configuration includes:
- Severity selection
- Default severity handling
- Detection record filtering by severity
CVE-based findings are scored automatically by Qualys and are not affected by this mapping configuration.
How the Connection Works
The Qualys Dataflow for VMDR Connector aggregates vulnerability and asset data from your existing Qualys VMDR subscription and imports it into Qualys ETM for unified risk analysis and prioritization. Qualys ETM processes the incoming data by de-duplicating redundant entries, normalizing data formats, enriching findings with additional context, and calculating risk scores using TruRisk.
The connector supports delta (incremental) synchronization for ongoing scheduled runs.
Each synchronization run retrieves host asset records including hostname, FQDN, IP address, operating system name, NetBIOS name, and cloud resource identifiers. Vulnerability findings include QID, title, severity score, CVSS scores, detection score (QDS value), exploit information, CVE IDs, MITRE tactic and technique mappings, and patch availability status.
Connector States
- Registered – The connector has been created successfully.
- Scheduled – The connector is queued for execution.
- Processing – The connector is actively importing asset and findings data.
- Processed – Asset synchronization completed successfully.
- Errored – Connector execution failed due to authentication, connectivity, or processing issues.
The first synchronization cycle can take up to 2 hours depending on the volume of imported findings and assets.
The Processed state indicates that assets have been imported successfully. Vulnerability findings processing may still continue in the background.
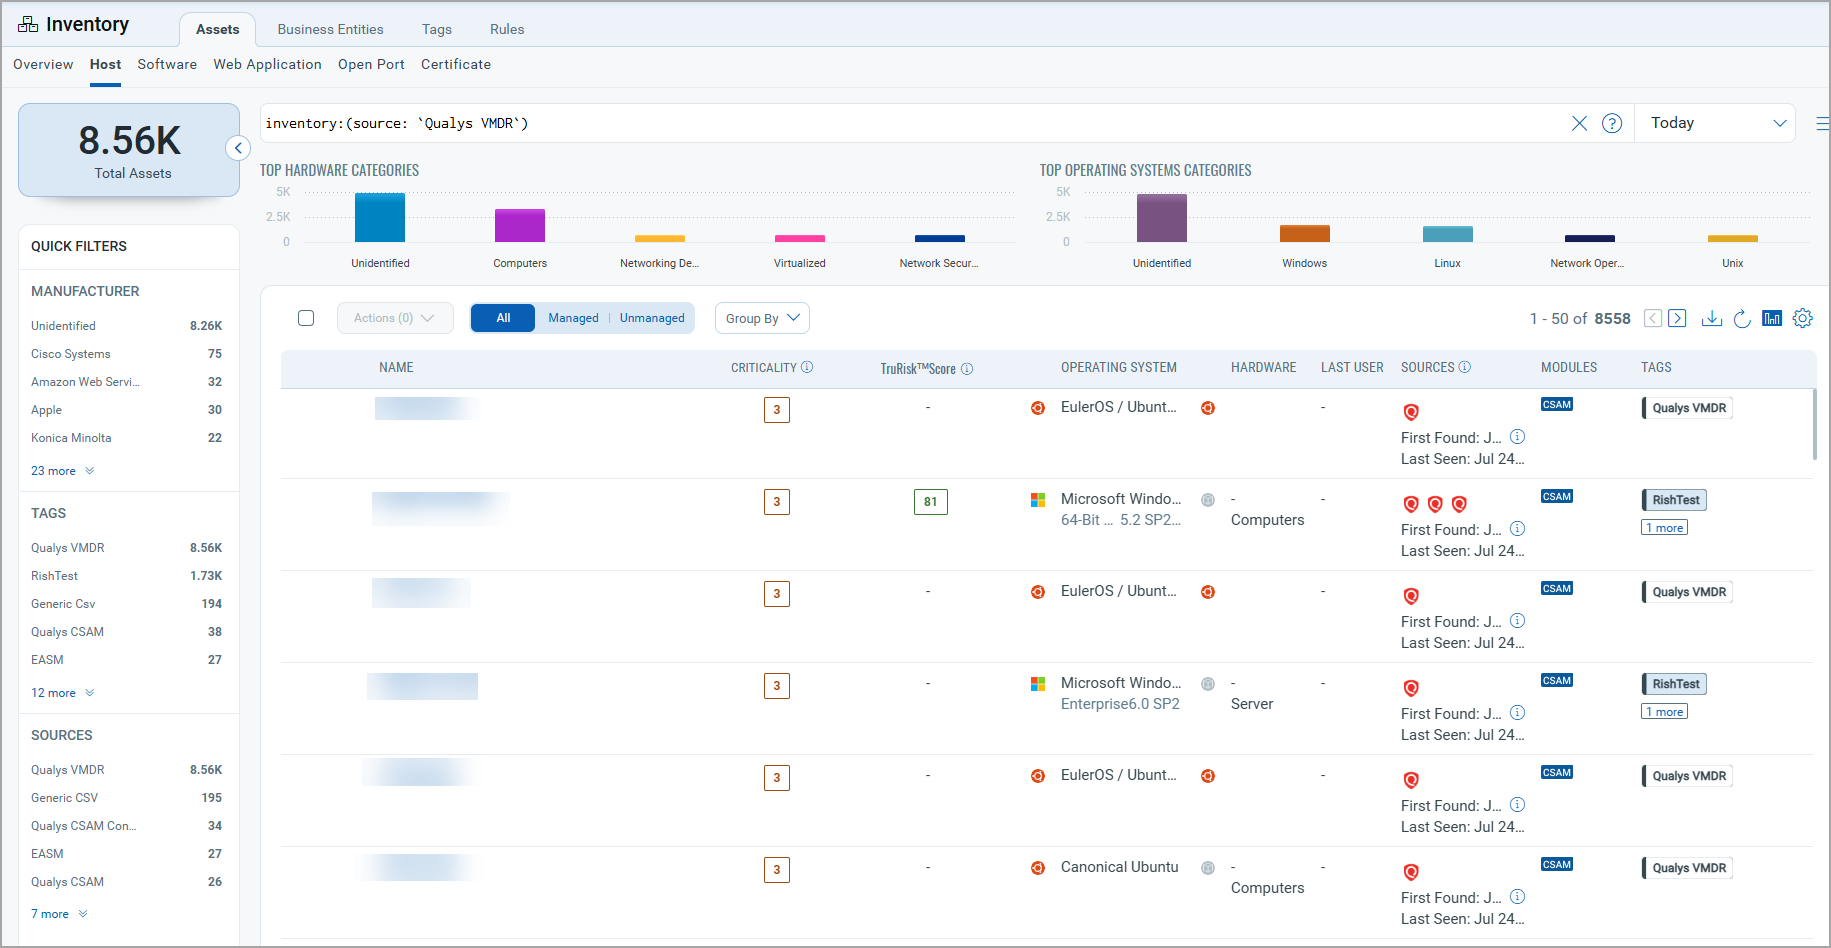
Viewing Assets and Findings in ETM
Navigate to Enterprise TruRisk Management (ETM) to view imported VMDR data.
To view imported assets:
Go to Assets > Host and use the following QQL filter:
inventory:(source:"qualys")
To view imported findings:
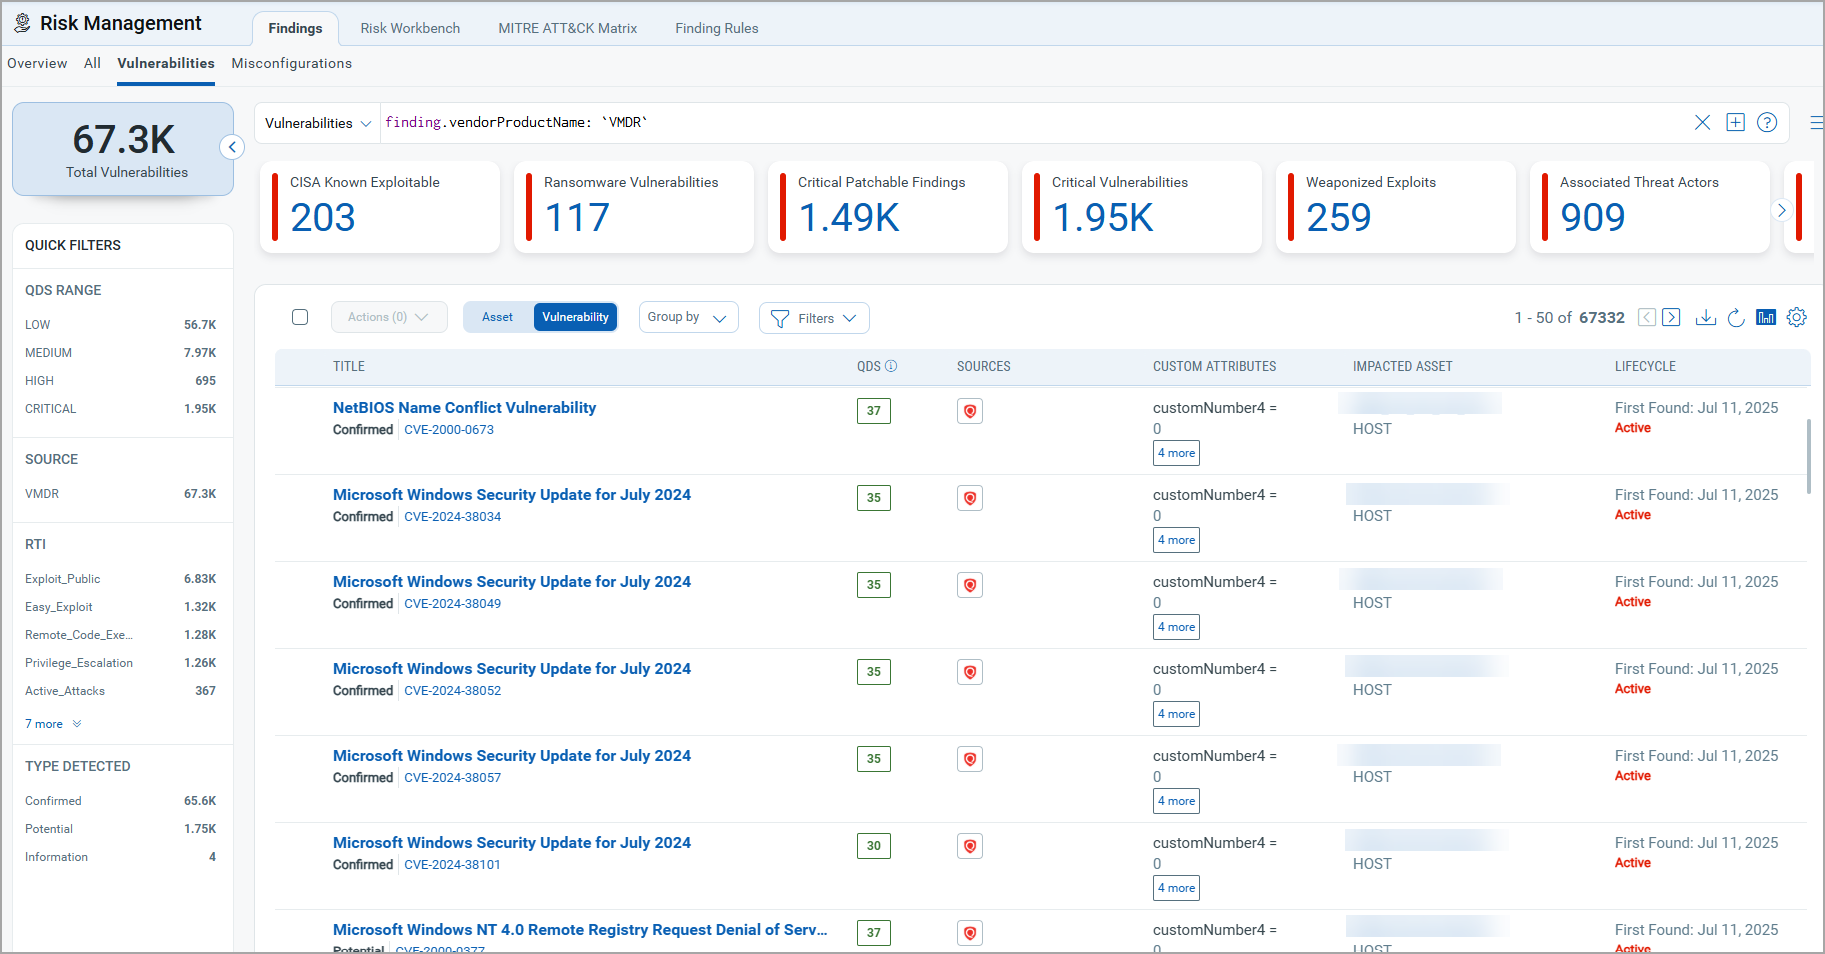
Go to Findings > Vulnerability and use the following QQL filter:
findings.vendorProductname:"Qualys VMDR"
Troubleshooting
| Issue | Resolution |
|---|---|
| Authentication failure on connector run | Verify the Gateway URL, Client ID, and Client Secret entered in Qualys ETM are correct. Confirm API access is enabled for the account and VMDR access is activated. |
| No assets or findings imported | Verify the VMDR subscription is active and contains data. Confirm selected filters or tags are associated with existing vulnerabilities. |
| Connection test fails | Verify the Base URL matches your Qualys platform region. Ensure ETM can reach the URL over HTTPS and confirm credentials are valid. |
| Findings import takes longer than expected | Findings processing may continue after the connector reaches the Processed state. Monitor connector execution until all findings are synchronized. |
Additional Information
API Reference
| Operation | Endpoint | Notes |
|---|---|---|
| Fetch Host Assets | https://<qualys_base_url>/api/4.0/fo/asset/host/ |
Retrieves VMDR host asset data. |
| Fetch Host Detections | https://<qualys_base_url>/api/4.0/fo/asset/host/vm/detection/ |
Retrieves vulnerability findings and detection details. |
Transformation Maps
Default transform maps are provided for each asset type and applied automatically during connector execution
VMDR Asset Transformation MappingVMDR Asset Transformation Mapping
|
Source Attribute Label |
Target Attribute Label |
|---|---|
|
ID |
externalAssetId |
|
VULNERABILITIES[].QID_INFO.qid.title |
findingName |
|
VULNERABILITIES[].UNIQUE_VULN_ID |
externalFindingId |
|
VULNERABILITIES[].SEVERITY |
findingSeverity |
|
DNS_DATA.HOSTNAME |
assetName |
|
CLOUD_RESOURCE_ID |
cloudInstanceId |
|
CLOUD_PROVIDER
|
cloudProvider
|
|
VULNERABILITIES[].QID_INFO.qid.cvssTemporal |
cvss2Temporal |
|
VULNERABILITIES[].QID_INFO.qid.cvssBase |
cvssV2Base |
|
VULNERABILITIES[].QID_INFO.qid.cvss3Base |
cvss3Base |
|
VULNERABILITIES[].QID_INFO.qid.cvss3Temporal |
cvss3Temporal |
|
VULNERABILITIES[].QDS.value |
detectionScore |
|
VULNERABILITIES[].QID_INFO.corExploit[].vendorName |
exploitedByList |
|
VULNERABILITIES[].QID_INFO.qid.description |
findingDescription |
|
VULNERABILITIES[].FIRST_FOUND_DATETIME |
findingFirstFoundOn |
|
VULNERABILITIES[].LAST_FOUND_DATETIME |
findingLastFoundOn |
|
VULNERABILITIES[].PORT |
findingPort |
|
VULNERABILITIES[].PROTOCOL |
findingProtocol |
|
VULNERABILITIES[].FIRST_REOPENED_DATETIME |
findingReopenedOn |
|
VULNERABILITIES[].STATUS |
findingStatus |
|
VULNERABILITIES[].TYPE |
findingSubType |
|
DNS_DATA.FQDN |
fqdn |
|
VULNERABILITIES[].IS_IGNORED |
ignoreFinding |
|
VULNERABILITIES[].QID_INFO.qid.consequence |
impact |
|
IP |
ipAddress |
|
VULNERABILITIES[].QID_INFO.qid.patchExist |
isPatchAvailable |
|
NETBIOS |
netBiosName |
|
OS |
operatingSystemName |
|
VULNERABILITIES[].QID_INFO.qid.solution |
recommendation |
|
VULNERABILITIES[].QID |
sourceVulnerabilityId |
|
VULNERABILITIES[].QID_INFO.qid.cvssAccessVector |
vector |
|
VULNERABILITIES[].MITRE_TACTIC_ID |
id |
|
VULNERABILITIES[].MITRE_TACTIC_NAME |
name |
|
VULNERABILITIES[].MITRE_TECHNIQUE_ID |
id |
|
VULNERABILITIES[].MITRE_TECHNIQUE_NAME |
name |
|
VULNERABILITIES[].QID_INFO.qid.cveId |
cveId |