Edit Scan Schedules
After creating a scan schedule for a registry, you can edit its settings, cancel an active scan job, or delete schedules you no longer need.
Scan jobs with a status of Finished, Unknown, or Error cannot be canceled and are ignored automatically.
To view detailed execution logs for a scan schedule — including which sensor performed the scan, listing start and end times, and a breakdown of image scan results — click the schedule name to open the Schedule Details page. For more information, see Viewing Scan Job Executions.
What can I edit in a scan schedule
To edit a scan schedule, go to Assets > Registries, select Edit for a registry, and open the Scan Schedule tab. Click the schedule name or select Edit from its Quick Actions menu.
You can modify the following settings on the Edit Schedule page.
Scan Settings
| Field | Description |
|---|---|
| On Demand / Automatic | Select On Demand to scan immediately. Select Automatic to run scans on a recurring schedule at a set time daily or weekly. |
| Name | The name of the scan schedule (for example, Automatic Scan - Daily). |
Automatic Scan Setting Parameters (visible when Automatic is selected)
| Field | Description |
|---|---|
| Repository | The repository or repositories within the registry to scan. Enter the repository name and click Add. To remove a selected repository, click the x next to its name, or click Remove All to clear all selections. |
Scan Schedule (visible when Automatic is selected)
| Field | Description |
|---|---|
| Recurrence | How often the scan runs. Select Daily or Weekly. |
| Start Time | The time at which the automatic scan starts each recurrence. |
| Scan all Images | When selected, scans all images in the repository based on the configured filter. Sensor version 1.21.0 or later is required to use this option. |
How to delete scan schedules
- Go to Assets > Registries and select Edit for any registry in your list.
- Go to Schedules for the selected registry.
- Select a single scan job and choose Delete from the Quick Actions menu, or choose multiple scan jobs and choose Delete from the Actions menu above the list.
How to cancel scan schedules
- Go to Assets > Registries and select Edit for any registry in your list.
- Go to Schedules for the selected registry.
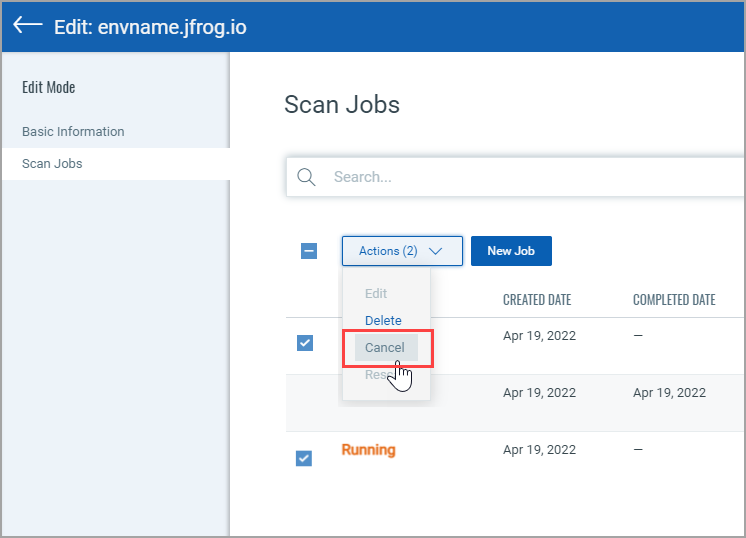
- Select a single scan schedule and choose Cancel from the Quick Actions menu, or choose multiple scan jobs and choose Cancel from the Actions menu above the list.
Use the Search field at the top of the page to quickly find the scan schedule you want to cancel, for example, find all scans with a Running status. Then pick one, multiple or all scan jobs for the action.
- Review the Confirmation that appears, and click Yes to proceed with the action. For each canceled scan schedule, the status will change to Canceled.
How to Restart a Scan Schedule
Use the Rescan option to restart an On Demand registry scan.
You cannot restart scan jobs in Queued or Running state.
- Go to Assets > Registries and select Edit for any registry in your list.
- Go to Schedules for the selected registry.
- Identify the scan you want to start again, and choose Rescan from the Quick Actions menu or from the Actions menu above the list.
A new scan job is created and appears on the Scan Jobs list with a status of Created.