Download and Configure Cloud Agents for EDR
You need to install a Cloud Agent activated for EDR on each asset you want to monitor for suspicious activity.
You must upgrade to following Cloud Agent versions to utilize all the EDR functionality:
Windows : 4.1 and above
Linux : 6.1.0.0.41 and above
If you are a new EDR customer, you must first download and install the default EDR key. For more information, see Download Cloud Agent.
Download Cloud Agent
- From the EDR welcome page, click Download Cloud Agent.
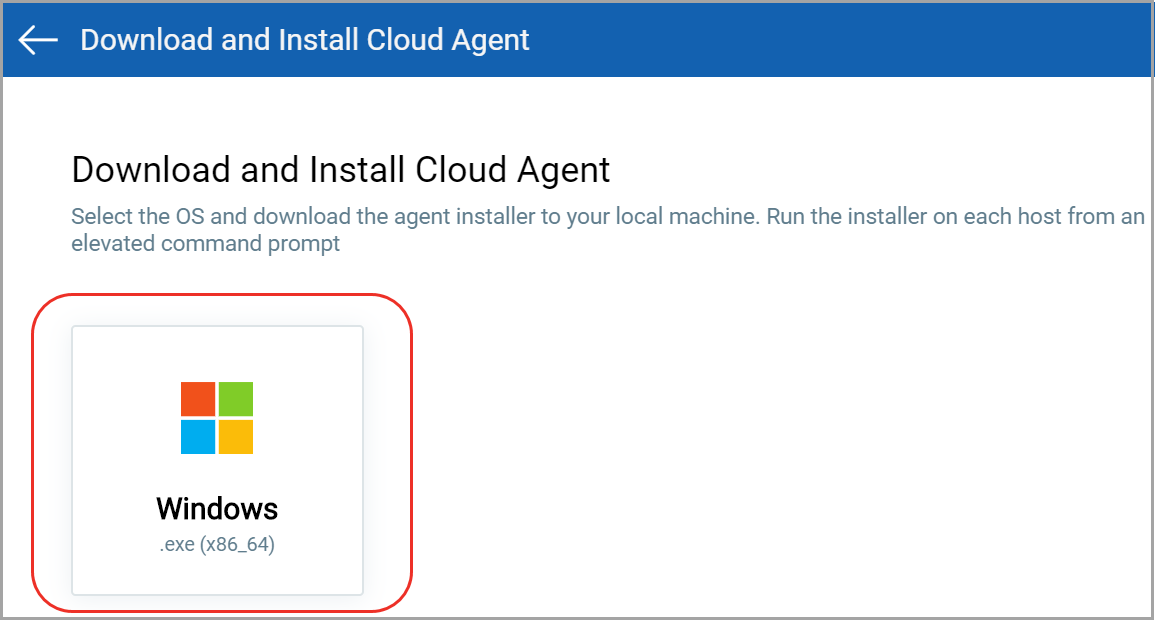
- Click on Windows.exe from the Download and Install Cloud Agent page. The following example screenshots represent Windows installation.
- Download the agent installer from the Installation Instructions page, download the agent installer and copy it to the host machine.
> QualysCloudAgent.exe CustomerId={xxxxxxxx-xxxx-xxxxxxxxxxxxxxxxxxxx}
Run the command from an elevated command prompt, or use a system management tool to install the agent as per your organization's standard process to install a software.
ActivationId={xxxxxxxx-xxxx-xxxx-xxxxxxxxxxxxxxxx}
WebServiceUri=<platform_url>/CloudAgent/ - After you successfully download and install the Default installation key and want to install more activation keys, see Install and Activate Cloud Agent.
Configure Cloud Agents
- From EDR welcome page, click Configure Agents for EDR.
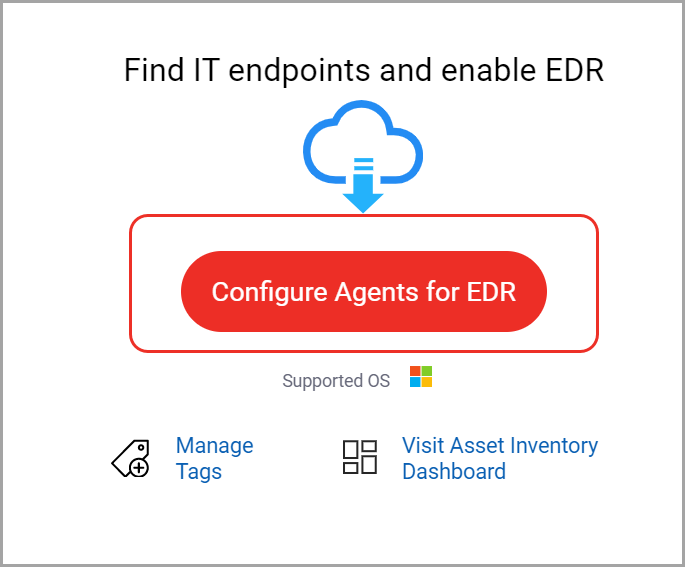
- On the Configure Agents for EDR window, you can:
- Select the existing activation key and upgrade the associated agents for EDR. For more information, see Upgrade Existing Agents.
- Install the new Cloud Agent and activate the agent for EDR. For more information, see Install and Activate Cloud Agents.
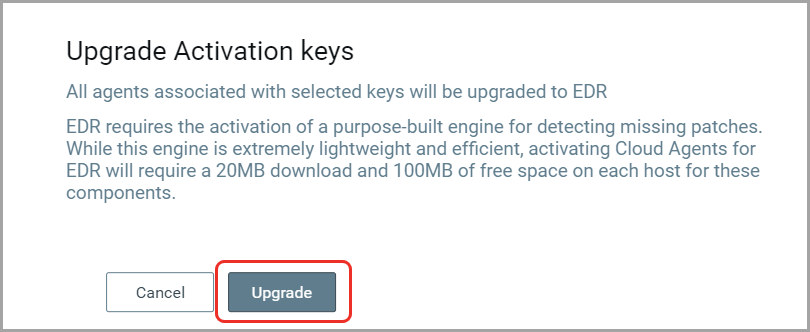
Upgrade Existing Agents
- Select one or multiple Activation Keys from the Configure Agents for EDR window and click Upgrade.
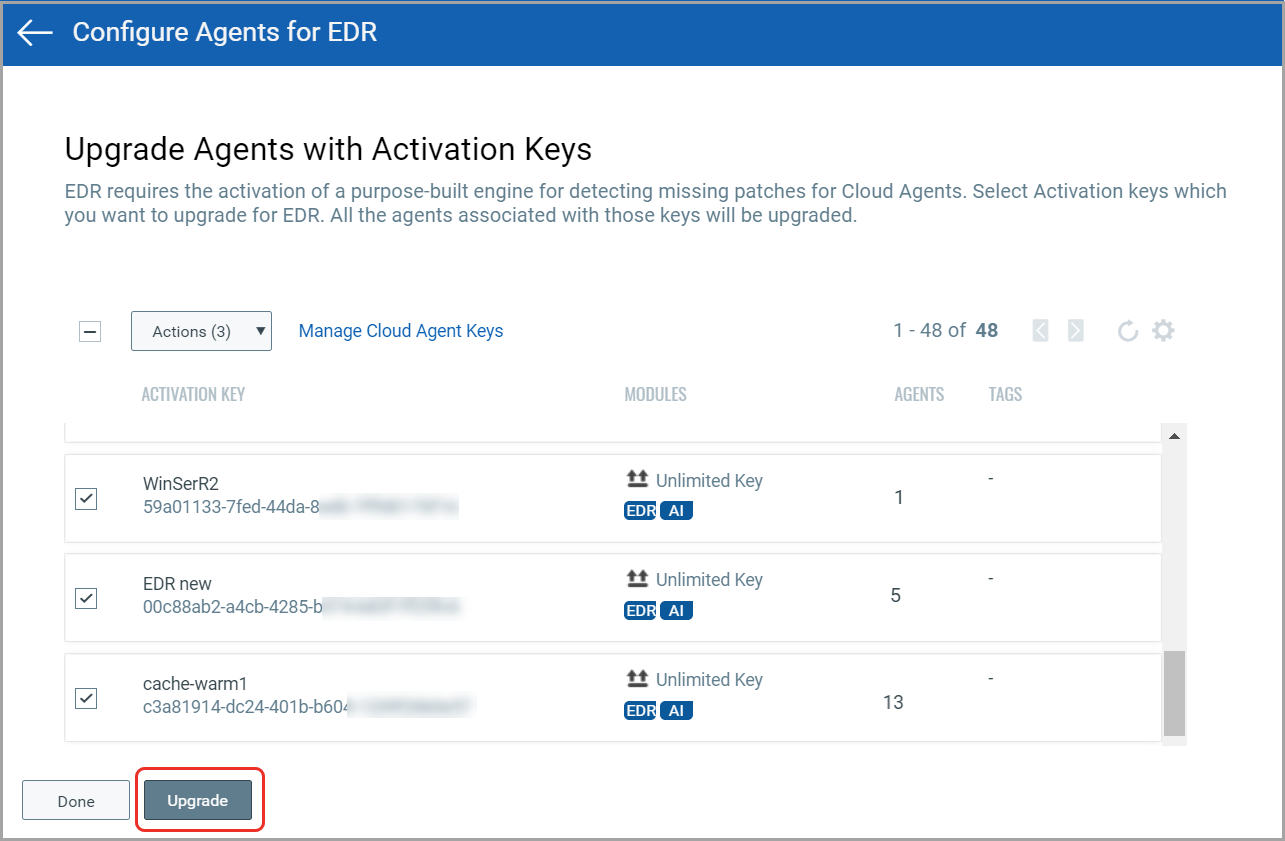
- On the confirmation window, click Upgrade to initiate the process. All the agents associated with the activation key will be upgraded and enabled for EDR.
Install and Activate Cloud Agent
Our cloud platform gives you continuous security updates through the cloud using lightweight cloud agents. Go to the Cloud Agent (CA) application to install agents and activate them for EDR. It's possible to activate existing agents for EDR with other capabilities like VM and PC.
|
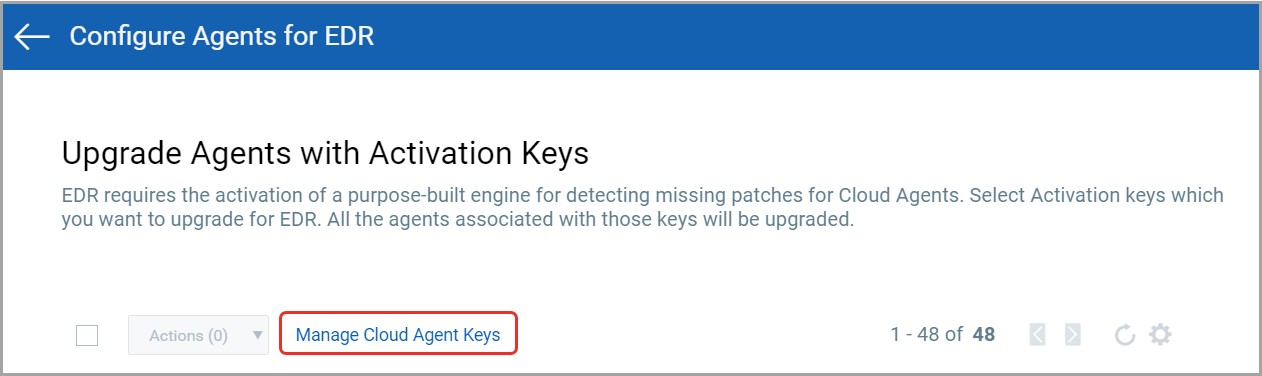
1. From the Configure Agents for EDR window, click Manage Cloud Agent Keys. You will be redirected to the Cloud Agent application. |
|
|
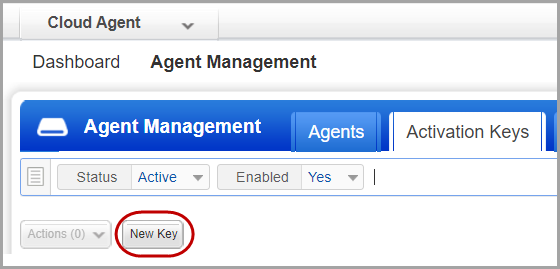
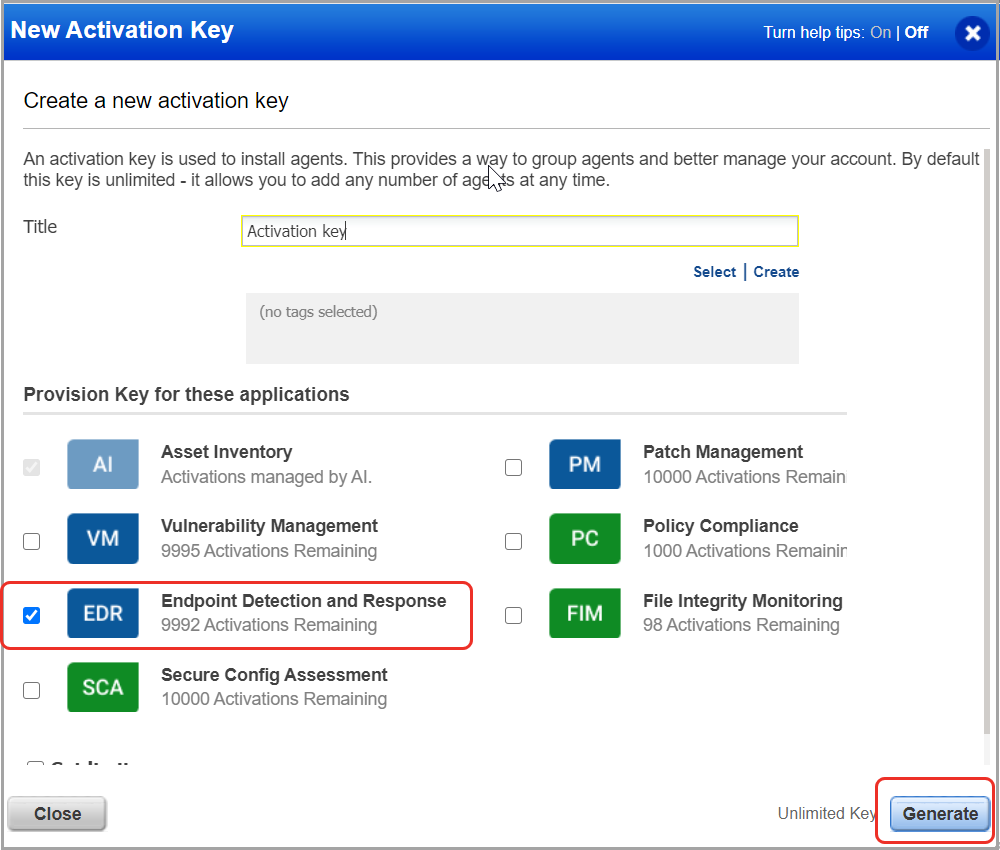
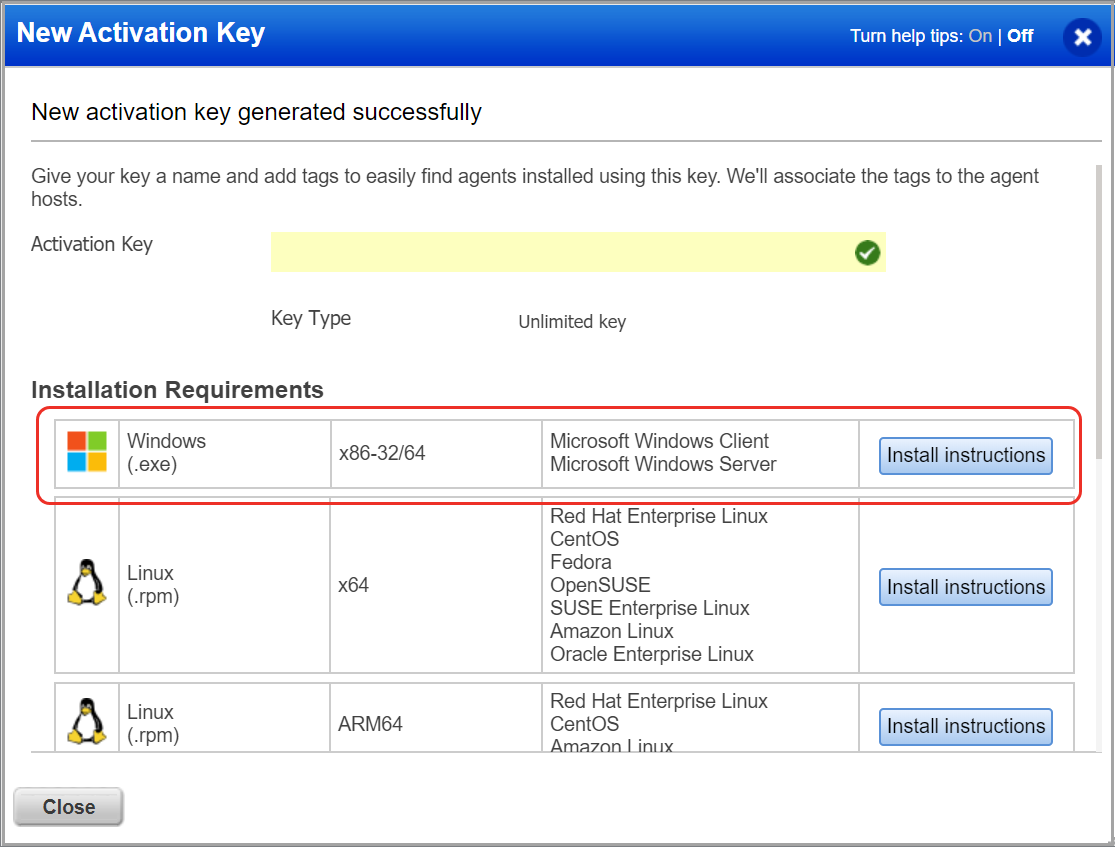
2. Click Agent Management > Activation Keys > New Key. Give a title and provision for the EDR application and click Generate. You can provide the same key for any other applications in your account. |
|
|
3. Click on Install Instructions against Windows (.exe). Want to do this step later?Want to do this step later? No problem, just exit the wizard. When you’re ready, return to your activation keys list, select the key you want to use, then Install Agent from the Quick Actions menu. |
 |
|
4. Review the installation requirements and click Download. Run the installer on each host from an elevated command prompt, or use a systems management tool or Windows group policy. Your agents should start connecting to our cloud platform. |
|
|
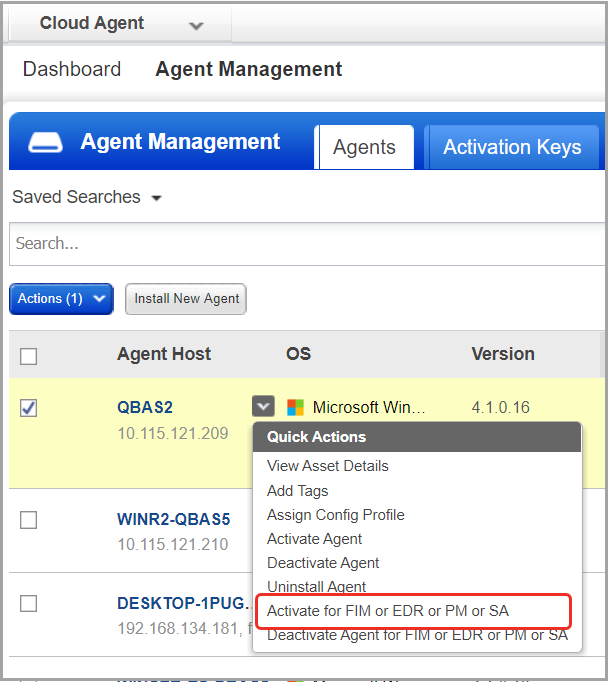
5. Activate your agents for EDR. Go to the Agents tab, choose an agent and Activate for FIM or EDR or PM or SA from the Quick Actions menu. (Bulk activation is supported using the Actions menu). In the Activate Agents window, enable the EDR agent and click Activate. |
|
|
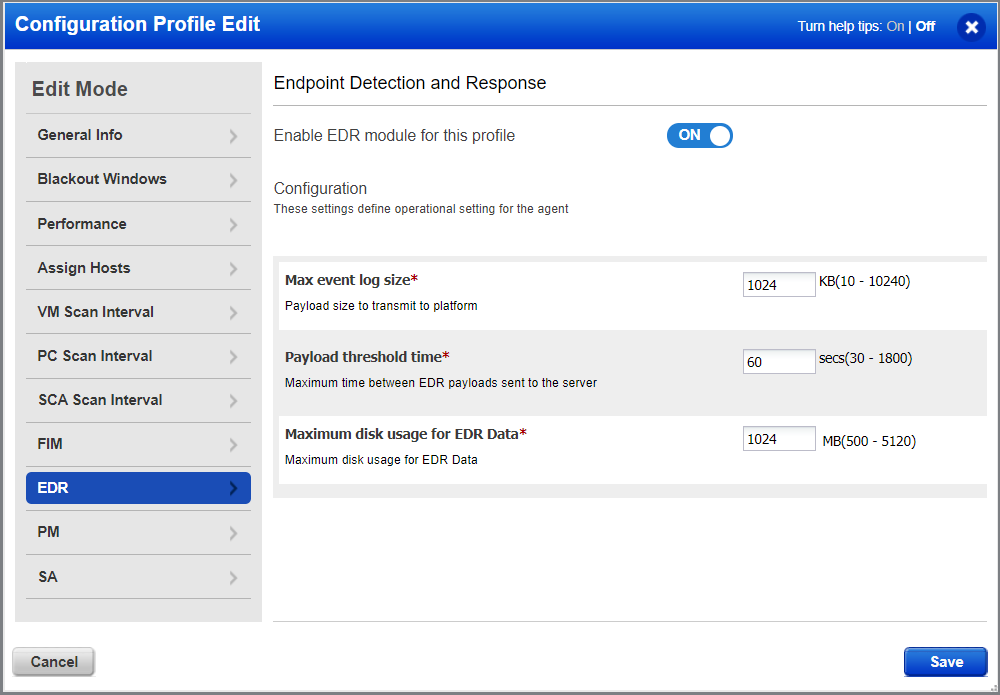
6. Enable EDR in a CA configuration profile. Toggle Enable EDR module for this profile to ON. This is required for EDR data collection. Configure the EDR artifacts that will be transfer to the Qualys Cloud Platform. Defaults are provided as shown, so this step is optional. You can configure values for max event log size, payload threshold time, and maximum disk usage for EDR data. Toggle a configuration setting to ON before you use it. You must set at least one configuration setting to ON if you have enabled EDR for this profile. Select EDR from the application picker, navigate to your Dashboard, and start investigating and remediating EDR incidents and events.
|
|