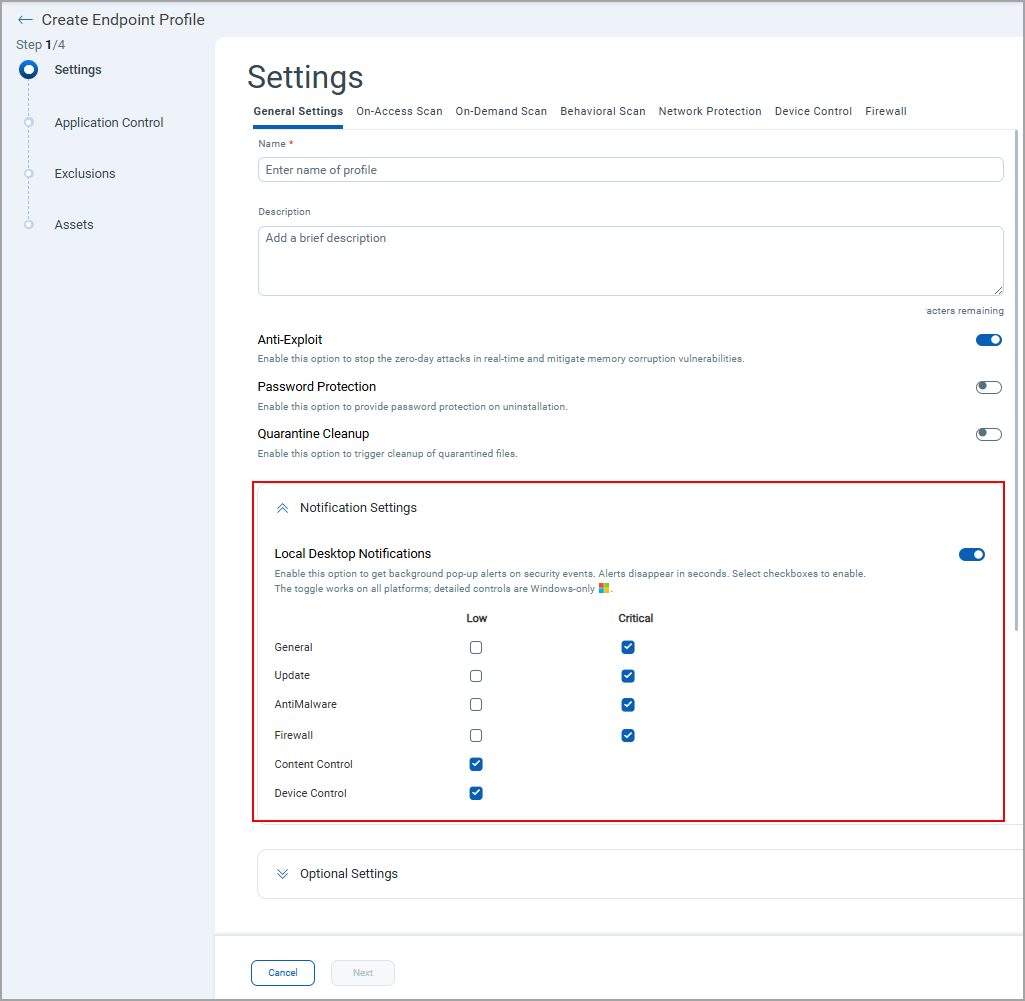
General Settings
The General Settings section defines the basic configuration for your Endpoint Security Profile.
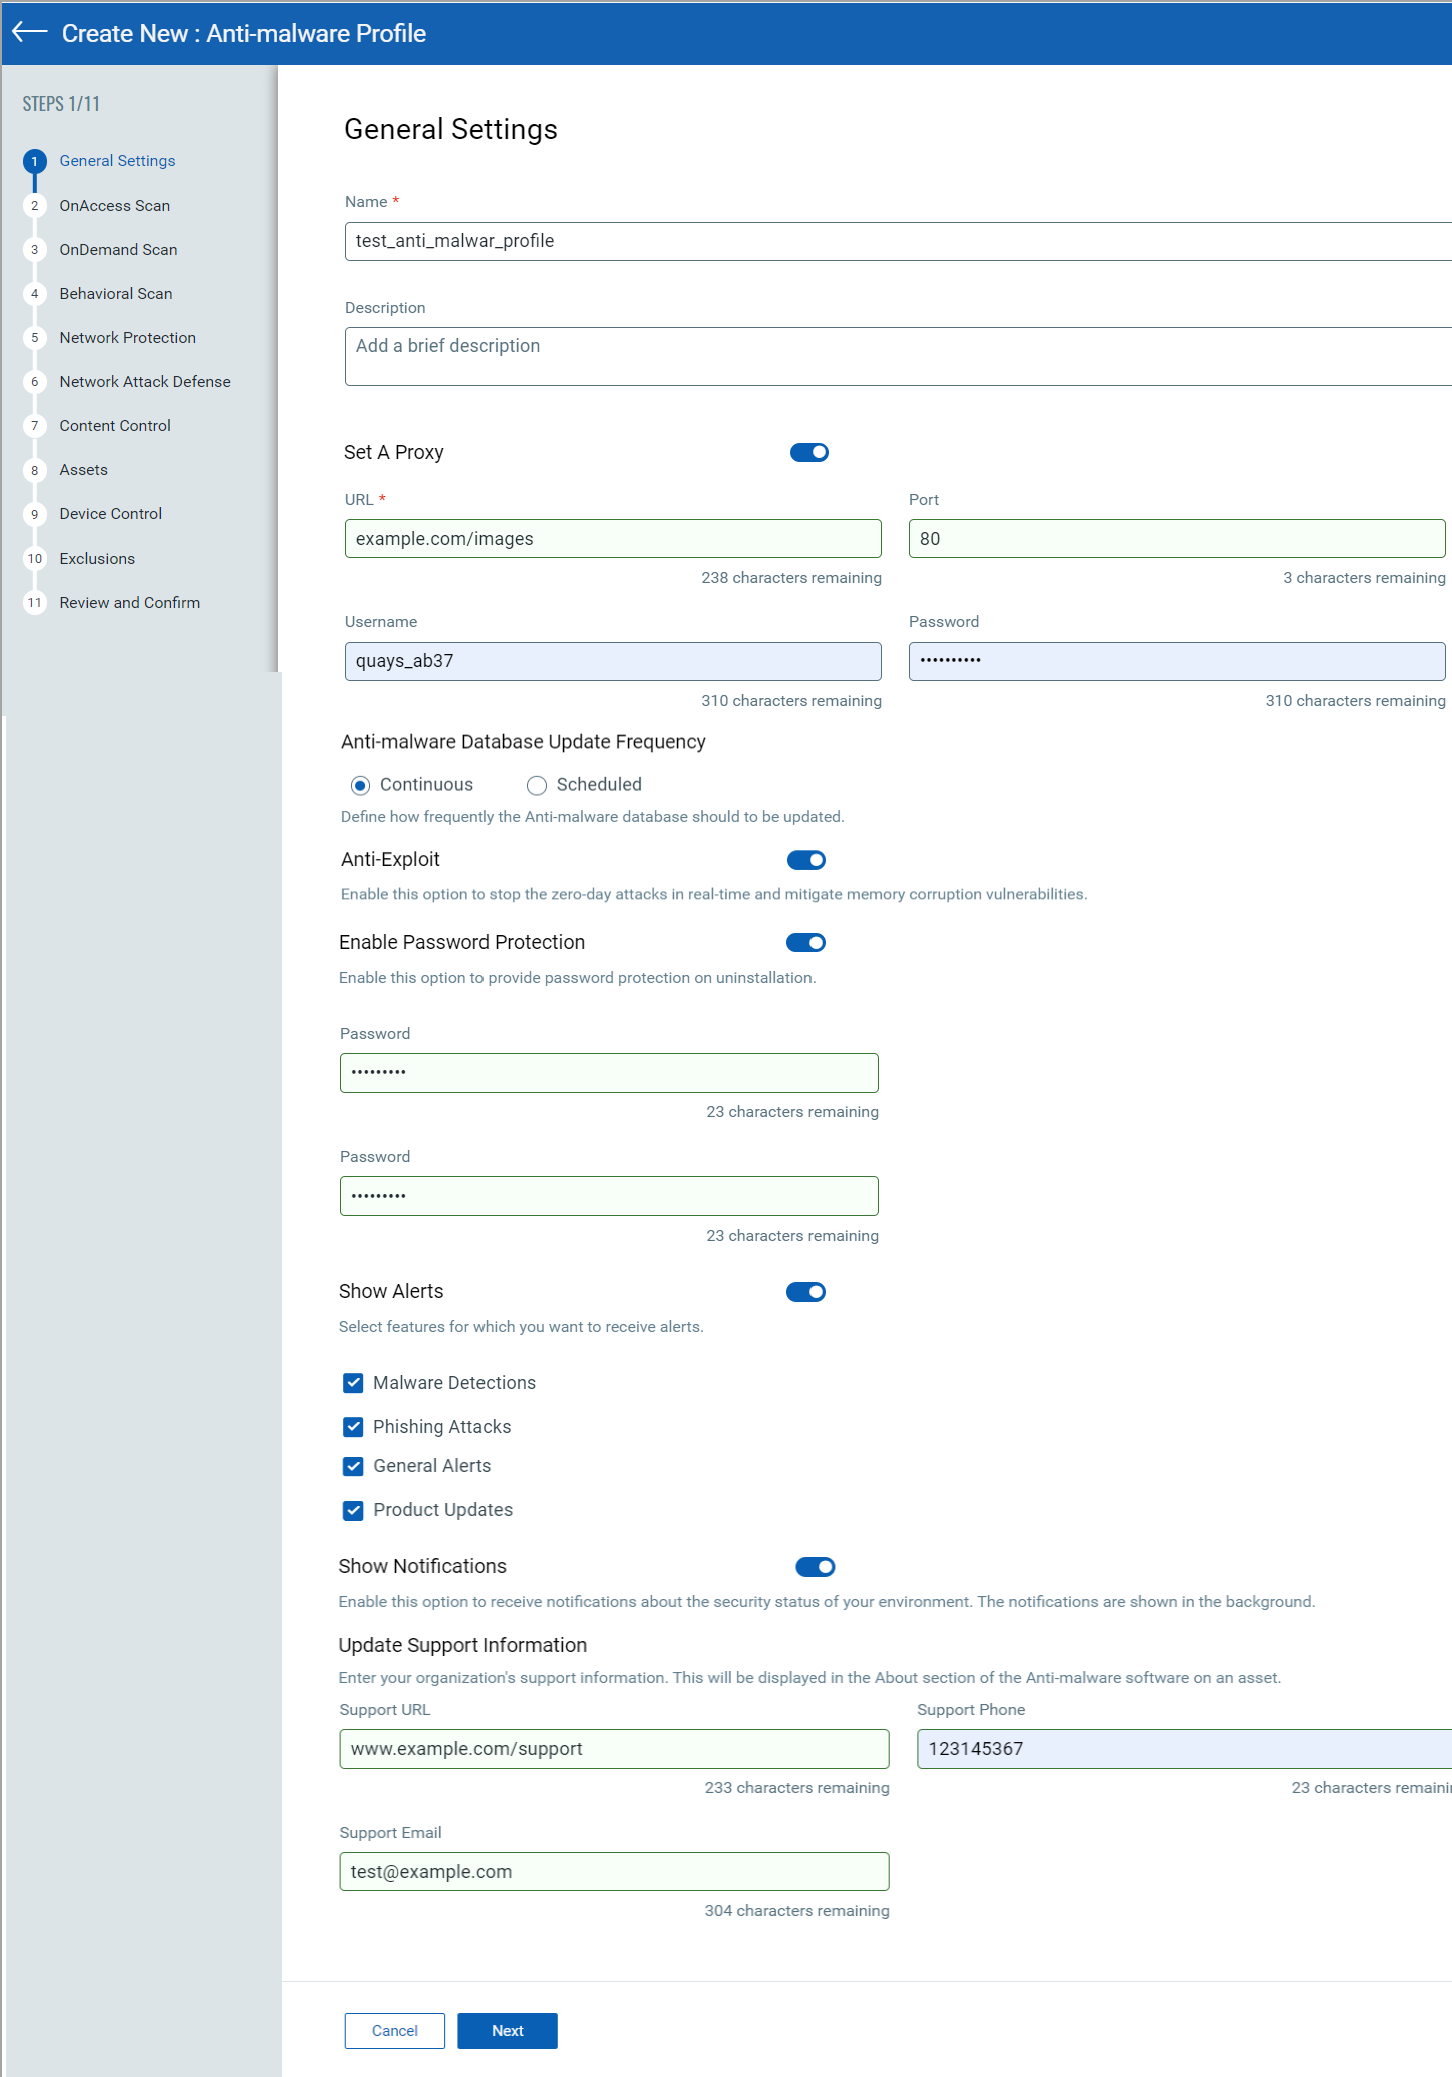
| Setting | Action |
| Name | Specify a unique name for the profile. |
| Description | Enter a short description to identify the profile's purpose. |
| Anti-Exploit | Activate this toggle to stop zero-day attacks in real time and mitigate memory corruption vulnerabilities. |
| Password Protection | Activate this toggle to provide password protection on uninstallation. |
| Local Desktop Notifications | Activate this toggle to receive security pop-up alerts that appear on the UI if a violation is detected on any particular asset. You can configure the pop-up alerts at a granular level by selecting feature groups and setting the severity to Low, Critical, or both. Critical shows severe-impact alerts, while Low shows minimal-impact alerts.
The toggle works on all platforms, but the granular notification selection is supported only on Windows. |
| Quarantine Cleanup | Activate this toggle to trigger the cleanup of quarantined files. |
| Update Frequency | Choose how frequently updates are downloaded from the Qualys platform. |
| Support Information | Provide your organization’s support URL, phone number, and email address. This information is displayed in the About section of the Anti-malware on an asset. |
| Proxy Configuration | Activate this toggle to ensure data protection and enhance security, and specify the proxy host, port, username, and password. |