Active Directory Setup Use Case
Create an attack path in Active Directory by configuring nested group memberships and delegated permissions, then validate the path in the Qualys ETM Identity UI.
Prerequisites
For Active Directory setup, you must meet the following prerequisites:
- Access to a Domain Controller.
- Administrative privileges to create and modify Active Directory objects.
- Qualys ETM Identity configured and synchronized with the Active Directory environment.
Step 1: Open Active Directory Users and Computers
- Access the machine where your Active Directory Domain Controller is installed.
- Log in to the Domain Controller.
- Open Active Directory Users and Computers (ADUC) from the Administrative Tools menu.
The Active Directory Users and Computers console is displayed.
Step 2: Create an Organizational Unit (OU)
- In the Active Directory Users and Computers (ADUC) console, locate and expand your domain.
- Right-click the domain name and select New > Organizational Unit.
- Enter CorpDemo as the Organizational Unit name and click OK.
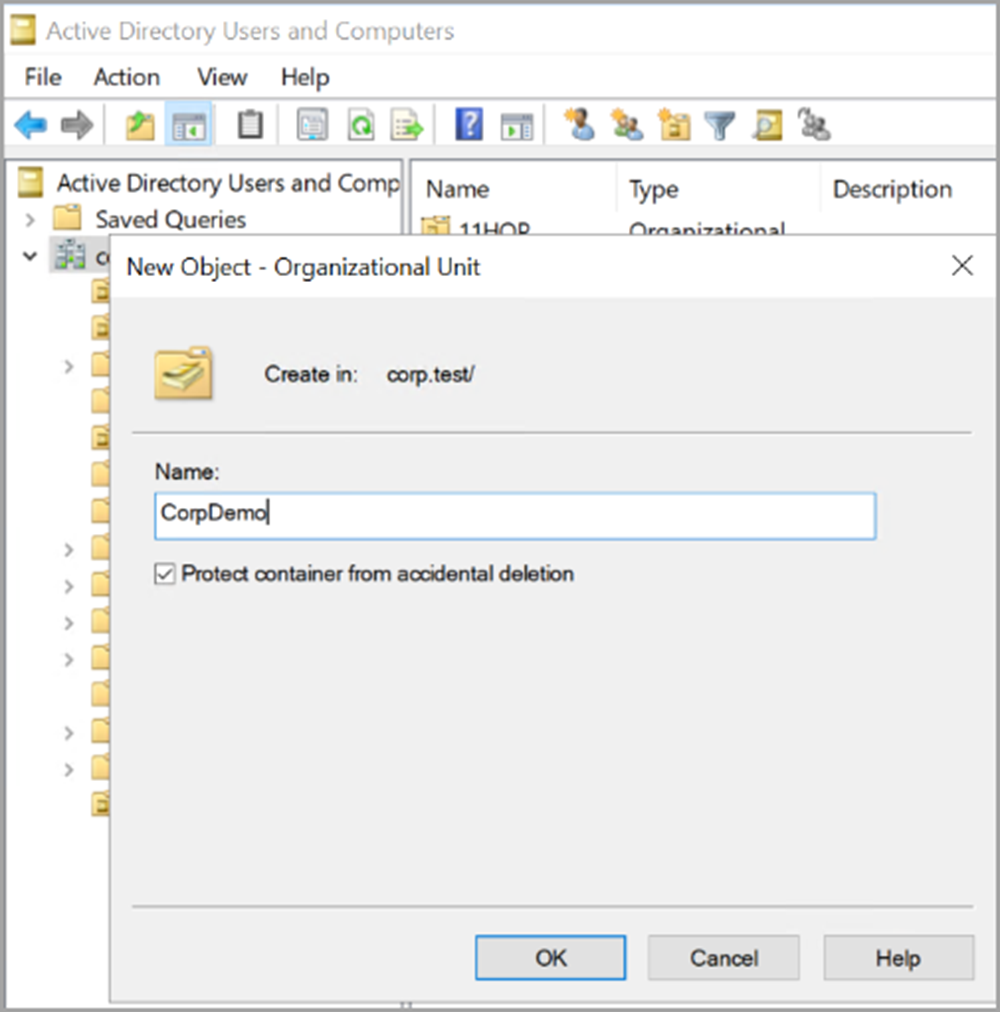 .
.A new Organizational Unit named CorpDemo is created under the domain.
Step 3: Create Objects Within the Organizational Unit (OU)
- Right-click the CorpDemo Organizational Unit (OU).
- Select New and create the required objects:
- User: TestUser
- Group: HR
- Group: Finance
- Computer objects (optional, as required for testing)
- Complete the creation wizard for each object.
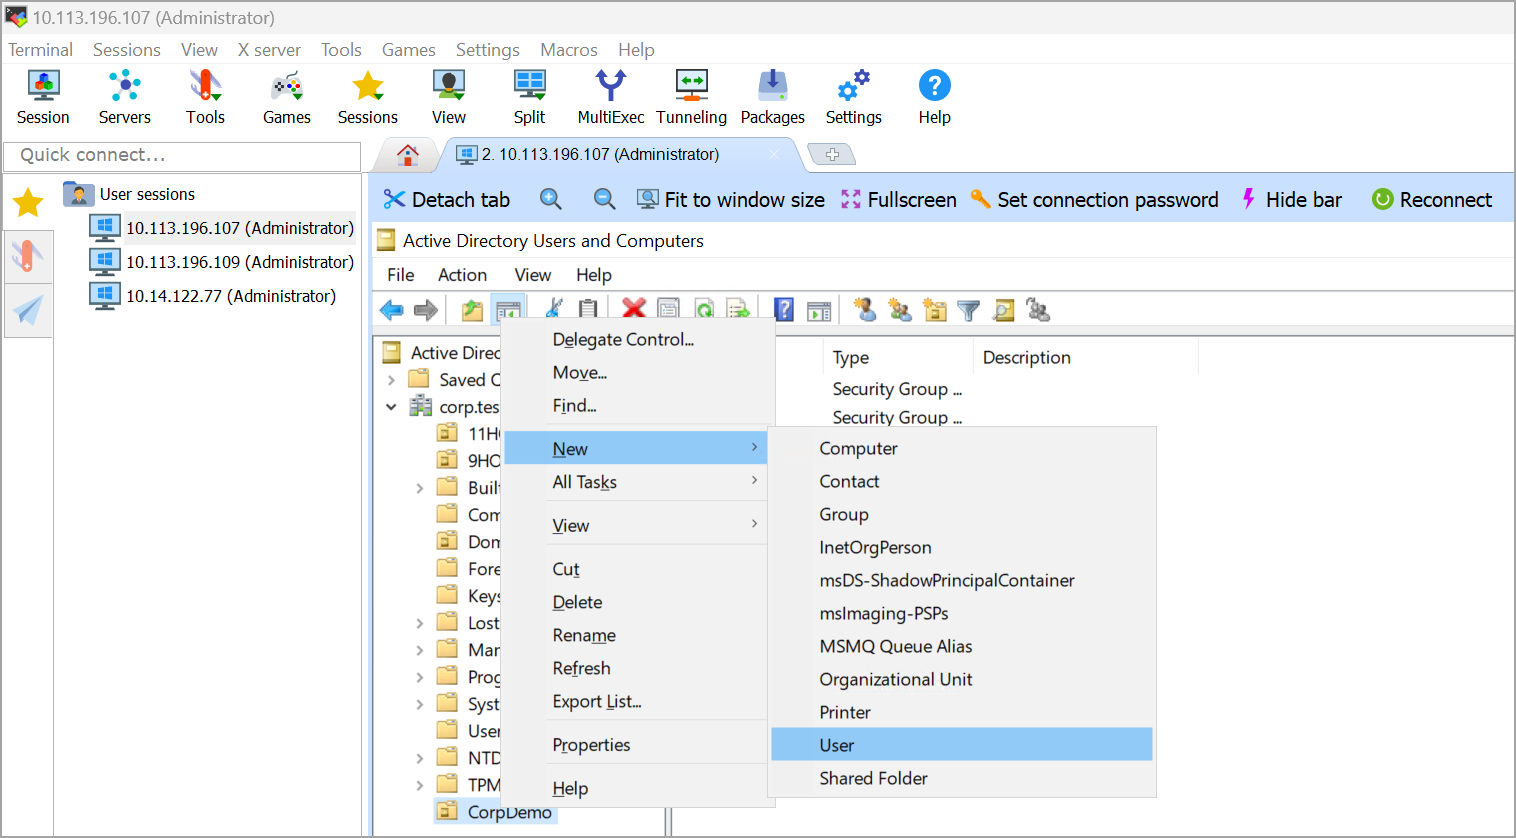
The required users, groups, and computer objects are successfully created within the CorpDemo OU.
Step 4: Add the HR Group to the Finance Group
- Right-click the HR group and select Properties.
- Open the Member Of tab, and click Add.
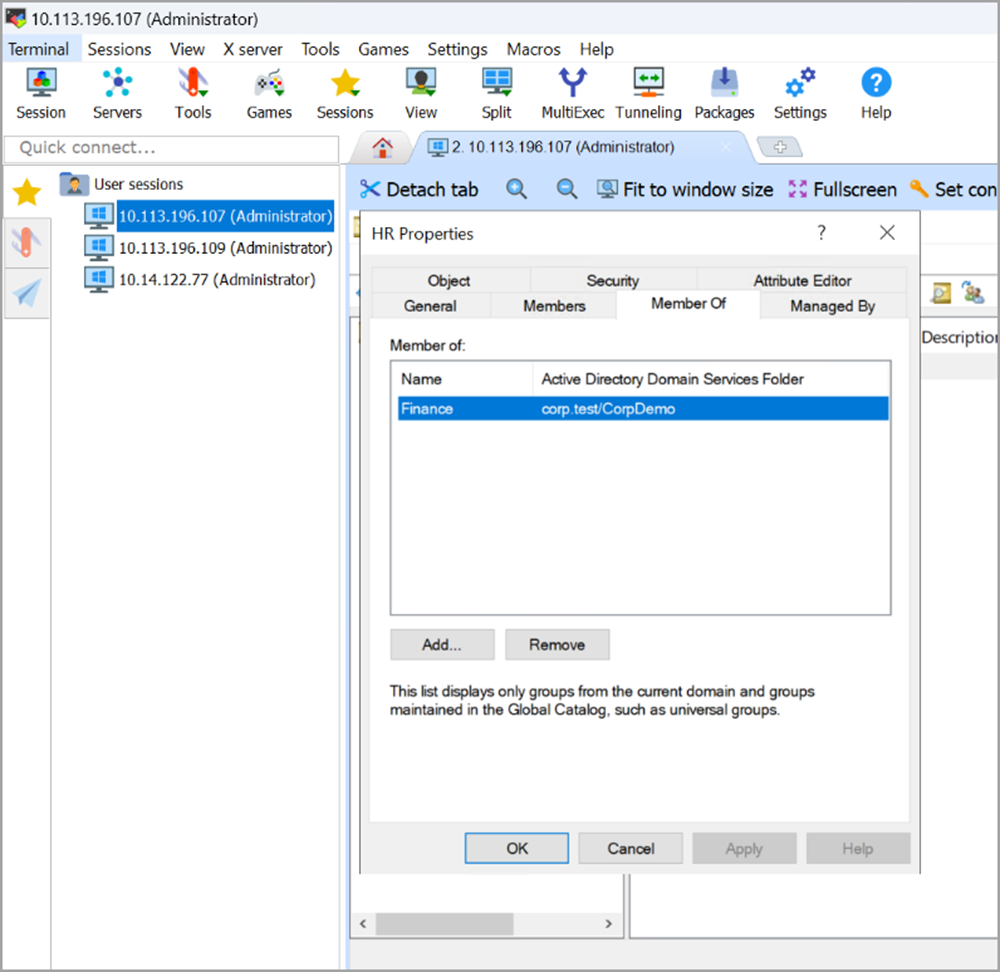
- Enter Finance, click Check Names, and click OK.
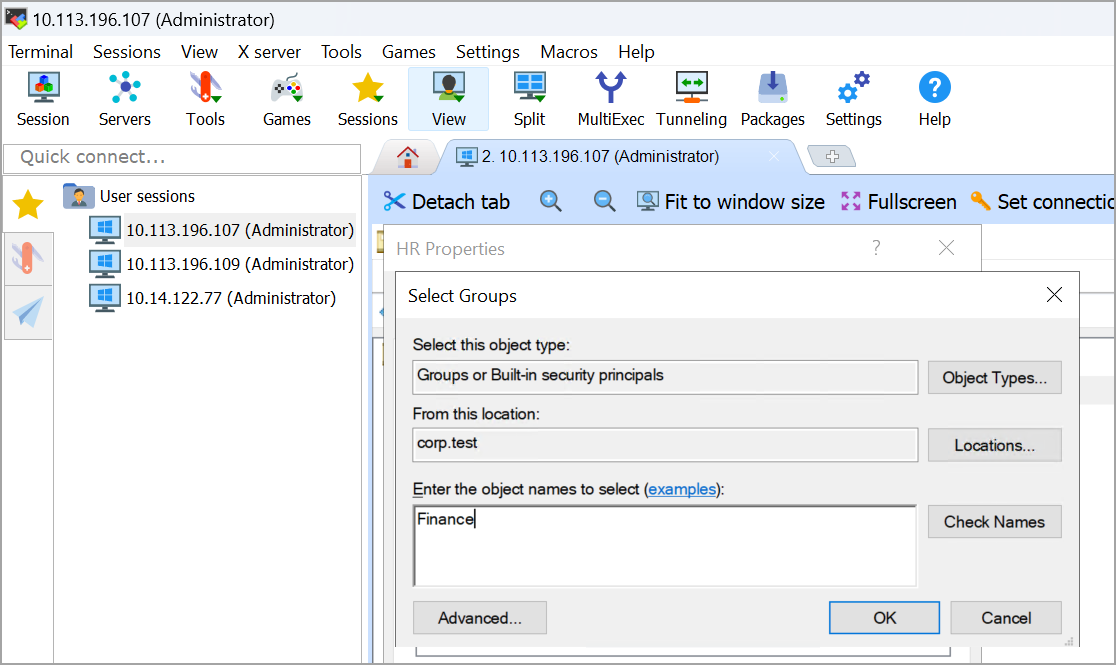
- Click Apply, then OK.
The HR group becomes a member of the Finance group.
Step 5: Assign Security Permissions
- Right-click the Finance group and select Properties.
- Open the Security tab, select the HR group.
- Grant the required permissions (for example, Full Control).
- To save the permissions, click Apply, then OK.
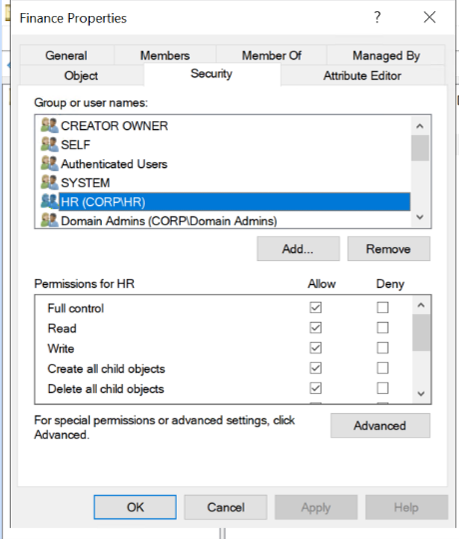
The HR group receives the assigned permissions on the Finance group.
This configuration creates a potential attack path by combining group membership relationships with delegated permissions.
Step 6: Verify the Attack Path in Qualys ETM Identity
- Navigate to Cloud Agent and run the On-Demand Scan.
It may take some time to update. For detailed steps on how to run the on-demand scan, refer to the Cloud Agent Online help.
- Wait for Active Directory changes to be synchronized with Qualys ETM Identity.
- Open the ETM Identity user interface.
- Navigate to the Attack Path Analysis view.
The newly created attack path is displayed in the Attack Path Analysis graph.
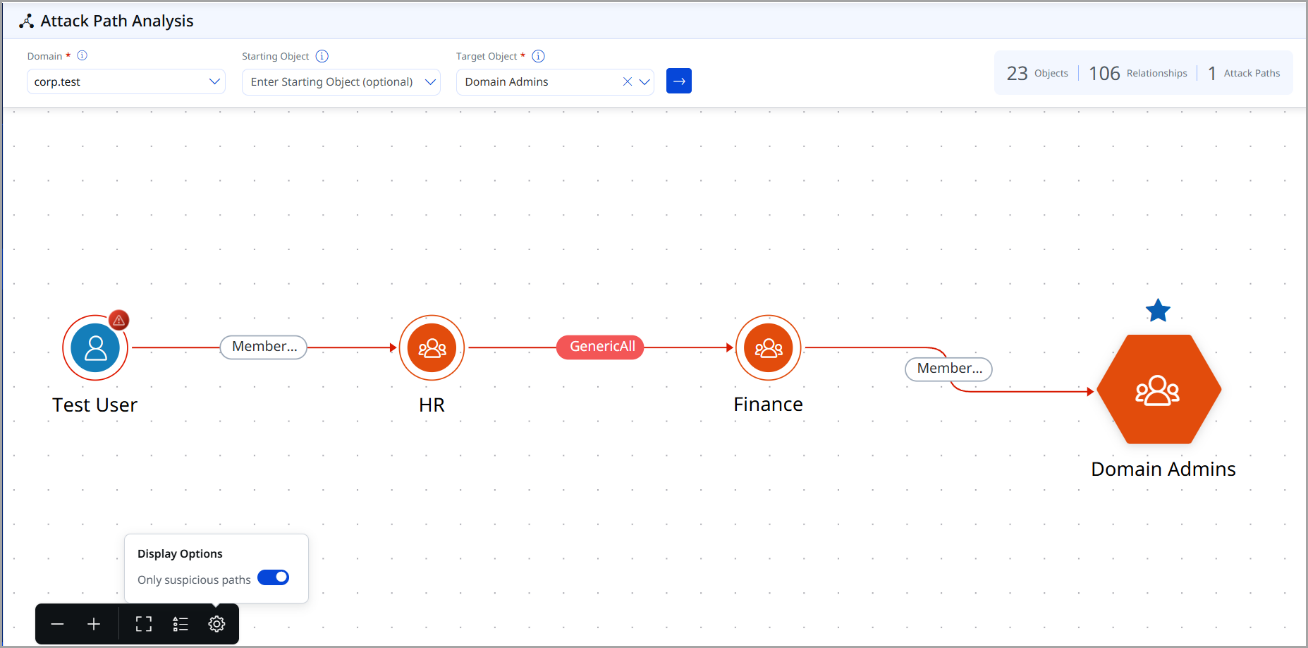
Understanding the Visualization
- The visual graph shows how access can propagate through group memberships and delegated permissions.
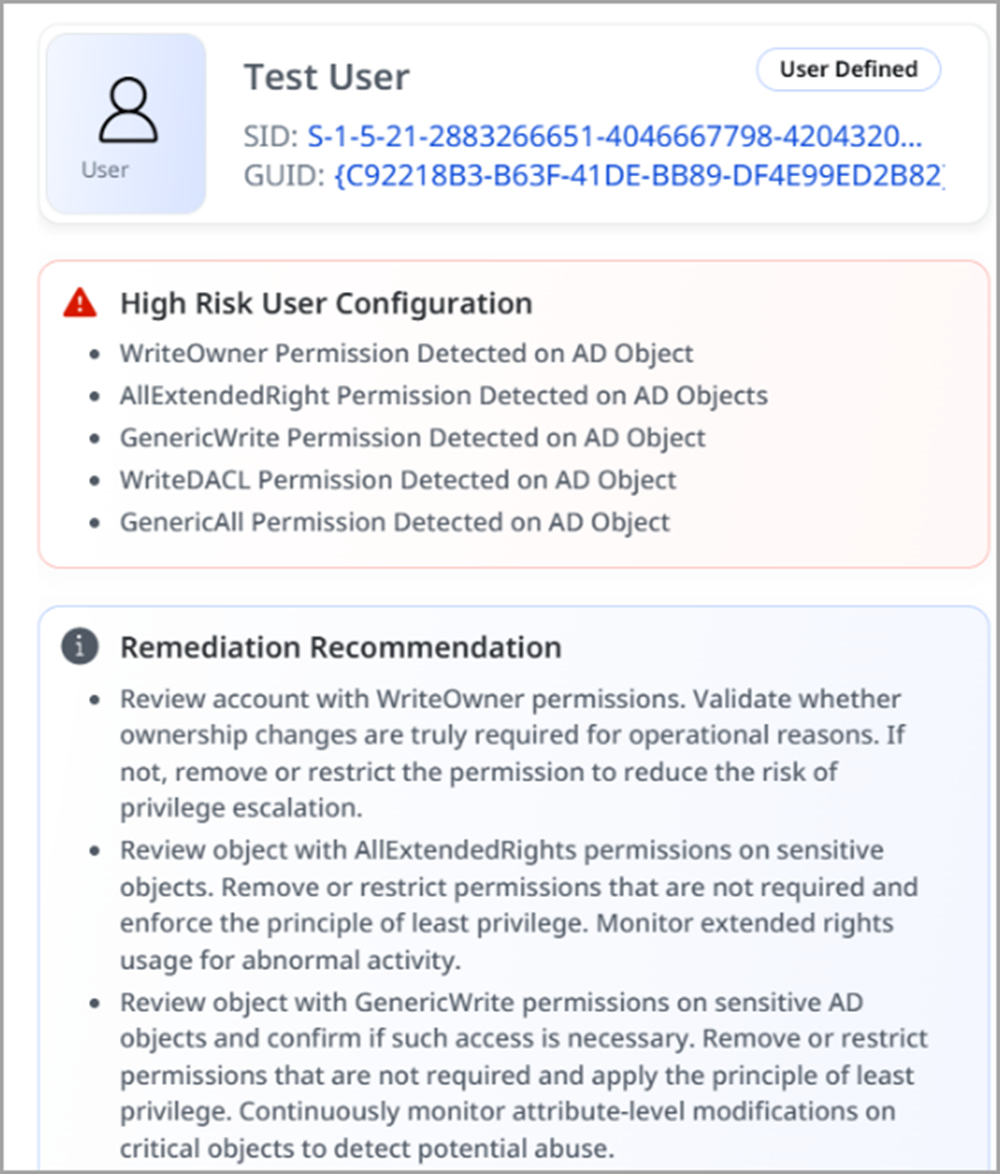
- Each node represents an identity object, such as a user, group, computer, or permission relationship.
- The attack path highlights relationships that could potentially be exploited by an attacker to gain elevated access.
- Select any highlighted or suspicious object to view remediation recommendations and additional risk details.
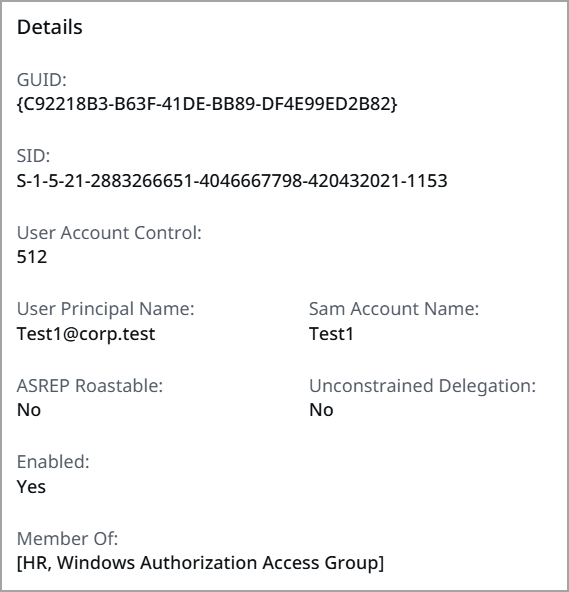
For more details on how ETM Identity Attack Path Analysis identifies and visualizes identity-based risks, refer to the Qualys Attack Path Analysis documentation.