Creating a User
If you have administrator permissions, you can create users and assign them roles to grant access to the application and its required permissions.
- You can directly assign a user to a business unit in your account.
- Assigned asset groups identify the assets (IP addresses, domains, and scanner appliances) the user can access for scanning, reporting, etc. If the user is in a business unit, then only the asset groups in the business unit are available.
To create a user, complete the following steps:
- On the User Management tab, click Create User. Select either of the two options as per the user role you want to create:
- Create Reader User
- Create Manager UserYou have further options to create Unit Manager, Auditor, Scanner, Administrator, Remediation User, Contact, and User Administrator user roles. You can change the type of user role in the following step.
- On the General Information tab, perform the following:
- Enter the details for the mandatory fields: First Name, Last Name, Title, Phone, Email Address, Address 1, and Country.
- (Optional) Enter the details in the Fax, Address 2, State, ZIP Code, and External ID fields.
- On the Locale tab, select the required Language, Date Format, and Time Zone from the drop-down list.
- On the User Role tab, perform the following:
- In the User Role field, select the type of user you want to create from the drop-down list.
- Select the required checkboxes for GUI and API access.
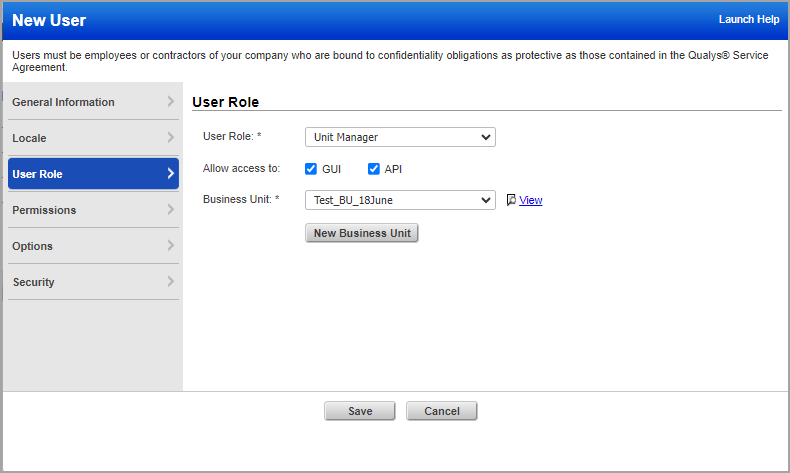
- In the Business Unit field, select the required business unit to be assigned to the user. To see the details of the selected BU, click View.
By default, Unassigned BU is selected for the Remediation User, Manager, and Auditor user roles. This default selection differs as per the application and its user roles.
- (Optional) To create a new BU, click New Business Unit. This option is available only for the Unit Manager user role.
- (Optional) On the Asset Groups tab, select the asset groups to be assigned to the user. You can add or remove multiple asset groups.

The Asset Groups option is available only for Scanner, Reader, Contact and Remediation User role. This selection differs as per the application and its user roles.
- On the Permissions tab, select the checkboxes for the permissions to allow the user to perform the listed actions.
- On the Options tab, select the required options for which and when the user must receive notifications for.
- On the Security tab, perform the following:
- Select the VIP two-factor authentication checkbox to enable two-factor authentication for the user account.
- Select the SAML SSO checkbox to enable the SAML SSO.
- Enter the User Session Timeout value in minutes.
- Click Save.
A success message about the user creation is displayed.
The created user is displayed on the Users > User Management dashboard.
You can edit, add or remove tags and add or remove tags to scope for the user. For more information, see Managing Users.