Create Actions and Alert Rules
The Responses tab in the ETM application allows you to set up rule-based alerts for resources that might fail critical evaluations, helping fix resource misconfigurations. Instead of actively monitoring the system, you can use these alerts to stay informed about changes or significant findings as soon as the rules are met.
Benefits
- Triggers alerts using alerting tokens in the Rule Query.
- Receive alerts using the Trigger Criteria such as Single Match, Time-Window Count Match, and Time-Window Scheduled Match.
- Notifies alerts via Email or Slack messages.
Creating a New Action from Actions
You can create a new action to receive an alert when the rule is triggered. Alerts are initiated when events matching a condition are detected, and the action you configure for the condition match is triggered. Actions that you can choose are sent as alert messages by Email, PagerDuty, or Post to Slack.
Perform the following steps in the application to create a new action:
- From the Responses, navigate to Actions and click New Action.
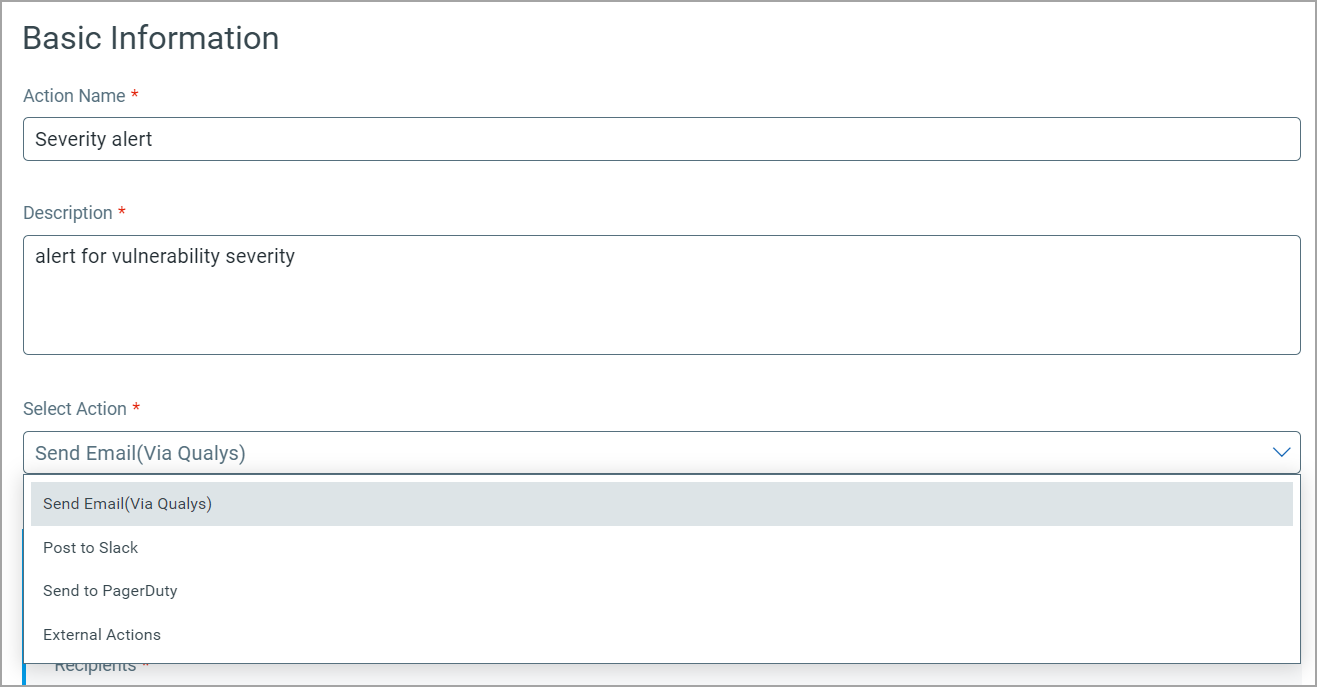
- Provide the Action Name and Description in the Basic Information section.
- From the Select Action, select an action to specify the mode of sending alert messages via any of the following actions:
- Send Email (via Qualys): Specify the recipients’ email IDs who will receive the alerts, the subject of the alert message, and the customized alert message.
- Post to Slack: This option allows you to post alert messages to your Slack account. Provide the Webhook URI to connect to your Slack account to post alert messages. In Default Message Settings, specify the alert message subject and the customized alert message.
- Post to Teams: This option allows you to post alert messages to your Microsoft Teams group. Provide the Webhook URI to connect to your Microsoft Teams account to post alert messages. In Default Message Settings, specify the alert message subject and the customized alert message. For Microsoft Teams integration, refer to Get Started with Microsoft Teams Alerting.
- Send to PagerDuty: This option allows you to send alerts to your PagerDuty account. Provide the service key to connect to your PagerDuty account. In Default Message Settings, specify the subject and the customized alert message.
- External Actions: Select the Connector Type to send alert messages to your ServiceNow account, Atlassian Jira.
-
Click Save.
Creating a New Rule from the Rule Manager tab
While creating a new rule, define the conditions and significant events that trigger the rules and send alerts. Perform the following steps in the VMDR application to create a new rule:
- From the Responses, navigate to Rule Manager and click New Rule.
- In the Rule Information section, provide a Rule Name and Description of the new rule.
- In the Rule Query section, specify a query for the rule. The system uses this query to search for events. Use the Test Query to test your query. If the Qualys Query Language (QQL) is not supported, you will be notified via the error message. The following screenshot is an example of the Rule Details section:

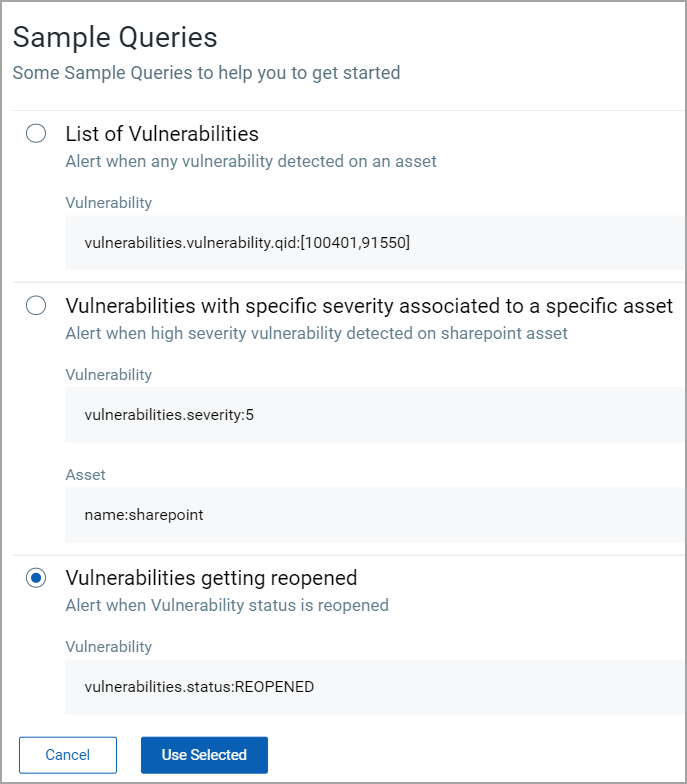
Alternatively, you can click Sample Queries to select from the predefined queries. The following screenshot is an example of Sample Queries:
- In the Trigger Criteria, select the trigger criteria that match the rule query. You can choose the following Trigger Criteria from the drop-down menu:
For Select Time-Window Count Match and Select Time-Window Scheduled Match, you can aggregate the alerts from the Aggregate Group option by selecting Vulnerability QID, Vulnerability Title, Vulnerability CVE ID, and so on.
- Single Match: the system generates an alert whenever it detects an event matching your search query.
- Time-Window Count Match: The system generates alerts based on the number of events the search query returns in a fixed time interval. For example, an alert will be sent when three matching events are found within a 4-hour window.
- Time-Window Scheduled Match: the system generates alerts for matching events during a scheduled time. The rule will be triggered only when an event matching your search criteria is found during the time specified in the schedule. Choose a date and time range for creating a schedule, and specify whether it should run Daily, Weekly, or Monthly. For example, daily alerts with all matches should be sent in a scheduled window between 4 PM and 5 PM.
- In the Action Settings, choose the actions the system will perform when an alert is triggered. You can customize the alert message by inserting tokens.
- Click Save.