Configure Qualys Universal Technology Add-on for Splunk
Provide information to connect to the Qualys API Server and configure settings for collecting VMDR and WAS scan data.
To access this page, go to Apps > Manage Apps > Qualys Universal Technology Add-on (TA) for Splunk > Configuration.
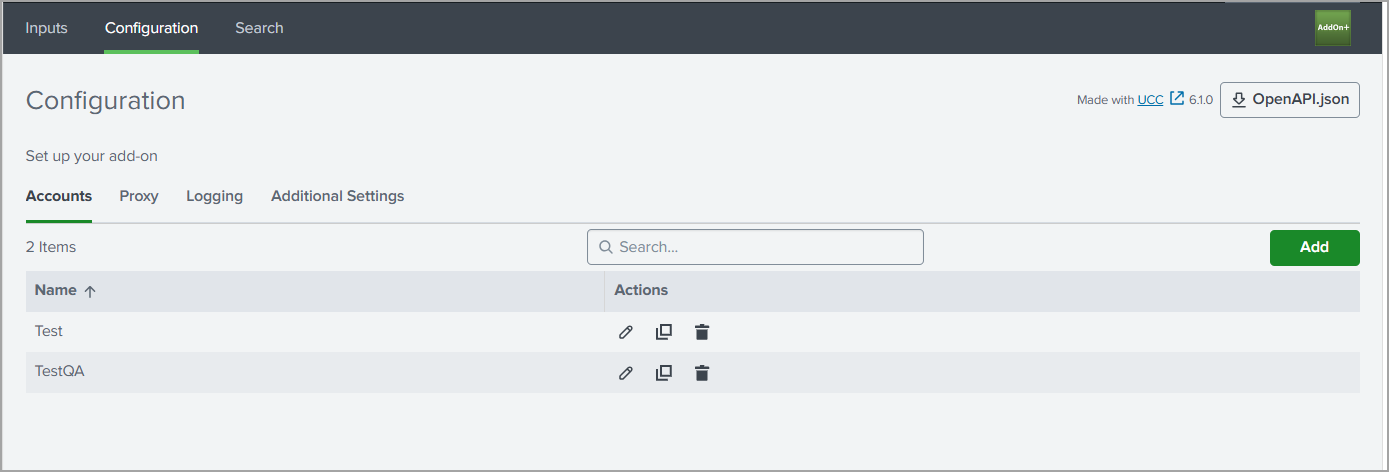
Accounts Configuration
The Accounts section in the Qualys Universal Technology Add-on (TA) for Splunk is used to define and manage the connection details required to authenticate with the Qualys platform. It allows you to store credentials, API endpoints, and authentication methods such as basic authentication or OIDC. Multiple accounts can be configured to support different Qualys subscriptions or environments. These account configurations are then used by data inputs to securely fetch VMDR and WAS scan data from Qualys into Splunk.
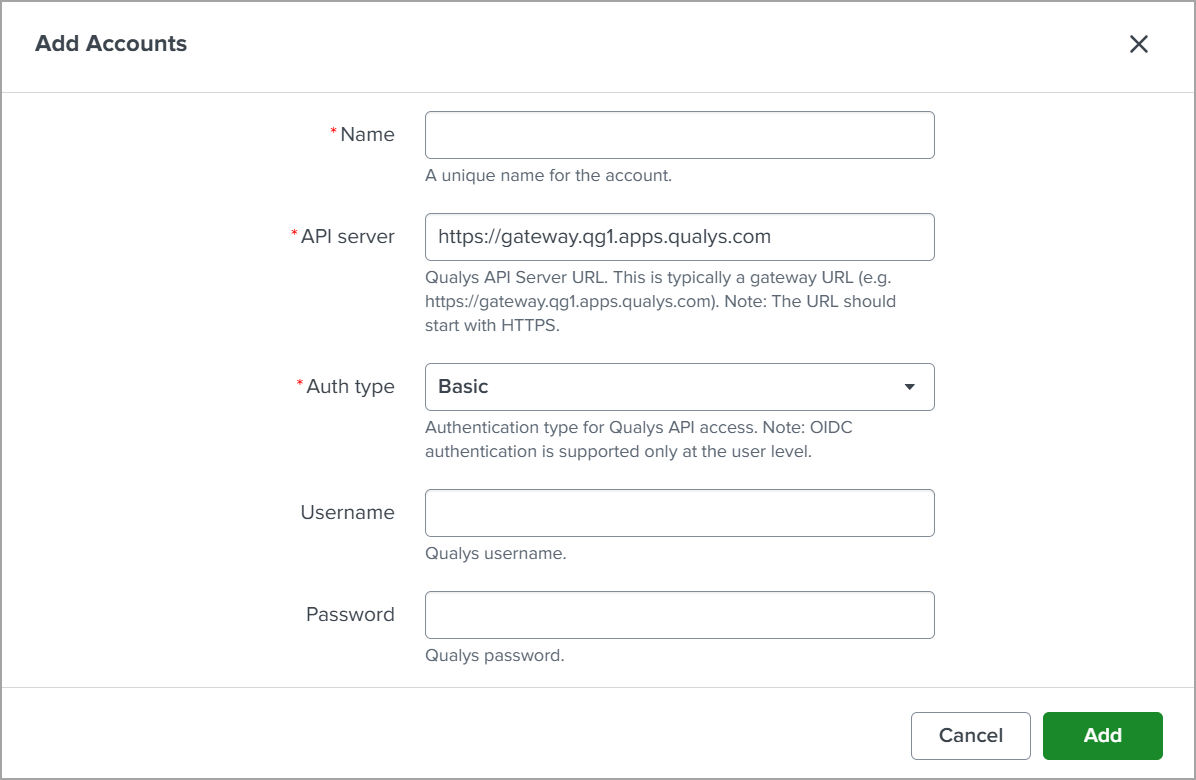
Add Account
To add an account, perform the following steps:
-
Go to Configuration > Accounts and click Add to open the account setup form.
-
Enter a unique Name to identify the Qualys account.
-
Provide the API Server URL (for example, the Qualys gateway URL starting with HTTPS). To identify your platform, see Identify your Qualys platform page.
Ensure that the URL begins with 'qualysapi', for example, https://qualysapi.abc.xyz.qualys.com.
-
Select the Authentication Type (such as Basic or OIDC) based on your setup.
Configure OIDC Authentication
Use this method if your Qualys environment is configured for OpenID Connect with Client ID and Client Secret.
Perform the following steps:
-
From the Authentication Type, select OIDC.
-
Provide the following required fields:
-
Client ID
Enter the Client ID received from your Qualys OIDC configuration. -
Client Secret
Enter the corresponding Client Secret.
-
-
Save the configuration.
Configure Basic Authentication
Use this method if your Qualys setup uses a standard username and password.
Perform the following steps:
-
From the Authentication Type, select Basic.
-
Provide the following required fields:
-
Username
The Qualys username used for API access. -
Password
The password for the above username.
-
-
Save the configuration.
-
-
Click Add to save the configuration and enable its use for data collection in Splunk.
Proxy Configuration
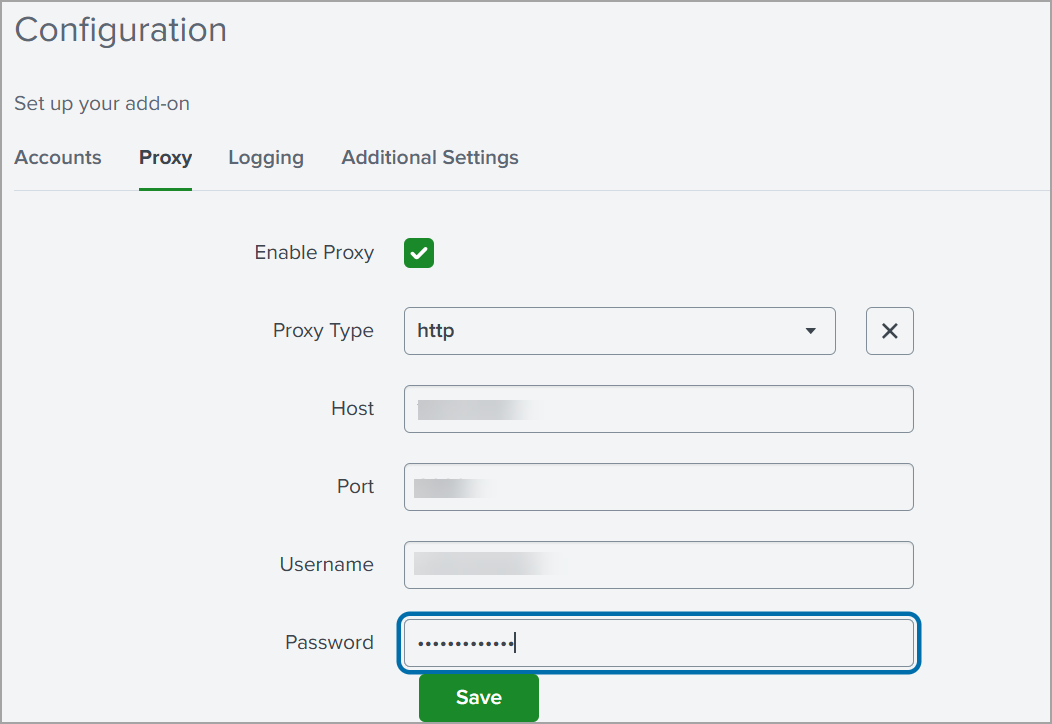
Use the Proxy tab to configure the add-on to communicate with the Qualys Platform through a proxy server. Configure these settings only if your environment requires outbound connections to pass through a proxy.
To configure a proxy server, perform the following steps:
-
Navigate to Configuration, and select the Proxy tab.
-
Select the Enable Proxy check box.
-
From the Proxy Type drop-down list, select the required proxy type.
-
In the Host field, enter the proxy server hostname or IP address.
-
In the Port field, enter the proxy server port number.
-
If proxy authentication is required, enter the Username.
-
Enter the corresponding Password.
-
Click Save to save the proxy configuration.
Logging Configuration
The Logging setting controls how activity and errors from the Qualys–Splunk integration are recorded. It allows adjusting the level of detail for monitoring and troubleshooting.
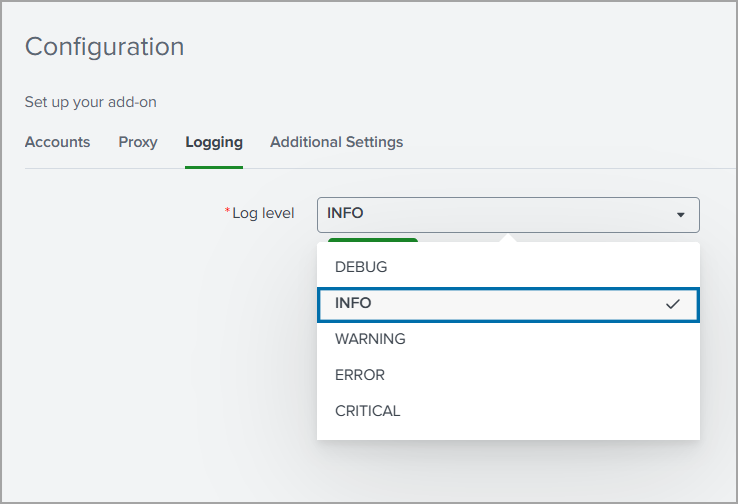
To configure Logging, perform the following steps:
- Navigate to Configuration > Logging in the add-on.
- From the Log Level dropdown, select the appropriate log level based on your requirement:
-
DEBUG
-
INFO
-
WARNING
-
ERROR
-
CRITICAL
-
-
Click Save to update the logging configuration.
Verify logs in Splunk to ensure the selected level is capturing the required information.
Additional Settings
The Additional Settings section allows fine-tuning of the Qualys–Splunk integration by controlling behaviors such as log preservation and API timeout. It helps optimize performance and reliability when handling large data volumes or long-running API requests.
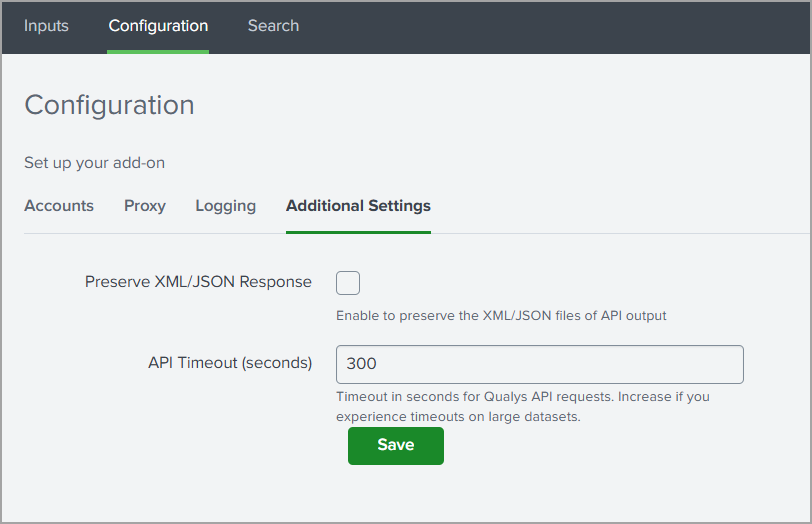
To configure Additional Settings, perform the following steps:
-
Go to Configuration > Additional Settings in the add-on.
-
Select Preserve XML/JSON Response if required to store API response data in XML/JSON format.
-
Enter the API Timeout (seconds) value based on data volume and performance needs.
The default API timeout is set to 300 seconds; it can be increased up to 600 seconds. -
Click Save to apply and store the configuration changes.
Next Step
Step 2 b: Configuration Settings