Installing Cloud Agents for Patch Management
Agent installations are managed in Cloud Agent (CA).
Qualys Cloud Agent Platform
Our revolutionary platform gives you continuous security updates through the cloud using lightweight cloud agents. Go to Cloud Agent (CA) app to install agents and activate them for PM. It's possible to activate existing agents for PM with other capabilities that are available in VM and PA/PC modules.
Policy Audit (PA) is an enhanced version of Policy Compliance (PC). Depending on your subscription, you may view Policy Audit (PA) or Policy Compliance (PC) in your application.
Step 3: Enable Cloud Agent to Download Patches
Step 4: Activate Agent for Patch Management
Step 5: Activate PM in CA Configuration Profile
Watch Video | PM Activation and Setup
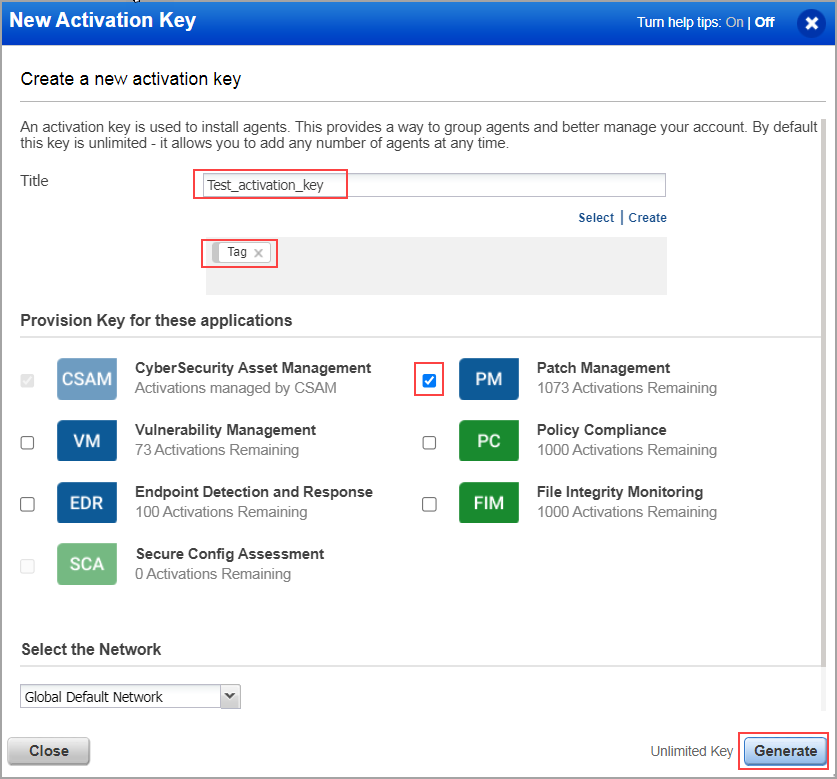
Step 1: Create Activation Key
1. Go to the Cloud Agent (CA) application from the app picker.
2. Create an activation key. Go to Activation Keys, and click New Key. Enter the title of the key. Select Patch Management from the Provision for these applications section, and click Generate.
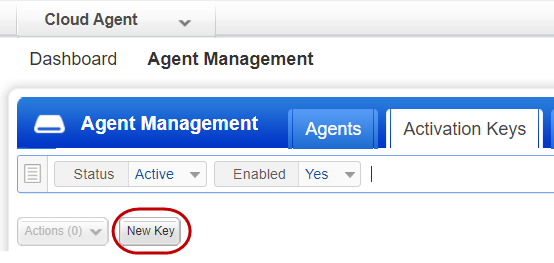
3. As you can see, you can provision the same key for any of the other applications in your account. To understand the license numbers, see About Available License Count.
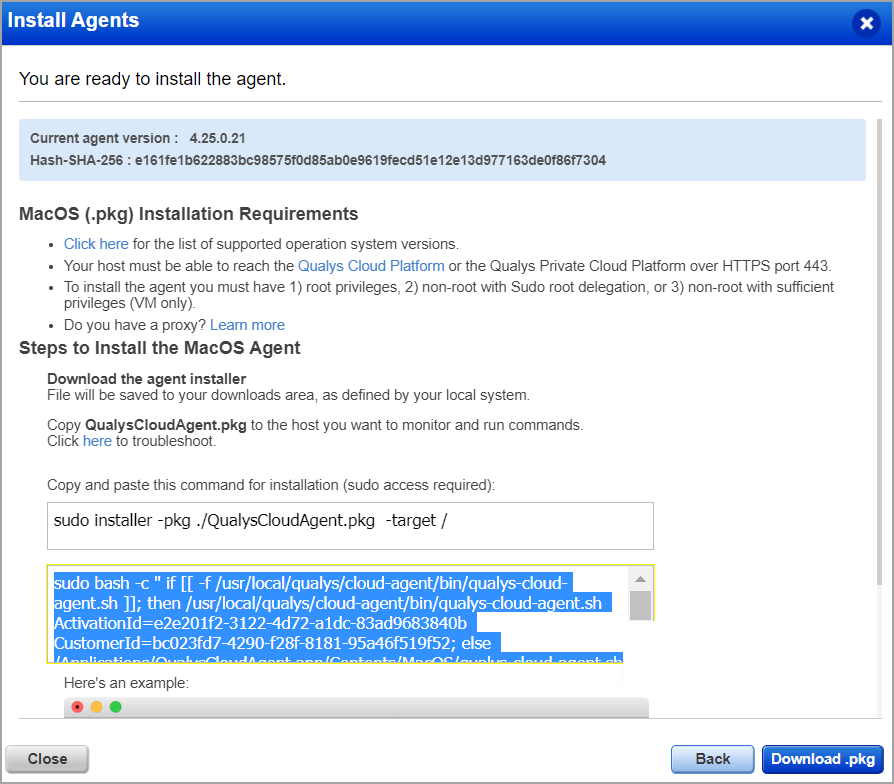
Step 2: Download Installer
1. Based on your preference, click Install instructions next to Windows (.exe), Linux (.rpm), or Mac (.pkg )
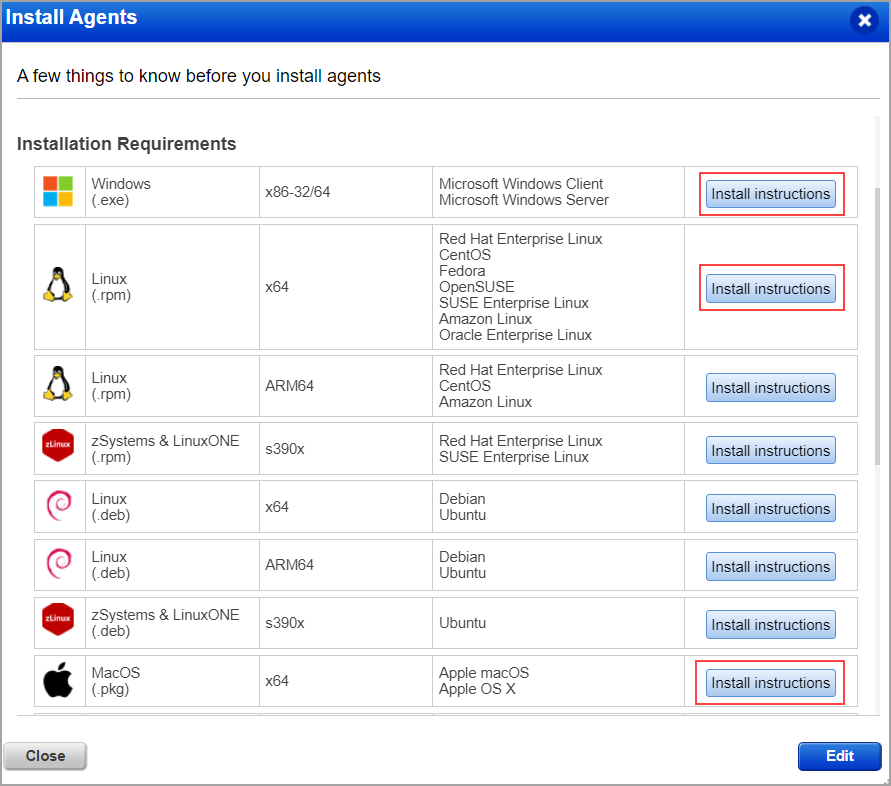
2. Review the installation requirements and click Download.
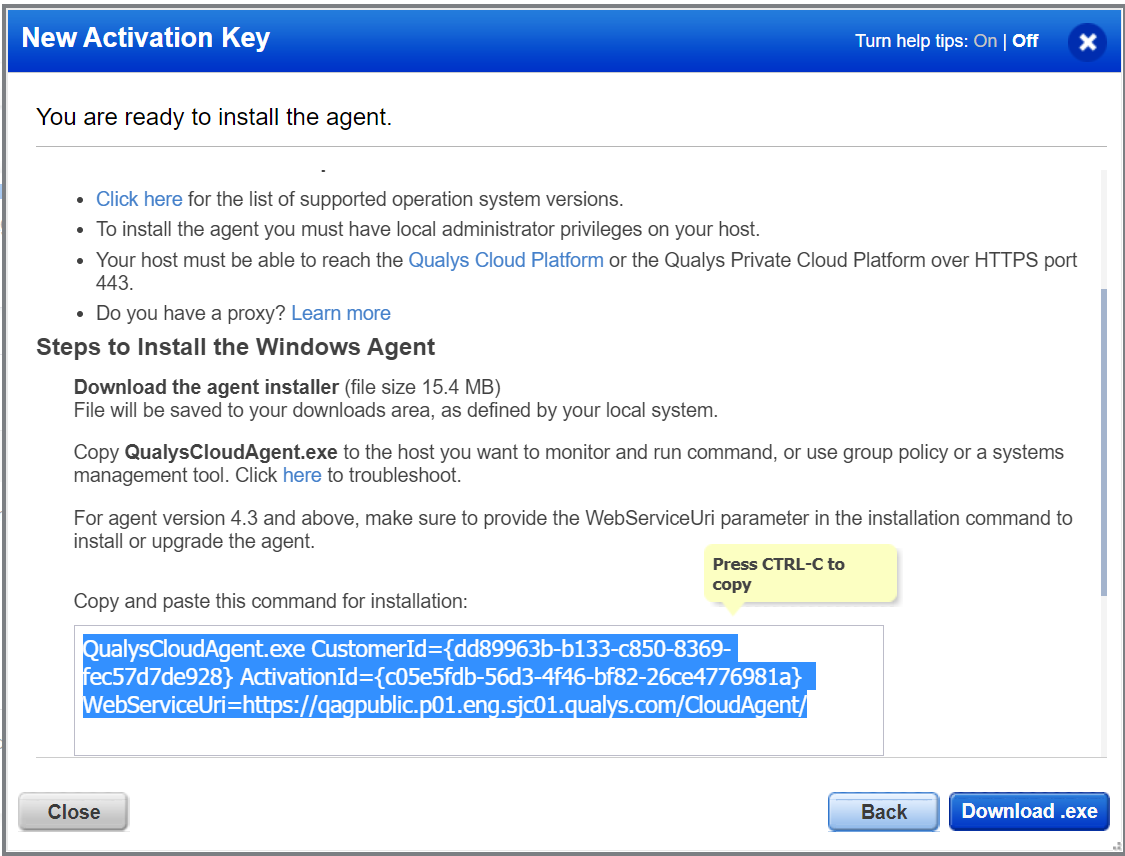
You'll run the installer on each system from an elevated command prompt, or use a systems management tool or Windows group policy.
Your agents should start connecting to our Qualys Enterprise TruRisk™ Platform.
For Windows agent:
For Linux agent, to enable patch installation on Linux assets, ensure the following:
- The Agent must be running with the root user or as a sudo user. You can configure users by using the Agent configuration tool.
- Supported YUM file version 3.2.29.
- YUM file must be configured with debugloglevel >= 2 Default is 2.
- The YUM file is configured with the correct proxy settings.
- The endpoint is subscribed for active Red Hat subscriptions.
- If the proxy is configured for a machine, then add the same proxy: /etc/apt/apt.conf.d/proxy.conf
Example:
Acquire::http::Proxy "http://<<proxy_ip_address>>:<<port>>"
Acquire::https::Proxy "https://<<proxy_ip_address>>:<<port>>"

To know the supported Linux operating systems and the supported agent versions for them, refer to the Cloud Agent Platform Availability Matrix (PAM).
For Mac agent, ensure the following:
- Mac agent binary 4.25 or later for x64, x86_64, and binary 4.26 or later for arm64 architecture. Contact your Technical Account Manager (TAM) to get these binaries.
You can deploy patches that are available in the following operating system repositories:
- macOS 10.15 Catalina
- macOS 11 Big Sur
- macOS 12 Monterey
- macOS 13 Ventura (3rd party and OS security update)
Your host must be able to reach your Qualys Enterprise TruRisk™ Platform (or the Qualys Private Cloud Platform) over HTTPS port 443. On the Qualys Enterprise TruRisk™ Platform, go to Help > About to see the URL your host needs to access. For more information about connectivity requirements/proxy settings refer to the platform-specific Cloud Agent Installation Guides available on https://www.qualys.com/documentation/.
Watch Video ![]() | Software Installation
| Software Installation
Step 3: Enable Cloud Agent to Download Patches
To ensure that the Cloud Agents can successfully download patches, you must add the download URLs to the allowlist. Click here to refer to the list of URLs that you must add to the allowlist.
Watch Video ![]() | Agent Enablement
| Agent Enablement
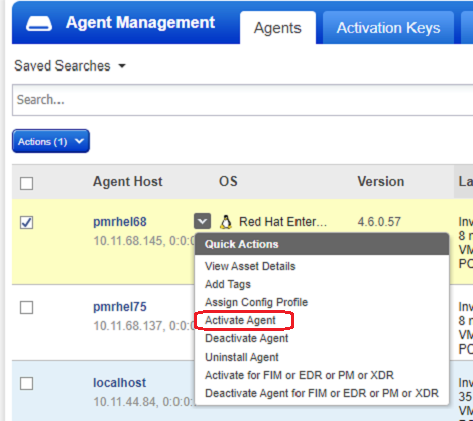
Step 4: Activate Agent for Patch Management
- Go to the Agents tab, and from the Quick Actions menu of an agent, click Activate for FIM or EDR or PM or SA. (Bulk activation is supported using the Actions menu).
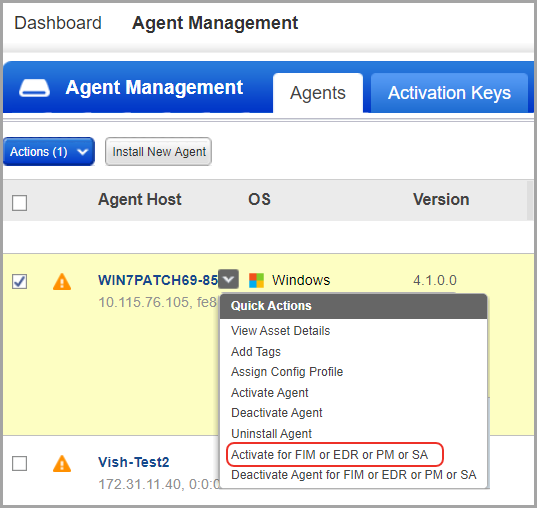
For Linux assets, you also need to activate Vulnerability Management (VM) along with PM because the missing patches for Linux assets are derived from the vulnerability scan performed by the agent. - Click Activate Agent and activate VM to see the missing patches for Linux assets on the Patch Management UI.
Watch Video ![]() | Activate Assets
| Activate Assets
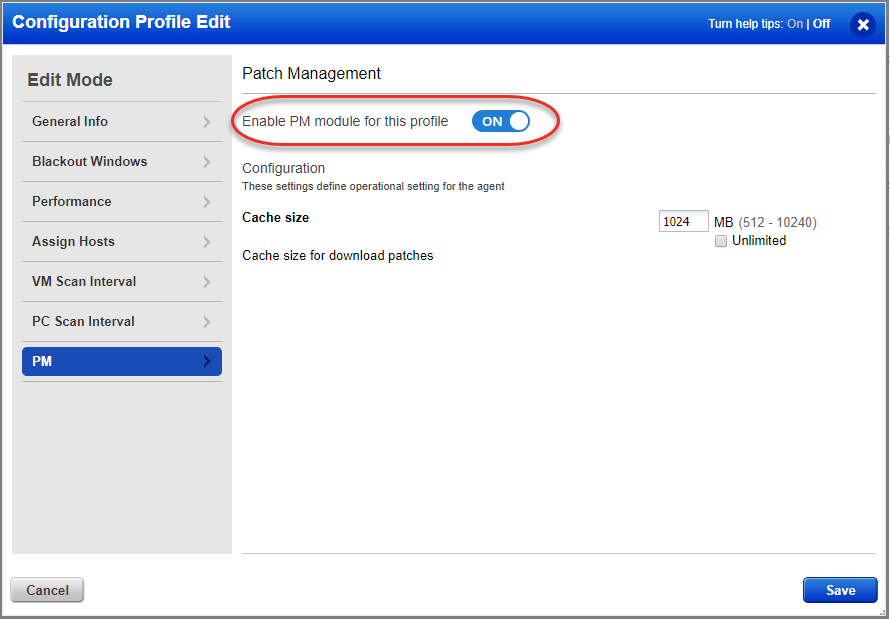
Step 5: Activate PM in CA Configuration Profile
Create a new CA configuration profile for Patch Management and then assign the CA configuration profile for your cloud agents. On the PM tab, toggle “Enable PM module for this profile” to ON.
You must add tags to include assets that need to be licensed. You can apply patches to the licensed assets only.
You're ready
Select PM from the application picker and then create a deployment job to start installing patches on your assets.