Create Isolation Job
You can create isolation job for the assets that are vulnerable and do not have a patch or mitigation available. The QID may contain one or more CVEs and each CVE has associated Qualys Detection Score (QDS) score.
Navigate to the VMDR > Vulnerabilities tab and select the QID to isolate. From the Quick Actions menu, click View Risk Elimination. You are redirected to the Isolation > Eliminations tab. Click Isolate Now.

If your asset is not activated, a confirmation window to activate the asset for isolation is displayed. After activation, proceed to create the isolation job. For more information, see Activate Agent for Isolation.
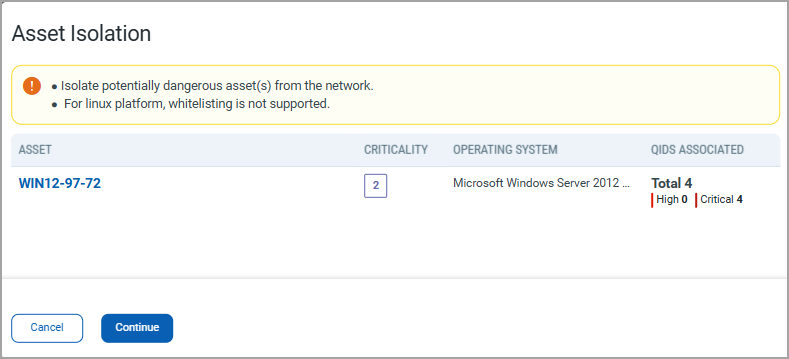
If asset is already activated, an Asset Isolation window that displays the selected asset is displayed. Click Continue.
Optionally, you can go to the Assets > Windows or Assets > Linux and select the assets you want to isolate. From the Quick Actions menu, click Add to New Job > Create Isolation Job or Add to Existing Job > Add to Isolation Job.
On the Create: Windows Isolation Job window, perform the following steps:
1. Basic Information
Enter a job title and description of the job in the respective fields and click Next.
2. Select Assets
The selected asset is automatically displayed on the screen.
Important to Know
- You can only remove assets but cannot add additional assets to the isolation job.
- If you remove an asset, the associated QID is also removed from the job.
- You need atleast one asset to save the isolation job.
- The common exceptions of applications, IPv4 and IPv6 addresses, and domains that are configured in the Asset Isolation Exceptions settings are pre-populated in the following sections.
- The additional exceptions that you configure for the assets included in the isolation job will supersede the common exceptions. You can add or remove the exceptions while creating the job as required.
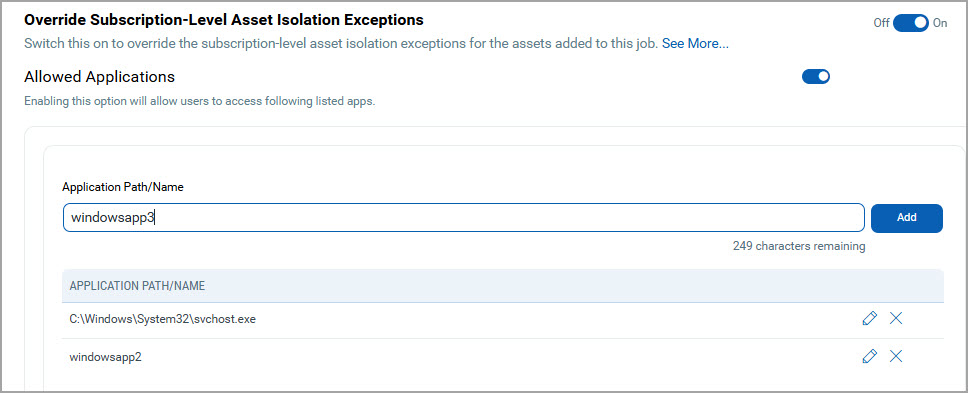
To override the subscription-level asset isolation exceptions for the selected assets in the job, turn the Override Subscription-Level Asset Isolation Exceptions toggle On. The following sections are displayed.
Allowed Applications
By default, the Allowed Applications toggle is turned On. The common exceptions for the applications configured in the Asset Isolation Exceptions settings are pre-populated by default.
- To add an additional application in exception, enter the path or name in the Application Path/Name field and click Add.
- Click
 to edit and
  to remove an IP.
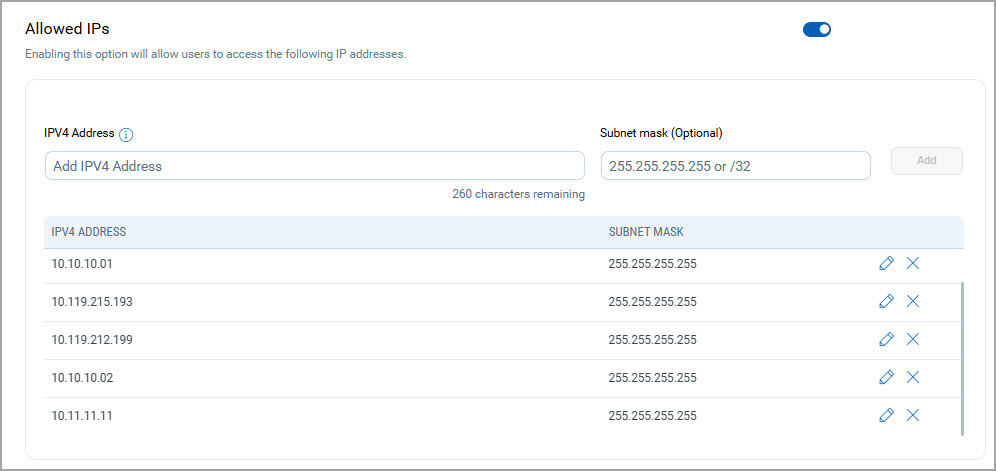
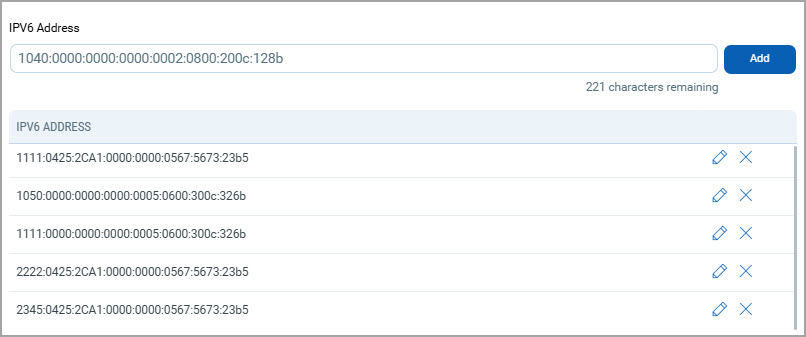
Allowed IPs
By default, the Allowed Applications toggle is turned On. The commonly configured exceptions for IPv4 and IPv6 IPs are pre-populated by default.
- To add additional IPv4 addresses in exception, enter the IP and subnet mask in the IPV4 Address and Subnet mask fields and click Add.
- Click to edit and to remove an IP.
- To add IPv6 address, enter the IP in the IPV6 Address field and click Add.
- Click to edit and to remove an IP.
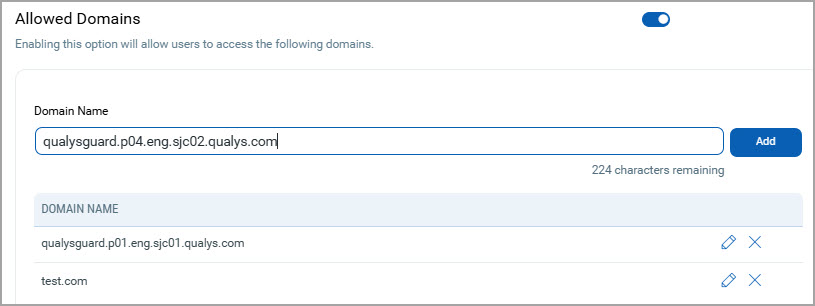
Allowed Domains
By default, the Allowed Domains toggle is turned On. The commonly configured exceptions for domains are pre-populated by default.
- To add an additional domain, enter the name in the Domain Name field and click Add.
- Click to edit and to remove a domain.
3. Schedule
i) The On Demand job run option is selected by default, and the job is executed once enabled.
ii) To schedule the job to run at a specific time:
- Click Schedule.
- Select the required START DATE and START TIME.
- To select the required timezone, click Set timezone and select from the options from the drop-down list.
By default, the system uses the agent timezone.
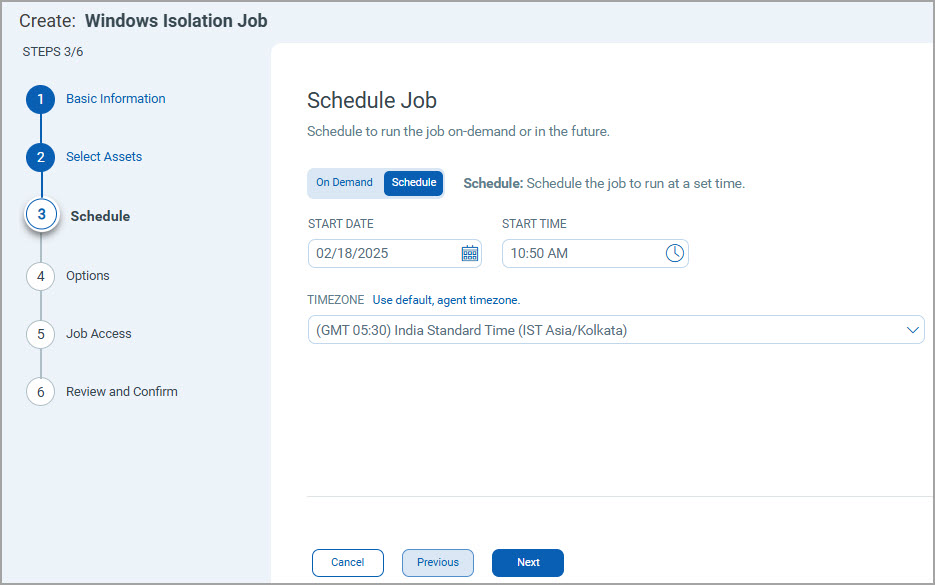
- Click Next.
4. Options
To configure the quarantine notification settings, turn the Quarantine Asset Notification toggle On.
- Enter a description for the settings.
- Enter the email address of the recipient. You can enter a maximum of ten email addresses.
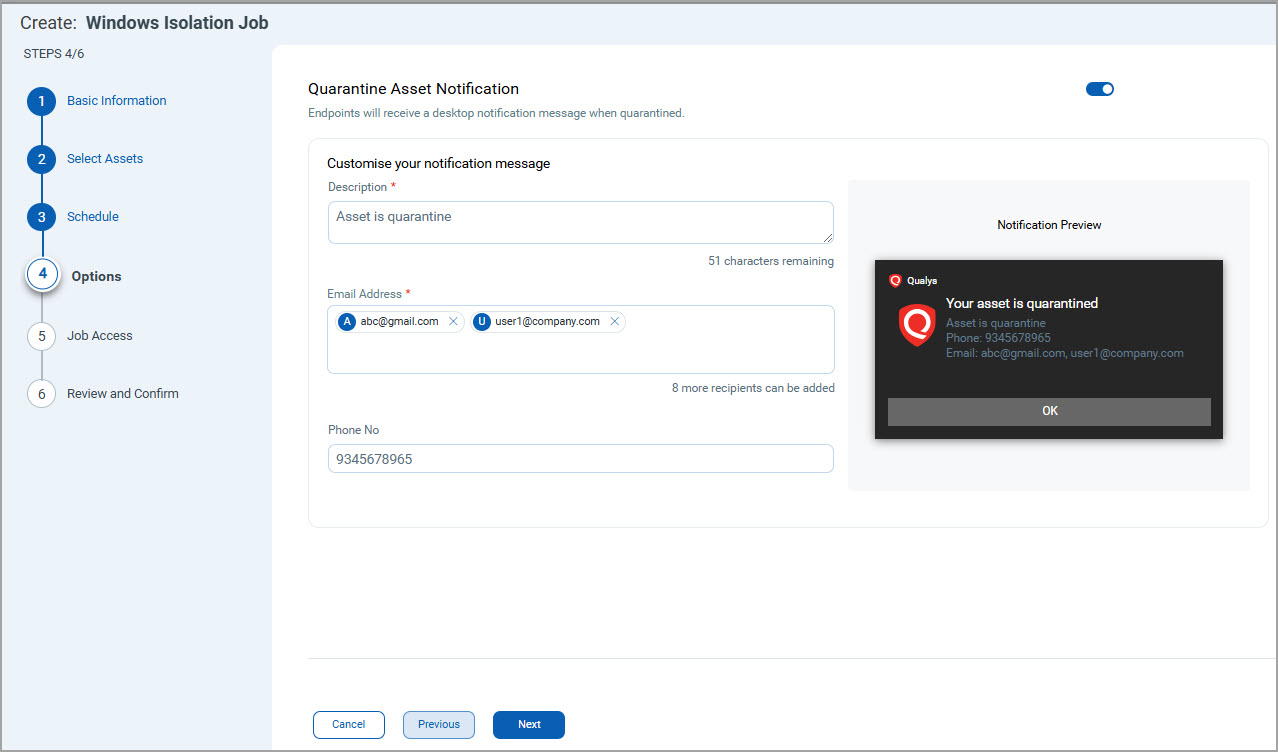
- (Optional) Enter the phone number.
- Click Next.
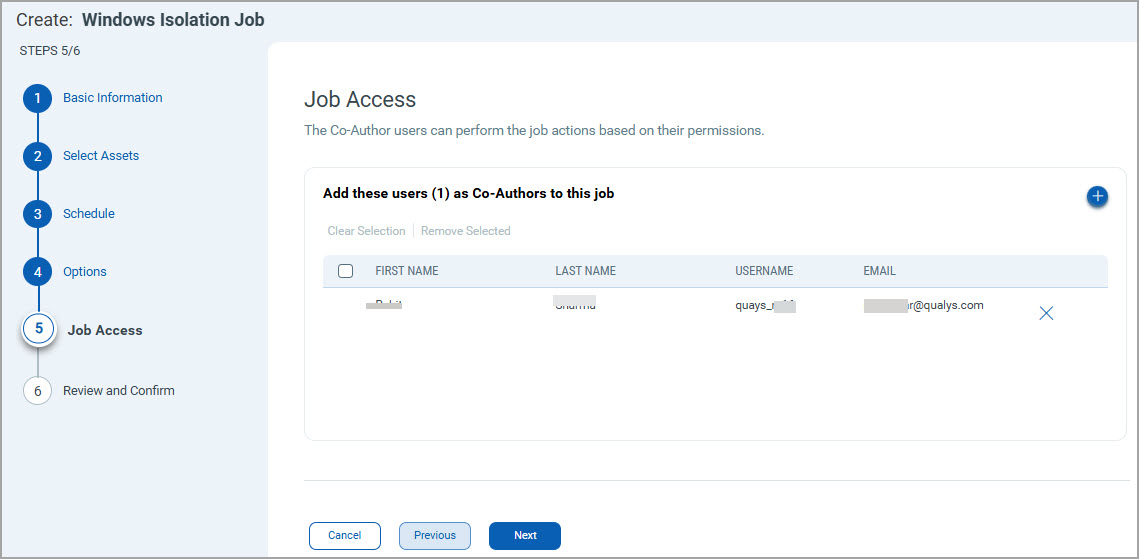
5. Job Access
Select the co-authors for this isolation job and click Next. The co-authors can perform job actions based on their permissions, such as editing the job.
- You can add a maximum of 200 co-authors to a job.
- Any deactivated user or a user without the required permissions is removed as a co-author, when you save the job.
6. Review and Confirm
Review your selections, and select Save or Save and Enable the job.
Note that the SuperUser or Administrator, or a user who has the permission to manage the job, can change the job status (enable/disable), delete and edit the job.
- When you click Save, the job is saved, and its status is DISABLED. You can enable it later.
To run a job that is in the DISABLED state, you must first enable it. To enable it, go to the Jobs tab and click Enable from the Quick Actions menu of a job.
- When you click Save & Enable, the job is saved and ENABLED. This option is available only when creating a Job the first time, not during editing the job.
The Save and Enable option should be chosen only when you are confident that the job is correctly configured because it's enabled and in a good-to-execute state.
You can use the Disable option to temporarily disable a scheduled job. Later, at your convenience, you can re-enable the job.
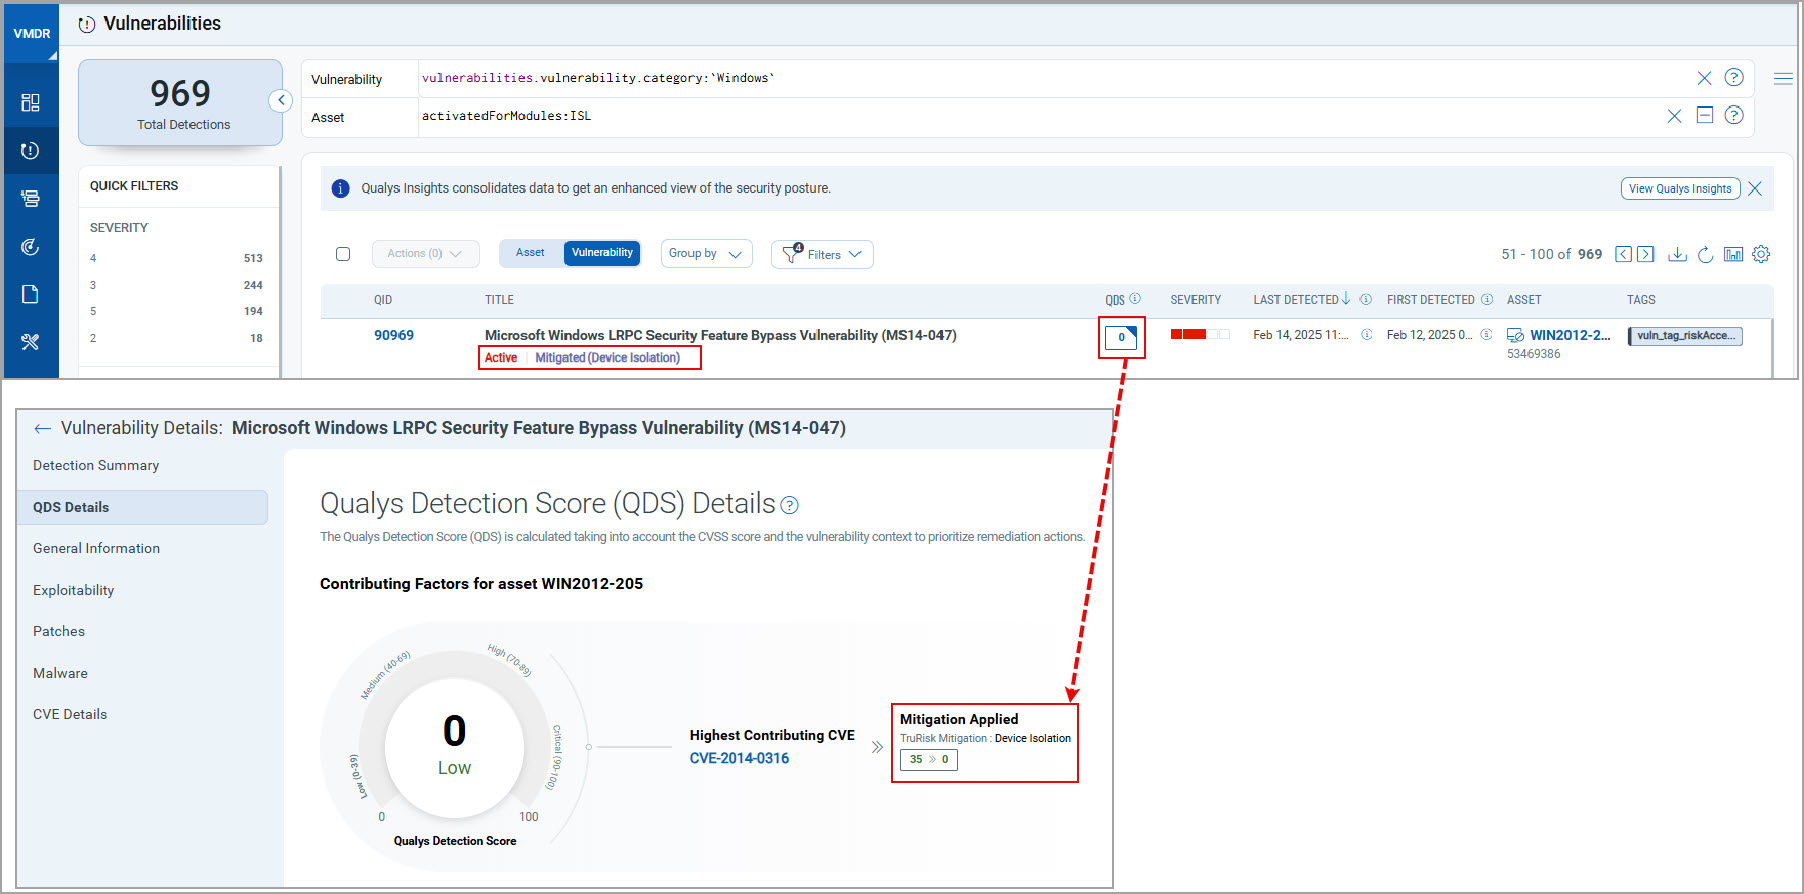
Once all the CVEs associated with the QID are isolated, the asset status changes to Isolated. After isolation, the QDS score reduces to zero.
When all the CVEs associated with the QID are isolated, only then the asset status changes to Isolated.
The isolated job status can be viewed on the VMDR > Vulnerabilities tab. You can view the QDS score changed to zero.