Windows Feature Updates Patching
Windows feature updates are major operating system (OS) upgrades for Windows that introduces new functionality, enhanced security, and performance improvements.
These updates upgrade the OS to a new version and include all previously released quality updates.
Qualys supports Windows feature updates to ensure your assets remain up to date with the latest Windows enhancements. To enable vendor-acquired feature update patches, you must generate the SHA256 hash value using appropriate utilities. For more information, see Generate Hash Value.
Best Practices
- Do not bundle feature updates with other patches, such as security or quality updates.
- Combining feature updates with other patches, in a single deployment job may not break the system, but it can lead to unexpected failures during patch deployment.
- To reduce risk and ensure reliable patch installation, always deploy feature updates separately.
- To search the feature update patches, navigate to Patches > Windows tab, use the QQL token
isFeatureUpdate:true.
Steps to deploy Windows Feature Updates
- Download the Windows Feature Updates
- Upload the Installer Files on Qualys Cloud Storage
- Deploying the Windows Feature Update Patch
1. Downloading the Feature Updates Installers
Perform the following steps to download the required ISO installer files.
Prerequisite: Refer to the Microsoft's official guidance for accurate and up-to-date compatibility details.
Microsoft Software Updates
To download the Windows 10 and 11 ISO files:
- Visit the Microsoft's website.
Windows 10: https://www.microsoft.com/software-download/windows10
Windows 11: https://www.microsoft.com/software-download/windows11 - Select the Windows 10/11 (multi-edition ISO for x64 devices) and click Download Now.
The ISO file is downloaded to your local system.
The software installer files can be in iso, exe or msi formats depending on the source where you download the files from.
Visual Studio Subscriptions (MSDN)
If you or your organisation has a Visual Studio subscription:
- Sign in to your account: https://my.visualstudio.com/downloads
- Download the required ISO files.
2. Uploading the Installer Files on Qualys Cloud Storage
To upload installer files to Qualys Cloud storage, perform the following steps:
- Navigate to the Patches > Windows tab and run the QQL query:
patch.isFeatureUpdate:true. The patches with the Lock icons indicate that they are available for enablement.
 - Select the required patch and click Enable Patch.
- On Enter Repository URL or Upload File page, select either of the following:
- Use Existing URL: This option is pre-selected by default. Complete the following steps:
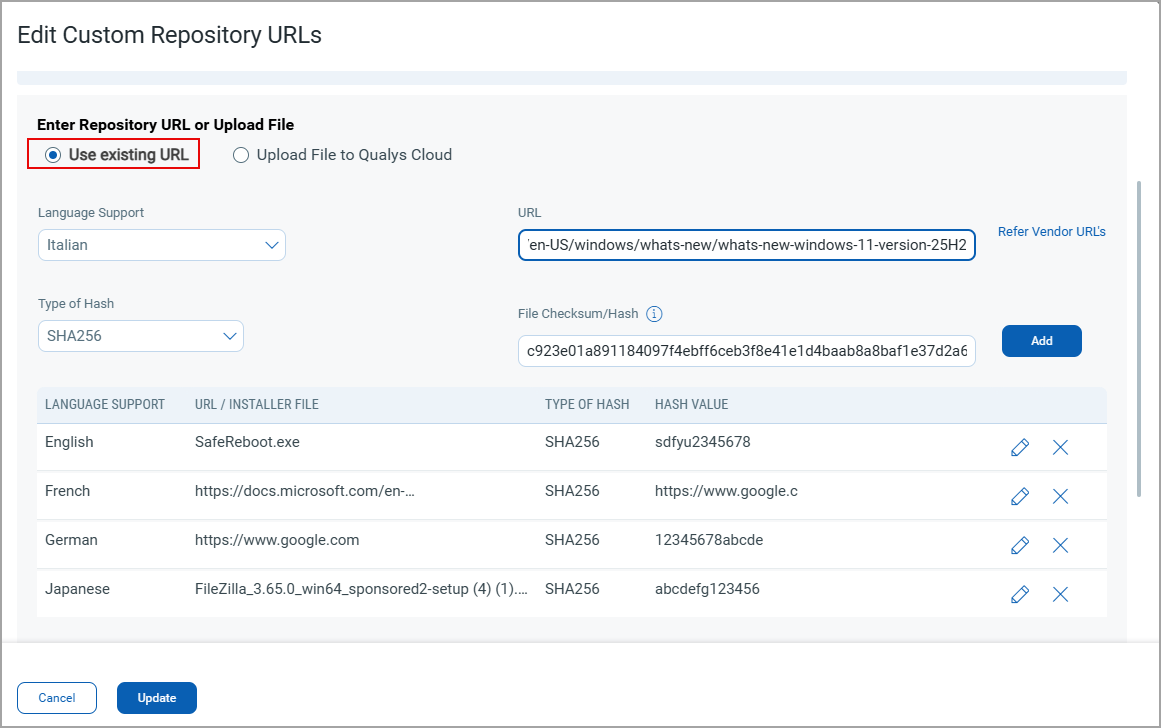
- Select the required language, for example, All Languages, from the Language Support list.
- Enter the respective local repository URL in the URL field, and click Add. You can enter both the HTTP and HTTPS types of links.
- Select the Type of Hash from the drop-down list as SHA256.
- Enter the File Checksum/Hash value and click Add.
- After the URL is added, click Add URLs.
Note: For more information, you can also find the Vendor URL on this page. To view, click Refer VENDOR URL's link. Click the Copy icon next to the vendor URL.
- Upload File to Qualys Cloud: You can upload your installer files to the Qualys Cloud storage. You are allocated 15GB of storage per subscription on the Cloud repository and can upload files as per the storage available. The supported file types for upload are .iso, .exe and .msi.
This feature is supported starting with Windows Cloud Agent version 6.3.
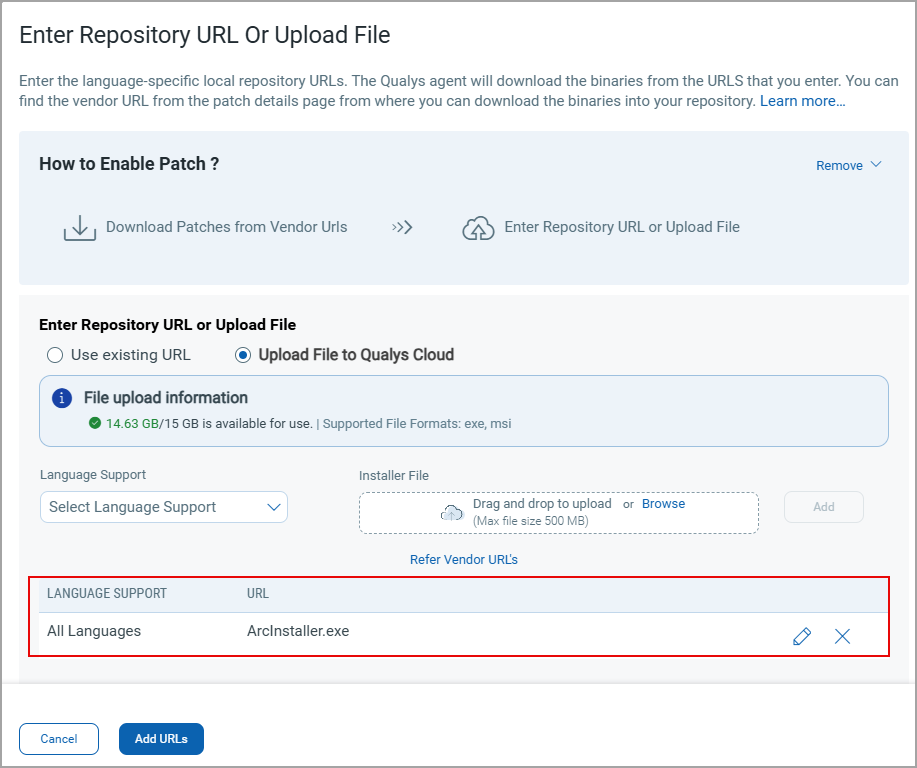
- Select the required language, for example, All Languages, from the Language Support list.
- Click Browse to upload the installer file and then click Add.
- (Optional) Click X to remove the uploaded file.
- Select the Type of Hash from the drop-down list as SHA256 and enter the File Checksum/Hash value.
- Click Add URLs.
To ensure Cloud Agents can access the Qualys CDN URLs, add the following URLs in the allowlists, for your network configurations to access them.
URLs to be added in AllowlistURLs to be added in AllowlistAmerica:
US1: https://caskcf.qg1.apps.qualys.com ·
US2: https://caskcf.qg2.apps.qualys.com ·
US3: https://caskcf.qg3.apps.qualys.com ·
US4: https://caskcf.qg4.apps.qualys.com ·
CA1: https://caskcf.qg1.apps.qualys.ca ·
IAD2: https://caskcf.gov1.qualys.us/
EMEA:
· EU1: https://caskcf.qg1.apps.qualys.eu
· EU2: https://caskcf.qg2.apps.qualys.eu
· EU3: https://caskcf.qg3.apps.qualys.it
· UK1: https://caskcf.qg1.apps.qualys.co.uk
· AE1: https://caskcf.qg1.apps.qualys.ae
· KSA: https://caskcf.qg1.apps.qualysksa.com
APAC:
- Use Existing URL: This option is pre-selected by default. Complete the following steps:
Once completed, the selected patch is enabled. You can verify the custom repository details in the Basic Information tab of the patch.
To search the enabled Windows feature updates patches, on the Patches > Windows page, use the QQL token query: patch.isFeatureUpdate:true and patch.isEnabledVendorAcquiredPatches:true. The enabled patches are indicated by a lock ( ![]() ) icon.
) icon.
3. Deploying the Windows Feature Update Patch
After enabling the patch, you can add it to an existing job or a new deployment job. Select the patch and from the Actions menu, perform either of the following:
- Click Add to New Job: A new Windows Deployment Job windows is displayed. Follow the steps mentioned in Creating Patch Job for Windows Assets.
- Add to Existing Job: An Add Patches: Existing Deployment Job windows is displayed, a list is displayed. Select the required patch from the list of existing patch jobs and click Add. Review the patch and click Continue.