Manage Sensors
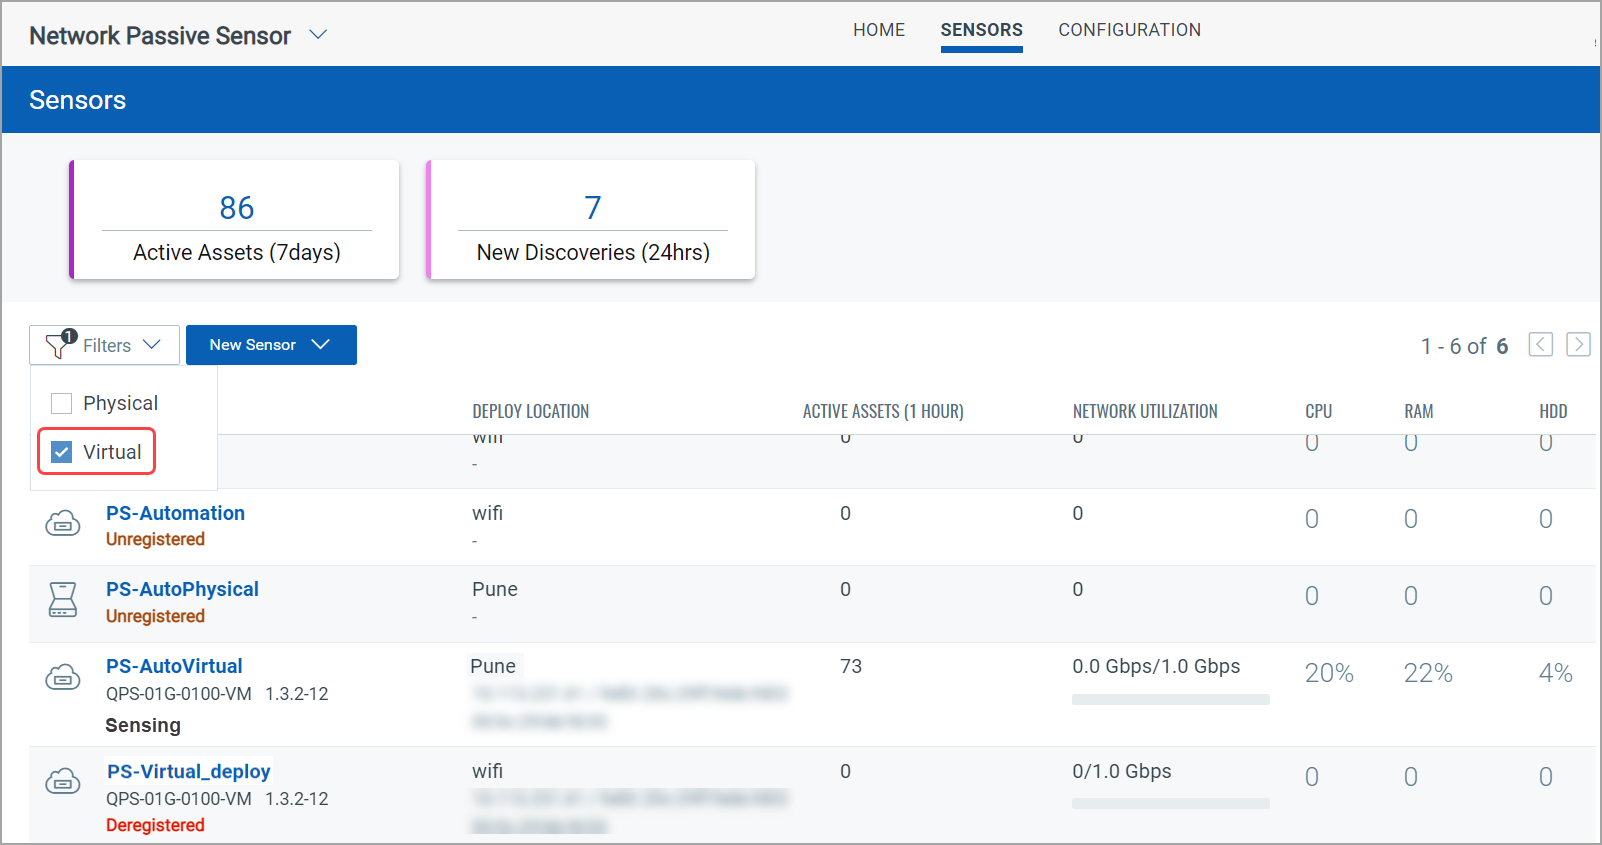
You can manage your physical or virtual sensors from the Sensors tab.
Navigate to the Sensors tab, and from the Quick Actions menu, you can perform actions such as View Details, Deregister sensor, Delete Assets discovered by the sensor, Start Sensing, Reboot, and Delete Sensor.

The sensor can go through the following states:
| State | Description |
|---|---|
| Paused/Pausing | The sensor is paused or in the process of pausing and is not discovering assets. |
| Sensing | The sensor is actively discovering assets. |
| Unregistered | The sensor is no longer registered. |
| Deregistered | The sensor has been deregistered. |
| Not Connected | The sensor is unable to connect to the cloud. |
| Purging | Assets associated with the sensor are being deleted from the inventory. |
| Upgrading | The sensor is installing an automatic software upgrade. |
| Failed | The sensor's automatic software upgrade failed to complete. Contact Qualys Support for assistance. |
You can filter out the sensor listing on the sensor page by the type of appliance – Physical or Virtual.
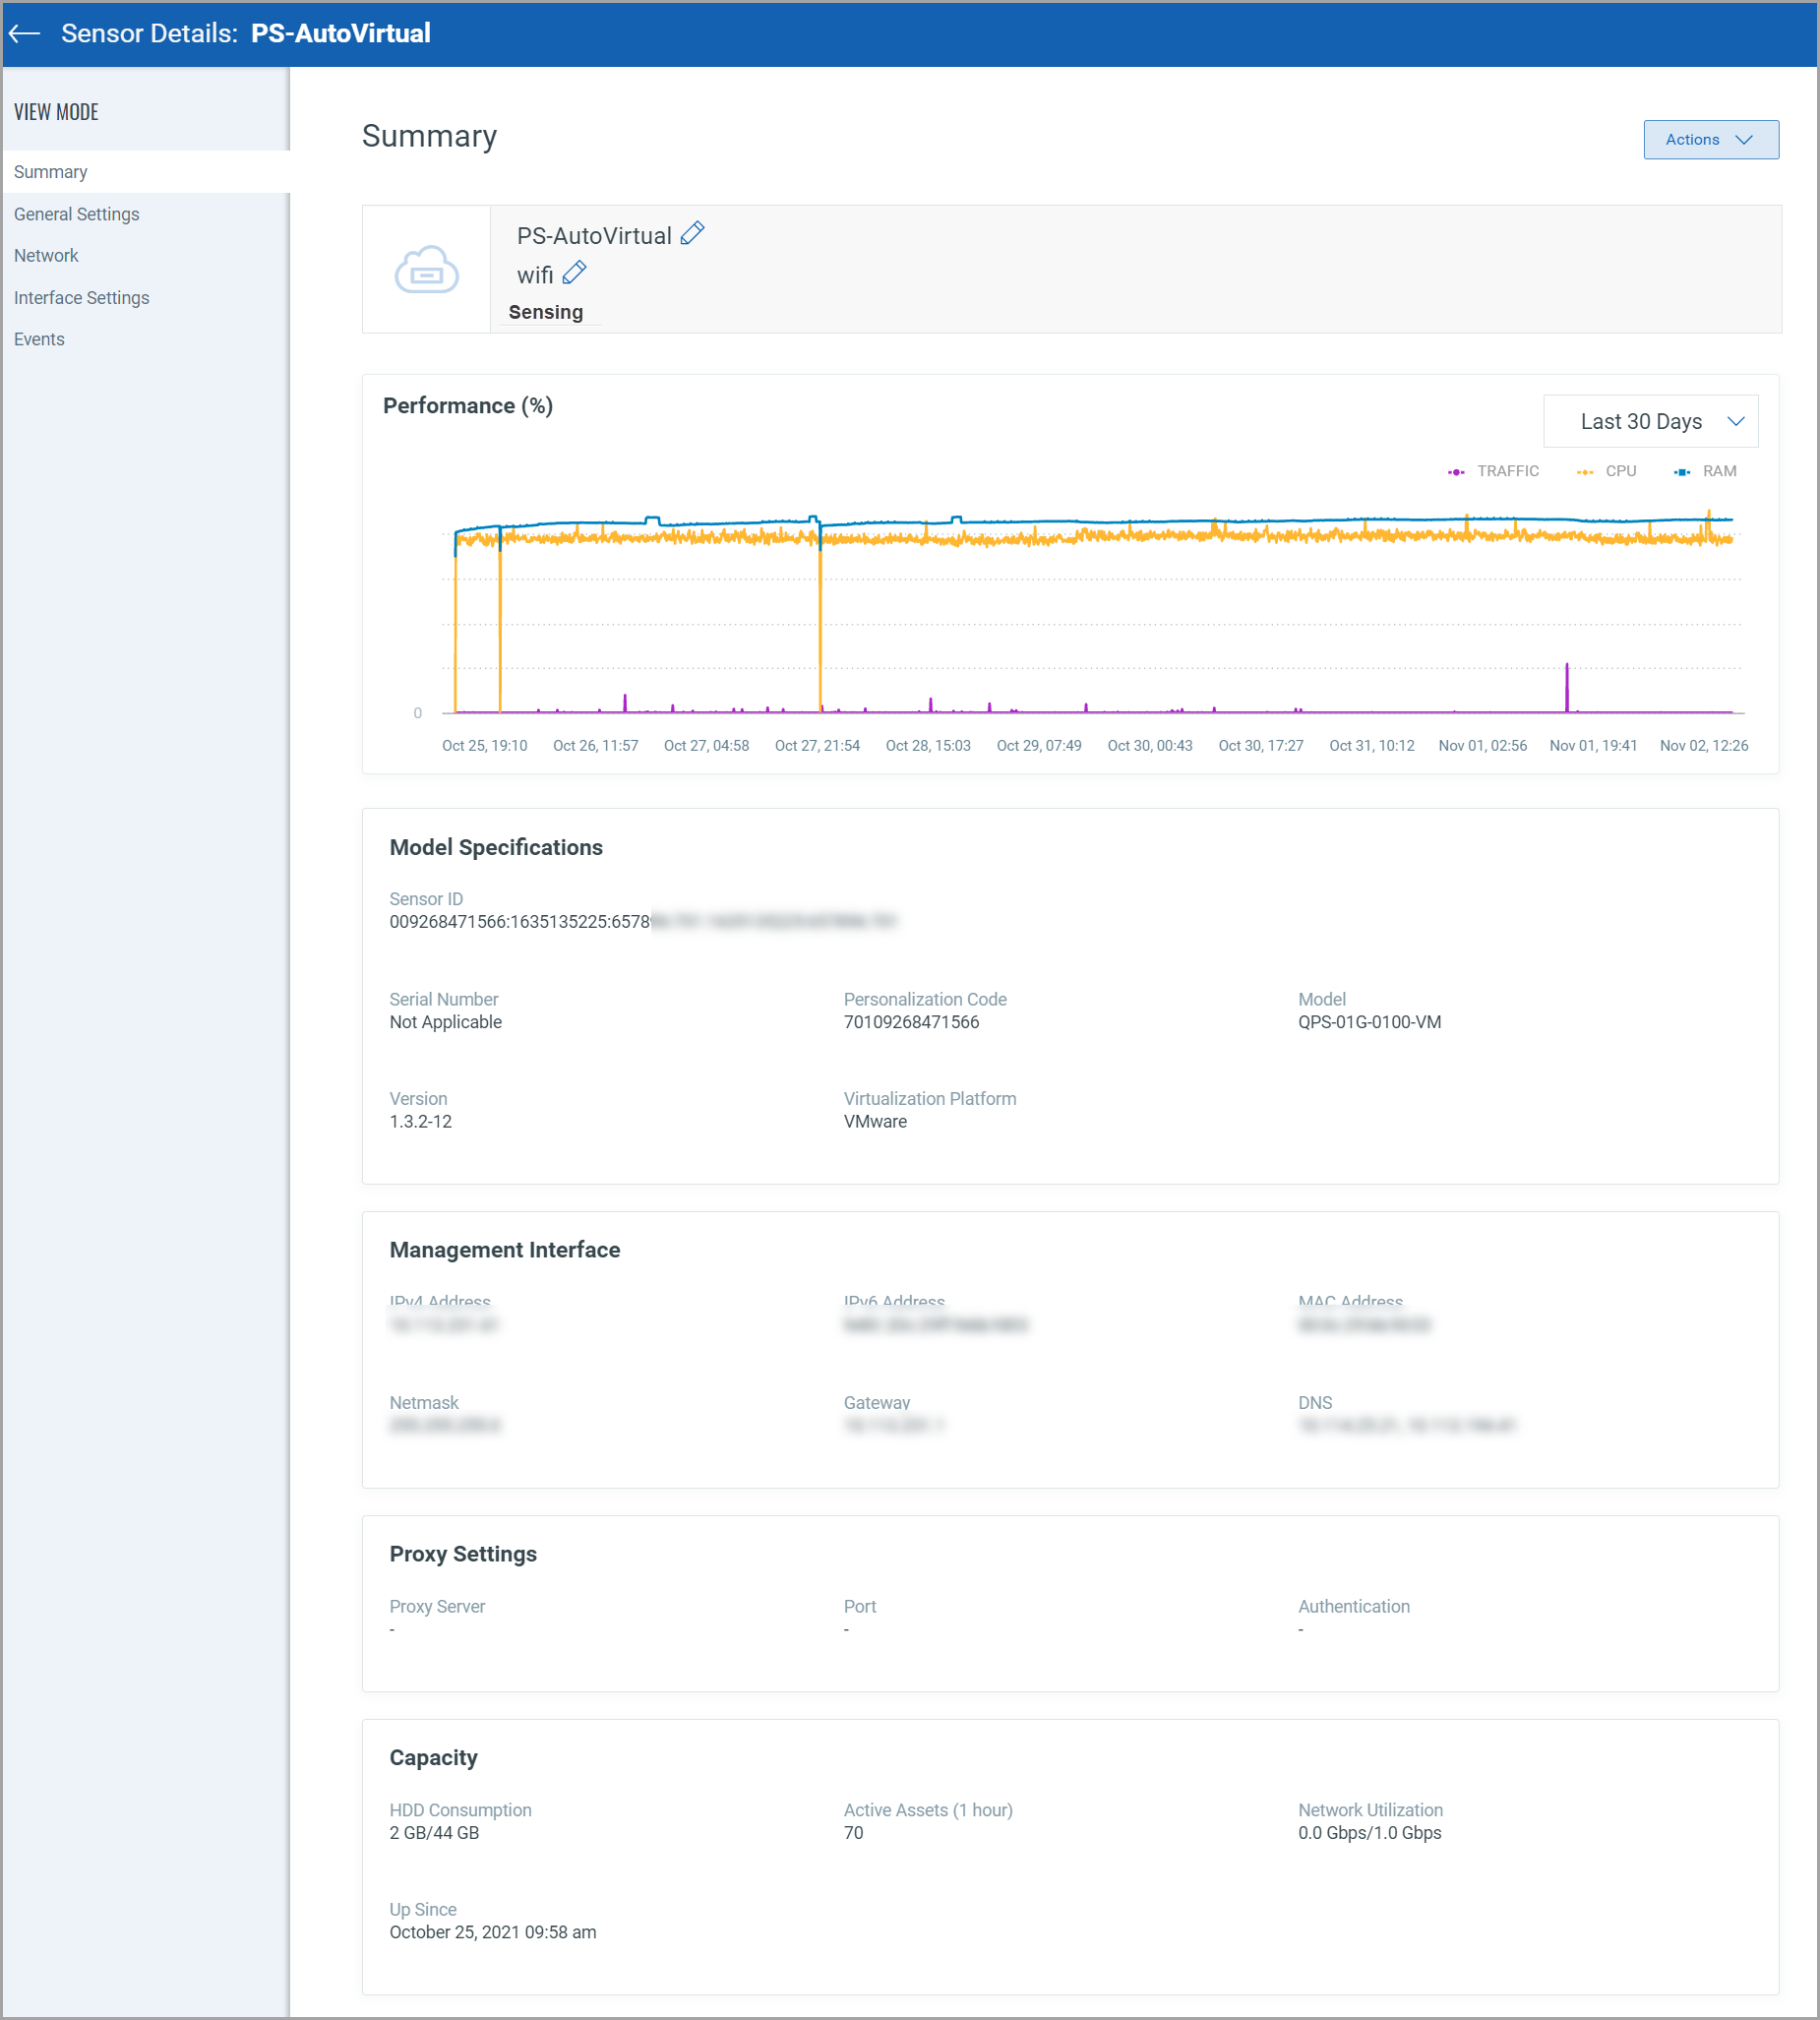
View Sensor Details
Select a sensor and from the Quick Action menu and click View Details. Navigate through multiple tabs to view the sensor details.
Summary
In this tab, you can see all your configured sensor details.
General Settings
In this tab, you can configure the passive sensor appliance settings.
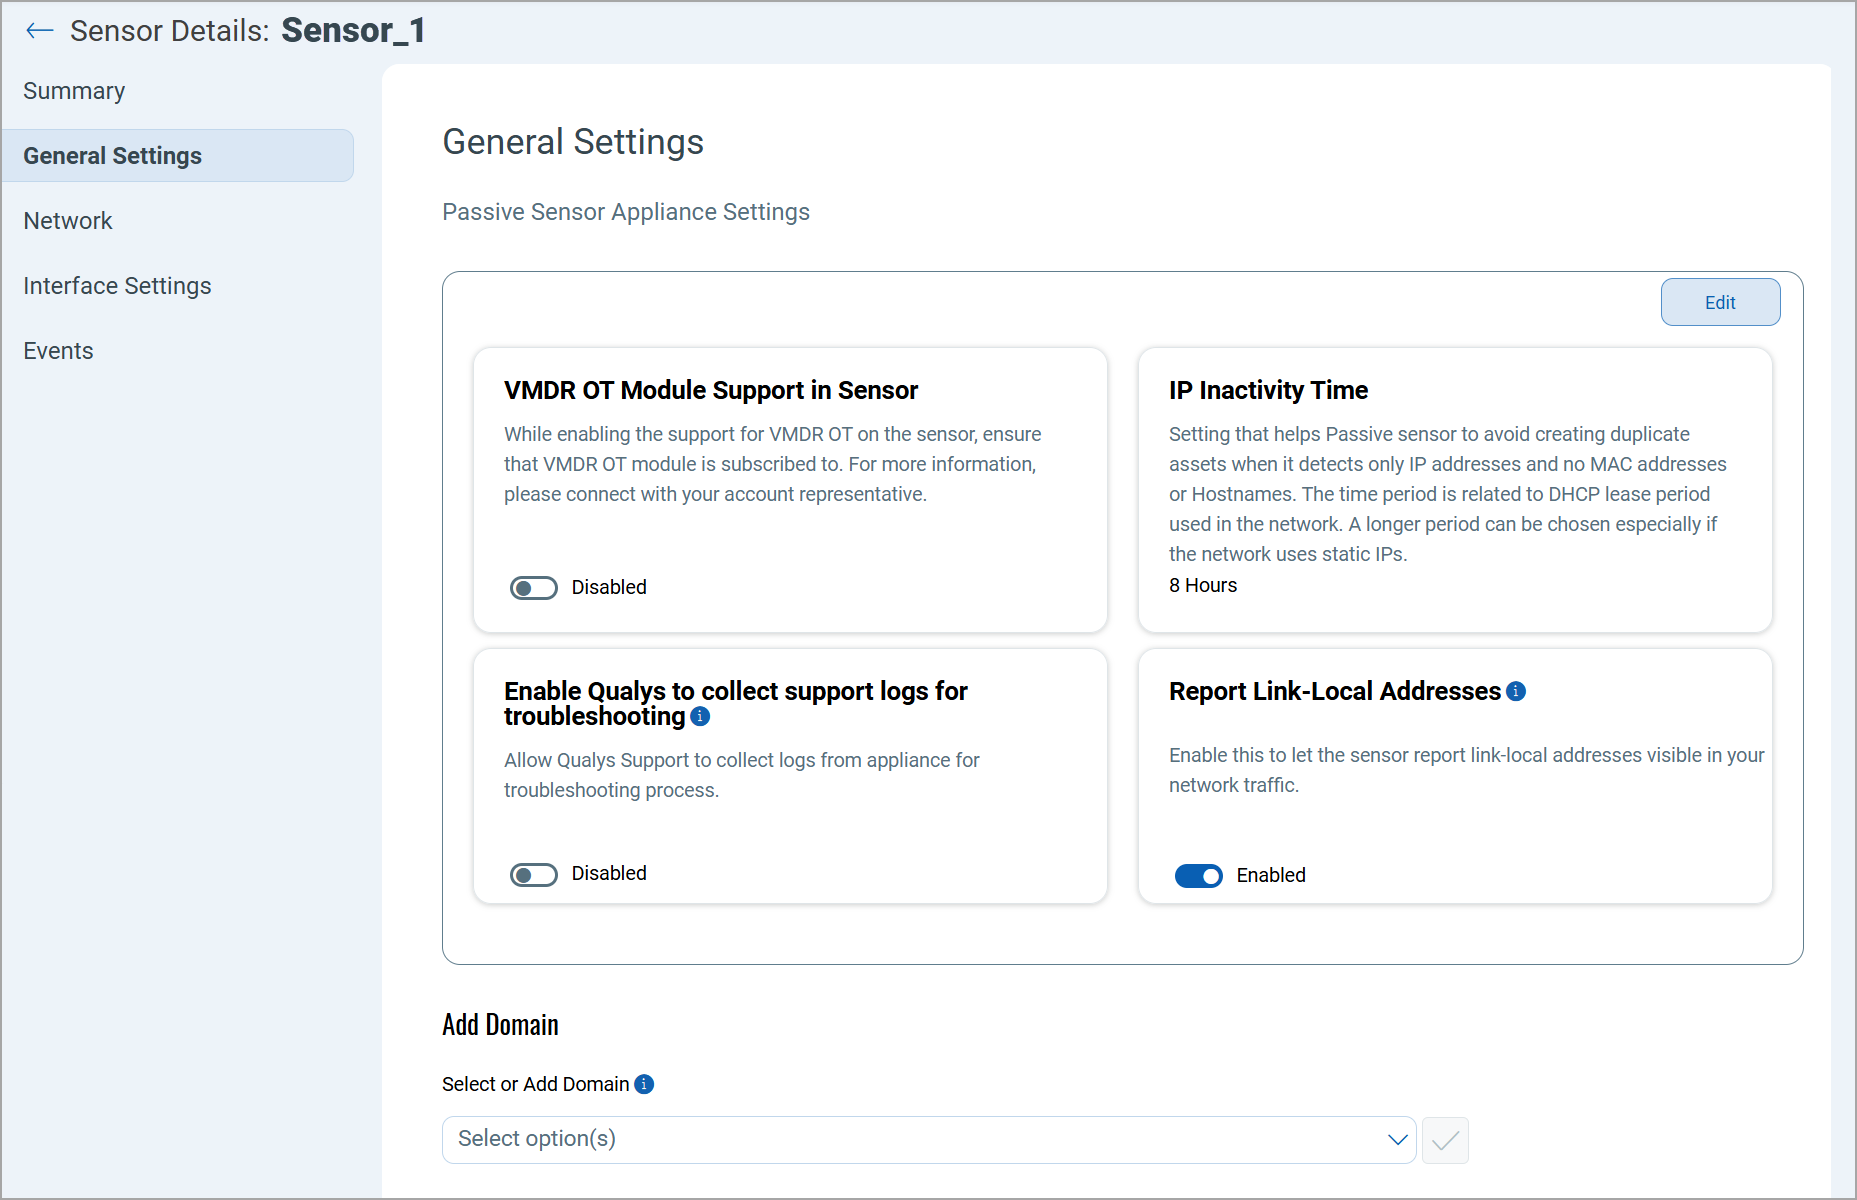
You can enable the following settings for your sensor:
| Setting | Description |
|---|---|
| VMDR OT Module Support in Sensor | Enable this setting to provide support for VMDR OT. |
| IP Inactivity Time | Set the IP inactivity time that helps the passive sensor to avoid creating duplicate assets when it detects only IP addresses and no MAC addresses or Hostnames. |
| Enable Qualys to collect support logs for troubleshooting | Enable this setting to allow Qualys Support to collect logs from the appliance for the troubleshooting process. For more information, refer to Logs for Troubleshooting. |
| Report Link-Local Addresses | Enable this setting to allow the sensor to report link-local addresses visible in your network traffic.
A link-local address is an IP address used for communication between devices on the same network segment or local area network (LAN) without needing a router or external network. These addresses are specifically used for local communication on a single network and are not routable across different networks. |
To configure the settings, follow these steps:
- Click Edit.
- Enable the respective toggle switches of settings as required.
- Select the IP Inactive Time from the list.
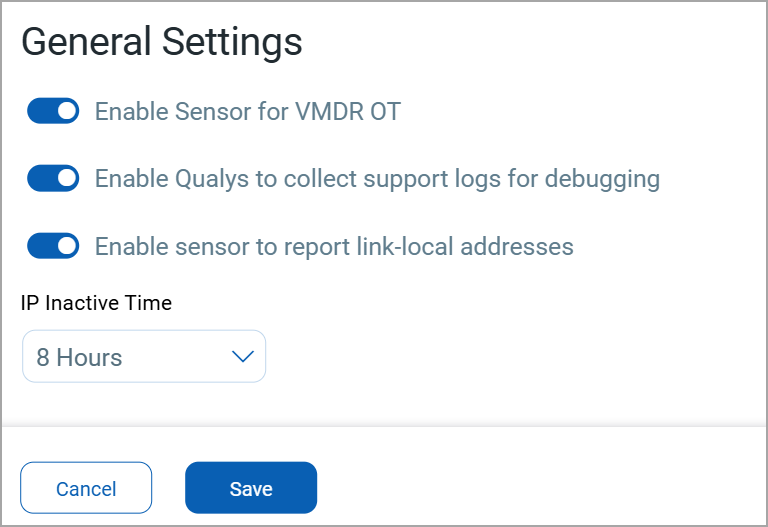
- Click Save.
Add Domain
You can select or add a domain from the list using the Add Domain option.
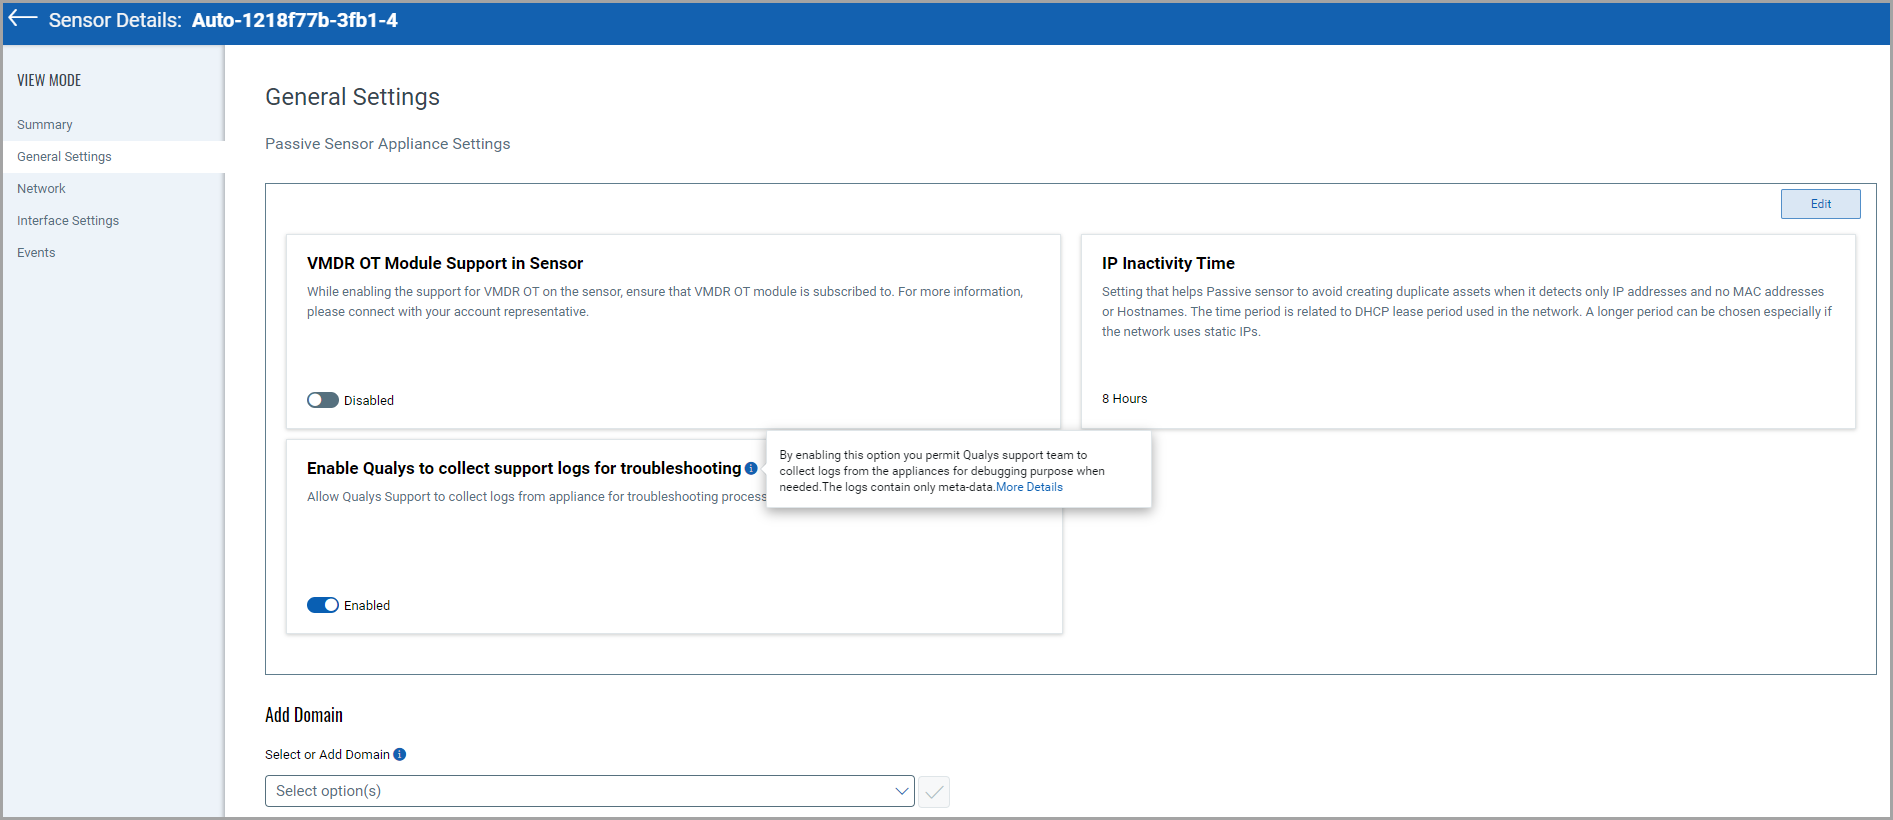
When merging unmanaged assets into managed assets, the system first uses the domain names provided by you (if available). If not, it uses the domain names discovered by the passive sensor appliance.
All the domains discovered from the passive sensor will be listed in the dropdown list. You can select a list of domains or provide additional domains.

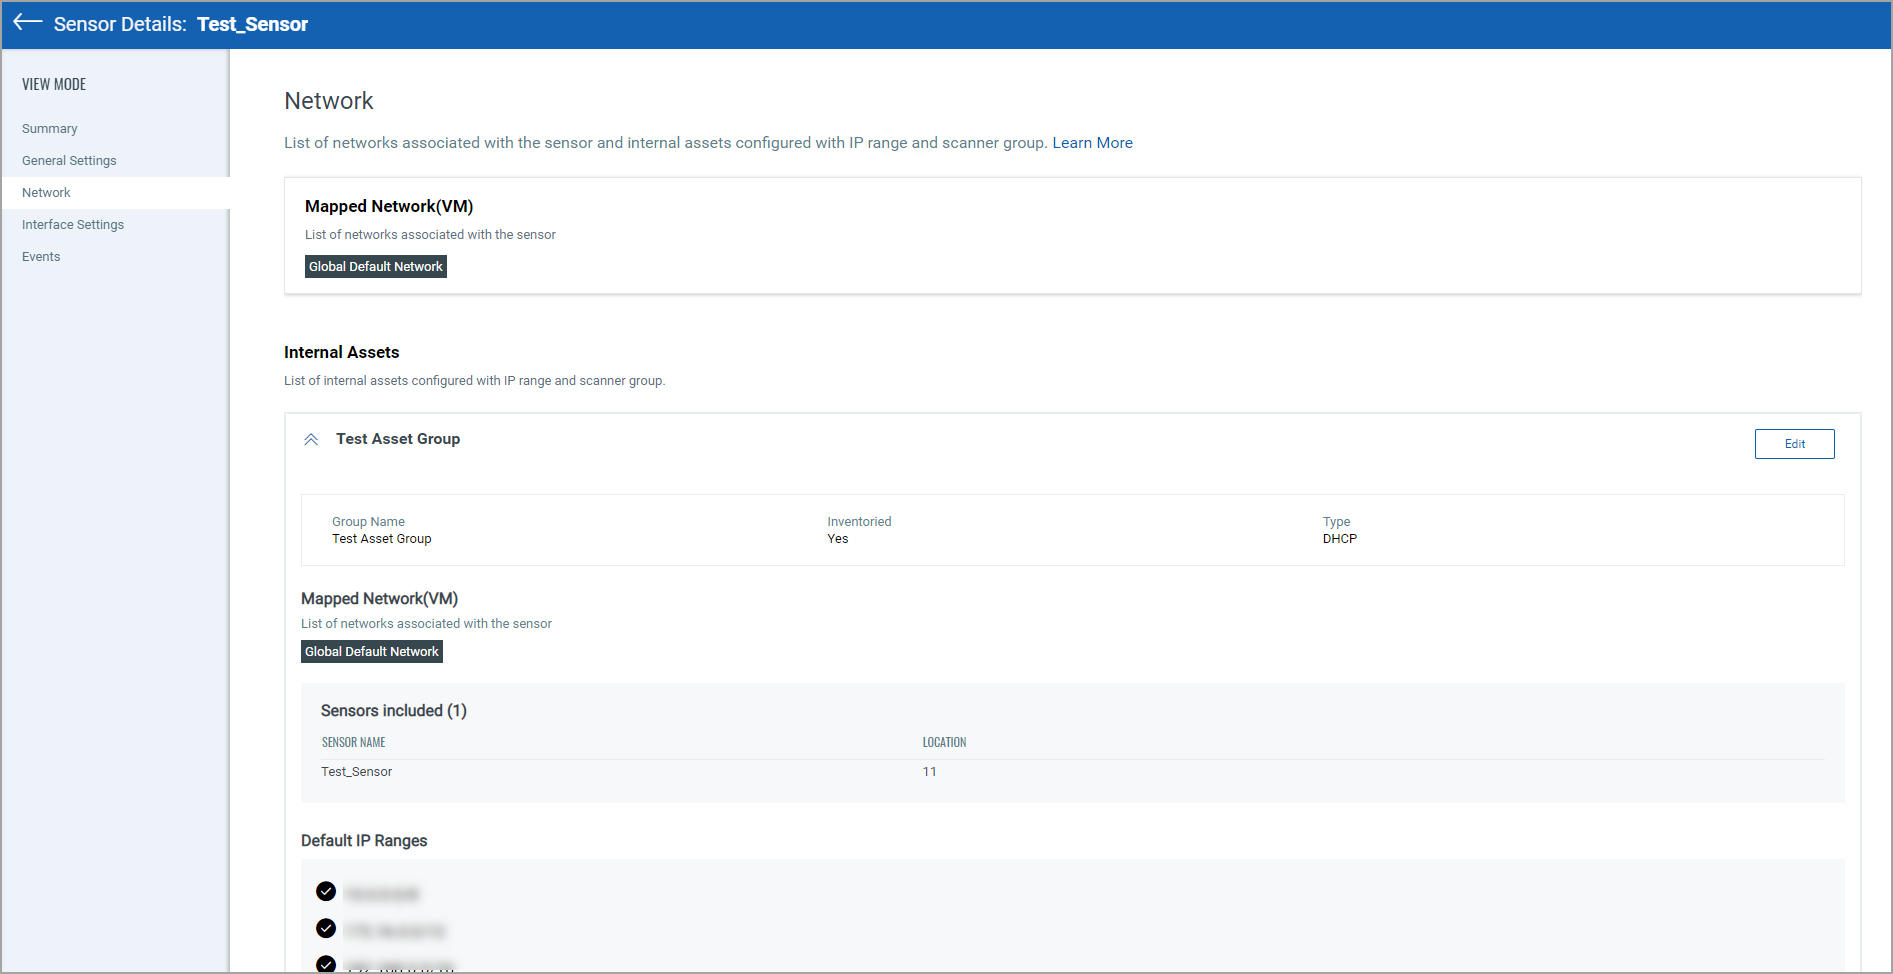
Network
In this tab, you can see the list of networks associated with the sensor and internal assets configured with IP range and scanner group.
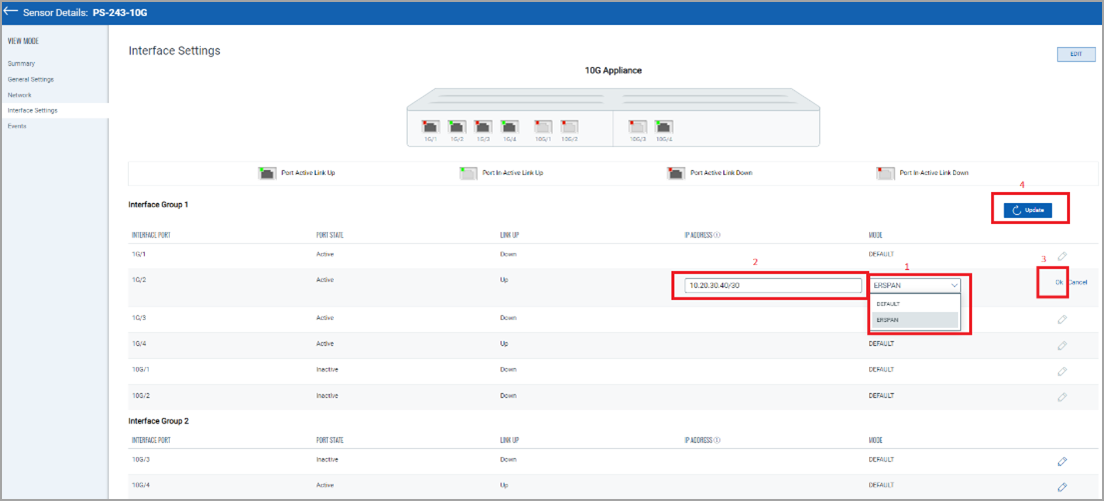
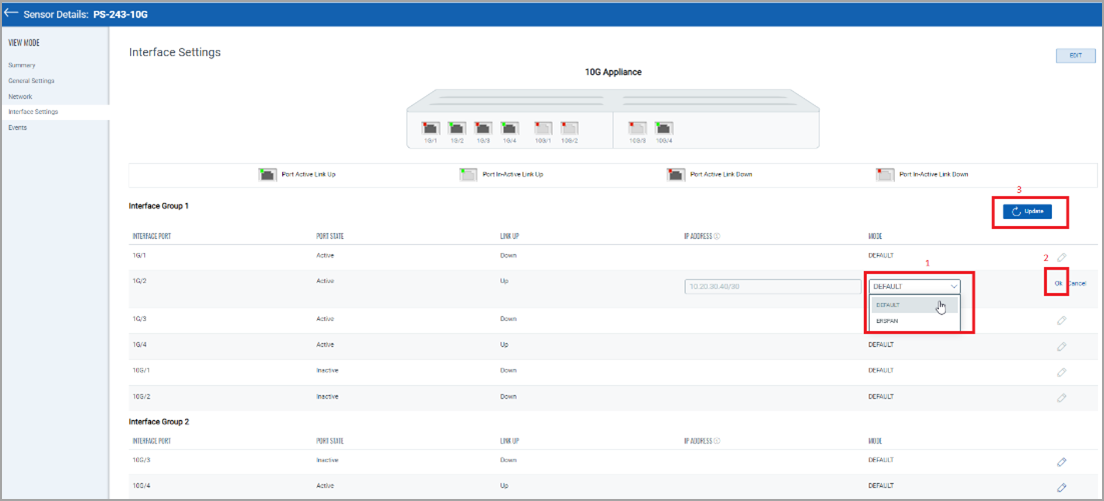
Interface Settings
In this tab, you can see the sensor interface details. Here, you can assign the IP address to the sniffing interface.
To assign the IP address, follow these steps:
- Click the edit icon of the desired sniffing interface, as shown in the following screenshot.
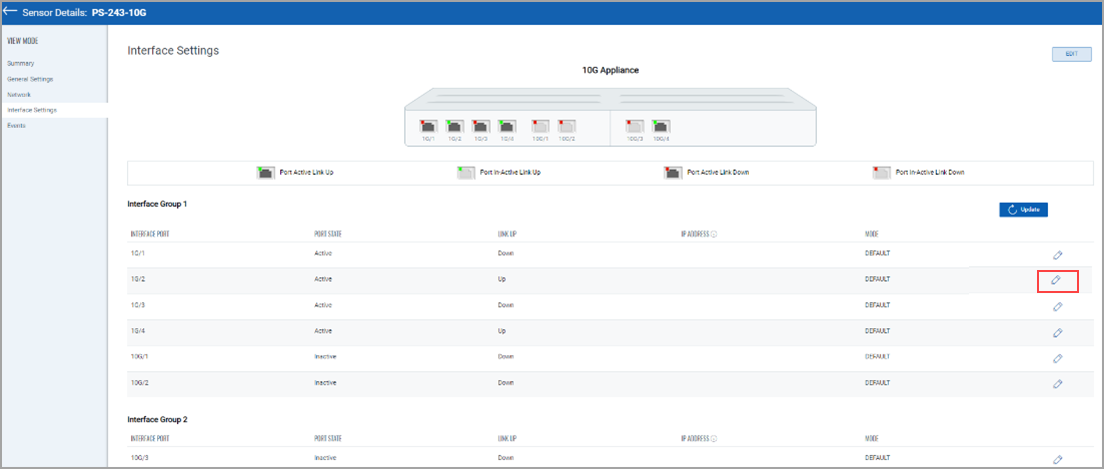
- Select ERSPAN mode and assign an IP address to the interface along with a subnet mask (for example: <10.20.30.40/30>).
- Click Ok > Update to save the configuration.
If you want to remove the IP Address from the sniffing interface, follow these steps:
- Click the edit icon of the desired sniffing interface.
- Select DEFAULT mode, click Ok > Update to save the configuration.
For the 10G appliance model (QPS-10G-0404-B1), the interface needs to be active before assigning an IP address to the sniffing interface.
The PS appliance will reboot once after adding/editing/deleting the IP address of the sniffing interface.
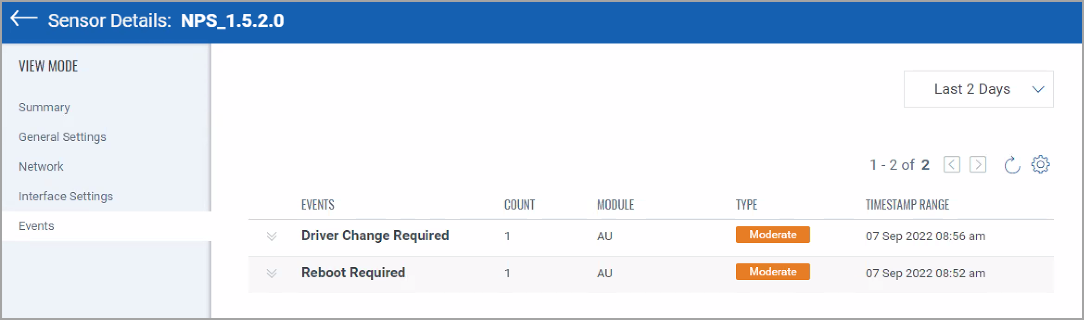
Events
In this tab, you can see the alert notification for events like Driver Change Required, Reboot Required, and Asset Reporting Stopped.
Deregister a Sensor
Once your physical or virtual sensor is ready and registered with Qualys Enterprise TruRisk™ Platform, you can start viewing information in the Network Passive Sensor UI.
If you would like to deregister/delete a sensor your sensor, follow these steps:
- Navigate to the Sensors tab and select your sensor.
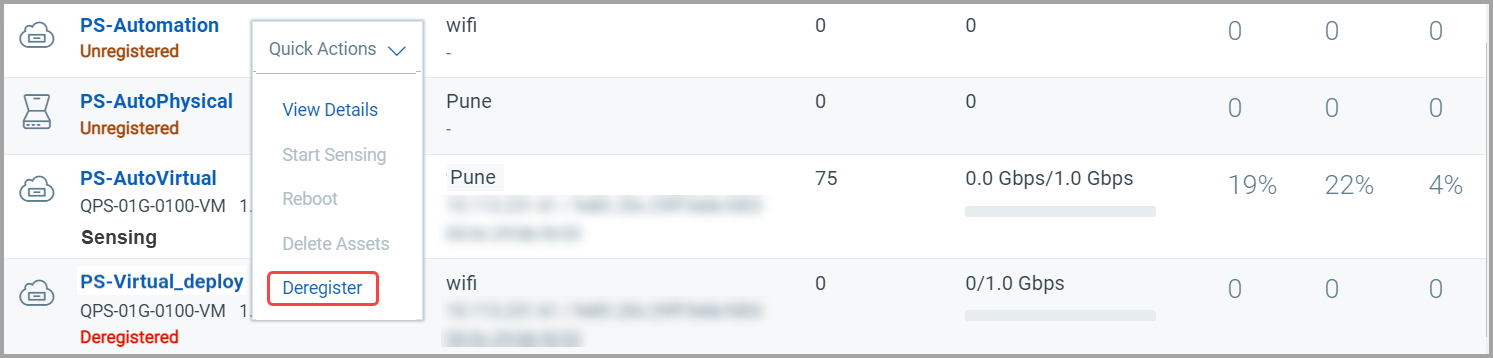
- From the Quick Actions menu, click Deregister.
A deregister confirmation message is displayed.
- Click Yes to deregister your sensor.

The sensor can also be deregistered from the Sensor Details page. Follow the steps:
- Select your sensor from the Sensors tab and click View Details from the Quick Actions menu.
The Sensors Details page is displayed.
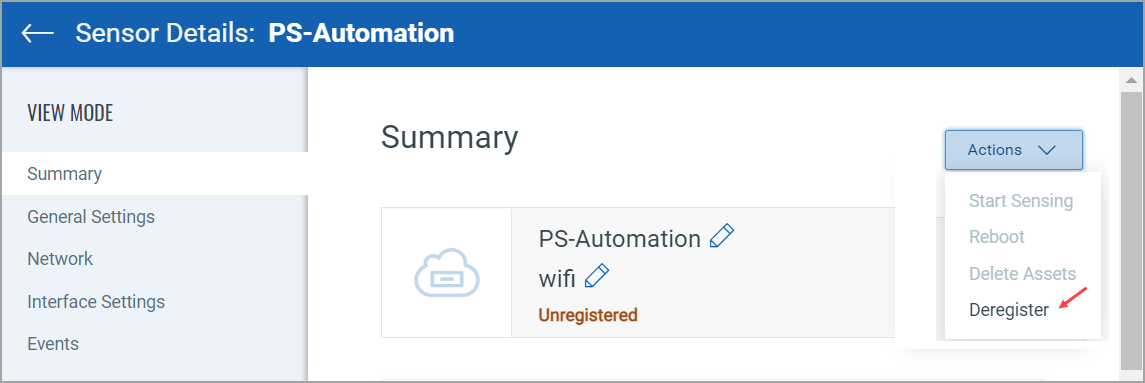
- Click Deregester from the Actions list.
A deregister confirmation message is displayed.
- Click Yes to deregister your sensor.
- After you have deregistered your sensor, and if you want to delete it, then follow the instructions:
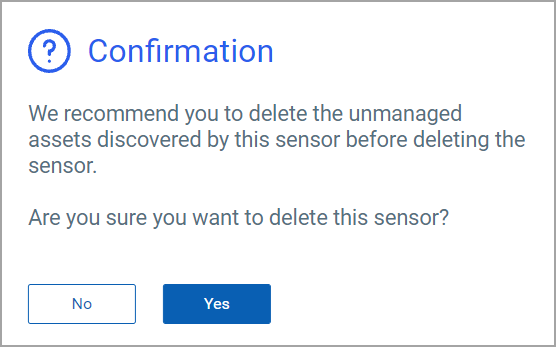
Delete a Sensor
To delete a sensor after deregistering it, follow these steps:
- Navigate to the Sensors tab and select your deregistered sensor.
- From the Quick Actions menu, click Delete Sensor.
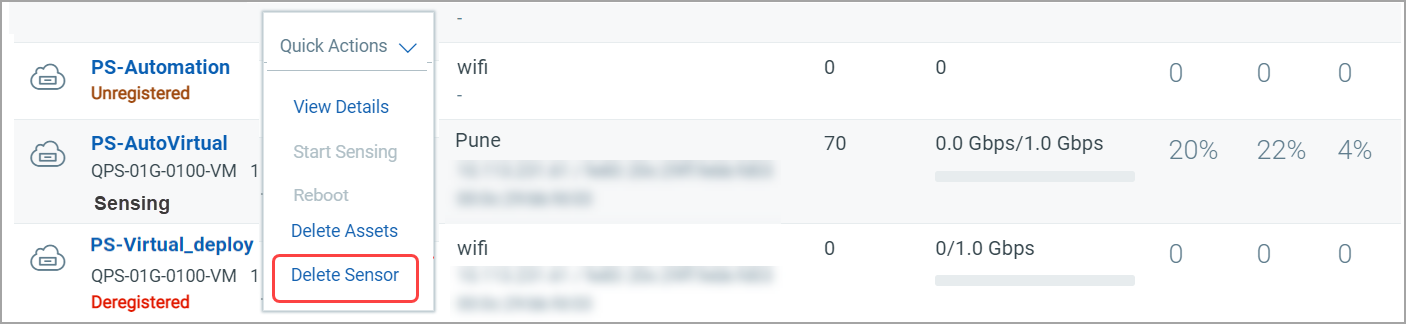
A delet confirmation message is displayed.
- Click Yes to delete the sensor.