Qualys Flow Release 1.16
June 26, 2025
Introduced Azure CLI Node
We have introduced the Azure CLI Node, a powerful node that allows users to execute Azure CLI commands directly within your workflow or automation. This feature overcomes previous limitations in Azure Resource Node and Azure Action Node by allowing CLI command execution.
You can now use more Azure services right away. Run commands directly to manage Azure resources based on your specific needs.
Working with Azure CLI Node
The following are the steps to use Azure CLI Node:
- Insert the Azure CLI Node
Add the Azure CLI Node to your workflow at the point where you want to execute an Azure command.
- Enter Your Azure CLI Command
Within the node, type your desired Azure CLI command you want to run. For example: az vm list
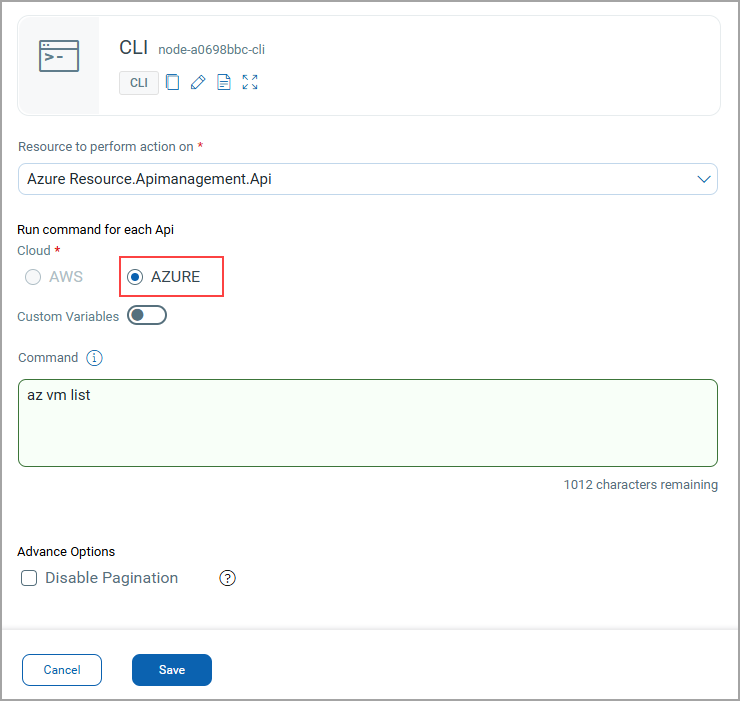
The Azure CLI node does not support interactive command-line prompts, such as those used for logging in.
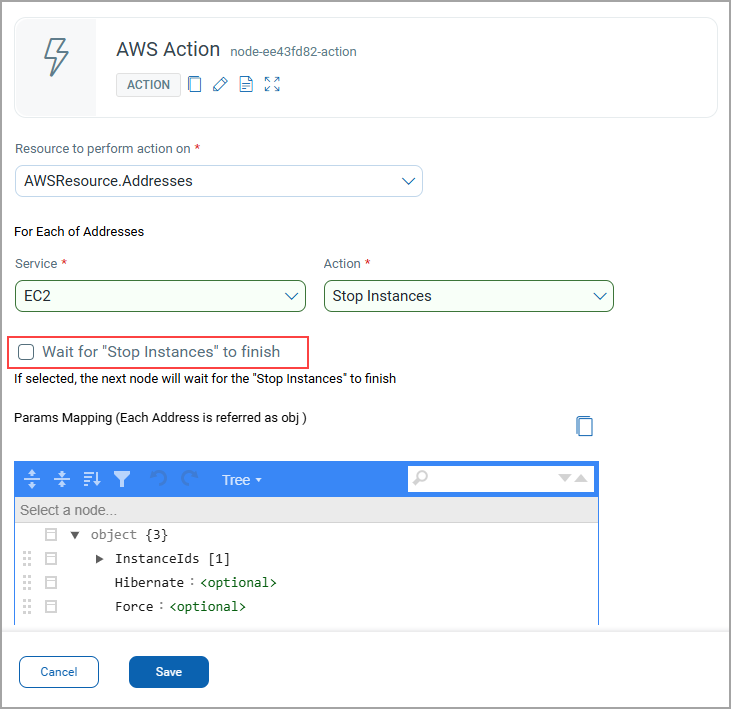
Introduced Wait-for Option in AWS Action Node
We introduced wait-for support in the AWS Action Node, which makes automation workflows more reliable. This enhancement ensures that each AWS action is completed successfully before the next step begins, reducing the chance of errors.
Now you can enable the Wait-for checkbox for supported APIs during configuration of the AWS Action Node. The workflow waits until the system workflow confirms the action has completed, then proceeds to the next step. The timeout duration for the wait-for execution is set to one hour.
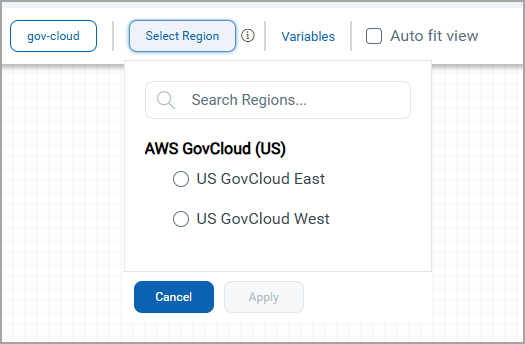
GovCloud Support for AWS and Azure Resource Node
We have extended our support for GovCloud in the AWS and Azure Resource Node, enabling secure and compliant automation for U.S. government agencies and public sector organizations.
GovCloud (U.S.) is a secure cloud environment that meets strict regulatory, security, and compliance requirements set by government agencies. It is designed specifically for managing sensitive workloads in the cloud with enhanced control and protection.
Prerequisite
Before using GovCloud with AWS or Azure nodes, ensure a GovCloud Connector for your respective AWS and Azure account is available.
Using GovCloud
Configure the AWS node like usual and while selecting account select GovCloud Account and Region. GovCloud support is available for all operations related to AWS and Azure GovCloud accounts.
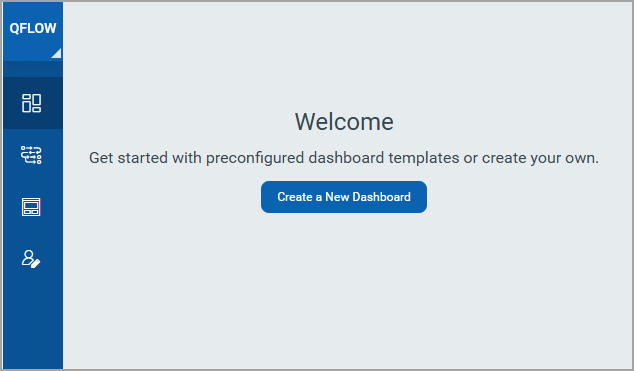
New Application Dashboard
To enhance user experience and ensure a consistent User Interface across all products, we have integrated the Unified Dashboard in QFlow. This enhancement allows you to seamlessly view and manage data through a single, unified dashboard by adding multiple widget types in one place. It eliminates the need for separate views for product widgets and matrices.
This feature allows you to create your own dashboard. First-time users can view this option when they navigate to the dashboard. You can use the default dashboard or customize it according to your preferences.
If you are already using the default dashboard, you can view the option to create a dashboard from the dashboard tab by clicking the + icon. You are navigated to the Dashboard Templates page. You can use the QFlow Template or create from Scratch by adding different widgets.
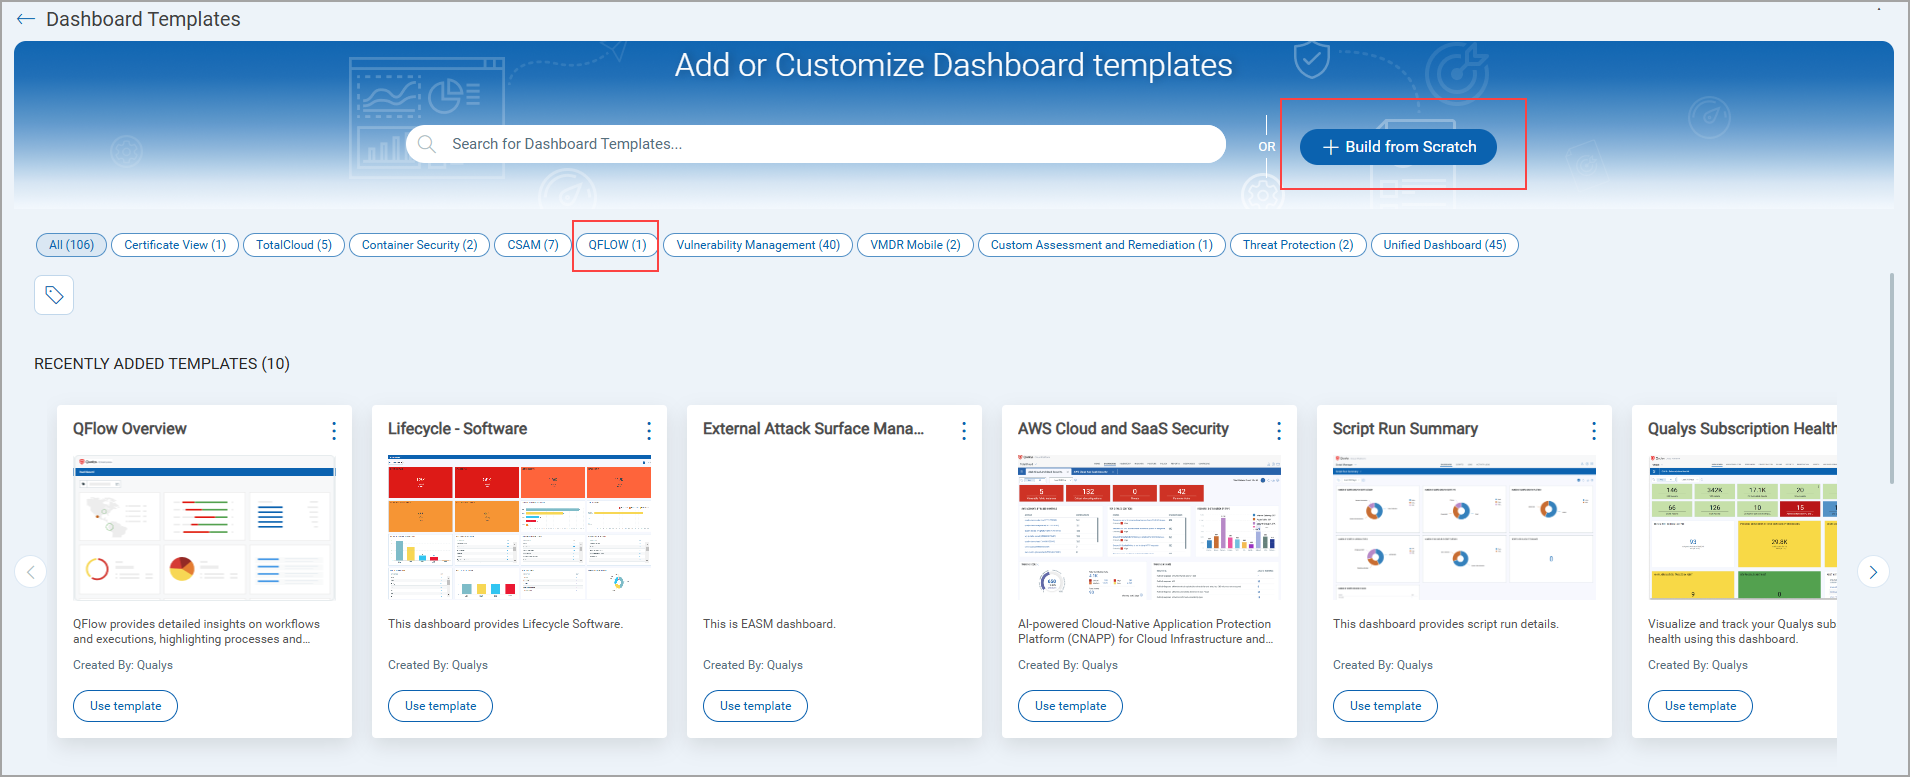
You can create widgets based on workflow, executions. You can define these widgets by selecting specific time frames and leveraging QQL queries with predefined tokens to filter or group data based on metric requirements.
Widget Types Supported
All four standard widget formats are supported:
- Numerical (Count)
- Table
- Pie Chart
- Bar Chart
Example Use Cases
Here are a few practical examples of widgets that can be added:
- Total number of workflows
- Workflow count grouped by:
- Cloud provider
- Region
- Status
- Categories
- Inactive or Undeployed workflows
- Total number of executions
- Execution data visualized by
- Region
- Source
- Status
- Execution type
To know more about how to create dashboard using template, refer to the Unified Dashboard Online Help.
Support for Authentication ID Client Management from UI
With this release, we have extended our support for OpenID Connect Authentication Client Management capabilities from UI. This update allows for secure authentication and authorization of API access directly from the user interface. Our API interactions are now authenticated with enhanced security measures.
ID tokens are generated and validated with utmost security. This seamless integration requires minimal changes to the existing infrastructure, allowing to maintain the highest level of security for APIs.
Access Control
Users can create clients based on access requirements:
User Level Clients
These are associated directly with individual user accounts, making them ideal for scenarios where user-specific access tracking and control are required. The token generated by the user level client becomes invalid if the user is deactivated.
With the Auth ID Client Management from UI, you can:
- Manage authentication and authorization processes more intuitively, providing a smoother user experience.
- Easily handle API access permissions directly from the UI, simplifying the process of granting and revoking access when needed.
- Maintain your existing workflows with minimal changes, enabling you to continue your tasks without the need to learn new processes extensively.
These settings can be found in the profile settings. To access them, navigate to your profile icon at the top right corner, click View Profile, and then go to the Auth Id Client Management tab.

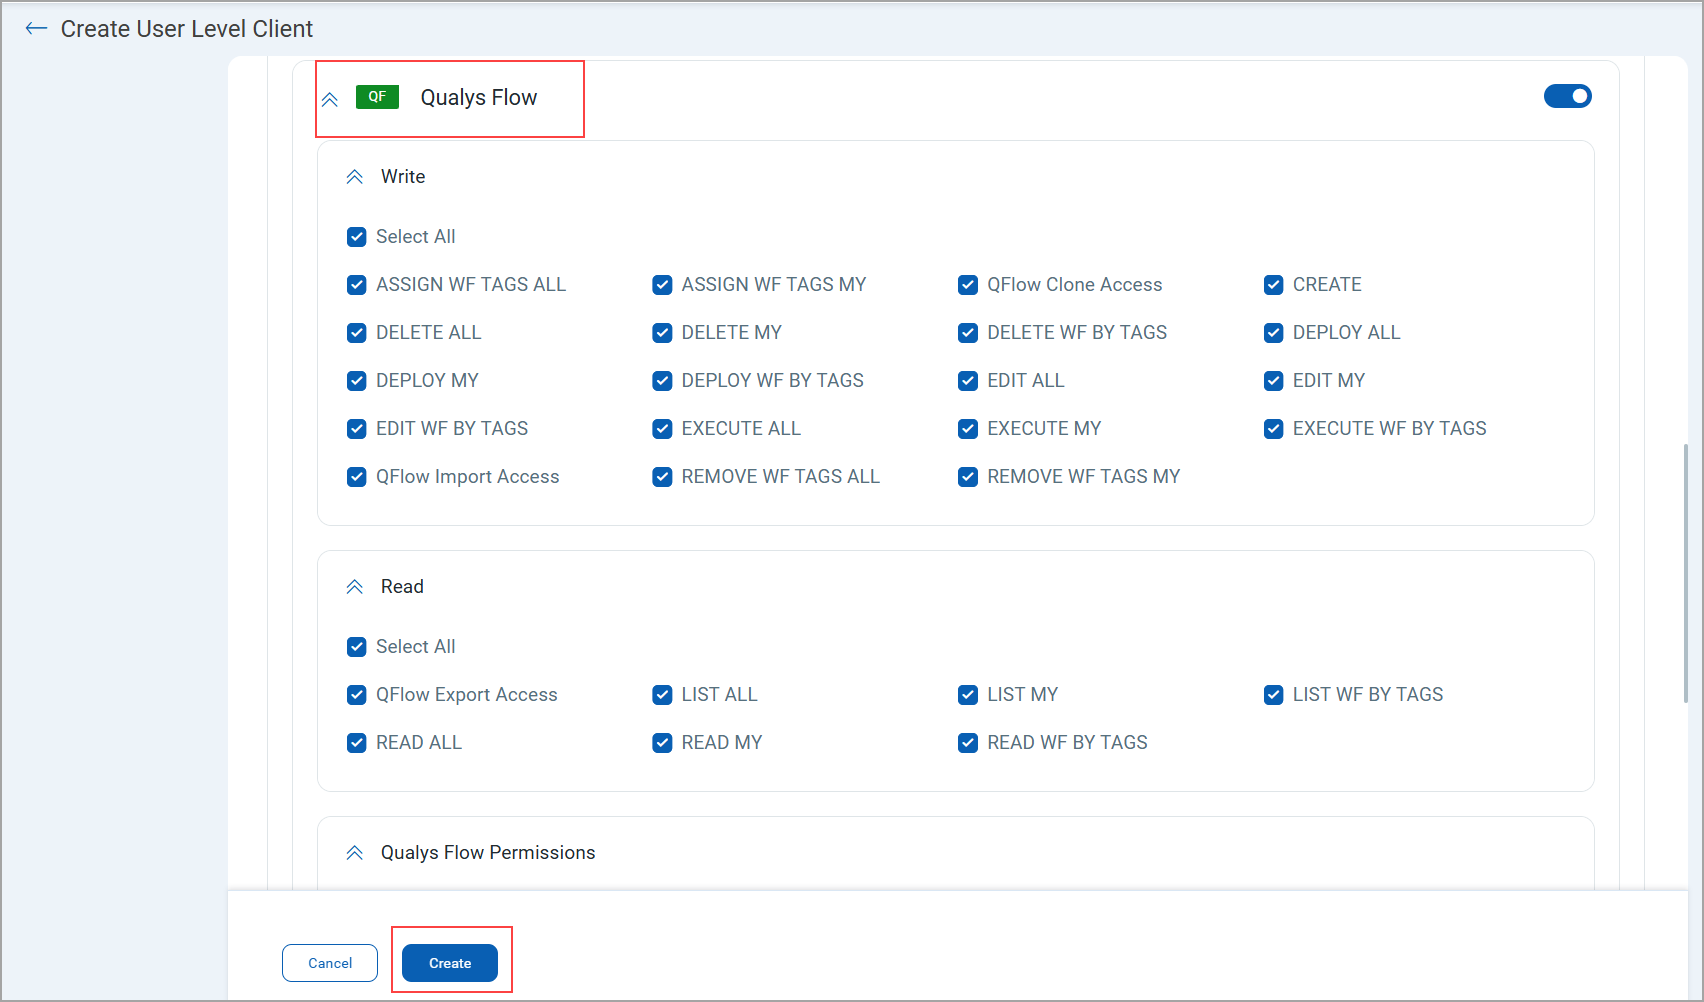
For Client Creation, click New Client.
While creating a client, you can select all modules at once or individual modules. You can also select global permissions, dashboard permissions, tagging permissions, API, and UI access.
Based on the permissions you select:
If the API Access permission is not enabled under Global Permissions > Access, the API returns a response with this message:
The user does not have permission to access API module.
Introduced Public APIs for Workflows, Details and Executions
With this release, we have introduced public APIs for workflow management, workflow execution, and workflow execution steps.
Workflow Management APIs
These APIs let you work with automated workflows in the system. They help you find existing workflows, get detailed information about each one, and start workflow runs.
Workflow Execution APIs
These APIs allow you to monitor and manage the execution history of automated workflows.
Workflow Execution Steps APIs
These APIs Provide visibility of each step in a workflow process.
For detailed information on APIs, refer to the QFlow API Release Notes.