Quick Look at Appliance
This section provides details about the appearance and components of the scanner appliance.
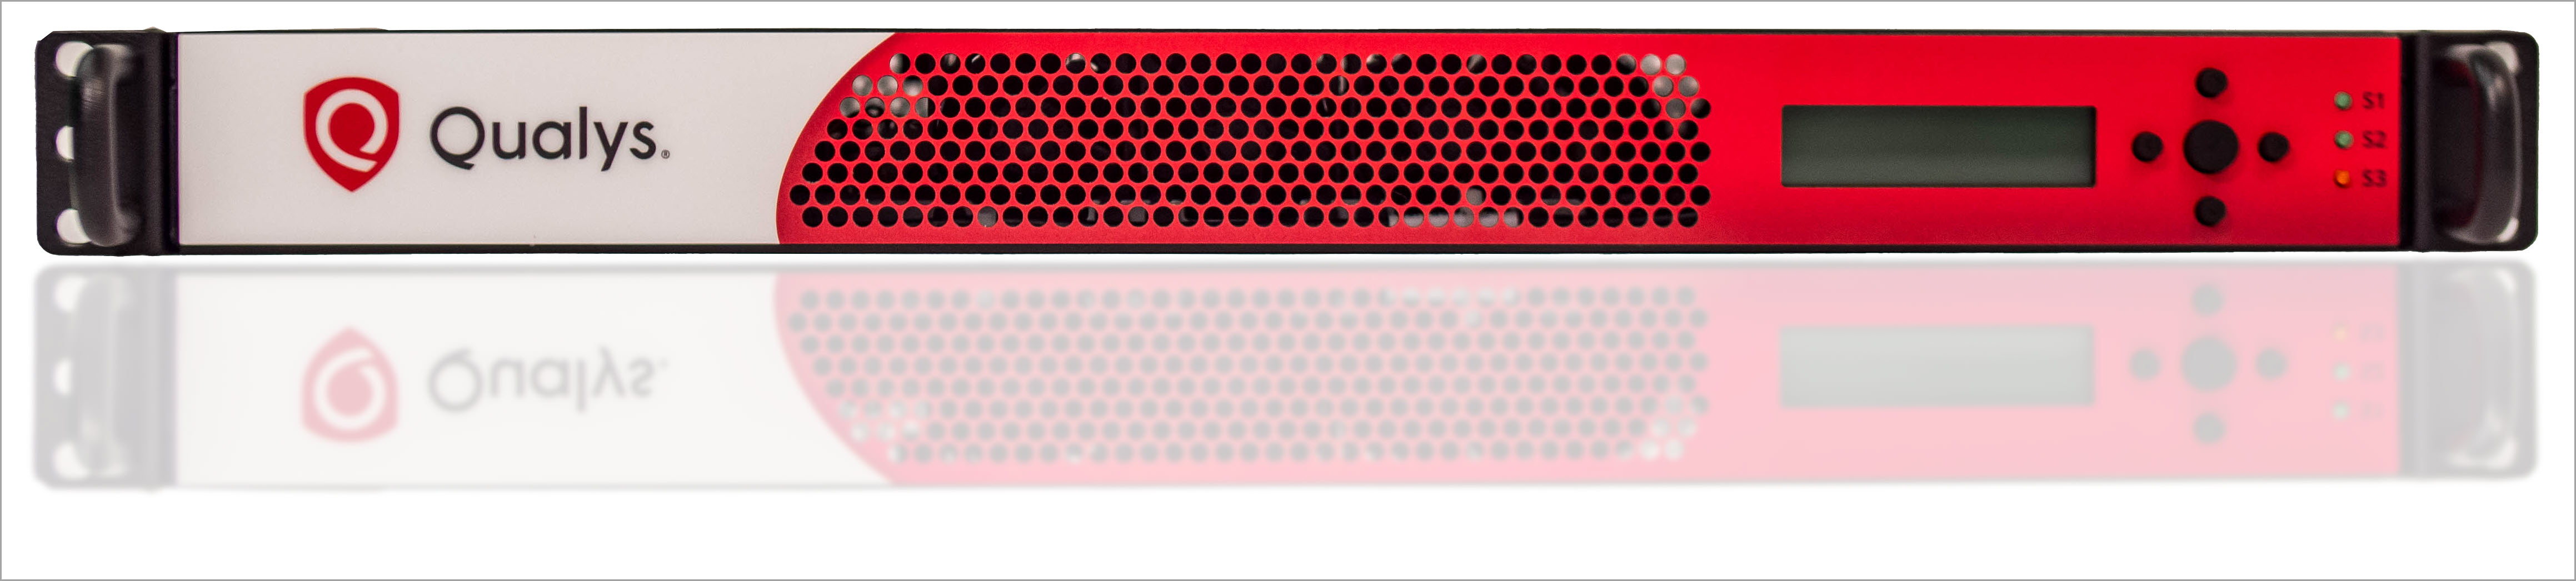
Front Panel
When you connect the Appliance to the network for the first time, the LCD display shows Welcome to Qualys! After you have successfully completed the Quick Start steps for your Scanner Appliance, you can refer to its Scanner Appliance name and IP address.
Use the keypad to enter information and respond to prompts.
- Left and Right arrow buttons move the cursor to left/right in an entry field.
- Up and Down arrow buttons scroll through menu options, and scroll through characters in an entry field.
- ENTER button, in the center, is used to confirm entries and move to the next screen.
Tell me about the LEDs
- S1 tells you a Qualys scan is in progress on the Scanner Appliance.
- S2 tells you a software update to the Scanner Appliance is in progress.
- S3 is not used.
Back Panel
The Appliance’s back panel includes a power socket, an Ethernet LAN port, an Ethernet WAN port, two USB 3.2 ports, a VGA port, a Q-Code/Port 80 LED display, and an additional power switch.
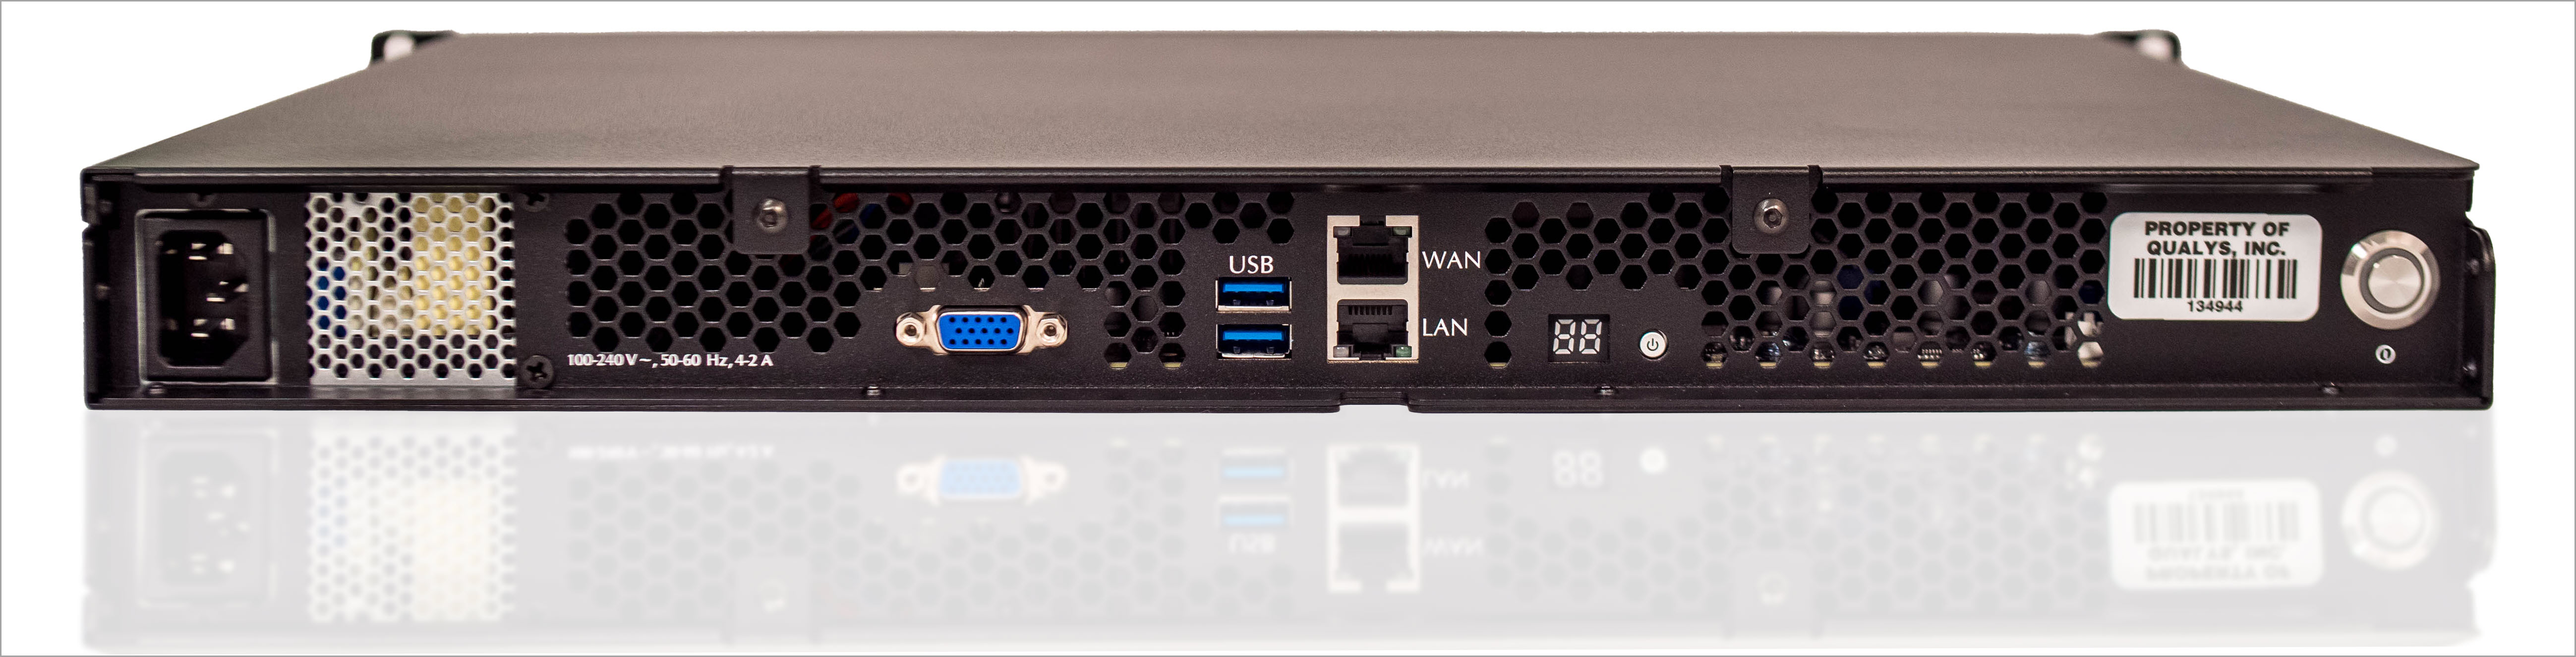
Power socket - Use to connect the power connector to the Appliance.
Power button - Use to power on the Appliance. A green light indicates the Appliance is turned on.
LAN/WAN ports - Use to connect the Appliance to a hub or switch on your network using a straight through CAT6 twisted pair Ethernet cable. The LAN port is required. The WAN port is only required if you choose the split network configuration option.
USB ports - Connect a USB-to-RS232 converter cable to a USB port if you want to use the optional Remote Console interface (any port may be used).
VGA Port - Connect a monitor to VGA port to capture TTY8 logs for troubleshooting purposes.
Q-Code/Port 80 LED display - In the case of Hardware failure, use the code displayed on this LED display for troubleshooting purposes.
Onboard Power Switch - Provides the same functionality as the main power button.
Appliance UI
The Scanner Appliance has a user interface for configuration and management. You can choose to use the LCD display and keypad on the front panel, or the optional Remote Console interface. Both the LCD display and Remote Console offer the same functionality and share the same menus and navigation (ENTER key and arrows) for a consistent user experience.
The Remote Console interface supports remote configuration and management of the Scanner Appliance using a VT100 terminal, such as Windows HyperTerminal. Refer to Remote Console Interface Set Up (optional).