Configure IPv6 Address for Scanning
This applies when you are in the default IPv4+v6 mode.
If you are using only IPv6, refer to Enable IPv6-only Mode.
You can configure the scanner with an IPv6 address on the LAN interface - this is used for scanning IPv6 hosts.
Account Requirements
The IPv6 Scanning feature must be enabled for your subscription.
How does it work?
Once configured, scanning traffic is routed through the LAN interface
- LAN IPv4 interface for scanning IPv4 hosts
- LAN IPv6 interface for scanning IPv6 hosts
All management traffic (software updates, health checks, and many more) is routed through the LAN IPv4 interface.
Step 1: Complete the Quick Start Steps
Follow the Quick Steps to Start the Scanner described in this user guide to activate your Scanner.
- Ensure your Scanner has successfully connected to the Qualys Enterprise TruRisk™ Platform. For more details, refer to Enable IPv6-only Mode.
- Your scanner must be configured using DHCP or a static IPv4 address before you can configure an IPv6 address for scanning.
Step 2: Edit Scanner Settings Using Qualys UI
Perform the following steps to edit the scanner settings:
- Log in to Qualys Enterprise TruRisk™ Platform.
-
Go to Scans > Appliances and edit your Scanner Appliance.
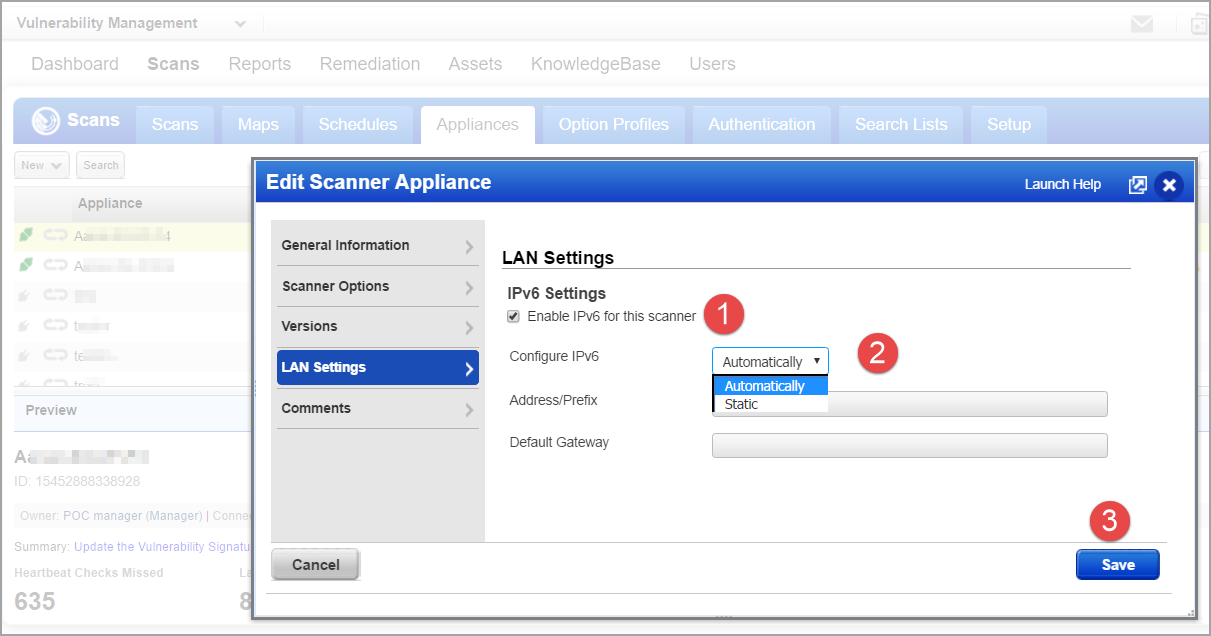
- Select Enable IPv6 for this scanner.
(Do not see IPv6 Settings? This means the IPv6 Scanning feature is not turned on for your account. Contact Support or your Technical Account Manager to get this feature.) - Choose Automatically, and we assign an IP address through router advertisement, or choose Static to assign a static IP address.
- Click Save to save the settings with IPv6 configuration.
The IPv6 Address configuration for scanning is completed.