Deploy Qualys Virtual Scanner Appliance in Classic Infrastructure Using IBM Cloud Console
Perform the following steps to deploy virtual scanner via IBM cloud console - classic infrastructure:
- Create a Qualys Scanner VM using private Qualys qVSA image shared with your IBM account by Qualys.
- Locate your qVSA image.
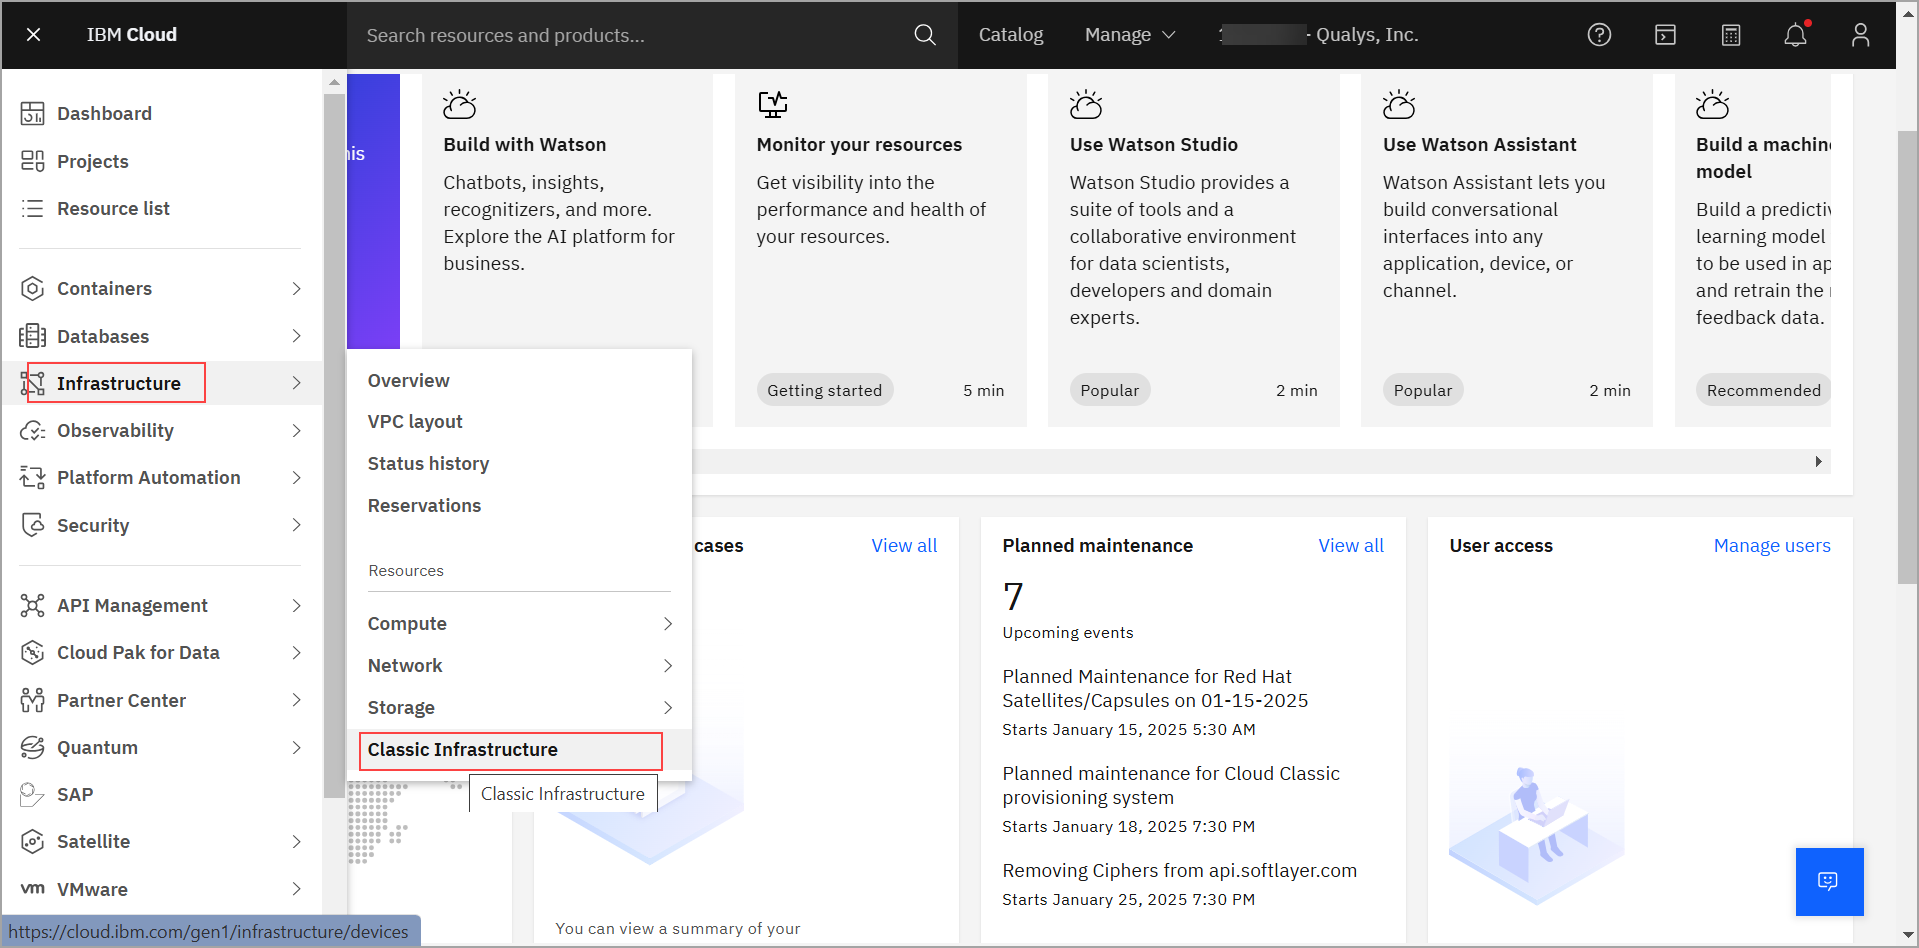
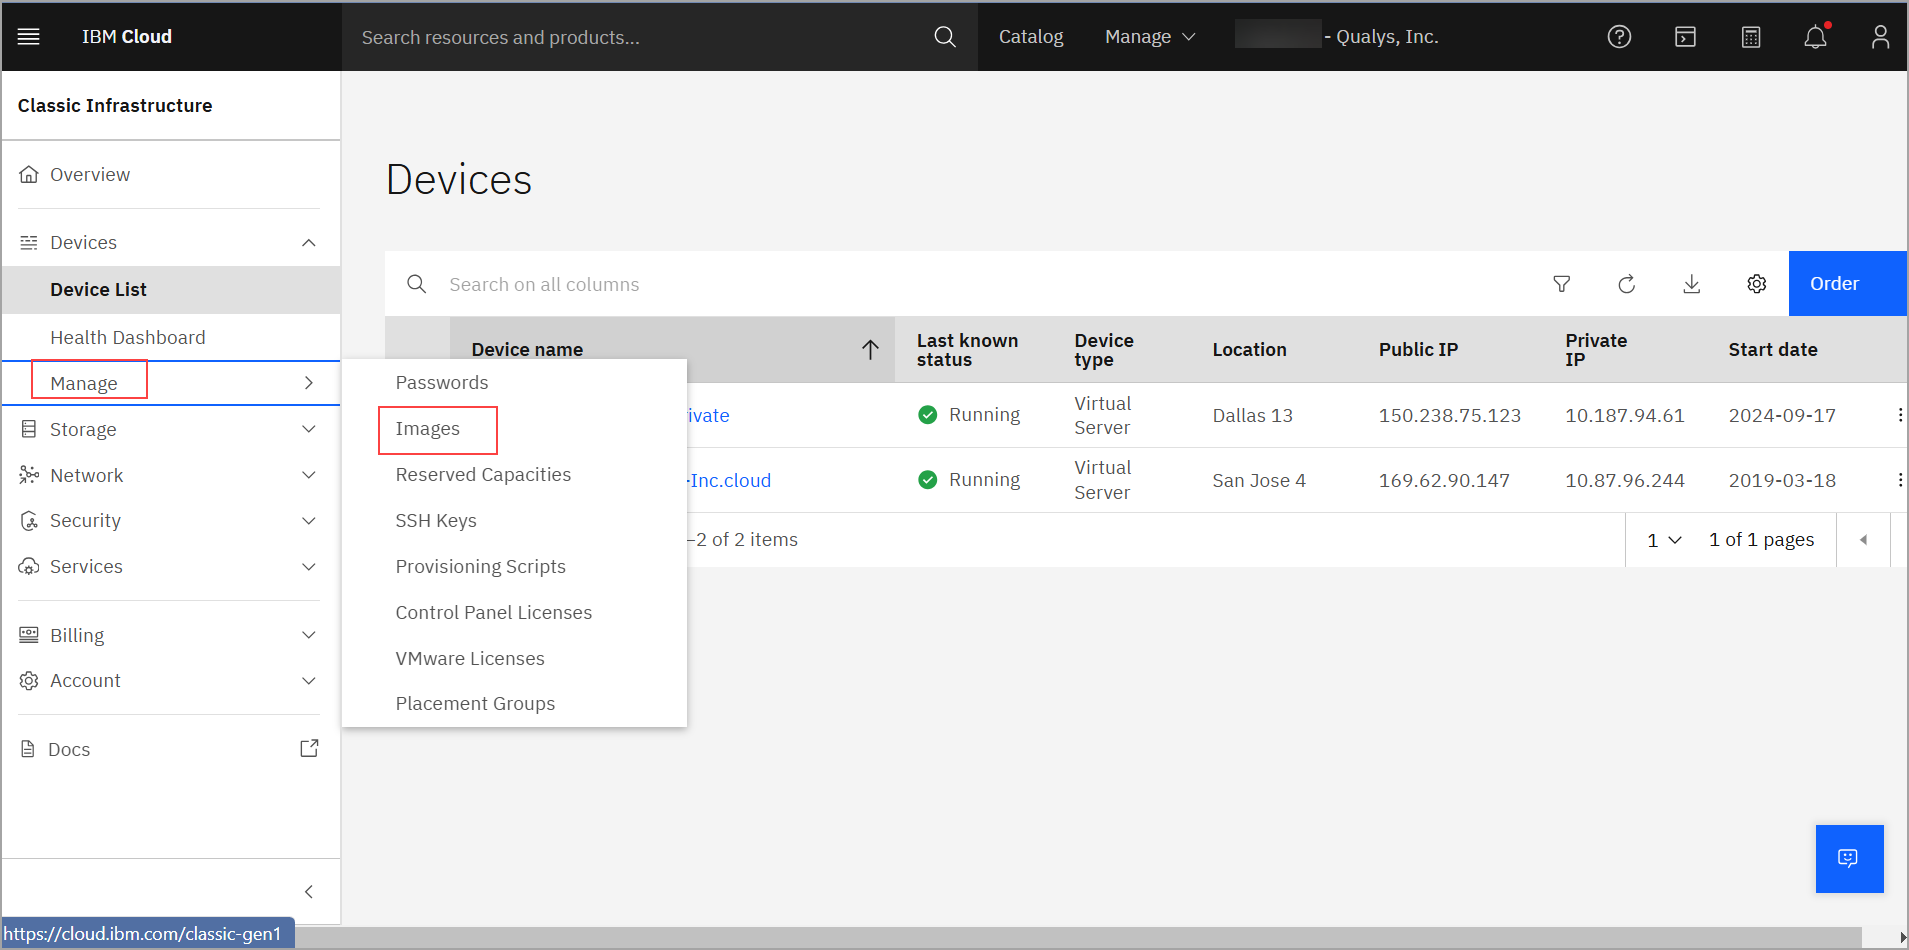
Navigate to Classic Infrastructure > Manage > Images > Image Templates.qVSA-IBM-X.X.X-X image must be available in your list of Private images.
-
Click the selected qVSA image and from the Actions drop-down list, select Order … VSI, and complete your order based on your requirements.
- Type of Virtual server: Choose Virtual server type. For more information on the IBM virtual servers, visit the IBM documentation.
- Instance Info: Fill in the requested information for your virtual server.
- Hostname and Domain: Provide a name for your Qualys scanner. This name is not DNS-resolvable and is for tagging purposes only.
- Location: Choose a data center where the scanner(s) is deployed.
- Profile: Choose instance flavor based on your requirement.
- SSH keys: Keep the default option 'None'. Qualys Scanners Appliance is locked down and SSH access is not allowed on the scanner.
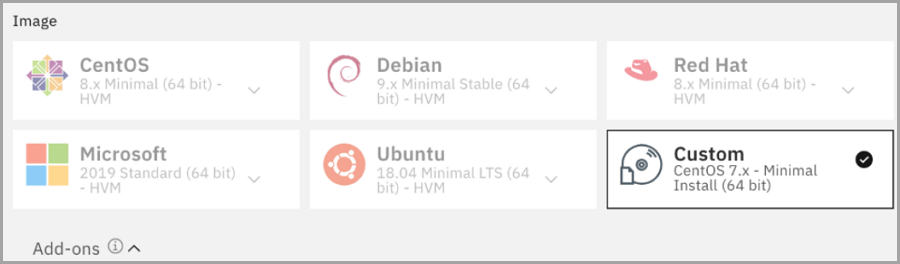
- Image: By default, Custom image is selected.
- Add-ons: Click the first Add-ons drop-down list, as shown in the following image. Make sure you click none other than the first Add-ons list right below the Image section.
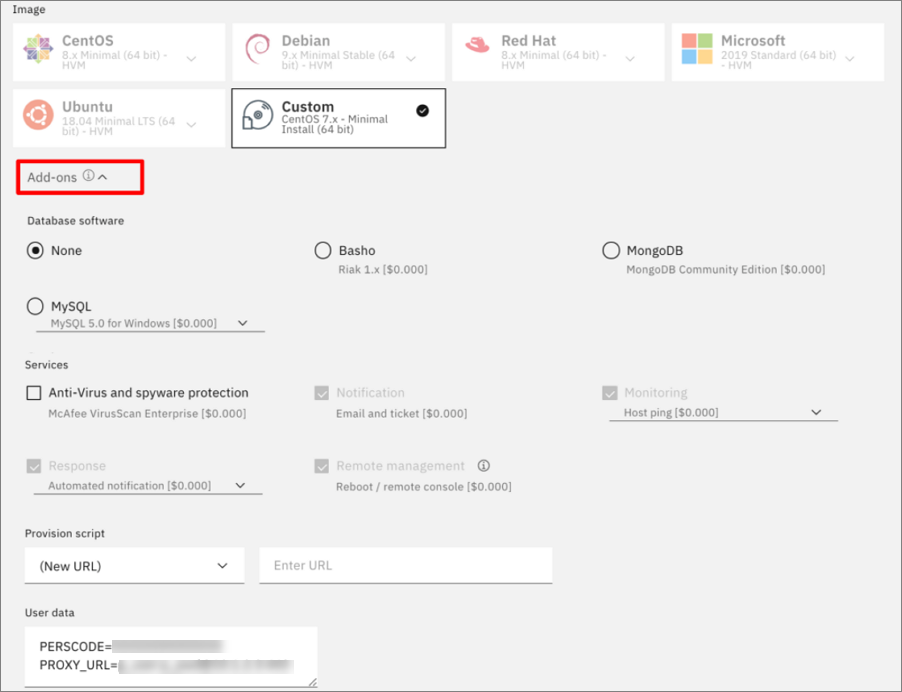
We use the User data field to inject PERSCODE (mandatory) and PROXY_URL (optional) into the Qualys scanner. You can configure the scanner to use SSL proxy for all outbound communication with the Qualys Enterprise TruRisk™ Platform. We support both IP and FQDN for the proxy server configuration.
You can specify the proxy server URL using this format:PROXY_URL=proxy_user:proxy_pass@proxyhost:portPERSCODE and PROXY_URL should be placed on separate lines with no extra whitespaces or blank lines, just like this:
PERSCODE=12345678901234

	PROXY_URL=p_user:[email protected]:3128
Verify the Order Summary and click Create to complete your Virtual Server order. - Attached storage disks: No additional storage disks should be attached.
- Network Interface: Currently, Qualys Scanner Appliance does not support IPv6 addresses. Your VSI can be configured with two network interfaces:
- A private IPv4 address is assigned on the first interface
- A public IPv4 address is assigned on the second interface.
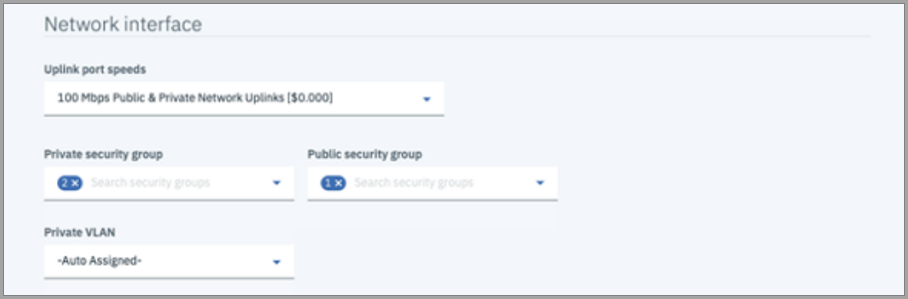
- Security Groups: It is important to configure your Security Groups for the scanner’s private and public network interfaces properly.
- If you are using a proxy server, then ensure you have an outbound rule allowing access on port 443 and the port used to communicate with the proxy server.
- If the scanner appliance has direct internet connectivity, then ensure that there is an outbound rule that allows access on port 443 to Qualys Security Operations Center (SOC) IP address. You can get the SOC IP address range by logging in to Qualys Portal and navigating to Help > About option.
- The scanner should be able to reach out to all the target instances to run the scan.
- It is recommended that an outbound rule be configured to allow access to all ports and subnets of the instances that the scanner has to scan.